Showing posts with label go. Show all posts
Showing posts with label go. Show all posts
Wednesday, 2 September 2020
Building a CI/CD pipeline for a SAM application written in Go
This tutorial shows how to build a CI/CD Pipeline for a SAM Application written in Go with CodeCommit, CodeBuild, CodePipeline, CloudFormation and the AWS CDK.
## Prerequisites
You need to have an AWS account and installed and configured AWS CLI and Go.
## Initialize The Hello World SAM project
- Run ``sam init``
- Type 1 to select AWS Quick Start Templates
- Choose ``go1.x`` for runtime
- Leave default ``sam-app`` for project name
- Type 1 to select the Hello World Example
- Verify if ``sam-app`` have been created
When deploying this project, it will create an API Gateway, a Lambda function and a IAM Role. They are defined in ``template.yaml``.
```
HelloWorldAPI:
Description: "API Gateway endpoint URL for Prod environment for First Function"
Value: !Sub "https://${ServerlessRestApi}.execute-api.${AWS::Region}.amazonaws.com/Prod/hello/"
HelloWorldFunction:
Description: "First Lambda Function ARN"
Value: !GetAtt HelloWorldFunction.Arn
HelloWorldFunctionIamRole:
Description: "Implicit IAM Role created for Hello World function"
Value: !GetAtt HelloWorldFunctionRole.Arn
```
The Lambda function simply prints out ``Hello World``.
```
func handler(request events.APIGatewayProxyRequest) (events.APIGatewayProxyResponse, error) {
return events.APIGatewayProxyResponse{
Body: "Hello World!",
StatusCode: 200,
}, nil
}
```
## Run SAM Application Locally
SAM allows your to run your serverless application locally for your development and testing by running the following command. The default local port number is ``3000``. If you are running your app on Cloud9 workspace, you need to override it with ``--port`` as Cloud 9 only support 8080, 8081 or 8082 in the local browser.
```
sam local start-api --port 8080
```
You should see
```
Mounting HelloWorldFunction at http://127.0.0.1:8080/hello [GET]
You can now browse to the above endpoints to invoke your functions. You do not need to restart/reload SAM CLI while working on your functions, changes will be reflected instantly/automatically. You only need to restart SAM CLI if you update your AWS SAM template
* Running on http://127.0.0.1:8080/ (Press CTRL+C to quit)
```
Let's verify it
```
curl http://127.0.0.1:8080/hello
```
You should see
```
Hello World
```
## Deploy to AWS
Run ``sam build`` to build the project.
```
sam build
```
A hidden directory has been created by SAM
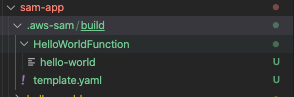
Run ``sam deploy`` to deploy your application. SAM will createa a CloudFormation stack and you can have a guided interactive mode by specifying ``--guided`` parameter.
```
sam deploy --guided
```
Configuring SAM deploy
```
Looking for samconfig.toml : Not found
Setting default arguments for 'sam deploy'
=========================================
Stack Name [sam-app]:
AWS Region [us-east-1]: ap-southeast-1
#Shows you resources changes to be deployed and require a 'Y' to initiate deploy
Confirm changes before deploy [y/N]: y
#SAM needs permission to be able to create roles to connect to the resources in your template
Allow SAM CLI IAM role creation [Y/n]: Y
HelloWorldFunction may not have authorization defined, Is this okay? [y/N]: Y
Save arguments to samconfig.toml [Y/n]: Y
Looking for resources needed for deployment: Not found.
Creating the required resources...
Successfully created!
Managed S3 bucket: aws-sam-cli-managed-default-samclisourcebucket-542w25h26du5
A different default S3 bucket can be set in samconfig.toml
Saved arguments to config file
Running 'sam deploy' for future deployments will use the parameters saved above.
The above parameters can be changed by modifying samconfig.toml
Learn more about samconfig.toml syntax at
https://docs.aws.amazon.com/serverless-application-model/latest/developerguide/serverless-sam-cli-config.html
Uploading to sam-app/9a42d6084bb2aaa2f7eaf7b2201e115a 5094701 / 5094701.0 (100.00%)
```
Deploying with following values
```
Stack name : sam-app
Region : ap-southeast-1
Confirm changeset : True
Deployment s3 bucket : aws-sam-cli-managed-default-samclisourcebucket-542w25h26du5
Capabilities : ["CAPABILITY_IAM"]
Parameter overrides : {}
```
Initiating deployment
```
HelloWorldFunction may not have authorization defined.
Uploading to sam-app/21a49766581b625811536c904121d4ba.template 1154 / 1154.0 (100.00%)
Waiting for changeset to be created..
CloudFormation stack changeset
---------------------------------------------------------------------------------------------------------------------------------------------------------------------------
Operation LogicalResourceId ResourceType
---------------------------------------------------------------------------------------------------------------------------------------------------------------------------
+ Add HelloWorldFunctionCatchAllPermissionProd AWS::Lambda::Permission
+ Add HelloWorldFunctionRole AWS::IAM::Role
+ Add HelloWorldFunction AWS::Lambda::Function
+ Add ServerlessRestApiDeployment47fc2d5f9d AWS::ApiGateway::Deployment
+ Add ServerlessRestApiProdStage AWS::ApiGateway::Stage
+ Add ServerlessRestApi AWS::ApiGateway::RestApi
---------------------------------------------------------------------------------------------------------------------------------------------------------------------------
Changeset created successfully. arn:aws:cloudformation:ap-southeast-1:XXXXXXXXXXX:changeSet/samcli-deploy1598436540/ea868c52-9c9a-4d27-a008-ef6157f65b9b
```
Previewing CloudFormation changeset before deployment
```
Deploy this changeset? [y/N]: y
2020-08-26 18:09:42 - Waiting for stack create/update to complete
CloudFormation events from changeset
-----------------------------------------------------------------------------------------------------------------------------------------------------------------------------
ResourceStatus ResourceType LogicalResourceId ResourceStatusReason
-----------------------------------------------------------------------------------------------------------------------------------------------------------------------------
CREATE_IN_PROGRESS AWS::IAM::Role HelloWorldFunctionRole -
CREATE_IN_PROGRESS AWS::IAM::Role HelloWorldFunctionRole Resource creation Initiated
CREATE_COMPLETE AWS::IAM::Role HelloWorldFunctionRole -
CREATE_IN_PROGRESS AWS::Lambda::Function HelloWorldFunction -
CREATE_IN_PROGRESS AWS::Lambda::Function HelloWorldFunction Resource creation Initiated
CREATE_COMPLETE AWS::Lambda::Function HelloWorldFunction -
CREATE_IN_PROGRESS AWS::ApiGateway::RestApi ServerlessRestApi -
CREATE_IN_PROGRESS AWS::ApiGateway::RestApi ServerlessRestApi Resource creation Initiated
CREATE_COMPLETE AWS::ApiGateway::RestApi ServerlessRestApi -
CREATE_IN_PROGRESS AWS::Lambda::Permission HelloWorldFunctionCatchAllPermissionProd Resource creation Initiated
CREATE_IN_PROGRESS AWS::ApiGateway::Deployment ServerlessRestApiDeployment47fc2d5f9d -
CREATE_IN_PROGRESS AWS::Lambda::Permission HelloWorldFunctionCatchAllPermissionProd -
CREATE_IN_PROGRESS AWS::ApiGateway::Deployment ServerlessRestApiDeployment47fc2d5f9d Resource creation Initiated
CREATE_COMPLETE AWS::ApiGateway::Deployment ServerlessRestApiDeployment47fc2d5f9d -
CREATE_IN_PROGRESS AWS::ApiGateway::Stage ServerlessRestApiProdStage -
CREATE_IN_PROGRESS AWS::ApiGateway::Stage ServerlessRestApiProdStage Resource creation Initiated
CREATE_COMPLETE AWS::ApiGateway::Stage ServerlessRestApiProdStage -
CREATE_COMPLETE AWS::Lambda::Permission HelloWorldFunctionCatchAllPermissionProd -
CREATE_COMPLETE AWS::CloudFormation::Stack sam-app -
-----------------------------------------------------------------------------------------------------------------------------------------------------------------------------
CloudFormation outputs from deployed stack
-----------------------------------------------------------------------------------------------------------------------------------------------------------------------------
Outputs
-----------------------------------------------------------------------------------------------------------------------------------------------------------------------------
Key HelloWorldFunctionIamRole
Description Implicit IAM Role created for Hello World function
Value arn:aws:iam::XXXXXXXXXXX:role/sam-app-HelloWorldFunctionRole-CXSDBGUHPMFS
Key HelloWorldAPI
Description API Gateway endpoint URL for Prod environment for First Function
Value https://yh1q5tcsqg.execute-api.ap-southeast-1.amazonaws.com/Prod/hello/
Key HelloWorldFunction
Description First Lambda Function ARN
Value arn:aws:lambda:ap-southeast-1:XXXXXXXXXXX:function:sam-app-HelloWorldFunction-13LO5HE0Y7BKS
-----------------------------------------------------------------------------------------------------------------------------------------------------------------------------
Successfully created/updated stack - sam-app in ap-southeast-1
```
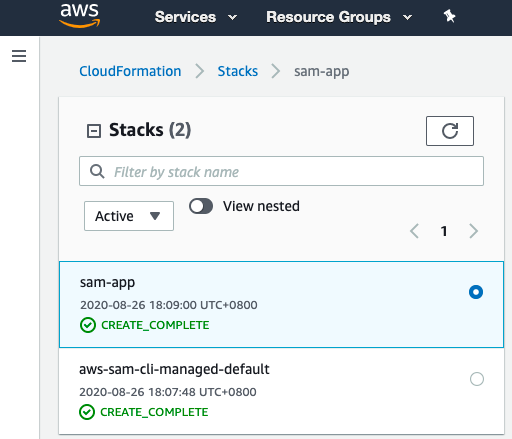
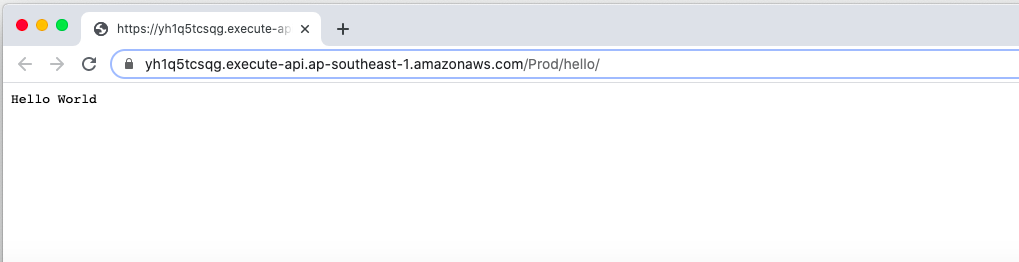
To verifiy it, click the HelloWorldApi Value in sam-app Output.
## Building the pipeline
With a continous delivery pipeline using AWS Code Pipeline, we can automate the build, package, and deploy commands. Other services will be used such as CodeCommit, CloudFormation and the AWS CDK.
The general flow would be like
```
Developer -- pushes changes --> Git Repository -- build --> deploy --> AWS
```
## Setting up CodeCommit
Let's create a CodeCommit repository
```
aws codecommit create-repository --repository-name sam-app
```
You should see the following output
```json
{
"repositoryMetadata": {
"accountId": "XXXXXXXXXXXX",
"repositoryId": "XXXXXXXX-XXXX-XXXX-XXXX-XXXXXXXXXXXX",
"repositoryName": "sam-app",
"lastModifiedDate": "2020-08-26T18:26:36.257000+08:00",
"creationDate": "2020-08-26T18:26:36.257000+08:00",
"cloneUrlHttp": "https://git-codecommit.ap-southeast-1.amazonaws.com/v1/repos/sam-app",
"cloneUrlSsh": "ssh://git-codecommit.ap-southeast-1.amazonaws.com/v1/repos/sam-app",
"Arn": "arn:aws:codecommit:ap-southeast-1:XXXXXXXXXXXX:sam-app"
}
}
```
To configurate git credentials
```
git config --global credential.helper '!aws codecommit credential-helper $@'
git config --global credential.UseHttpPath true
git config --global user.name "wingkwong"
git config --global user.email "wingkwong.code@gmail.com"
```
Go to the root directory of your SAM project and run
```
cd ./sam-app
git init
git add .
git commit -m "Initial commit"
```
Setup Git origin
```
git remote add origin
```
Push the code to origin
```
git push -u origin master
```
You should see
```
Counting objects: 17, done.
Delta compression using up to 4 threads.
Compressing objects: 100% (13/13), done.
Writing objects: 100% (17/17), 4.86 MiB | 1.55 MiB/s, done.
Total 17 (delta 0), reused 0 (delta 0)
To https://git-codecommit.ap-southeast-1.amazonaws.com/v1/repos/sam-app
* [new branch] master -> master
Branch 'master' set up to track remote branch 'master' from 'origin'.
```
## Setting up CodePipline
We will use Amazon CDK to provision the pipeline.
### Install CDK
```
npm install -g aws-cdk
```
### Initialize the project
```
cdk init --language typescript
```
### To bulid and deploy
```
npm run build
cdk deploy
```
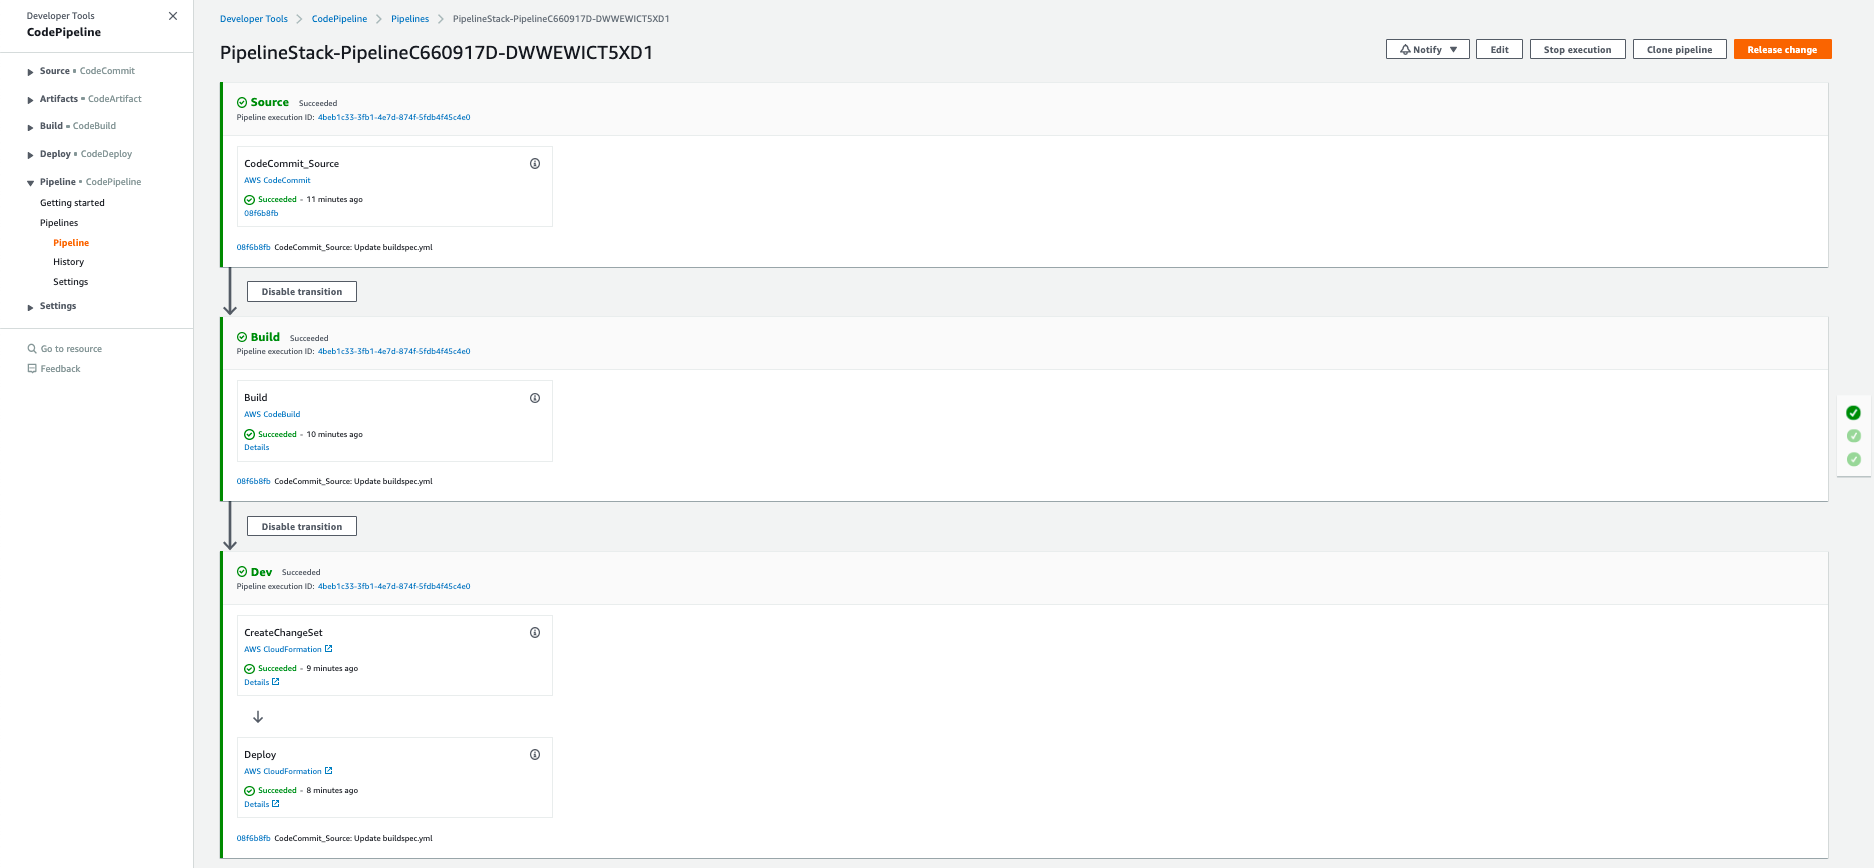
You should see ``PipelineStack`` has been created
Go to AWS Console -> Developer Tools -> CodePipeline -> Pipelines
## Clean up
```
cdk destroy PipelineStack
```
```
Are you sure you want to delete: PipelineStack (y/n)? y
PipelineStack: destroying...
11:21:26 PM | DELETE_IN_PROGRESS | AWS::CloudFormation::Stack | PipelineStack
11:22:34 PM | DELETE_IN_PROGRESS | AWS::IAM::Role | Pipeline/Dev/Creat...PipelineActionRole
11:22:34 PM | DELETE_IN_PROGRESS | AWS::IAM::Role | Pipeline/Build/Bui...PipelineActionRole
11:22:34 PM | DELETE_IN_PROGRESS | AWS::IAM::Role | Build/Role
✅ PipelineStack: destroyed
```

Sunday, 29 March 2020
Building Serverless CRUD services in Go with OpenFaaS, Arkade, MongoDB and k3d
After the publishing the series - [Building Serverless CRUD services in Go with DynamoDB](https://dev.to/wingkwong/building-serverless-crud-services-in-go-with-dynamodb-part-1-2kec), I've been exploring different ways to build serverless CRUD services. I spent a day trying out Openfaas, MongoDB, Arkade and k3d and I think it is a good idea to write a post and share some mistakes that I've had.
# Prerequisites
You need to install Docker on your machine and you need to register for a Docker Hub account as your Docker images will be stored there.
# Install Docker
Check out [Docker Official Installation Page](https://docs.docker.com/install/)
# Register Docker Hub account
Register via [https://hub.docker.com/](https://hub.docker.com/)
# Install k3d
``k3d`` is a little helper to run k3s in docker, where ``k3s`` is the lightweight Kubernetes distribution by Rancher. It actually removes millions of lines of code from k8s. If you just need a learning playground, k3s is definitely your choice.
Check out [k3d Github Page](https://github.com/rancher/k3d#get) to see the installation guide.
> When creating a cluster, ``k3d`` utilises ``kubectl`` and ``kubectl`` is not part of ``k3d``. If you don't have ``kubectl``, please install and set up [here](https://kubernetes.io/docs/tasks/tools/install-kubectl/).
Once you've installed ``k3d`` and ``kubectl``, run
```bash
k3d create
```
It creates a new single-node cluster which is a docker container.
```
INFO[0000] Created cluster network with ID d198f2b6085ea710ab9b8cd7fa711e69acfe1f3750a2faa5efec06255723e130
INFO[0000] Created docker volume k3d-k3s-default-images
INFO[0000] Creating cluster [k3s-default]
INFO[0000] Creating server using docker.io/rancher/k3s:v1.0.1...
INFO[0000] Pulling image docker.io/rancher/k3s:v1.0.1...
INFO[0029] SUCCESS: created cluster [k3s-default]
INFO[0029] You can now use the cluster with:
```
We need to make ``kubectl`` to use the kubeconfig for that cluster
```bash
export KUBECONFIG="$(k3d get-kubeconfig --name='k3s-default')"
```
Let's take a look at the cluster info
```bash
kubectl cluster-info
```
You should see
```bash
Kubernetes master is running at https://localhost:6443
CoreDNS is running at https://localhost:6443/api/v1/namespaces/kube-system/services/kube-dns:dns/proxy
Metrics-server is running at https://localhost:6443/api/v1/namespaces/kube-system/services/https:metrics-server:/proxy
```
By running the following command,
```bash
kubectl get node
```
You should see there is a node provisioned by ``k3d``.
```bash
NAME STATUS ROLES AGE VERSION
k3d-k3s-default-server Ready master 8m42s v1.16.3-k3s.2
```
# Install arkade
Moving on to [arkade](https://github.com/alexellis/arkade), it provides a simple Golang CLI with strongly-typed flags to install charts and apps to your cluster in one command. Originally, the codebase is derived from [k3sup](https://github.com/alexellis/k3sup) which I've contributed last month.
Let's install the latest version of arkade
```bash
curl -sLS https://dl.get-arkade.dev | sudo sh
```
You should see
```
Downloading package https://github.com/alexellis/arkade/releases/download/0.2.1/arkade-darwin as /tmp/arkade-darwin
Download complete.
Running with sufficient permissions to attempt to move arkade to /usr/local/bin
New version of arkade installed to /usr/local/bin
Creating alias 'ark' for 'arkade'.
_ _
__ _ _ __| | ____ _ __| | ___
/ _` | '__| |/ / _` |/ _` |/ _ \
| (_| | | | < (_| | (_| | __/
\__,_|_| |_|\_\__,_|\__,_|\___|
Get Kubernetes apps the easy way
Version: 0.2.1
Git Commit: 29ff156bbeee7f5ce935eeca37d98f319ef4e684
```
# Install MongoDB
MongoDB is a cross-platform document-oriented database program which is classified as a NoSQL database program, and it uses JSON-like documents with schema.
We can use arkade to install mongodb to our cluster
```bash
arkade install mongodb
```
You can run ``arkade info mongodb`` to get more info about the connection.
Once you've installed MongoDB, it can be accessed via port 27017 on the following DNS name from within your cluster:
```bash
mongodb.default.svc.cluster.local
```
First, let's get the MongoDB root password
```bash
export MONGODB_ROOT_PASSWORD=$(kubectl get secret --namespace default mongodb -o jsonpath="{.data.mongodb-root-password}" | base64 --decode)
```
Connect to your database run the following command:
```bash
kubectl run --namespace default mongodb-client --rm --tty -i --restart='Never' --image docker.io/bitnami/mongodb:4.2.4-debian-10-r0 --command -- mongo admin --host mongodb --authenticationDatabase admin -u root -p $MONGODB_ROOT_PASSWORD
```
Execute the following commands if you need to connect to your database from outside the cluster
```bash
kubectl port-forward --namespace default svc/mongodb 27017:27017 &
mongo --host 127.0.0.1 --authenticationDatabase admin -p $MONGODB_ROOT_PASSWORD
```
By default, the selected db is ``admin``. Let's create a new one.
```
use k3d-mongodb-crud
```
You should see
```
switched to db k3d-mongodb-crud
```
Then, create a collection called ``foo``.
```
db.createCollection("foo")
```
Since you've logged in as a root account and this account has nothing to do with this database. Hence, you need to create a new user with read and write permission. Without this step, you will encounter authentication error later on.
Replace ```` before executing the below command. To keep it simple for this demonstration, I used the same password as MongoDB root password, i.e. ``$MONGODB_ROOT_PASSWORD``.
```
db.createUser({ user:"admin", pwd: "", roles: [{role: "readWrite", db: "k3d-mongodb-crud"}] })
```
Verify it
```
> db.getUsers()
[
{
"_id" : "k3d-mongodb-crud.admin",
"userId" : UUID("72671c44-7306-4abb-bf57-efa87286a0f0"),
"user" : "admin",
"db" : "k3d-mongodb-crud",
"roles" : [
{
"role" : "readWrite",
"db" : "k3d-mongodb-crud"
}
],
"mechanisms" : [
"SCRAM-SHA-1",
"SCRAM-SHA-256"
]
}
]
```
# Install OpenFaaS
[OpenFaaS](https://github.com/openfaas/faas) allows us to deploy event-driven functions and micro-services to Kubernetes easily.
Install the latest faas-cli
```bash
curl -SLsf https://cli.openfaas.com | sudo sh
```
Forward the gateway to your machine
```bash
kubectl rollout status -n openfaas deploy/gateway
kubectl port-forward -n openfaas svc/gateway 8080:8080 &
```
# Setup our project
OpenFaaS provides a curated list of functions for your kickstart.
```bash
faas-cli template store list | grep go
```
```bash
go openfaas Classic Golang template
golang-http openfaas-incubator Golang HTTP template
golang-middleware openfaas-incubator Golang Middleware template
```
Let's pick ``golang-middleware``
```bash
faas-cli template store pull golang-middleware
```
```
Fetch templates from repository: https://github.com/openfaas-incubator/golang-http-template at master
2020/03/28 14:55:08 Attempting to expand templates from https://github.com/openfaas-incubator/golang-http-template
2020/03/28 14:55:11 Fetched 4 template(s) : [golang-http golang-http-armhf golang-middleware golang-middleware-armhf] from https://github.com/openfaas-incubator/golang-http-template
```
The project will be built into a Docker image and push to Docker Hub.
> Replace ``wingkwong`` with your Docker Hub username
```bash
faas-cli new --lang golang-middleware k3d-mongodb-crud --prefix=wingkwong
```
```
Folder: k3d-mongodb-crud created.
___ _____ ____
/ _ \ _ __ ___ _ __ | ___|_ _ __ _/ ___|
| | | | '_ \ / _ \ '_ \| |_ / _` |/ _` \___ \
| |_| | |_) | __/ | | | _| (_| | (_| |___) |
\___/| .__/ \___|_| |_|_| \__,_|\__,_|____/
|_|
Function created in folder: k3d-mongodb-crud
Stack file written: k3d-mongodb-crud.yml
```
Let's take a look at the project structure. All files are generated by ``faas-cli``.
```
├── k3d-mongodb-crud
│ └── handler.go
├── k3d-mongodb-crud.yml
└── template
├── golang-http
│ ├── Dockerfile
│ ├── function
│ │ └── handler.go
│ ├── go.mod
│ ├── go.sum
│ ├── main.go
│ ├── template.yml
│ └── vendor
│ ├── github.com
│ └── modules.txt
├── golang-http-armhf
│ ├── Dockerfile
│ ├── function
│ │ ├── Gopkg.toml
│ │ └── handler.go
│ ├── go.mod
│ ├── go.sum
│ ├── main.go
│ ├── template.yml
│ └── vendor
│ ├── github.com
│ └── modules.txt
├── golang-middleware
│ ├── Dockerfile
│ ├── function
│ │ └── handler.go
│ ├── go.mod
│ ├── main.go
│ └── template.yml
└── golang-middleware-armhf
├── Dockerfile
├── function
│ └── handler.go
├── go.mod
├── main.go
└── template.yml
```
Here's ``k3d-mongodb-crud.yml``, which is our configuration file for the deployment.
```
version: 1.0
provider:
name: openfaas
gateway: http://127.0.0.1:8080
functions:
k3d-mongodb-crud:
lang: golang-middleware
handler: ./k3d-mongodb-crud
image: wingkwong/k3d-mongodb-crud:latest
```
Let's build and deploy the project to the cluster
```bash
faas-cli up -f k3d-mongodb-crud.yml
```
Oops..it failed to deploy due to unauthorised access
```
Deploying: k3d-mongodb-crud.
WARNING! Communication is not secure, please consider using HTTPS. Letsencrypt.org offers free SSL/TLS certificates.
Handling connection for 8080
unauthorized access, run "faas-cli login" to setup authentication for this server
Function 'k3d-mongodb-crud' failed to deploy with status code: 401
```
Let's get the password from Secret
```bash
PASSWORD=$(kubectl get secret -n openfaas basic-auth -o jsonpath="{.data.basic-auth-password}" | base64 --decode; echo)
```
Log into the gateway by running
```bash
echo -n $PASSWORD | faas-cli login --username admin --password-stdin
```
Okay..another error is occurred
```bash
Calling the OpenFaaS server to validate the credentials...
Cannot connect to OpenFaaS on URL: http://127.0.0.1. Get https://127.0.0.1:443/system/functions: x509: cannot validate certificate for 127.0.0.1 because it doesn't contain any IP SANs
```
This is because the name localhost maps to an IPv6 alias meaning that the CLI may hang on certain Linux distributions. As suggested by Openfaas, you may have following solutions:
```
1. Use the -g or --gateway argument with 127.0.0.1:8080 or similar
2. Set the OPENFAAS_URL environmental variable to 127.0.0.1:8080 or similar
3. Edit the /etc/hosts file on your machine and remove the IPv6 alias for localhost (this forces the use of IPv4)
```
Let's take the second solution and retry it
```bash
export OPENFAAS_URL="127.0.0.1:8080"
PASSWORD=$(kubectl get secret -n openfaas basic-auth -o jsonpath="{.data.basic-auth-password}" | base64 --decode; echo)
echo -n $PASSWORD | faas-cli login --username admin --password-stdin
```
```
Calling the OpenFaaS server to validate the credentials...
Handling connection for 8080
WARNING! Communication is not secure, please consider using HTTPS. Letsencrypt.org offers free SSL/TLS certificates.
credentials saved for admin http://127.0.0.1:8080
```
It looks good now. Let's deploy again.
```bash
faas-cli up -f k3d-mongodb-crud.yml
```
Deploy successfully!
```bash
Deployed. 202 Accepted.
URL: http://127.0.0.1:8080/function/k3d-mongodb-crud
```
Go to ``http://127.0.0.1:8080/ui/``. You should see the function on the portal.
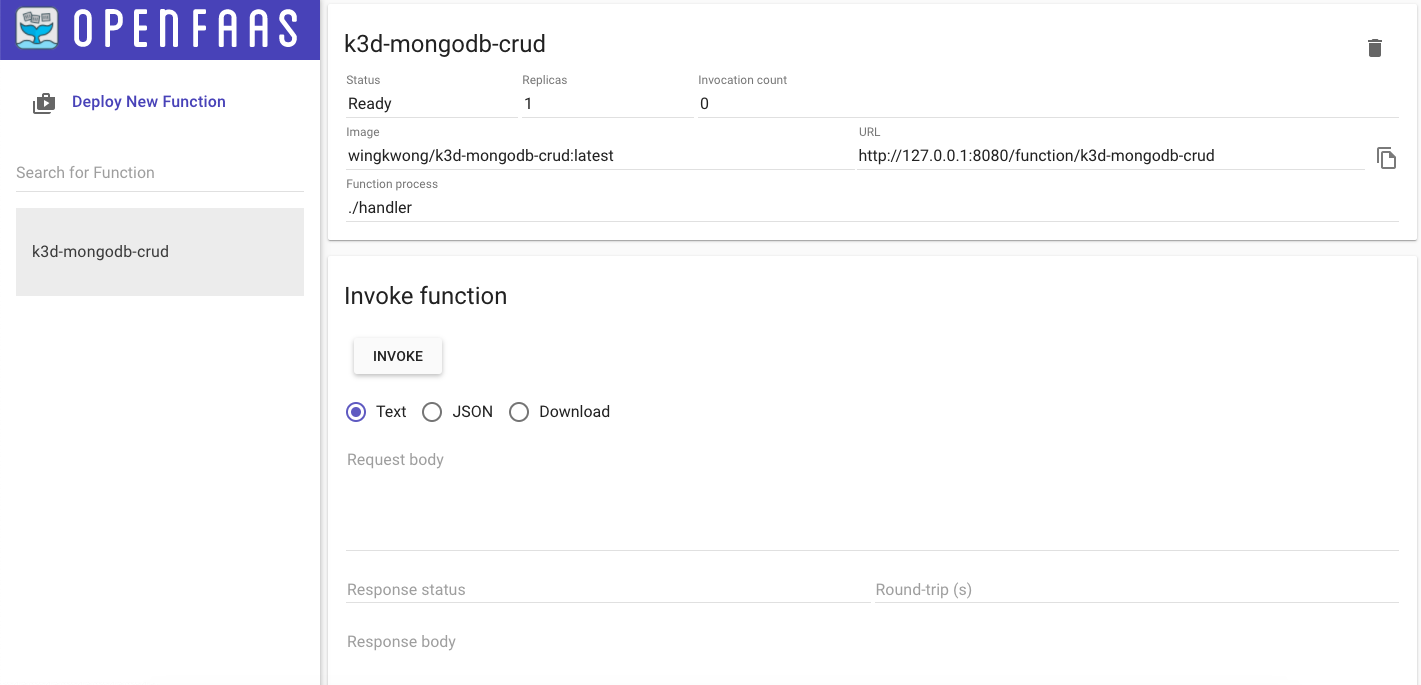
Finally we've all the setup. Let's move on to the coding part.
# Start Coding
Go to ``k3d-mongodb-crud.yml``, add ``environment`` and ``secrets`` under your function.
```
version: 1.0
provider:
name: openfaas
gateway: http://127.0.0.1:8080
functions:
k3d-mongodb-crud:
lang: golang-middleware
handler: ./k3d-mongodb-crud
image: wingkwong/k3d-mongodb-crud:latest
environment:
mongo_host: mongodb.default.svc.cluster.local:27017
mongo_database: k3d-mongodb-crud
mongo_collection: foo
write_debug: true
combine_output: false
secrets:
- mongo-db-username
- mongo-db-password
```
Back to the terminal, create two secrets by running
```bash
faas-cli secret create mongo-db-username --from-literal admin
faas-cli secret create mongo-db-password --from-literal $MONGODB_ROOT_PASSWORD
```
You should see
```bash
Creating secret: mongo-db-username
Creating secret: mongo-db-password
```
Back to ``k3d-mongodb-crud/handler.go``, import the libraries that we will use in this project
```
import (
"encoding/json"
"fmt"
"net/http"
"os"
"time"
"github.com/openfaas/openfaas-cloud/sdk"
"gopkg.in/mgo.v2"
"gopkg.in/mgo.v2/bson"
)
```
Declare some variables
```
var (
sess *mgo.Session
mongoDatabase = os.Getenv("mongo_database")
mongoCollection = os.Getenv("mongo_collection")
)
```
Add a new function called ``init`` where we establish a persistent connection to MongoDB.
As we've created our ``mongo-db-username`` and ``mongo-db-password`` in previous steps, we use ``sdk.ReadSecret`` to retrieve the value from the secret file.
Then we need to use DialWithInfo to establishe a new session to the cluster identified by info. Before that, we need ``DialInfo`` to hold our options.
```
func init() {
var err error
mongoHost := os.Getenv("mongo_host")
mongoUsername, _ := sdk.ReadSecret("mongo-db-username")
mongoPassword, _ := sdk.ReadSecret("mongo-db-password")
if _, err := os.Open("/var/openfaas/secrets/mongo-db-password"); err != nil {
panic(err.Error())
}
info := &mgo.DialInfo{
Addrs: []string{mongoHost},
Timeout: 60 * time.Second,
Database: mongoDatabase,
Username: mongoUsername,
Password: mongoPassword,
}
if sess, err = mgo.DialWithInfo(info); err != nil {
panic(err.Error())
}
}
```
Let's create a Foo struct with two fields ``Bar`` and ``Baz``
```
type Foo struct {
Bar string
Baz string
}
```
Delete anything inside Handle function and add the below structure
```
func Handle(w http.ResponseWriter, r *http.Request) {
if r.Method == http.MethodPost {
} else if r.Method == http.MethodGet {
} else if r.Method == http.MethodPut {
} else if r.Method == http.MethodDelete {
}
}
```
For ``CREATE``, as we've established ``sess`` in ``init()`` function. We can just use it to run ``Insert``. The below code snippet will insert 4 records to Collection ``foo`` in Database ``k3d-mongodb-crud``. If it goes wrong, it will throw an internal server error. IF not, it will return the defined json output.
```
if r.Method == http.MethodPost {
fmt.Println("4 records will be inserted")
if err := sess.DB(mongoDatabase).C(mongoCollection).Insert(
&Foo{Bar: "bar", Baz: "baz"},
&Foo{Bar: "bar1", Baz: "baz1"},
&Foo{Bar: "bar2", Baz: "baz2"},
&Foo{Bar: "bar3", Baz: "baz3"},
); err != nil {
http.Error(w, fmt.Sprintf("Failed to insert: %s", err.Error()), http.StatusInternalServerError)
return
}
w.Header().Set("Content-Type", "application/json")
w.Write([]byte(`{"success":true, "message": "4 records have been inserted"}`))
}
```
For ``GET``, similar to ``CREATE``, use ``sess.DB(mongoDatabase).C(mongoCollection)`` to call ``Find``. In this example, we do not input any filter so we just need to put ``bson.M{}``. All records will be retrieved and stored in foo. This time we do not output our json output but the actual result.
Remember if you find all records, make sure foo is an array or you will get ``MongoDB Error: result argument must be a slice address ``.
```
else if r.Method == http.MethodGet {
fmt.Println("All records will be listed")
var foo []Foo
err := sess.DB(mongoDatabase).C(mongoCollection).Find(bson.M{}).All(&foo)
if err != nil {
http.Error(w, fmt.Sprintf("Failed to read: %s", err.Error()), http.StatusInternalServerError)
return
}
out, err := json.Marshal(foo)
if err != nil {
http.Error(w, fmt.Sprintf("Failed to marshal: %s", err.Error()), http.StatusInternalServerError)
return
}
w.Header().Set("Content-Type", "application/json")
w.Write(out)
}
```
For ``UPDATE``, it is getting simple. Call ``Update`` with the the one
```
else if r.Method == http.MethodPut {
fmt.Println("bar1 will be updated to bar1-updated")
if err := sess.DB(mongoDatabase).C(mongoCollection).Update(bson.M{"bar": "bar1"}, bson.M{"$set": bson.M{"bar": "bar1-updated"}}); err != nil {
http.Error(w, fmt.Sprintf("Failed to update: %s", err.Error()), http.StatusInternalServerError)
return
}
w.Header().Set("Content-Type", "application/json")
w.Write([]byte(`{"success":true, "message": "bar1 has been updated to bar1-updated"}`))
}
```
Let's build and deploy
```bash
faas-cli up -f k3d-mongodb-crud.yml
```
Oops
```
Step 10/29 : RUN cat function/GO_REPLACE.txt >> ./go.mod || exit 0
---> Running in 2103ee3002c2
cat: can't open 'function/GO_REPLACE.txt': No such file or directory
```
This comes from ``k3d-mongodb-crud/build/k3d-mongodb-crud/Dockerfile``
```dockerfile
# Add user overrides to the root go.mod, which is the only place "replace" can be used
RUN cat function/GO_REPLACE.txt >> ./go.mod || exit 0
```
```
cd k3d-mongodb-crud/
export GO111MODULE=on
go mod init
go get
go mod tidy
cat go.mod > GO_REPLACE.txt
```
GO_REPLACE.txt should look like
```
module github.com/go-serverless/k3d-mongodb-crud/k3d-mongodb-crud
go 1.14
require (
github.com/alexellis/hmac v0.0.0-20180624211220-5c52ab81c0de // indirect
github.com/niemeyer/pretty v0.0.0-20200227124842-a10e7caefd8e // indirect
github.com/openfaas/faas-provider v0.15.0 // indirect
github.com/openfaas/openfaas-cloud v0.0.0-20200319114858-76ce15eb291a
gopkg.in/check.v1 v1.0.0-20200227125254-8fa46927fb4f // indirect
gopkg.in/mgo.v2 v2.0.0-20190816093944-a6b53ec6cb22
gopkg.in/yaml.v2 v2.2.8 // indirect
)
```
Let's build and deploy again
```bash
faas-cli up -f k3d-mongodb-crud.yml
```
# Testing
Currently I don't see OpenFaaS UI Portal allow us to select the HTTP request method.
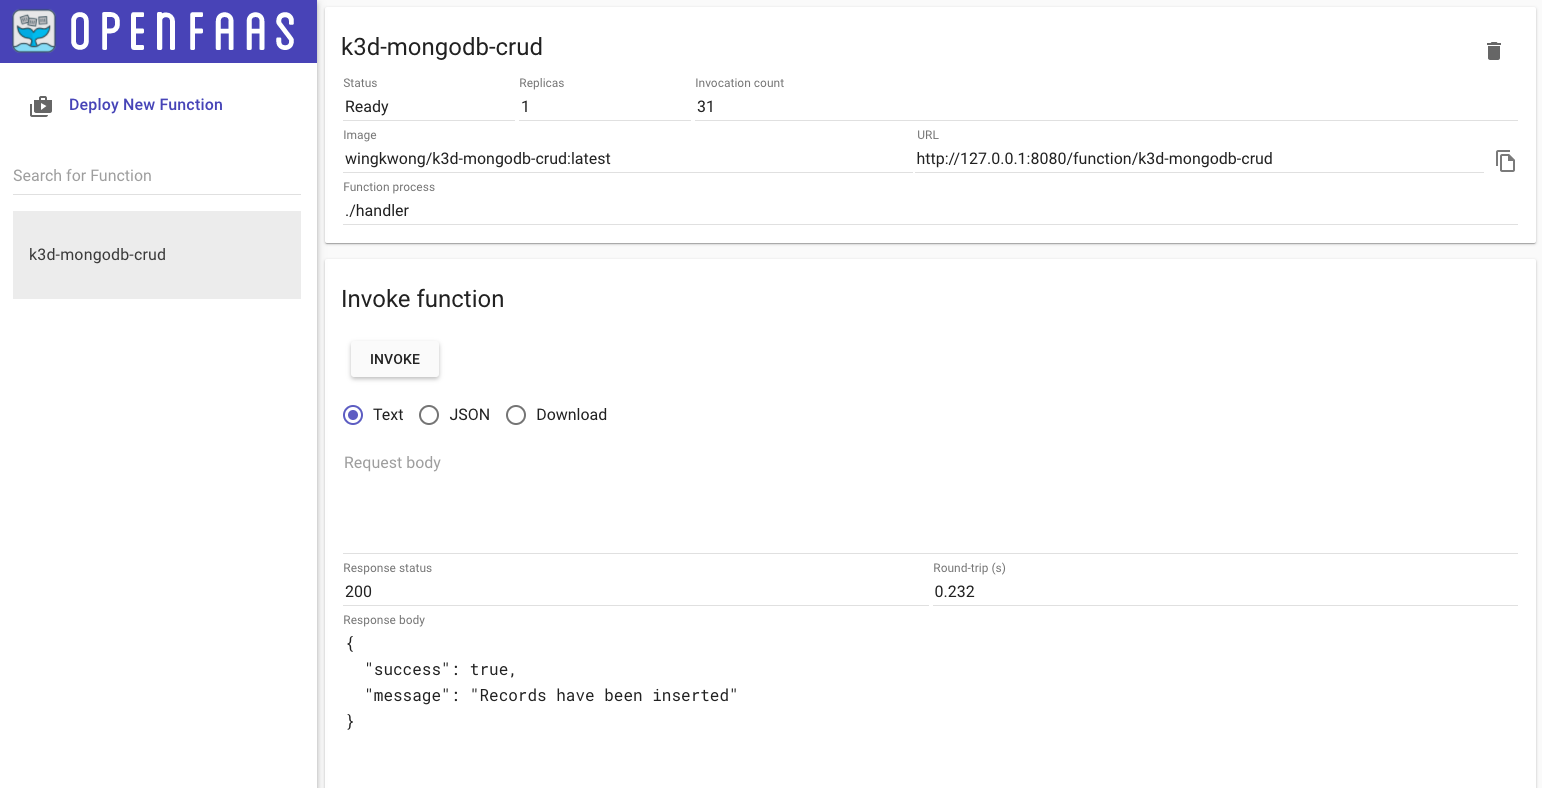
Hence, once your endpoints are ready, use curl to test instead
### Create
```
curl http://127.0.0.1:8080/function/k3d-mongodb-crud --request POST
{"success":true, "message": "4 records have been inserted"}
```
Go to MongoDB, check the collection
```
> db.foo.find()
{ "_id" : ObjectId("5e8014f10c4812773ee77f16"), "bar" : "bar", "baz" : "baz" }
{ "_id" : ObjectId("5e8014f10c4812773ee77f17"), "bar" : "bar1", "baz" : "baz1" }
{ "_id" : ObjectId("5e8014f10c4812773ee77f18"), "bar" : "bar2", "baz" : "baz2" }
{ "_id" : ObjectId("5e8014f10c4812773ee77f19"), "bar" : "bar3", "baz" : "baz3" }
```
### Read
```
curl http://127.0.0.1:8080/function/k3d-mongodb-crud --request GET
[{"Bar":"bar","Baz":"baz"},{"Bar":"bar1","Baz":"baz1"},{"Bar":"bar2","Baz":"baz2"},{"Bar":"bar3","Baz":"baz3"}]
```
### Update
```
curl http://127.0.0.1:8080/function/k3d-mongodb-crud --request PUT
{"success":true, "message": "bar1 has been updated to bar1-updated"}
```
Go to MongoDB, check the collection
```
> db.foo.find()
{ "_id" : ObjectId("5e8014f10c4812773ee77f16"), "bar" : "bar", "baz" : "baz" }
{ "_id" : ObjectId("5e8014f10c4812773ee77f17"), "bar" : "bar1-updated", "baz" : "baz1" }
{ "_id" : ObjectId("5e8014f10c4812773ee77f18"), "bar" : "bar2", "baz" : "baz2" }
{ "_id" : ObjectId("5e8014f10c4812773ee77f19"), "bar" : "bar3", "baz" : "baz3" }
```
### Delete
```
curl http://127.0.0.1:8080/function/k3d-mongodb-crud --request DELETE
{"success":true, "message": "bar1 has been deleted"}
```
```
> db.foo.find()
{ "_id" : ObjectId("5e8014f10c4812773ee77f17"), "bar" : "bar1-updated", "baz" : "baz1" }
{ "_id" : ObjectId("5e8014f10c4812773ee77f18"), "bar" : "bar2", "baz" : "baz2" }
{ "_id" : ObjectId("5e8014f10c4812773ee77f19"), "bar" : "bar3", "baz" : "baz3" }
```
It looks good. If you've encountered some errors, you can check the log to have more insights by running
```
faas-cli logs k3d-mongodb-crud
```
# Clean up
To clean up, simply just run
```
k3d delete
```
# Wrap up
Of course this is just a learning playground. In the real life scenarios, we take user input from the Request body and we may filter the requests by ``r.URL.Path``. Besides, the functions should be separated for better readability.
The full source code for this post is available
{% github go-serverless/k3d-mongodb-crud %}
If you are looking for Python version, please check out [Get storage for your functions with Python and MongoDB](https://www.openfaas.com/blog/get-started-with-python-mongo/).
I've also referenced a blog post [Building a TODO API in Golang with Kubernetes](https://medium.com/@alexellisuk/building-a-todo-api-in-golang-with-kubernetes-1ec593f85029) written by Alex Ellis (The founder of OpenFaaS).
Here's some useful links
[Template Store - OpenFaaS](https://www.openfaas.com/blog/template-store/)
[Troubleshooting Guide - OpenFaaS](https://docs.openfaas.com/deployment/troubleshooting/)
[mgo.v2 API Documentation](https://godoc.org/gopkg.in/mgo.v2)
[OpenFaaS workshop](https://github.com/openfaas/workshop/)
Thursday, 26 March 2020
Building Serverless CRUD services in Go with DynamoDB - Part 6 (Bonus)
Welcome to the part 6. This is the last part of this series. In this post, we will create ``loginHandler.go``.
# Getting started
First, let's add the config under functions in serverless.yml
```
login:
handler: bin/handlers/loginHandler
package:
include:
- ./bin/handlers/loginHandler
events:
- http:
path: iam/login
method: post
cors: true
```
Create a file ``loginHandler.go`` under src/handlers
Similarly, we have the below structure.
```
package main
import (
"context"
"encoding/json"
"fmt"
"os"
"github.com/aws/aws-lambda-go/events"
"github.com/aws/aws-lambda-go/lambda"
"github.com/aws/aws-sdk-go/aws"
"github.com/aws/aws-sdk-go/aws/session"
"github.com/aws/aws-sdk-go/service/dynamodb"
"github.com/aws/aws-sdk-go/service/dynamodb/dynamodbattribute"
utils "../utils"
)
type Credentials struct {
// TODO1
}
type User struct {
ID string `json:"id,omitempty"`
UserName string `json:"user_name,omitempty"`
FirstName string `json:"first_name,omitempty"`
LastName string `json:"last_name,omitempty"`
Age int `json:"age,omitempty"`
Phone string `json:"phone,omitempty"`
Password string `json:"password,omitempty"`
Email string `json:"email,omitempty"`
Role string `json:"role,omitempty"`
IsActive bool `json:"is_active,omitempty"`
CreatedAt string `json:"created_at,omitempty"`
ModifiedAt string `json:"modified_at,omitempty"`
DeactivatedAt string `json:"deactivated_at,omitempty"`
}
type Response struct {
Response User `json:"response"`
}
var svc *dynamodb.DynamoDB
func init() {
region := os.Getenv("AWS_REGION")
// Initialize a session
if session, err := session.NewSession(&aws.Config{
Region: ®ion,
}); err != nil {
fmt.Println(fmt.Sprintf("Failed to initialize a session to AWS: %s", err.Error()))
} else {
// Create DynamoDB client
svc = dynamodb.New(session)
}
}
func Login(ctx context.Context, request events.APIGatewayProxyRequest) (events.APIGatewayProxyResponse, error) {
var (
tableName = aws.String(os.Getenv("IAM_TABLE_NAME"))
)
//TODO2
}
func main() {
lambda.Start(Login)
}
```
Basically we are going to make an API with POST method. Users are expected to pass their credentials to ``iam/login`` to authorise their identities.
In this tutorials, we only send username and password. You may change username to email if you want. Let's update the below code and remove the comment ``// TODO1``.
```
type Credentials struct {
UserName string `json:"user_name"`
Password string `json:"password"`
}
```
As we only need to return a single object, we can use same response struct used in ``getHandler.go``
```
type Response struct {
Response User `json:"response"`
}
```
The next step is to write our logic under ``//TODO2``. The general idea is that users send their credentials which are further used to check the data in Amazon DynamoDB. It then returns the user object if it matches.
First, we need to initialise ``Credentials`` to hold our users input.
```
creds := &Credentials{}
```
Like what we did previously, parse the request body to creds
```
json.Unmarshal([]byte(request.Body), creds)
```
The next step is to utilise Query API operation for Amazon DynamoDB. In this tutorial, it finds items based on primary key values. You can also query any table or secondary index which has a composite primary key.
Query takes QueryInput. It should includes ``TableName``, ``IndexName``, ``KeyConditions``.
``TableName`` is a required field which tells the client service which table you want to perform Query.
``IndexName`` is the name of an index to query. It can be local secondary index or global secondary index on the table.
``KeyConditions`` includes ``Condition`` which is used when querying a table or an index with comparison operators such as EQ | LE | LT | GE | GT | BEGINS_WITH | BETWEEN. It can also apply ``QueryFilter``.
```
result, err := svc.Query(&dynamodb.QueryInput{
TableName: tableName,
IndexName: aws.String("IAM_GSI"),
KeyConditions: map[string]*dynamodb.Condition{
"user_name": {
ComparisonOperator: aws.String("EQ"),
AttributeValueList: []*dynamodb.AttributeValue{
{
S: aws.String(creds.UserName),
},
},
},
},
})
```
Like other handler, we retrieve the value of IAM_TABLE_NAME in our configuration file and set it to tableName.
```
tableName = aws.String(os.Getenv("IAM_TABLE_NAME"))
```
We select ``IAM_GSI`` to query, which is also defined in serverless.yml in part 1.
```
GlobalSecondaryIndexes:
- IndexName: IAM_GSI
KeySchema:
- AttributeName: user_name
KeyType: HASH
Projection:
ProjectionType: ALL
ProvisionedThroughput:
ReadCapacityUnits: 5
WriteCapacityUnits: 5
```
We then define a ``dynamodb.Condition`` struct holding our condition. As you can see, we only have one condition which is to check if ``user_name`` and ``creds.UserName`` are equal (EQ).
Check if there is an error
```
if err != nil {
fmt.Println("Got error calling Query:")
fmt.Println(err.Error())
// Status Internal Server Error
return events.APIGatewayProxyResponse{
Body: err.Error(),
StatusCode: 500,
}, nil
}
```
If there is no error, we can see a User object in ``result.Items``. However, if there is no item returned from Amazon DynamoDB, we can return an empty object in response.
```
user := User{}
if len(result.Items) == 0 {
body, _ := json.Marshal(&Response{
Response: user,
})
// Status OK
return events.APIGatewayProxyResponse{
Body: string(body),
StatusCode: 200,
}, nil
}
```
The response should look like this
```json
{
"response": {}
}
```
If there is a record found, we can pass it to user.
```
if err := dynamodbattribute.UnmarshalMap(result.Items[0], &user); err != nil {
fmt.Println("Got error unmarshalling:")
fmt.Println(err.Error())
return events.APIGatewayProxyResponse{
Body: err.Error(),
StatusCode: 500,
}, nil
}
```
Now we only check if the password in user input matches with the one in the record.
Remember we've created ``utils/password.go`` in Part 1? We've only created ``HashPassword``. We use this function to hash the password. In order to compare a bcrypt hashed password with its possible plaintext equivalent, we need another function here.
```
func CheckPasswordHash(password, hash string) bool {
err := bcrypt.CompareHashAndPassword([]byte(hash), []byte(password))
return err == nil
}
```
It's simple. We also use bcrypt to perform checking by using ``CompareHashAndPassword``.
Back to ``loginHandler.go``
```
match := utils.CheckPasswordHash(creds.Password, user.Password)
```
If it matches, then we can return user to Response.
```
if match {
body, _ := json.Marshal(&Response{
Response: user,
})
// Status OK
return events.APIGatewayProxyResponse{
Body: string(body),
StatusCode: 200,
}, nil
}
```
If not, we just return an empty user
```
body, _ := json.Marshal(&Response{
Response: User{},
})
// Status Unauthorized
return events.APIGatewayProxyResponse{
Body: string(body),
StatusCode: 401,
}, nil
```
Run the below command to deploy our code
```
./scripts/deploy.sh
```
# Testing
If you go to AWS Lambda Console, you will see there is a function called ``serverless-iam-dynamodb-dev-login``
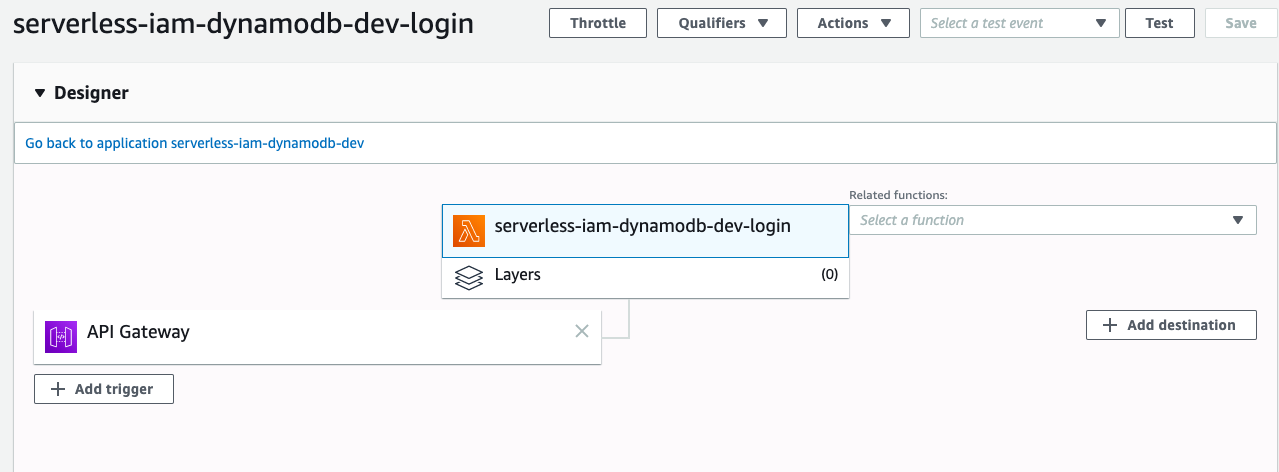
Go to API Gateway Console to test it,
```json
{
"user_name": "wingkwong",
"password": "password"
}
```
You should see the corresponding data.
```json
{
"response": {
"id": "6405bc74-a706-4987-86a9-82cf69d386c2",
"user_name": "wingkwong",
"password": "$2a$15$abtf69CeWZwGPJxIS/D/teXV26kBfY3SmHFNSNTbhP8gNa1OUeoiy",
"email": "wingkwong.me@gmail.com",
"role": "user",
"is_active": true,
"created_at": "2020-03-07 07:29:23.336349405 +0000 UTC m=+0.087254950",
"modified_at": "2020-03-07 07:30:47.531266176 +0000 UTC m=+0.088812866"
}
}
```
Let's try a wrong password
```json
{
"user_name": "wingkwong",
"password": "password2"
}
```
You should see an empty object
```json
{
"response": {}
}
```
# Cleanup
As mentioned in Part 1, serverless provisions / updates a single CloudFormation stack every time we deploy. To cleanup, we just need to delete the stack.
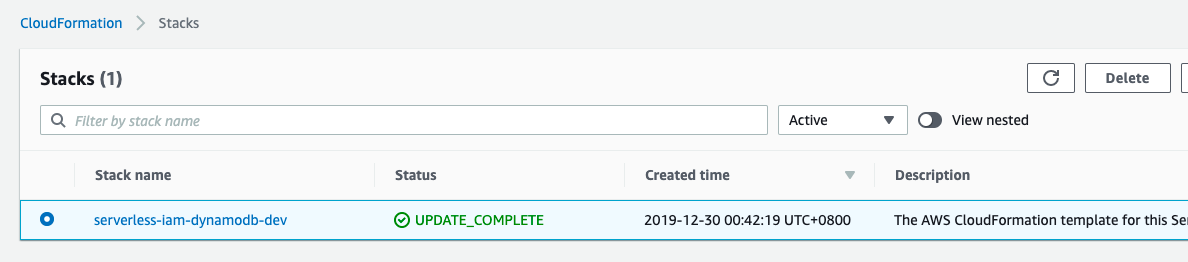
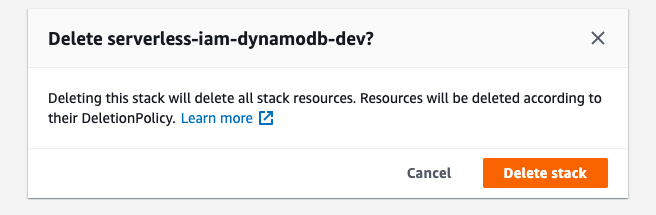
Click Delete stack
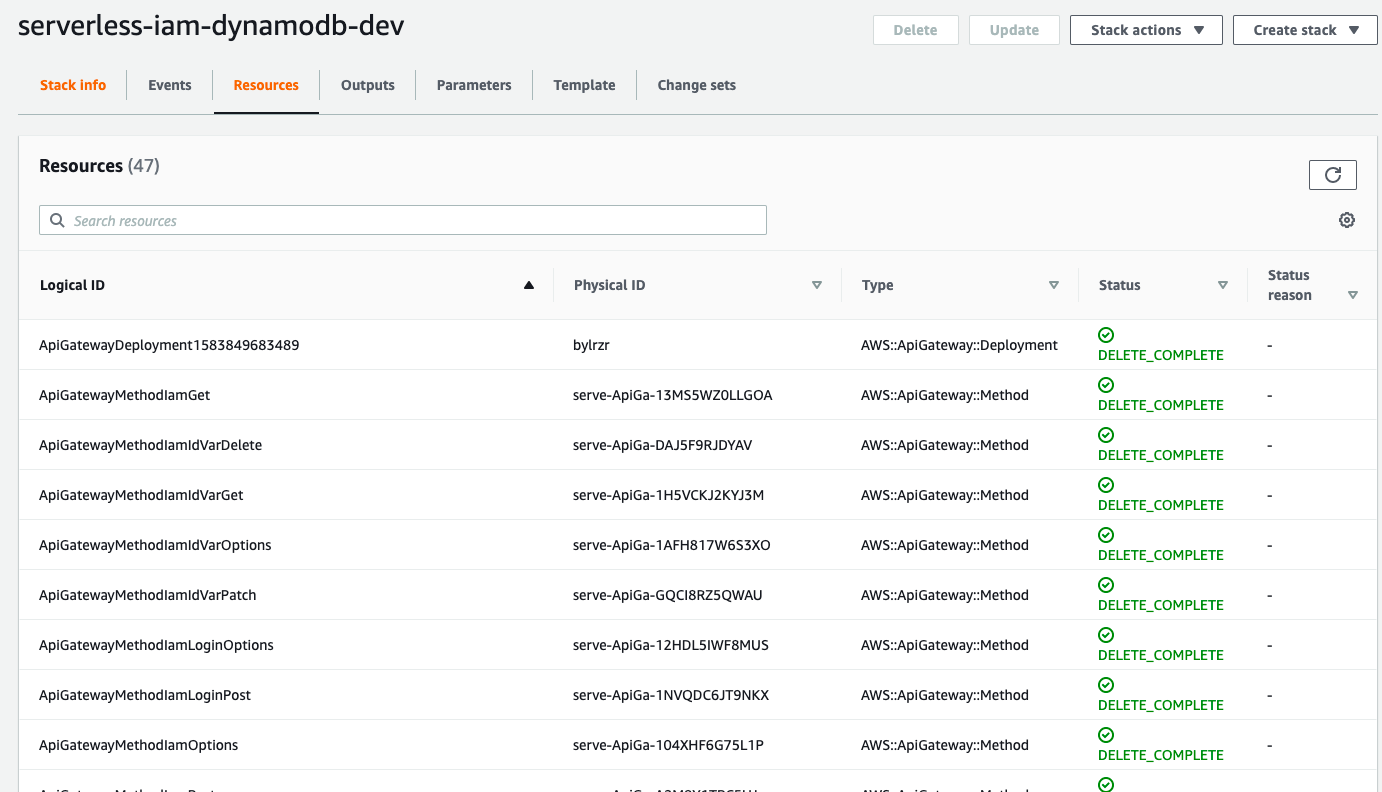
You should see the status is now DELETE_IN_PROGRESS.
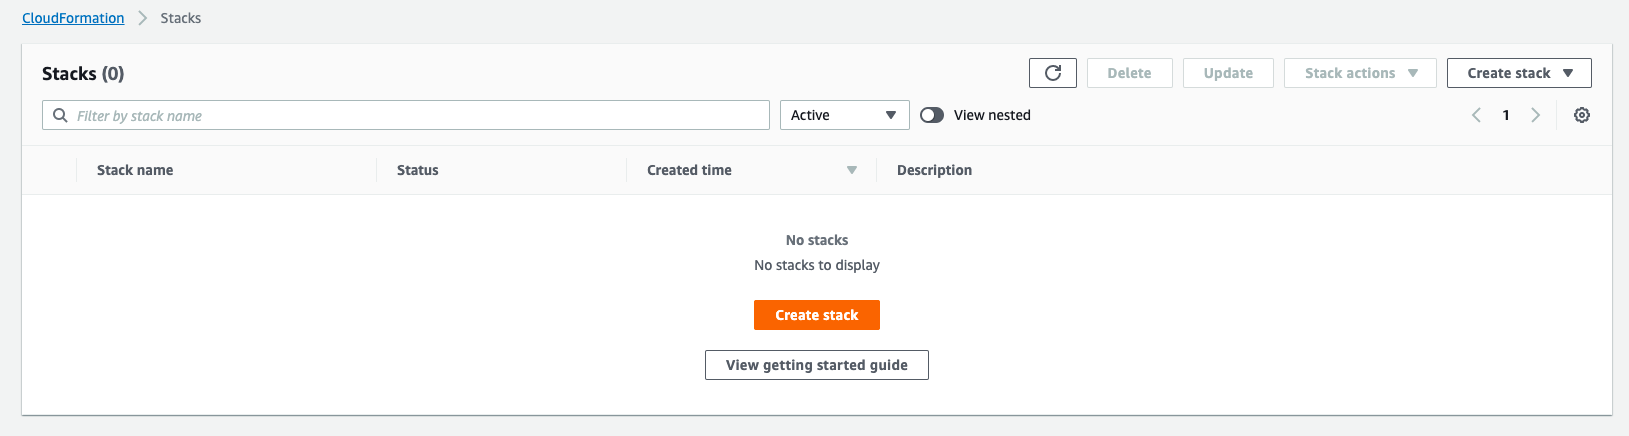
Once it's done, you should see the stack has been deleted.
# Source Code
{% github go-serverless/serverless-iam-dynamodb %}
Monday, 23 March 2020
Building Serverless CRUD services in Go with DynamoDB - Part 5
Welcome to Part 5. Last time we've learnt how to delete a single item in a table by primary key. In this post, we'll learn how to secure our APIs.
# Getting started
First, let's add the config under functions in serverless.yml
```
auth:
package:
include:
- ./bin/handlers/authHandler
handler: bin/handlers/authHandler
```
Previously, we've already created ``list``, ``create``, ``update`` and ``delete``. We would like to secure these APIs. To do so, we just need to simply to just add ``authorizer: auth`` to allow us to run an AWS Lambda Function before your targeted AWS Lambda Function.
Take ``list`` as an example:
```
list:
handler: bin/handlers/listHandler
package:
include:
- ./bin/handlers/listHandler
events:
- http:
path: iam
method: get
cors: true
authorizer: auth
```
Then also add it to ``create``, ``update`` and ``delete``.
Before running our business logic, we can perform some Authorisation. It's also useful for micro-service Architectures.
The next step is to create ``authHandler.go`` under ``src/handlers/``. We need a custom authoriser calling an AWS Lambda Function.
About few months ago, I wrote a tutorial to teach how to build a simple authoriser. If you miss it, please check it out via below link and come back later. We'll use the exact code for this tutorial.
{% link https://dev.to/wingkwong/a-simple-amazon-api-gateway-lambda-authoriser-in-go-4cgd %}
In this example, our authentication strategy is to use bearer token like JWT to authorise our requests before reaching to our endpoints.
Under your environment in serverless.yml, you should add your JWT_SECRET_KEY.
```
environment:
IAM_TABLE_NAME: ${self:custom.iamTableName}
JWT_SECRET_KEY:
```
Run the below command to deploy our code
```
./scripts/deploy.sh
```
# Testing
Go to Amazon API Gateway Console, Select your API and Click Authorizers.
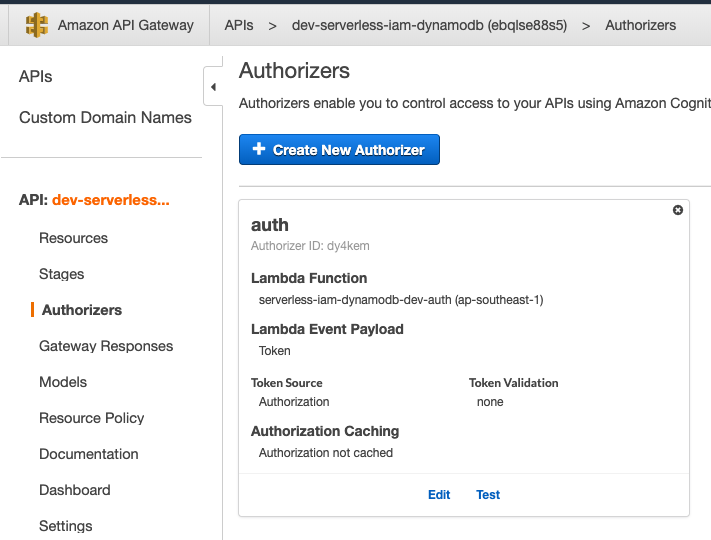
If you test it without the token, you are expected to see the below messages.
```
Response
Response Code: 401
Latency 344
Execution log for request [HIDDEN]
Mon Dec 30 08:56:58 UTC 2019 : Starting authorizer: [HIDDEN]
Mon Dec 30 08:56:58 UTC 2019 : Incoming identity: [HIDDEN]
Mon Dec 30 08:56:58 UTC 2019 : Endpoint request URI: [HIDDEN]
Mon Dec 30 08:56:58 UTC 2019 : Endpoint request headers: [HIDDEN]
Mon Dec 30 08:56:58 UTC 2019 : Endpoint request body after transformations: [HIDDEN]
Mon Dec 30 08:56:58 UTC 2019 : Sending request to [HIDDEN]
Mon Dec 30 08:56:58 UTC 2019 : Unauthorized request: [HIDDEN]
Mon Dec 30 08:56:58 UTC 2019 : Unauthorized
```
With the token, you should see the policy statement authorise our requests.
```json
{
"Version": "2012-10-17",
"Statement": [
{
"Action": [
"execute-api:Invoke"
],
"Effect": "Allow",
"Resource": [
"arn:aws:execute-api:ap-southeast-1:*:a123456789/ESTestInvoke-stage/GET/"
]
}
]
}
```
That's it for part 5. In the next part, we'll create ``loginHandler.go``.
Friday, 20 March 2020
Building Serverless CRUD services in Go with DynamoDB - Part 4
Welcome back! It's been a while. Here's the part 4. In this post, we will create ``deleteHandler.go``.
# Getting started
First, let's add the config under functions in serverless.yml
```
delete:
handler: bin/handlers/deleteHandler
package:
include:
- ./bin/handlers/deleteHandler
events:
- http:
path: iam/{id}
method: delete
cors: true
```
Create a file deleteHandler.go under src/handlers
Similarly, we have the below structure.
```
package main
import (
"context"
"fmt"
"github.com/aws/aws-lambda-go/events"
"github.com/aws/aws-lambda-go/lambda"
"github.com/aws/aws-sdk-go/aws"
"github.com/aws/aws-sdk-go/aws/session"
"github.com/aws/aws-sdk-go/service/dynamodb"
"os"
)
var svc *dynamodb.DynamoDB
func init() {
region := os.Getenv("AWS_REGION")
// Initialize a session
if session, err := session.NewSession(&aws.Config{
Region: ®ion,
}); err != nil {
fmt.Println(fmt.Sprintf("Failed to initialize a session to AWS: %s", err.Error()))
} else {
// Create DynamoDB client
svc = dynamodb.New(session)
}
}
func Delete(ctx context.Context, request events.APIGatewayProxyRequest) (events.APIGatewayProxyResponse, error) {
var (
tableName = aws.String(os.Getenv("IAM_TABLE_NAME"))
id = aws.String(request.PathParameters["id"])
)
// TODO: Add delete logic
}
func main() {
lambda.Start(Delete)
}
```
Deleting a record is pretty simple, we just need the record id (primary key) which can be retrieved from the request path parameters ``id``.
```
func (c *DynamoDB) DeleteItem(input *DeleteItemInput) (*DeleteItemOutput, error)
```
In order to call DeleteItem API operation for Amazon DynamoDB, we need to build ``DeleteItemInput`` first.
```
input := &dynamodb.DeleteItemInput{
Key: map[string]*dynamodb.AttributeValue{
"id": {
S: id,
},
},
TableName: tableName,
}
```
If you define a composite primary key, you must provide values for both the partition key and the sort key. In this case, we just need to provide the first one. We also need to tell which table your records are located in.
call ``DeleteItem`` to delete a single item in a table by primary key
```
_, err := svc.DeleteItem(input)
if err != nil {
fmt.Println("Got error calling DeleteItem:")
fmt.Println(err.Error())
// Status Internal Server Error
return events.APIGatewayProxyResponse{
Body: err.Error(),
StatusCode: 500,
}, nil
}
// Status No Content
return events.APIGatewayProxyResponse{
StatusCode: 204,
}, nil
```
Run the below command to deploy our code
```
./scripts/deploy.sh
```
# Testing
If you go to AWS Lambda Console, you will see there is a function called ``serverless-iam-dynamodb-dev-delete``
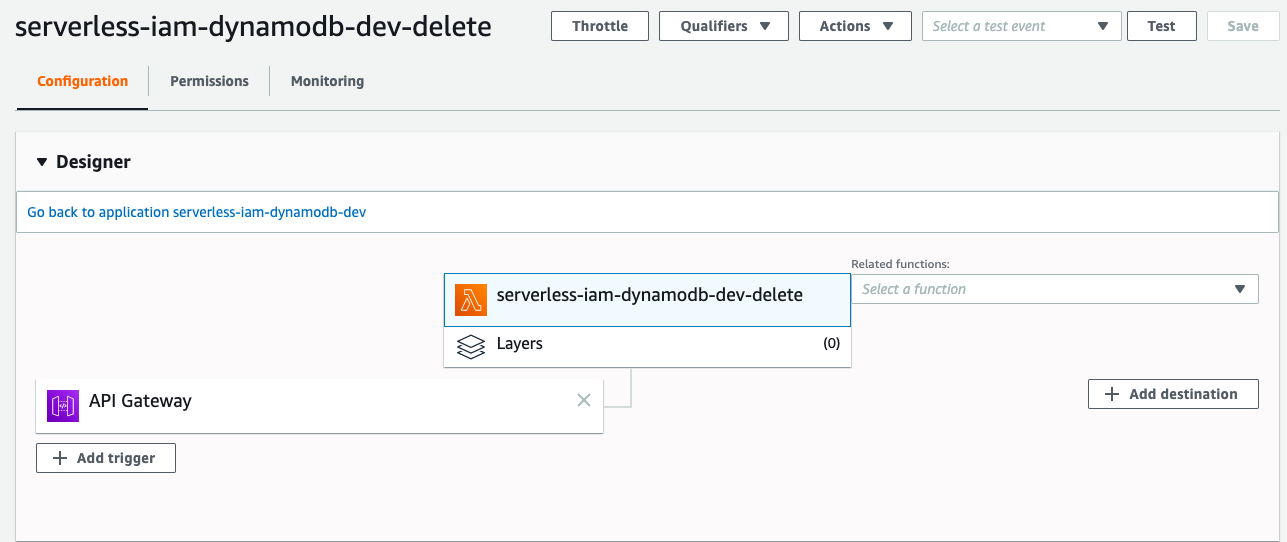
You can test your code either in Lambda or API Gateway.
Upon the success deletion, you should see that the status code returns 204.
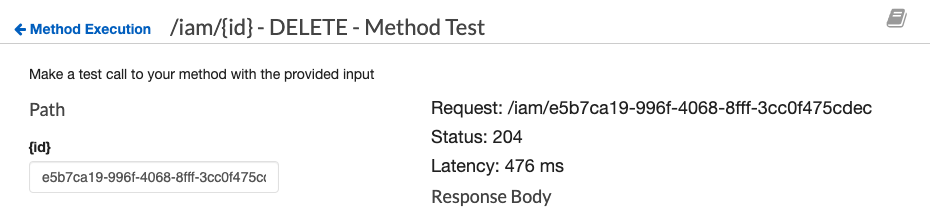
That's it for part 4. In the next post, we'll create ``authHandler.go`` to secure our APIs.
Wednesday, 11 March 2020
Building Serverless CRUD services in Go with DynamoDB - Part 3
So far we've created ``createHandler.go`` and ``listHandler.go``. In part 3, we will learn how to build ``updateHandler.go``
# Getting started
First, let's add the config under functions in serverless.yml
```
update:
handler: bin/handlers/updateHandler
package:
include:
- ./bin/handlers/updateHandler
events:
- http:
path: iam/{id}
method: patch
cors: true
```
Create a file updateHandler.go under src/handlers
Similarly, we have the below structure.
```
package main
import (
"context"
"encoding/json"
"fmt"
"github.com/aws/aws-lambda-go/events"
"github.com/aws/aws-lambda-go/lambda"
"github.com/aws/aws-sdk-go/aws"
"github.com/aws/aws-sdk-go/aws/session"
"github.com/aws/aws-sdk-go/service/dynamodb"
"github.com/aws/aws-sdk-go/service/dynamodb/expression"
"gopkg.in/go-playground/validator.v9"
"os"
"reflect"
"strings"
"time"
)
var svc *dynamodb.DynamoDB
func init() {
region := os.Getenv("AWS_REGION")
// Initialize a session
if session, err := session.NewSession(&aws.Config{
Region: ®ion,
}); err != nil {
fmt.Println(fmt.Sprintf("Failed to initialize a session to AWS: %s", err.Error()))
} else {
// Create DynamoDB client
svc = dynamodb.New(session)
}
}
type User struct {
ID *string `json:"id,omitempty"`
UserName *string `json:"user_name,omitempty" validate:"omitempty,min=4,max=20"`
FirstName *string `json:"first_name,omitempty"`
LastName *string `json:"last_name,omitempty"`
Age *int `json:"age,omitempty"`
Phone *string `json:"phone,omitempty"`
Email *string `json:"email,omitempty" validate:"omitempty,email"`
Role *string `json:"role,omitempty" validate:"omitempty,min=4,max=20"`
IsActive *bool `json:"is_active,omitempty"`
CreatedAt *string `json:"created_at,omitempty"`
ModifiedAt string `json:"modified_at,omitempty"`
DeactivatedAt *string `json:"deactivated_at,omitempty"`
}
func Update(ctx context.Context, request events.APIGatewayProxyRequest) (events.APIGatewayProxyResponse, error) {
var (
tableName = aws.String(os.Getenv("IAM_TABLE_NAME"))
id = aws.String(request.PathParameters["id"])
)
// TODO: Add Update logic
}
func main() {
lambda.Start(Update)
}
```
When we update a record, we need to update the column ``ModifiedAt``.
```
user := &User{
ModifiedAt: time.Now().String(),
}
```
Similar to ``createHandler.go``, we parse the request body and perform validation.
```
// Parse request body
json.Unmarshal([]byte(request.Body), user)
// Validate user struct
var validate *validator.Validate
validate = validator.New()
err := validate.Struct(user)
if err != nil {
// Status Bad Request
return events.APIGatewayProxyResponse{
Body: err.Error(),
StatusCode: 400,
}, nil
}
```
We need to create a ``dynamodb.UpdateItemInput`` for DynamoDB service to update the item. You may see that some people use the following code.
```
input := &dynamodb.UpdateItemInput{
Key: map[string]*dynamodb.AttributeValue{
"id": {
S: aws.String(id),
},
UpdateExpression: aws.String("set #a = :a, #b = :b, #c = :c"),
ExpressionAttributeNames: map[string]*string{
"#a": &a,
"#b": &b,
"#c": &c,
},
ExpressionAttributeValues: map[string]*dynamodb.AttributeValue{
":a": {
BOOL: aws.Bool(true),
},
":b": {
BOOL: aws.Bool(true),
},
":c": {
BOOL: aws.Bool(true),
},
},
ReturnValues: aws.String("UPDATED_NEW"),
TableName: "tableName",
}
```
The above example uses ``set`` to update attribute ``a``, ``b``, and ``c`` with mapped attribute values provided in ``ExpressionAttributeValues``.
With such approach, the expression cannot be dynamic as we allow users to update some specific attributes only.
To do that, we use reflect to get the input struct and get the json name without a corresponding tag. Then we append each json field name and its value to UpdateBuilder by using ``UpdateBuilder.Set``.
```
u := reflect.ValueOf(user).Elem()
t := u.Type()
for i := 0; i < u.NumField(); i++ {
f := u.Field(i)
// check if it is empty
if !reflect.DeepEqual(f.Interface(), reflect.Zero(f.Type()).Interface()) {
jsonFieldName := t.Field(i).Name
// get json field name
if jsonTag := t.Field(i).Tag.Get("json"); jsonTag != "" && jsonTag != "-" {
if commaIdx := strings.Index(jsonTag, ","); commaIdx > 0 {
jsonFieldName = jsonTag[:commaIdx]
}
}
// construct update
update = update.Set(expression.Name(jsonFieldName), expression.Value(f.Interface()))
}
}
```
Create a new Builder with Update
```
builder := expression.NewBuilder().WithUpdate(update)
```
Call ``Build()`` to get the expression and error
```
expression, err := builder.Build()
```
Verify if there is an error
```
if err != nil {
// Status Bad Request
return events.APIGatewayProxyResponse{
Body: err.Error(),
StatusCode: 400,
}, nil
}
```
Create ``dynamodb.UpdateItemInput``
```
// Update a record by id
input := &dynamodb.UpdateItemInput{
Key: map[string]*dynamodb.AttributeValue{
"id": {
S: id,
},
},
ExpressionAttributeNames: expression.Names(),
ExpressionAttributeValues: expression.Values(),
UpdateExpression: expression.Update(),
ReturnValues: aws.String("UPDATED_NEW"),
TableName: tableName,
}
```
Feed it into ``UpdateItem``
```
_, err = svc.UpdateItem(input)
```
Check if it can be updated or not
```
if err != nil {
fmt.Println("Got error calling UpdateItem:")
fmt.Println(err.Error())
// Status Internal Server Error
return events.APIGatewayProxyResponse{
Body: err.Error(),
StatusCode: 500,
}, nil
}
// Status OK
return events.APIGatewayProxyResponse{
Body: request.Body,
StatusCode: 200,
}, nil
```
Run the below command to deploy our code
```
./scripts/deploy.sh
```
# Testing
If you go to AWS Lambda Console, you will see there is a function called ``serverless-iam-dynamodb-dev-update``
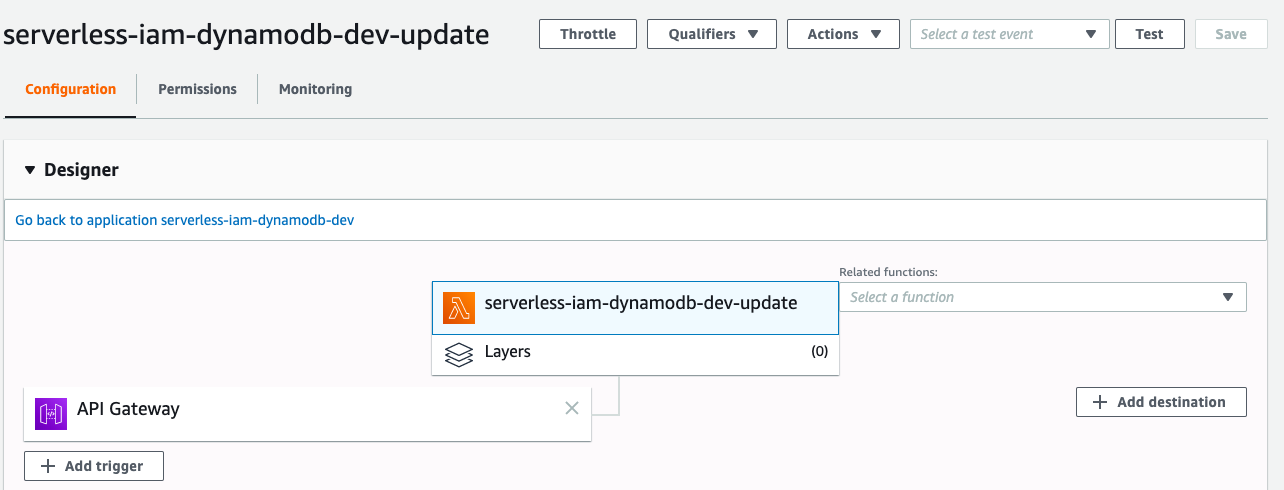
Go to API Gateway Console to test it, this time we need to set an id.
```json
{
"email": "wingkwong@gmail.com"
}
```
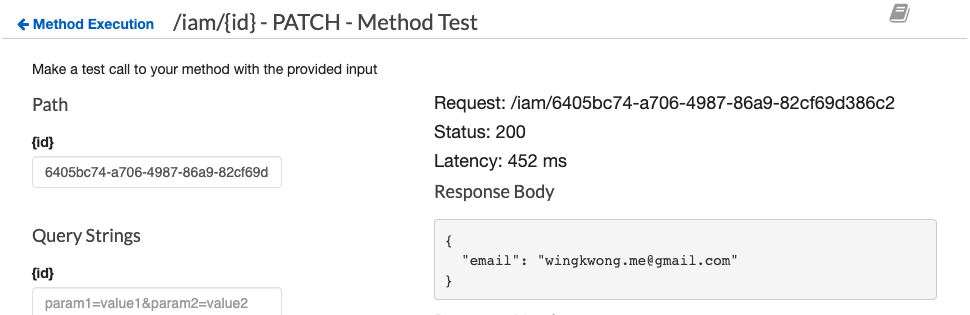
If the update returns 200, then go to DynamoDB to verify the result.

We should see that only the email has been updated.
That's it for part 3. In part 4, we will create ``deleteHandler.go``.
Sunday, 8 March 2020
Building Serverless CRUD services in Go with DynamoDB - Part 2
In the previous post, we've created ``createHandler``. In this post, we'll create ``listHandler``.
# Getting started
First, let's add the config under ``functions`` in ``serverless.yml``
```
list:
handler: bin/handlers/listHandler
package:
include:
- ./bin/handlers/listHandler
events:
- http:
path: iam
method: get
cors: true
```
Create a file ``listHandler.go`` under src/handlers
Similarly, we have the below structure.
```
package main
import (
"context"
"encoding/json"
"fmt"
"os"
"github.com/aws/aws-lambda-go/events"
"github.com/aws/aws-lambda-go/lambda"
"github.com/aws/aws-sdk-go/aws"
"github.com/aws/aws-sdk-go/aws/session"
"github.com/aws/aws-sdk-go/service/dynamodb"
"github.com/aws/aws-sdk-go/service/dynamodb/dynamodbattribute"
)
// TODO1: Define User Struct
// TODO2: Define User Response Struct
var svc *dynamodb.DynamoDB
func init() {
region := os.Getenv("AWS_REGION")
// Initialize a session
if session, err := session.NewSession(&aws.Config{
Region: ®ion,
}); err != nil {
fmt.Println(fmt.Sprintf("Failed to initialize a session to AWS: %s", err.Error()))
} else {
// Create DynamoDB client
svc = dynamodb.New(session)
}
}
func List(ctx context.Context, request events.APIGatewayProxyRequest) (events.APIGatewayProxyResponse, error) {
var (
tableName = aws.String(os.Getenv("IAM_TABLE_NAME"))
)
// TODO3: Add DynamoDB retrival logic
}
func main() {
lambda.Start(List)
}
```
For TODO1, this time we don't need omitempty tags because we want to retrieve every field. Ths struct would be
```
type User struct {
ID string `json:"id"`
UserName string `json:"user_name"`
FirstName string `json:"first_name"`
LastName string `json:"last_name"`
Age int `json:"age"`
Phone string `json:"phone"`
Password string `json:"password"`
Email string `json:"email"`
Role string `json:"role"`
IsActive bool `json:"is_active"`
CreatedAt string `json:"created_at"`
ModifiedAt string `json:"modified_at"`
DeactivatedAt string `json:"deactivated_at"`
}
```
We also need another struct for holding our user response. Let's create a new one and remove TODO2 comment.
```
type Response struct {
Response []User `json:"response"`
}
```
By doing so, our response should look like
```json
{
"response": [
{
// user record #1
},
{
// user record #2
}
// and so on
]
}
```
When I was coding the response part, one mistake I made was I accidentally added an extra space after ``json:`` like
```
type Response struct {
Response []User `json: "response"`
}
```
and I got the below result
```json
{
"Response": [
{
// user record #1
},
{
// user record #2
}
// and so on
]
}
```
If there is no json tag or the tag cannot be read, it will reflect the json field name instead.
This time we need to use ``svc`` to retrieve the users from DynamoDB. First of all, we need to build the query input parameters
```
params := &dynamodb.ScanInput{
TableName: tableName,
}
```
Make the DynamoDB Query API call
```
result, err := svc.Scan(params)
if err != nil {
fmt.Println("Query API call failed:")
fmt.Println((err.Error()))
// Status Bad Request
return events.APIGatewayProxyResponse{
Body: err.Error(),
StatusCode: 400,
}, nil
}
```
Construct users from response
```
var users []User
for _, i := range result.Items {
user := User{}
if err := dynamodbattribute.UnmarshalMap(i, &user); err != nil {
fmt.Println("Got error unmarshalling:")
fmt.Println(err.Error())
return events.APIGatewayProxyResponse{
Body: err.Error(),
StatusCode: 400,
}, nil
}
users = append(users, user)
}
```
Marshal the user response and return APIGatewayProxyResponse
```
body, _ := json.Marshal(&Response{
Response: users,
})
return events.APIGatewayProxyResponse{
Body: string(body),
StatusCode: 200,
}, nil
```
Let's deploy and test it
```
./scripts/deploy.sh
```
# Testing
If you go to AWS Lambda Console, you should see there is a function called ``serverless-iam-dynamodb-dev-get``
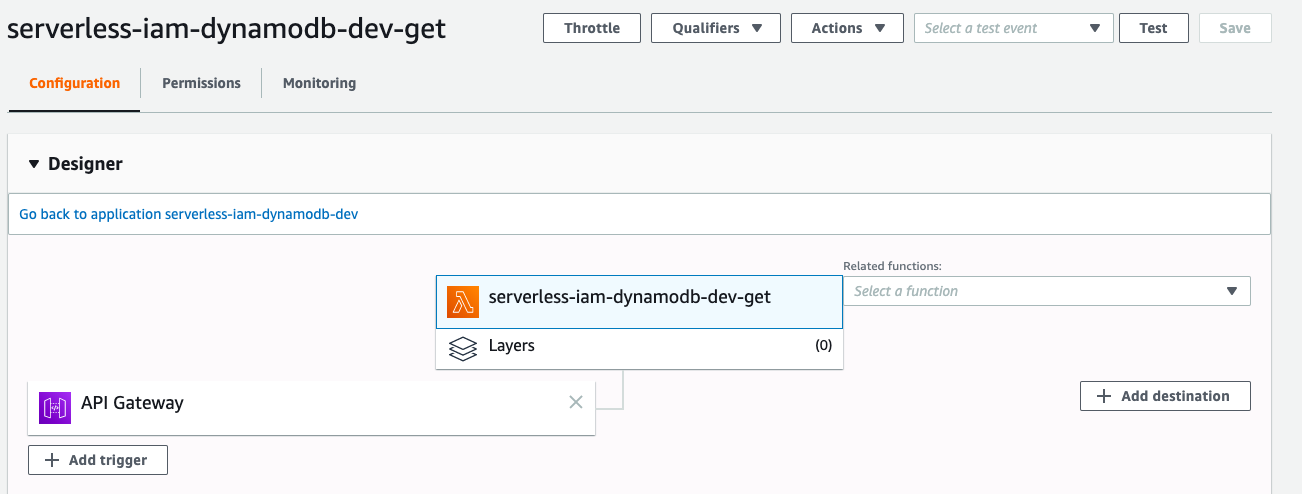
You can test your code either in Lambda or API Gateway.
Since this is a GET method, a request body is not supported. The response should look like
```json
{
"response": [
{
"id": "bd6fde14-3f6a-4551-95f3-349077a5501f",
"user_name": "wingkwong",
"first_name": null,
"last_name": null,
"age": null,
"phone": null,
"password": "$2a$14$iwyLz8DOnbcolxXezZGXG.uXN9kCxJ8aYzMFftYZ06j1Ybb4uThC2",
"email": "wingkwong@gmail.com",
"role": "user",
"is_active": true,
"created_at": "2019-12-28 13:16:41.09607401 +0000 UTC m=+0.077451001",
"modified_at": "2019-12-28 13:16:41.096188175 +0000 UTC m=+0.077565137",
"deactivated_at": null
}
]
}
```
That's it for part 2. In the next post, we'll create ``updateHandler.go``.
Tuesday, 3 March 2020
Building Serverless CRUD services in Go with DynamoDB - Part 1
[AWS Lamdba](https://aws.amazon.com/lambda/) is a serverless compute service which allows you to run your code without provisioning or managing servers. It costs only the compute time that you consume. It also supports continuous scaling. [AWS DynamoDB](https://aws.amazon.com/dynamodb/) is a serverless database for applications that need high performance at any scale. We'll also use [Serverless Framework](https://serverless.com/) to deploy our services on AWS.
In this series, we'll go through how to implement serverless CRUD services with DynamoDB in Go.
# Project structure
/.serverless
It will be created automatically when running ``serverless deploy`` in where deployment zip files, cloudformation stack files will be generated
/bin
This is the folder where our built Go codes are placed
/scripts
General scripts for building Go codes and deployment
/src/handlers
All Lambda handlers will be placed here
# Prerequisites
Install serverless cli
```
npm install -g serverless
```
Install aws cli
```
pip install awscli
```
Setup your aws credentials
```
aws configure
```
Of course you need to install [Go](https://golang.org/doc/install)
# Getting started
First of all, we need to create ``serverless.yml`` which is the main config for your service. When you run ``serverless deploy``, the framework will use this config file to help provision the corresponding resources.
First, let's name our service. You can name whatever your like.
```
service: serverless-iam-dynamodb
```
Then, let's create the primary section - provider. We can choose our serverless provider such as AWS, Google Cloud or Azure and specify the programming language we use. In this example, we'll use aws with go 1.x. We can need to set the stage, region, environment variables and IAM role statements here.
```
provider:
name: aws
runtime: go1.x
stage: dev
region: ap-southeast-1
environment:
IAM_TABLE_NAME: ${self:custom.iamTableName}
iamRoleStatements:
- Effect: Allow
Action:
- dynamodb:Scan
- dynamodb:Query
- dynamodb:GetItem
- dynamodb:PutItem
- dynamodb:UpdateItem
- dynamodb:DeleteItem
Resource:
- ${self:custom.iamTableArn}
- Fn::Join:
- /
- - ${self:custom.iamTableArn}
- index/*
```
Every Lambda function requires certain permissions to interact with AWS resources and they are set via an AWS IAM Role. In this example, we allow the function to perform multiple dynamodb actions on the resource ``${self:custom.iamTableArn}``.
Since we'll use ``dynamodb:Query`` and by default index is not allowed so we have to allow it here. Below snippet shows how to join our ARN and the string index/*.
```
- Fn::Join:
- /
- - ${self:custom.iamTableArn}
- index/*
```
What is ``${self:custom.iamTableArn}``? We haven't defined it yet. Let's do it.
```
custom:
iamTableName: ${self:service}-${self:provider.stage}-iam
iamTableArn:
Fn::Join:
- ":"
- - arn
- aws
- dynamodb
- Ref: AWS::Region
- Ref: AWS::AccountId
- table/${self:custom.iamTableName}
```
This ``custom`` section just allows us to create our custom variables. In this example, we define our table name and table ARN.
After that, we need to define how to package our code.
```
package:
individually: true
exclude:
- ./**
```
It's pretty self-explanatory. This is to package our functions separately (See the below ``functions`` section) and exclude everything in the root directory.
Moving on to next section ``functions``. This is where we define our Lambda functions. We'll create a function called ``create`` where the handler is ``bin/handlers/createHandler`` which will be built by our script later. Inside ``events``, we can define our HTTP endpoint. This example is a POST method with the path ``/iam``. To handle preflight requests, we can set ``cors: true`` to the HTTP endpoint.
```
functions:
create:
handler: bin/handlers/createHandler
package:
include:
- ./bin/handlers/createHandler
events:
- http:
path: iam
method: post
cors: true
```
The last section is to define what resources we need to provision. These resources are AWS infrastructure resources that our functions depend on. In this example, we need to deploy DynamoDB.
```
resources:
Resources:
iamTable:
Type: AWS::DynamoDB::Table
Properties:
TableName: ${self:custom.iamTableName}
ProvisionedThroughput:
ReadCapacityUnits: 1
WriteCapacityUnits: 1
AttributeDefinitions:
- AttributeName: id
AttributeType: S
- AttributeName: user_name
AttributeType: S
KeySchema:
- AttributeName: id
KeyType: HASH
GlobalSecondaryIndexes:
- IndexName: IAM_GSI
KeySchema:
- AttributeName: user_name
KeyType: HASH
Projection:
ProjectionType: ALL
ProvisionedThroughput:
ReadCapacityUnits: 5
WriteCapacityUnits: 5
```
There are other sections you can use. For more, please check out serverless framework documentation [here](https://serverless.com/framework/docs/).
After defining our serverless.yml, we can start writing our Go codes. Let's create ``src/handlers/createHandler.go`` which is responsible for handling a POST request.
First, we need to define the package name as ``main``
```
package main
```
or else you will get something like this
```
{
"errorMessage": "fork/exec /var/task/main: no such file or directory",
"errorType": "PathError"
}
```
Import the packages that will be used later
```
import (
"context"
"encoding/json"
"fmt"
"os"
"time"
"github.com/aws/aws-lambda-go/events"
"github.com/aws/aws-lambda-go/lambda"
"github.com/aws/aws-sdk-go/aws"
"github.com/aws/aws-sdk-go/aws/session"
"github.com/aws/aws-sdk-go/service/dynamodb"
"github.com/aws/aws-sdk-go/service/dynamodb/dynamodbattribute"
"gopkg.in/go-playground/validator.v9"
"github.com/satori/go.uuid"
utils "../utils"
)
```
Create a User struct. Since some fields are optional, we can use ``omitempty`` to omit them.
```
type User struct {
ID string `json:"id" validate:"required"`
UserName string `json:"user_name" validate:"required,min=4,max=20"`
FirstName *string `json:"first_name,omitempty"`
LastName *string `json:"last_name,omitempty"`
Age *int `json:"age,omitempty"`
Phone *string `json:"phone,omitempty"`
Password string `json:"password" validate:"required,min=4,max=50"`
Email string `json:"email" validate:"required,email"`
Role string `json:"role" validate:"required,min=4,max=20"`
IsActive bool `json:"is_active" validate:"required"`
CreatedAt string `json:"created_at,omitempty"`
ModifiedAt string `json:"modified_at,omitempty"`
DeactivatedAt *string `json:"deactivated_at,omitempty"`
}
```
Declare a global variable ``svc``
```
var svc *dynamodb.DynamoDB
```
Create an init function which is executed when the handler is loaded. In this function, we simply initialize a session to AWS and create a DynamoDB client service.
```
func init() {
region := os.Getenv("AWS_REGION")
// Initialize a session
if session, err := session.NewSession(&aws.Config{
Region: ®ion,
}); err != nil {
fmt.Println(fmt.Sprintf("Failed to initialize a session to AWS: %s", err.Error()))
} else {
// Create DynamoDB client
svc = dynamodb.New(session)
}
}
```
Create a main function. It is the entry point that executes our Lambda function code ``Create``
```
func main() {
lambda.Start(Create)
}
```
Create a function called ``Create`` which is our Lambda function. Please note that the handler name has to be captialized.
```
func Create(ctx context.Context, request events.APIGatewayProxyRequest) (events.APIGatewayProxyResponse, error) {
// TODO
}
```
Inside ``Create``, declare two variables which will be used later
```
var (
id = uuid.Must(uuid.NewV4()).String()
tableName = aws.String(os.Getenv("IAM_TABLE_NAME"))
)
```
Initialize ``user`` with default values
```
user := &User{
ID: id,
IsActive: true,
Role: "user",
CreatedAt: time.Now().String(),
ModifiedAt: time.Now().String(),
}
```
Use json.Unmarshal to parse the request body
```
json.Unmarshal([]byte(request.Body), user)
```
You may notice that there are some validation tags in the user struct. Validation should be done in both frontend and backend. Here's the way to validate the user input. If validation fails, it will end immediately and return an APIGatewayProxyResponse.
```
var validate *validator.Validate
validate = validator.New()
err := validate.Struct(user)
if err != nil {
// Status Bad Request
return events.APIGatewayProxyResponse{
Body: err.Error(),
StatusCode: 400,
}, nil
}
```
We need to generate a hash password before storing in dynamodb
```
// Encrypt password
user.Password, err = utils.HashPassword(user.Password)
if err != nil {
fmt.Println("Got error calling HashPassword:")
fmt.Println(err.Error())
// Status Bad Request
return events.APIGatewayProxyResponse{
Body: err.Error(),
StatusCode: 400,
}, nil
}
```
utils/password.go
```
package utils
import (
"golang.org/x/crypto/bcrypt"
)
func HashPassword(password string) (string, error) {
hash, err := bcrypt.GenerateFromPassword([]byte(password), 15)
return string(hash), err
}
```
We need to convert the User Go type to a dynamodb.AttributeValue type by using MarshalMap so that we can use the values to make a PutItem API request.
```
item, err := dynamodbattribute.MarshalMap(user)
if err != nil {
fmt.Println("Got error calling MarshalMap:")
fmt.Println(err.Error())
// Status Bad Request
return events.APIGatewayProxyResponse{
Body: err.Error(),
StatusCode: 400,
}, nil
}
```
Create PutItemInput parameters
```
params := &dynamodb.PutItemInput{
Item: item,
TableName: tableName,
}
```
Use the service to trigger call PutItem with the parameters we just created
```
if _, err := svc.PutItem(params); err != nil {
// Status Internal Server Error
return events.APIGatewayProxyResponse{
Body: err.Error(),
StatusCode: 500,
}, nil
} else {
body, _ := json.Marshal(user)
// Status OK
return events.APIGatewayProxyResponse{
Body: string(body),
StatusCode: 200,
}, nil
}
```
# Buliding our code
For building our code, we can write a simple bash script to do that.
/scripts/build.sh
```bash
#!/usr/bin/env bash
dep ensure
echo "************************************************"
echo "* Compiling functions to bin/handlers/ ... "
echo "************************************************"
rm -rf bin/
cd src/handlers/
for f in *.go; do
filename="${f%.go}"
if GOOS=linux go build -o "../../bin/handlers/$filename" ${f}; then
echo "* Compiled $filename"
else
echo "* Failed to compile $filename!"
exit 1
fi
done
echo "************************************************"
echo "* Formatting Code ... "
echo "************************************************"
go fmt
echo "************************************************"
echo "* Build Completed "
echo "************************************************"
```
``dep`` is a dependency management tool for Go. We use ``dep`` to delivers a safe, complete, and reproducible set of dependencies.
We need to create some rules in ``Gopkg.toml`` to let ``dep`` catch up the changes.
```toml
[[constraint]]
name = "github.com/aws/aws-lambda-go"
version = "1.0.1"
[[constraint]]
name = "github.com/aws/aws-sdk-go"
version = "1.12.70"
[[constraint]]
name = "github.com/satori/go.uuid"
version = "1.2.0"
[[constraint]]
name = "gopkg.in/go-playground/validator.v9"
version = "9.31.0"
[[constraint]]
name = "golang.org/x/crypto/bcrypt"
```
Then we remove ``rm -rf bin/``, build our Go codes and format the code before exiting.
Once the build is done, you can find your executable files under ``/bin``
# Deploying your lambda code
To deploy our code, we just need to run ``serverless deploy``. However, we need to make sure that we've built our code and the build completed successfully.
```bash
#!/usr/bin/env bash
echo "************************************************"
echo "* Building ... "
echo "************************************************"
./scripts/build.sh
if [ $? == 0 ]; then
echo "************************************************"
echo "* Deploying ... "
echo "************************************************"
serverless deploy
fi
```
Run the below command to deploy our code
```
./scripts/deploy.sh
```
You should see something like
```
************************************************
* Building ...
************************************************
************************************************
* Compiling functions to bin/handlers/ ...
************************************************
* Compiled createHandler
************************************************
* Formatting Code ...
************************************************
createHandler.go
************************************************
* Build Completed
************************************************
************************************************
* Deploying ...
************************************************
Serverless: Packaging service...
Serverless: Excluding development dependencies...
Serverless: Excluding development dependencies...
Serverless: Excluding development dependencies...
Serverless: Excluding development dependencies...
Serverless: Uploading CloudFormation file to S3...
Serverless: Uploading artifacts...
Serverless: Uploading service create.zip file to S3 (13.54 KB)...
Serverless: Validating template...
Serverless: Updating Stack...
Serverless: Checking Stack update progress...
........................
Serverless: Stack update finished...
Service Information
service: serverless-iam-dynamodb
stage: dev
region: ap-southeast-1
stack: serverless-iam-dynamodb-dev
resources: 30
api keys:
None
endpoints:
POST - https://.execute-api.ap-southeast-1.amazonaws.com/dev/iam
functions:
create: serverless-iam-dynamodb-dev-create
layers:
None
Serverless: Removing old service artifacts from S3...
Serverless: Run the "serverless" command to setup monitoring, troubleshooting and testing
```
Every time you run this script to deploy, serverless will create or update a single AWS CloudFormation stack to provision / update corresponding resources. You can see the resources in CloudFormation Portal.
CloudFormation > Stacks > serverless-iam-dynamodb-dev
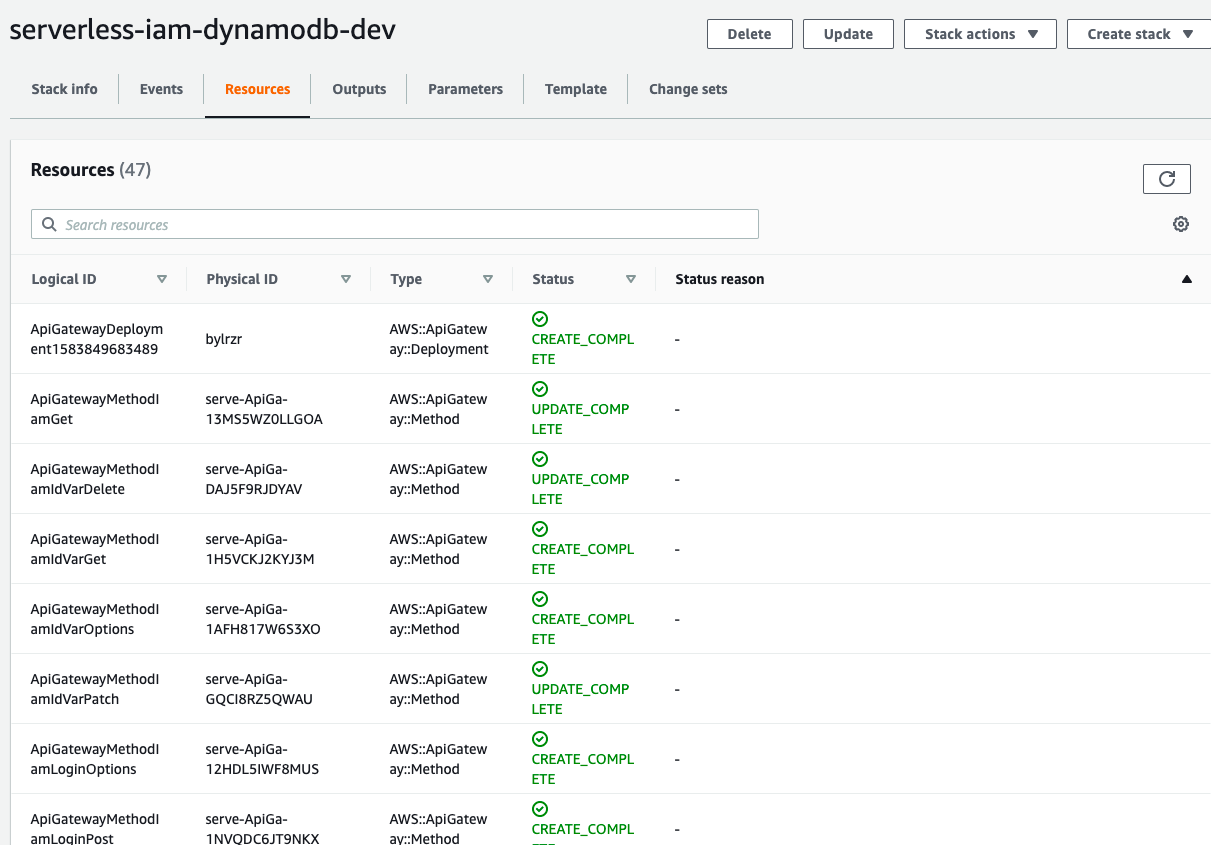
# Testing
If you go to AWS Lambda Console, you will see there is a function called ``serverless-iam-dynamodb-dev-create``
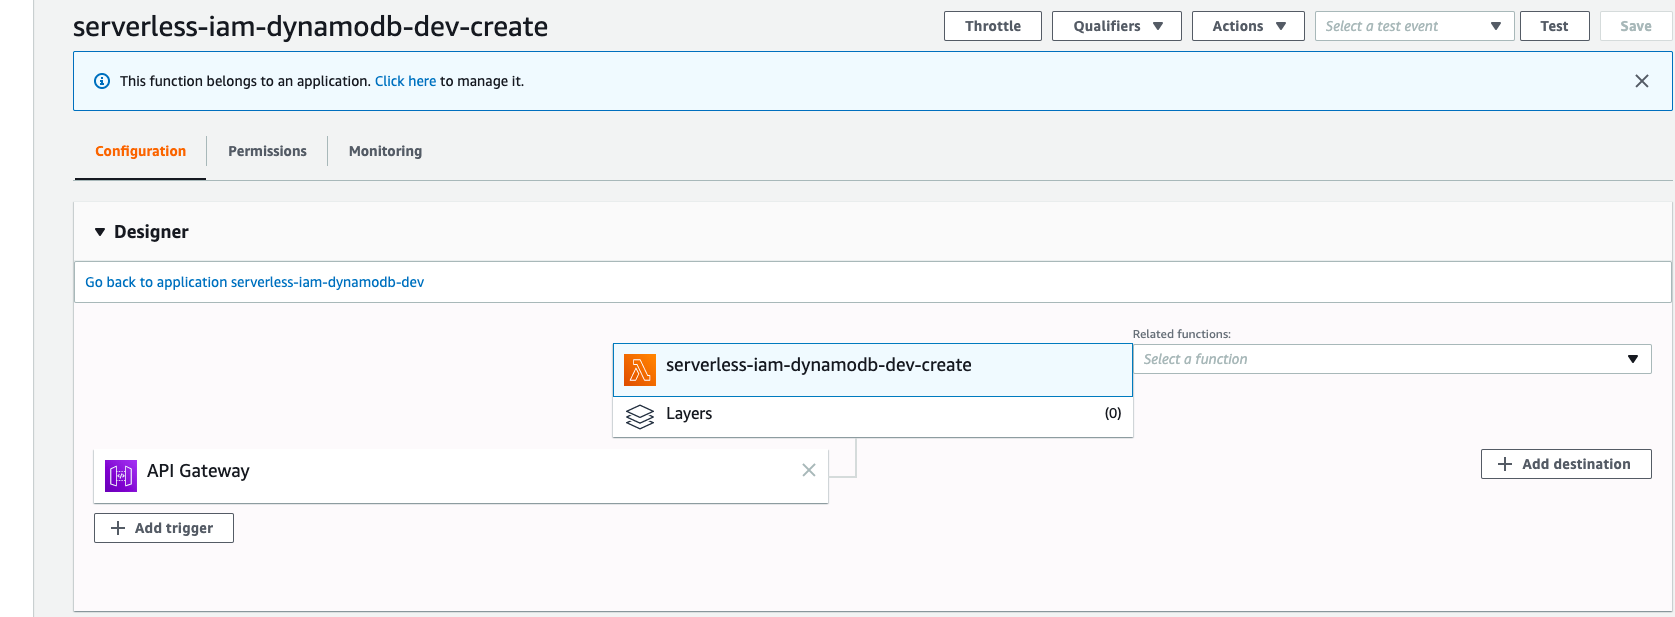
You can test your code either in Lambda or API Gateway.
A sample request
```json
{
"user_name": "wingkwong",
"email": "wingkwong@gmail.com",
"password": "password"
}
```
A sample response
```json
{
"id": "bd6fde14-3f6a-4551-95f3-349077a5501f",
"user_name": "wingkwong",
"first_name": null,
"last_name": null,
"age": null,
"phone": null,
"email": "wingkwong@gmail.com",
"password": "$2a$14$iwyLz8DOnbcolxXezZGXG.uXN9kCxJ8aYzMFftYZ06j1Ybb4uThC2",
"role": "user",
"is_active": true,
"created_at": "2019-12-28 11:08:10.684640037 +0000 UTC m=+0.077910868",
"modified_at": "2019-12-28 11:08:10.684757949 +0000 UTC m=+0.078028753"
}
```
Go to DynamoDB and verify the result. The record has been inserted to ``serverless-iam-dynamodb-dev-iam``
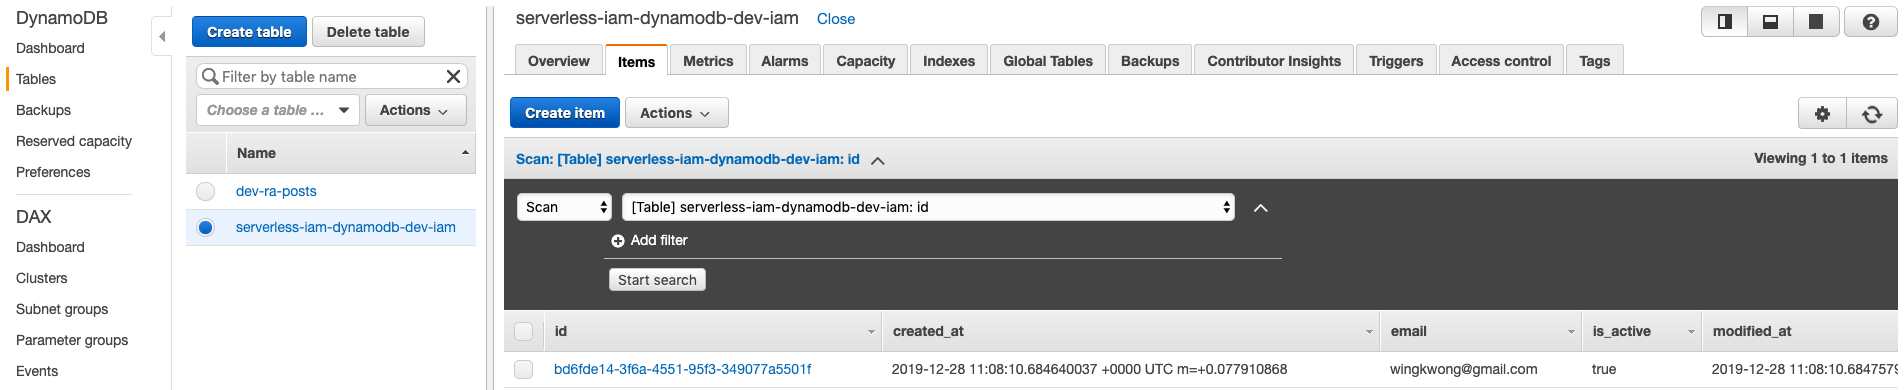
If you have any errors, you can go to CloudWatch > Logs > Log groups to view the log streams under ``/aws/lambda/serverless-iam-dynamodb-dev-create``
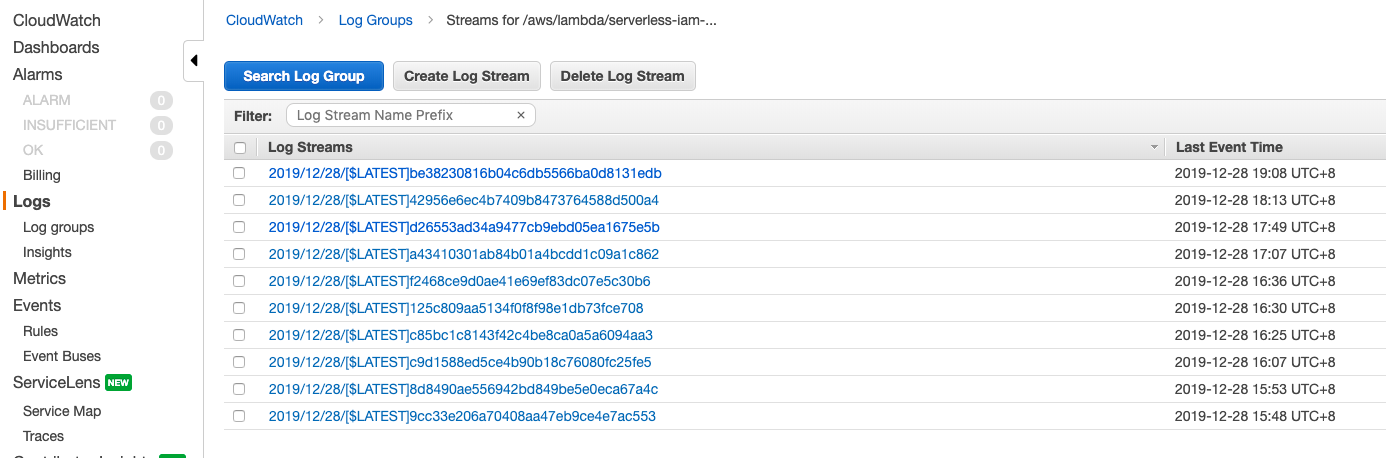
That's it for part 1. In the next post, we'll continue to create ``listHandler``.
Some useful links:
- [Go](https://golang.org/)
- [Dep Doc](https://golang.github.io/dep/docs/introduction.html)
- [Serverless Framework](https://serverless.com/)
- [Configure AWS Credentials](https://docs.aws.amazon.com/cli/latest/userguide/cli-chap-configure.html)
- [AWS SDK for Go API Reference](https://docs.aws.amazon.com/sdk-for-go/api/service/dynamodb/)
Friday, 14 February 2020
Cross-Origin Resource Sharing (CORS) support for Gin
[gin](https://github.com/gin-gonic/gin) is a popular HTTP web framework written in Go. I've worked with a few people using it to build restful APIs. When the frontend side sends an Ajax request to their backend endpoint from my localhost, it shows the following error message:
```
Access to XMLHttpRequest at 'http:///?_=1575637880588' from origin 'http://localhost:3000' has been blocked by CORS policy: Response to preflight request doesn't pass access control check: No 'Access-Control-Allow-Origin' header is present on the requested resource.
```
This security risk is only considered by webkit based browsers like Chrome or Safari and they block ajax queries. If you use Firefox, you can get rid of it. If Chrome is your only browser, you use start with your Chrome with the ``--disable-web-security`` flag.
As the resources are requested by Ajax, it by default forbids same-origin security policy. That means the resources you request and the first page you access must be in the same origin.
The fix is pretty simple and it is quite clear to state that No 'Access-Control-Allow-Origin' header is present on the requested resource. In gin's world, we just need to add a middleware.
```
go get github.com/gin-contrib/cors
```
```
import "github.com/gin-contrib/cors"
```
You may use the ``DefaultConfig`` as a starting point. By default, no origin is allowed for GET, POST, PUT and HEAD methods. Credentials share is disabled the preflight requests is cached for 12 hours.
```
func main() {
router := gin.Default()
config := cors.DefaultConfig()
config.AllowOrigins = []string{"http://foo.com"}
router.Use(cors.New(config))
router.Run()
}
```
It can also allow all origins, which I personally don't recommend as you should create a whitelist to indicates which origins are allowed for best practice.
```
func main() {
router := gin.Default()
router.Use(cors.Default())
router.Run()
}
```
Thursday, 2 January 2020
Generating an S3 Presigned URL in Go
When you create an object in s3, by default it is private. If you access an object url, you should see
```
Access Denied
0E7531544D92C793
wCC8lVp1Yqnjl2ItHuFxhAKCr2IWLziOavoWyif/Spn1WVsHUyTHEK3vckTK49Kmy/M/YIHQvQ4=
```
If you need to share the object to other people without making it public, you can control the access using a fine-grained IAM policy or use presigned url to grant your users temporary access to a specific object.
In this post, you will learn how to generate a s3 presigned url in Go.
First, let's import some packages that will be used
```
import (
"fmt"
"github.com/aws/aws-sdk-go/aws"
"github.com/aws/aws-sdk-go/aws/session"
"github.com/aws/aws-sdk-go/service/s3"
"time"
)
```
Create a function which takes three parameters - bucket, key and region. It returns the presigned url at the end.
```
func GetS3PresignedUrl(bucket string, key string, region string, expiration time.Duration) string{
// TODO
}
```
Initialize a session in the target region that the SDK will use to load credentials from the shared credentials file ``~/.aws/credentials``.
```
sess, err := session.NewSession(&aws.Config{
Region: aws.String(region)},
)
```
Create S3 service client
```
svc := s3.New(sess)
```
Construct a new GetObjectRequest
```
req, _ := svc.GetObjectRequest(&s3.GetObjectInput{
Bucket: aws.String(bucket),
Key: aws.String(key),
})
```
Create a presigned url with expiration time
```
presignedUrl, err := req.Presign(expiration * time.Minute)
```
Check if it can be presigned or not
```
if err != nil {
fmt.Println("Failed to sign request", err)
}
```
Return the presigned URL
```go
return presignedUrl
```
You can find the complete code [here](https://gist.github.com/wingkwong/a7a33fee0b640997991753d9f06ff120)
Let's have a quick test
```
S3PresignedUrl.GetS3PresignedUrl("test-s3-presigned-url-s2kvn2bs", "d4fb43054862c768921504199c78958b.jpg", "ap-southeast-1", 15)
```
The ``presignedUrl`` is
```
https://test-s3-presigned-url-s2kvn2bs.s3.ap-southeast-1.amazonaws.com/d4fb43054862c768921504199c78958b.jpg?X-Amz-Algorithm=AWS4-HMAC-SHA256&X-Amz-Credential=AKIAW4RRUVRQTI2J564J%2F20191227%2Fap-southeast-1%2Fs3%2Faws4_request&X-Amz-Date=20191227T055220Z&X-Amz-Expires=900&X-Amz-SignedHeaders=host&X-Amz-Signature=ed1d94edd580976f0175eca1c4c1944a9f215fd572540e3e3c7ed1c317656358
```
If we break it down, the presigned url contains ``X-Amz-Algorithm``, ``X-Amz-Credential``, ``X-Amz-Date``, ``X-Amz-Expires`` and ``X-Amz-Signature``. These are AWS Signature Version 4 query parameters.
```
https://test-s3-presigned-url-s2kvn2bs.s3.ap-southeast-1.amazonaws.com/d4fb43054862c768921504199c78958b.jpg
?X-Amz-Algorithm=AWS4-HMAC-SHA256
&X-Amz-Credential=AKIAW4RRUVRQTI2J564J%2F20191227%2Fap-southeast-1%2Fs3%2Faws4_request
&X-Amz-Date=20191227T055220Z
&X-Amz-Expires=900&X-Amz-SignedHeaders=host
&X-Amz-Signature=ed1d94edd580976f0175eca1c4c1944a9f215fd572540e3e3c7ed1c317656358
```
Browse the presigned url
After the expiration time, you will see the below message
```
Request has expired
900
2019-12-27T06:07:20Z
2019-12-27T07:13:10Z
805E5BD14FFAEA84
My9ZyJNtcixWAu91g79KVomutCU2AE4cj8G2eQo4KERAm/AoRxzppIZfXs5Cw+cuhuyo8eFgtvY=
```
Complete Code: [https://gist.github.com/wingkwong/a7a33fee0b640997991753d9f06ff120](https://gist.github.com/wingkwong/a7a33fee0b640997991753d9f06ff120)
AccessDenied
AccessDenied
Monday, 30 December 2019
A Simple Amazon API Gateway Lambda Authoriser in Go
When you are building your application APIs, you may need to think how to protect those APIs. A simple way to do so is to protect them with Amazon API Gateway and Amazon Lambda authorisers.
Before diving it, you should know that Amazon API Gateway helps us to take the requests and re-route to corresponding backend service. It is a gate keeper providing security. To provide access control to our APIs, we can use Amazon Lambda authorisers which authorise our requests before reaching to our endpoints.
We can use it if we want to implement our custom authorisation scheme. For example, if our authentication strategy is to use bearer token like JWT.
Here's a general auth workflow.
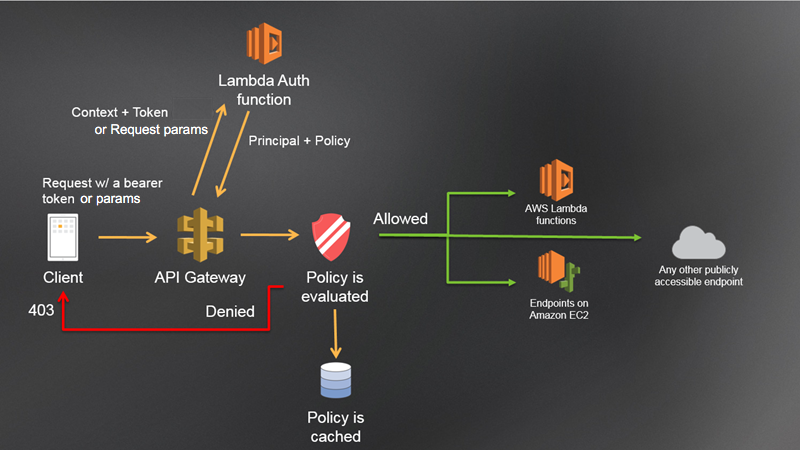
We can authorise the request to see if the bearer token is valid or not to verify the caller's identity. If it's valid, a corresponding permission will be granted and allow the caller to perform different actions.
This example will be written in Go.
The general idea is to create a lambda function to authorise the caller identity. First, we start with the below code.
```
package main
import (
"errors"
"strings"
"github.com/aws/aws-lambda-go/events"
"github.com/aws/aws-lambda-go/lambda"
jwt "github.com/dgrijalva/jwt-go"
"os"
)
func Auth(request events.APIGatewayCustomAuthorizerRequest) (events.APIGatewayCustomAuthorizerResponse, error) {
// TODO
}
func main() {
lambda.Start(Auth)
}
```
Our Auth function takes the input ``APIGatewayCustomAuthorizerRequest`` and returns ``APIGatewayCustomAuthorizerResponse`` and ``error``.
``APIGatewayCustomAuthorizerRequest`` contains data coming in to a custom API Gateway authorizer function such as type, authorisation token and method Arn.
``APIGatewayCustomAuthorizerResponse`` shows the expected format of an API Gateway authorisation response. We have to include principal ID and policy Document.
In our Auth function, we need to extract the token from the request.
```
token := request.AuthorizationToken
```
A simple token should look like
```
Bearer
eyJ0eXAiOiJKV1QiLCJhbGciOiJIUzI1NiJ9.eyJpc3MiOiJPbmxpbmUgSldUIEJ1aWxkZXIiLCJpYXQiOjE1Nzc2ODA5NzEsImV4cCI6MTYwOTIxNjk3MSwiYXVkIjoid3d3LmV4YW1wbGUuY29tIiwic3ViIjoianJvY2tldEBleGFtcGxlLmNvbSIsIkdpdmVuTmFtZSI6IkpvaG5ueSIsIlN1cm5hbWUiOiJSb2NrZXQiLCJFbWFpbCI6Impyb2NrZXRAZXhhbXBsZS5jb20iLCJSb2xlIjpbIk1hbmFnZXIiLCJQcm9qZWN0IEFkbWluaXN0cmF0b3IiXX0.S5yVf1U33yrZPLHh6e9xLkOrexo_78sd9Sl6ItBczzg
```
However, what we need is just the second part. Therefore, we take out the string ``Bearer ``
```
tokenSlice := strings.Split(token, " ")
var tokenString string
if len(tokenSlice) > 1 {
tokenString = tokenSlice[len(tokenSlice)-1]
}
```
Then, we need a key used to sign this JWT to verify the signature.
```
k := os.Getenv("JWT_SECRET_KEY")
```
We can use ``github.com/dgrijalva/jwt-go`` this library to perform the parsing action. We should also validate the expected algo.
If it is successful, we have to return the secret key in a []byte format or else you will get ``Invalid Signature``.
```
var jwtToken, _ = jwt.Parse(tokenString, func(jwtToken *jwt.Token) (interface{}, error) {
if _, ok := token.Method.(*jwt.SigningMethodHMAC); !ok {
return nil, fmt.Errorf("Unexpected signing method: %v", token.Header["alg"])
}
return []byte(k), nil
})
```
Check if the jwtToken is valid or not. If not, return an empty response with error Unauthorized.
```go
if jwtToken != nil && !jwtToken.Valid {
return events.APIGatewayCustomAuthorizerResponse{}, errors.New("Unauthorized")
}
```
If it is valid, we can generate our policy to the caller.
```
return generatePolicy("user", "Allow", request.MethodArn), nil
```
We can create another function called ``generatePolicy``. It takes three parameters - principalID, effect and resource in string type and returns events.APIGatewayCustomAuthorizerResponse at the end.
As I mention before, we need to return principal ID. Let's create a new response struct.
```
authResponse := events.APIGatewayCustomAuthorizerResponse{PrincipalID: principalID}
```
Also, we need to define our PolicyDocument for this response. What we are doing here is to allow the role to perform action ``execute-api:Invoke`` on the request method Arn.
```
if effect != "" && resource != "" {
authResponse.PolicyDocument = events.APIGatewayCustomAuthorizerPolicy{
Version: "2012-10-17",
Statement: []events.IAMPolicyStatement{
{
Action: []string{"execute-api:Invoke"},
Effect: effect,
Resource: []string{resource},
},
},
}
}
```
At the end, return the auth response.
```
return authResponse
```
Let's deploy and test it.
Go to API Gateway console, and click Authorisers. We should see our deployed authoriser. Click Test and we don't input any token.
Click Test and we will see it returns 401 which is Unauthorised.
```
Response
Response Code: 401
Latency 344
Execution log for request [HIDDEN]
Mon Dec 30 08:56:58 UTC 2019 : Starting authorizer: [HIDDEN]
Mon Dec 30 08:56:58 UTC 2019 : Incoming identity: [HIDDEN]
Mon Dec 30 08:56:58 UTC 2019 : Endpoint request URI: [HIDDEN]
Mon Dec 30 08:56:58 UTC 2019 : Endpoint request headers: [HIDDEN]
Mon Dec 30 08:56:58 UTC 2019 : Endpoint request body after transformations: [HIDDEN]
Mon Dec 30 08:56:58 UTC 2019 : Sending request to [HIDDEN]
Mon Dec 30 08:56:58 UTC 2019 : Unauthorized request: [HIDDEN]
Mon Dec 30 08:56:58 UTC 2019 : Unauthorized
```
Put the authorisation token and try again.
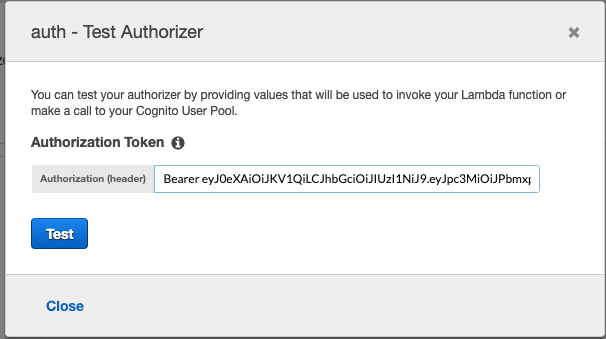
This time it returns 200
```
Response
Response Code: 200
Latency 26
```
and shows the policy statement.
```json
{
"Version": "2012-10-17",
"Statement": [
{
"Action": [
"execute-api:Invoke"
],
"Effect": "Allow",
"Resource": [
"arn:aws:execute-api:ap-southeast-1:*:a123456789/ESTestInvoke-stage/GET/"
]
}
]
}
```
That's it. For the complete code, please check out [here](https://gist.github.com/wingkwong/2bc368c1b5cd116114560d17d4c4de6c).
Sunday, 29 December 2019
Relocate Golang Boilerplate Packages using Taskfile
Supposing you've found a Go boilerplate and you want to relocate the project under your name. Here's a TaskFile to help you do so.
Task is a task runner / build tool that aims to be simpler and easier to use than, for example, [GNU Make](https://www.gnu.org/software/make/).
TaskFile is a yml file. A simple is shown below
```
version: '2'
tasks:
hello:
cmds:
- echo 'Hello World from Task!'
silent: true
```
Compared with Makefile, it indeed looks simpler.
For running the coverage tests, we just need add our commands under ``cmds`` block
```
test:
cmds:
- echo " *** Running Coverage Tests ***"
- $(pwd)/test.sh
- echo " *** Completed *** "
silent: true
```
What about ``relocate``? That would be a bit different as I need to think about how to inject the variables into it. Thanks to TaskFile development team, I could do something like this.
```
relocate:
cmds:
- echo " *** Relocating packages to {{.TARGET_PATH}} ***"
- task: replace-string
vars: {
SOURCE_STR: "{{.PACKAGE_NAME}}",
TARGET_STG: "{{.TARGET_PATH}}"
}
- task: replace-string
vars: {
SOURCE_STR: "{{.PROJECT_NAME}}",
TARGET_STG: "{{.TARGET_PROJECTNAME}}"
}
- echo " *** Completed *** "
silent: true
```
In Taskfile, a variable is represented like this: ``{{.VAR}}``. We just need to declare all the variables there.
```
vars:
GITHUB: "github.com"
PROJECT_NAME_DIR:
sh: echo $(basename "$(dirname "$(pwd)")")
PROJECT_NAME:
sh: echo $(basename "$(pwd)" | sed -e 's/[\/&]/\\&/g')
PACKAGE_NAME:
sh: echo "{{.GITHUB}}/{{.PROJECT_NAME_DIR}}/{{.PROJECT_NAME}}" | sed -e 's/[\/&]/\\&/g'
TARGET_PATH:
sh: echo "{{.TARGET}}" | sed -e 's/[\/&]/\\&/g'
TARGET_PROJECTNAME:
sh: basename "dirname {{.TARGET_PATH}}" | sed -e 's/[\/&]/\\&/g'
```
Remember ``relocate`` is only triggered if there is a TARGET path? A preconditions block can help in this case. The variable ``TARGET`` is a parameters when calling ``task relocate``.
```
preconditions:
- sh: "[ {{.TARGET}} != '' ]"
```
Wait a minute, then what is replace-string? replace-string is another task used to grep the file and perform the replacement.
```
replace-string:
cmds:
- grep -rlI '{{.SOURCE_STR}}' --include=*.{go,json} ./ | xargs -I@ sed -i '' 's/{{.SOURCE_STR}}/{{.TARGET_STG}}/g' @
silent: true
```
By adding ``silent: true``, we can make the console cleaner. Just like we add ``.SILENT`` in Makefile.
Sample usage: task relocate TARGET=github.com/wingkwong/project
Complete Code:
```
version: '2'
tasks:
relocate:
cmds:
- echo " *** Relocating packages to {{.TARGET_PATH}} ***"
- task: replace-string
vars: {
SOURCE_STR: "{{.PACKAGE_NAME}}",
TARGET_STG: "{{.TARGET_PATH}}"
}
- task: replace-string
vars: {
SOURCE_STR: "{{.PROJECT_NAME}}",
TARGET_STG: "{{.TARGET_PROJECTNAME}}"
}
- echo " *** Completed *** "
silent: true
vars:
GITHUB: "github.com"
PROJECT_NAME_DIR:
sh: echo $(basename "$(dirname "$(pwd)")")
PROJECT_NAME:
sh: echo $(basename "$(pwd)" | sed -e 's/[\/&]/\\&/g')
PACKAGE_NAME:
sh: echo "{{.GITHUB}}/{{.PROJECT_NAME_DIR}}/{{.PROJECT_NAME}}" | sed -e 's/[\/&]/\\&/g'
TARGET_PATH:
sh: echo "{{.TARGET}}" | sed -e 's/[\/&]/\\&/g'
TARGET_PROJECTNAME:
sh: basename "dirname {{.TARGET_PATH}}" | sed -e 's/[\/&]/\\&/g'
preconditions:
- sh: "[ {{.TARGET}} != '' ]"
replace-string:
cmds:
- grep -rlI '{{.SOURCE_STR}}' --include=*.{go,json} ./ | xargs -I@ sed -i '' 's/{{.SOURCE_STR}}/{{.TARGET_STG}}/g' @
silent: true
```
Friday, 29 November 2019
Relocate Golang Boilerplate Packages using Makefile
Supposing you've found a golang boilerplate and you want to relocate the project under your name. Here's a makefile to help you do so.
> Note: A makefile is a file containing a set of directives used by a make build automation tool to generate a target/goal.
First, let's declare some variables for further use.
```makefile
GITHUB := "github.com"
PROJECTNAME := $(shell basename "$(PWD)")
PACKAGENAME := $(GITHUB)/$(shell basename "$(shell dirname "$(PWD)")")/$(PROJECTNAME)
GOBASE := $(shell pwd)
```
A code snippet for running coverage tests is shown below. It is triggered by running ``make test``
```makefile
.PHONY .SILENT: test
## test: Run coverage tests
test:
# Example: make test
@echo " *** Running Coverage Tests ***"
$(GOBASE)/test.sh
@echo " *** Completed *** "
```
The author has built a shell script to handle the coverage tests. Here we just need to call ``test.sh``
A simple test is required to see if a target path is provided or not. A sample usage would be ``make relocate TARGET=github.com/wingkwong/myproject``
```makefile
@test ${TARGET} || ( echo ">> TARGET is not set. Use: make relocate TARGET="; exit 1 )
```
Then, we need to have our variables escaped as we will to sed to perform the replacement
```makefile
$(eval ESCAPED_PACKAGENAME := $(shell echo "${PACKAGENAME}" | sed -e 's/[\/&]/\\&/g'))
$(eval ESCAPED_PROJECTNAME := $(shell echo "${PROJECTNAME}" | sed -e 's/[\/&]/\\&/g'))
$(eval ESCAPED_TARGET_PACKAGENAME := $(shell echo "${TARGET}" | sed -e 's/[\/&]/\\&/g'))
$(eval ESCAPED_TARGET_PROJECTNAME := $(shell basename "$(shell dirname ${TARGET})" | sed -e 's/[\/&]/\\&/g'))
$(eval ESCAPED_PARENT_DIRECTORY:= $(shell cd ../ && pwd | sed -e 's/[\/&]/\\&/g'))
$(eval ESCAPED_PARENT_DIRECTORYNAME:= $(shell basename $(ESCAPED_PARENT_DIRECTORY)))
```
We need to replace the package name ``github.com/author/project`` with the desired one.
```makefile
@grep -rlI '${PACKAGENAME}' --include=*.go ./ | xargs -I@ sed -i '' 's/${ESCAPED_PACKAGENAME}/${ESCAPED_TARGET_PACKAGENAME}/g' @
```
We also need to replace the project name ``project`` with the desired one.
```makefile
@grep -rlI '${PROJECTNAME}' --include=*.go ./ | xargs -I@ sed -i '' 's/${ESCAPED_PROJECTNAME}/${ESCAPED_TARGET_PROJECTNAME}/g' @
```
Sample usage: make relocate TARGET=github.com/wingkwong/myproject
```
GITHUB := "github.com"
PROJECTNAME := $(shell basename "$(PWD)")
PACKAGENAME := $(GITHUB)/$(shell basename "$(shell dirname "$(PWD)")")/$(PROJECTNAME)
GOBASE := $(shell pwd)
.PHONY .SILENT: relocate
## relocate: Relocate packages
relocate:
# Example: make relocate TARGET=github.com/wingkwong/myproject
@test ${TARGET} || ( echo ">> TARGET is not set. Use: make relocate TARGET="; exit 1 )
@echo " *** Relocating packages to $(TARGET) *** "
$(eval ESCAPED_PACKAGENAME := $(shell echo "${PACKAGENAME}" | sed -e 's/[\/&]/\\&/g'))
$(eval ESCAPED_PROJECTNAME := $(shell echo "${PROJECTNAME}" | sed -e 's/[\/&]/\\&/g'))
$(eval ESCAPED_TARGET_PACKAGENAME := $(shell echo "${TARGET}" | sed -e 's/[\/&]/\\&/g'))
$(eval ESCAPED_TARGET_PROJECTNAME := $(shell basename "$(shell dirname ${TARGET})" | sed -e 's/[\/&]/\\&/g'))
$(eval ESCAPED_PARENT_DIRECTORY:= $(shell cd ../ && pwd | sed -e 's/[\/&]/\\&/g'))
$(eval ESCAPED_PARENT_DIRECTORYNAME:= $(shell basename $(ESCAPED_PARENT_DIRECTORY)))
# Replacing ${ESCAPED_PACKAGENAME} to ${ESCAPED_TARGET_PACKAGENAME}
@echo " *** Replacing ${ESCAPED_PACKAGENAME} to ${ESCAPED_TARGET_PACKAGENAME} *** "
@grep -rlI '${PACKAGENAME}' --include=*.go ./ | xargs -I@ sed -i '' 's/${ESCAPED_PACKAGENAME}/${ESCAPED_TARGET_PACKAGENAME}/g' @
# Replacing ${PROJECTNAME} to ${ESCAPED_TARGET_PROJECTNAME}
@echo " *** Replacing ${PROJECTNAME} to ${ESCAPED_TARGET_PROJECTNAME} *** "
@grep -rlI '${PROJECTNAME}' --include=*.go ./ | xargs -I@ sed -i '' 's/${ESCAPED_PROJECTNAME}/${ESCAPED_TARGET_PROJECTNAME}/g' @
@echo " *** Completed *** "
.PHONY: help
all: help
help: Makefile
@echo
@echo " Choose a command run in "$(PROJECTNAME)":"
@echo
@sed -n 's/^##//p' $< | column -t -s ':' | sed -e 's/^/ /'
@echo
```
Subscribe to:
Posts (Atom)