Monday, 13 April 2020
Getting Started with Stackdriver
## Objectives
- View the load on a VM instance using Cloud Monitoring.
## Prerequisites
- Existing GCP Project
- Existing VM instance
## View the Load on a VM using Cloud Monitoring
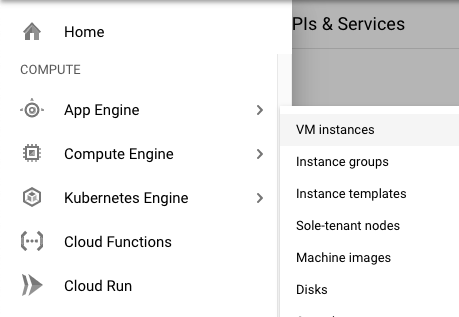
In the GCP Console, on the Navigation menu (Navigation menu), click Compute Engine > VM instances.
To open a command prompt on the my-vm instance, click SSH in its row in the VM instances list.
In the ssh session on my-vm, execute this command to create a CPU load:
```
dd if=/dev/urandom | gzip -9 >> /dev/null &
```
This Linux pipeline forces the CPU to work on compressing a continuous stream of random data.
Leave the window containing your SSH session open.
## Create a Monitoring workspace
You will now setup a Monitoring workspace that's tied to your GCP Project. The following steps create a new account that has a free trial of Monitoring.
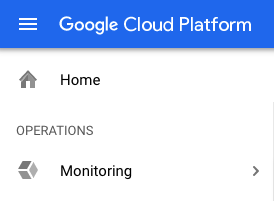
In the Google Cloud Platform Console, click on Navigation menu > Monitoring.
Wait for your workspace to be provisioned.
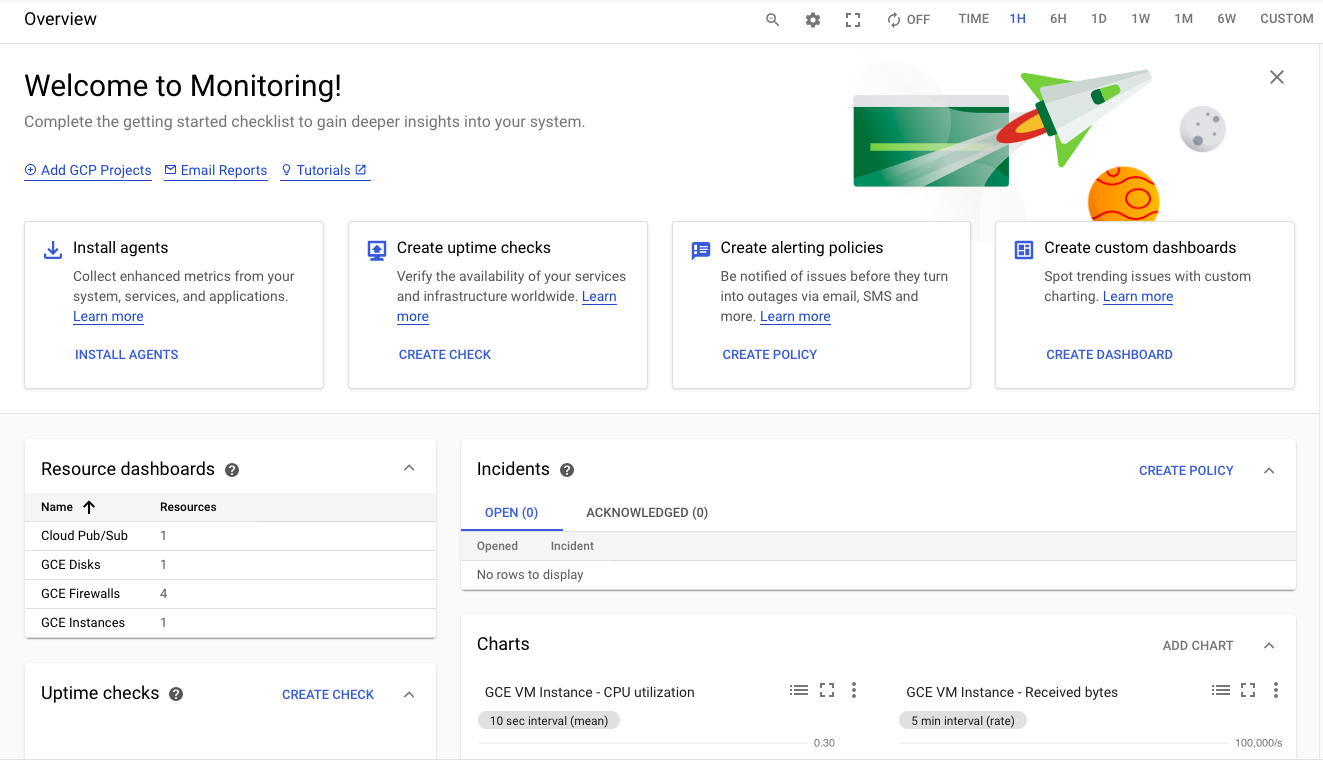
When the Monitoring dashboard opens, your workspace is ready.
Click on Settings option from the left panel and confirm that the GCP project is shown under the GCP Projects section.
Under the Settings tab menu, click Agent. Using your VM's open SSH window and the code shown on the Agents page, install both the Monitoring and Logging agents on your project's VM.
The monitoring and logging agents give you deeper insight into your infrastructure and application data. Install both agents onto all the infrastructure you want deeper insight into.
### Monitoring agent
The Monitoring agent is a collectd-based daemon that gathers system and application metrics from virtual machine instances and sends them to Monitoring. By default, the Monitoring agent collects disk, CPU, network, and process metrics. Configuring the Monitoring agent allows third-party applications to get the full list of agent metrics.
Monitoring agent install script
```
curl -sSO https://dl.google.com/cloudagents/install-monitoring-agent.sh
sudo bash install-monitoring-agent.sh
```
### Logging Agent
The Logging agent streams logs from your VM instances and from selected third-party software packages to Logging. It is a best practice to run the Logging agent on all your VM instances.
Logging agent install script
```
curl -sSO https://dl.google.com/cloudagents/install-logging-agent.sh
sudo bash install-logging-agent.sh
```
Once both of the agents have been installed on your project's VM, click Metrics Explorer under the main Cloud Monitoring menu on the far left.
In the Metric pane of Metrics Explorer, select the resource type GCE VM instance
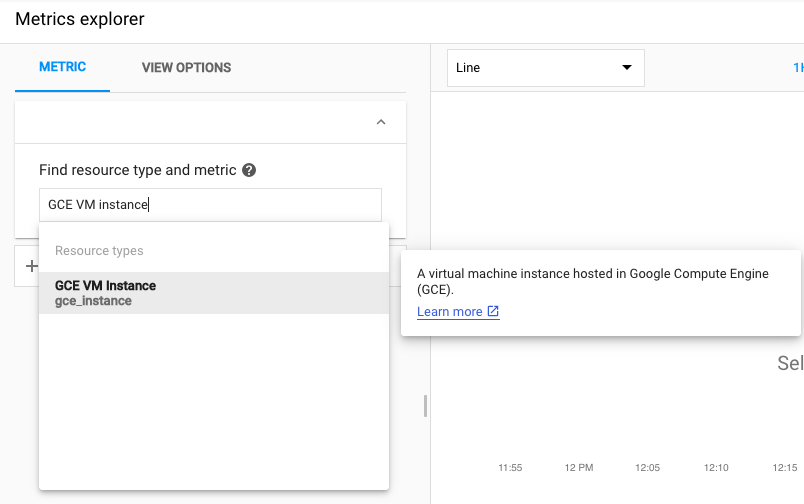
and the metric CPU usage.
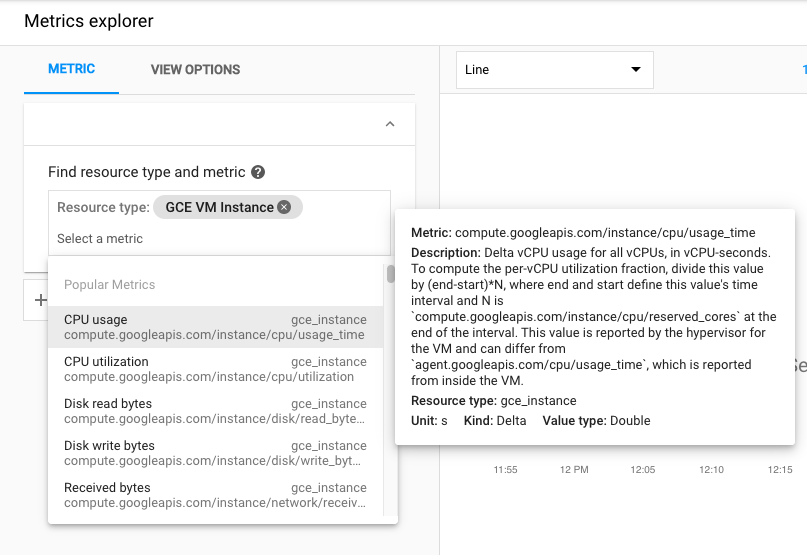
In the resulting graph, notice that CPU usage increased sharply a few minutes ago.
Terminate your workload generator. Return to your ssh session on my-vm and enter this command:
```
kill %1
```
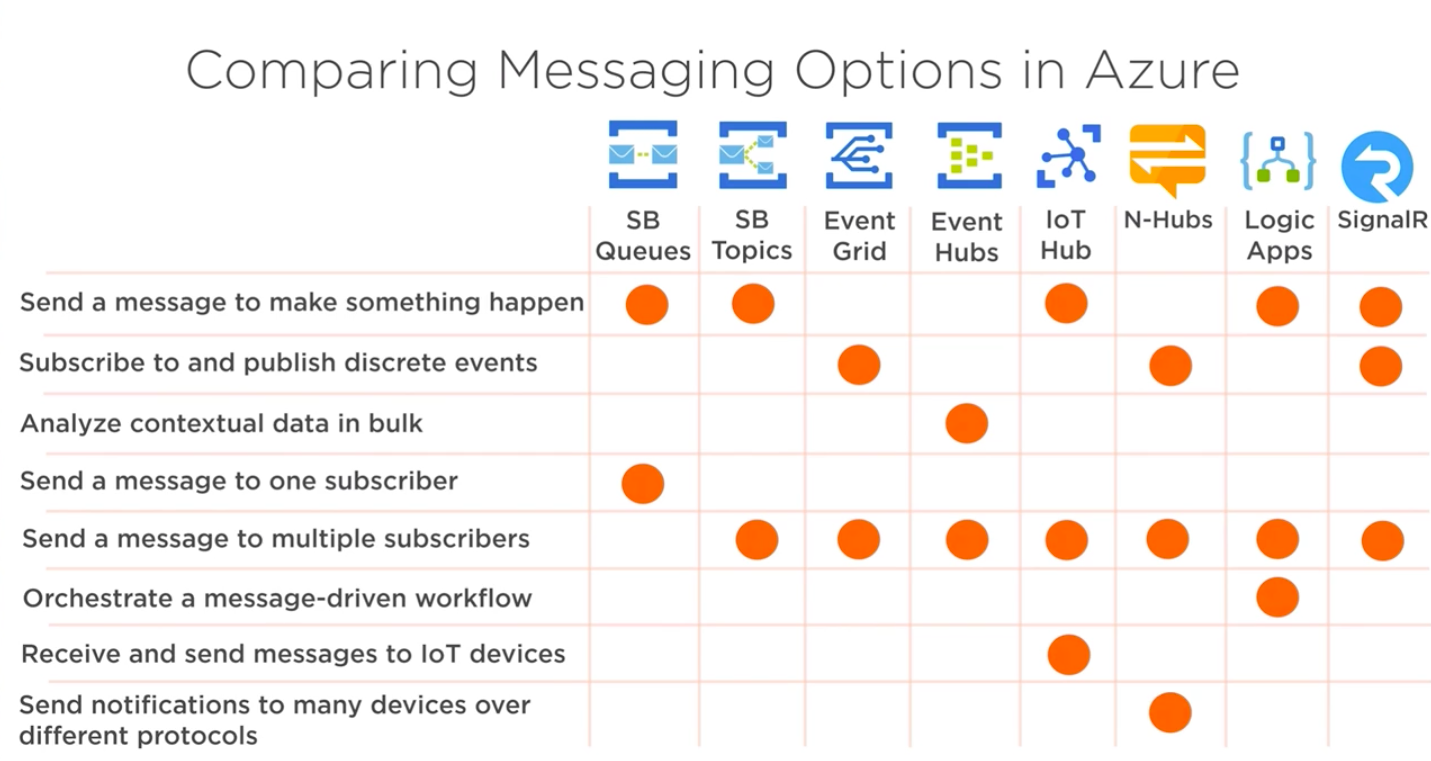
How to choose Azure services for working with messages in your application
## Options for working with messages in Azure
- Azure Storage Queue
- Azure Service Bus
- Azure Notification Hubs
- Azure Event Grid
- Azure Event Hubs
- Azure IoT Hub
- Azure Logic Apps
- Azure SignalR Service
### Azure Storage Queue
- Message lifetime <= 7 days
- Queue size > 80 GB
- Transaction logs
- Message size <= 64KB
### Azure Service Bus
- Message lifetime > 7 days
- Guaranteed (FIFO) ordered
- Duplicate detection
- Message size <= 1MB>
#### Queues
Put a message on the queue and one application takes it out for processing
#### Topics
Put a message on the queue and multiple applications can take it out for processing
### Azure Notification Hubs
Put a message to send notifications to Andrioid, iOS, Windows and all sort of other platform network notification services without having to write plumbing to talk to those notification services.
### Azure Event Grid
Subscribe to events and push those events to somewhere. For example, subscribe to an event in Azure storage when Blob gets uploaded and use that event to kickoff an Azure Function to process something.
### Azure Event Hubs
Ingest massive amounts of messages and push them off to be analyzed.
### Azure IoT Hub
Take in a lot of messages and have them analyzed but it can also communicate back (bi-directional messaging).
### Azure Logic Apps
Create processes in Azure. Easy to use.
### Azure SignalR Service
Connect clients together in real time and send messages to each other.
## Different Types of Messages
### Intent
#### Command
Services: Storage Queues, Service Bus, IoT Hub, Logic Apps, SignalR
- You want something to happen
- Could get a message back
- Increase temperature on thermostat
### Facts
#### Discrete data
Services: Event Grid, SignalR, Notification Hubs
- Does not happen continually
- Door open / closed
#### Stream of data
Services: Event Hub, IoT Hub
- Continuous stream of data
- Data is related to each other
- Temperature data
## Summary
Getting Started With App Engine
## Objectives
- Install the Cloud SDK for App Engine
- Preview an App Engine application running locally in Cloud Shell.
- Deploy an App Engine application, so that others can reach it.
- Disable an App Engine application, when you no longer want it to be visible.
## Prerequisites
- Existing GCP Project
## Install the Cloud SDK for App Engine
Run the following command to install the gcloud component that includes the App Engine extension for Python 3.7:
```
gcloud components install app-engine-python
```
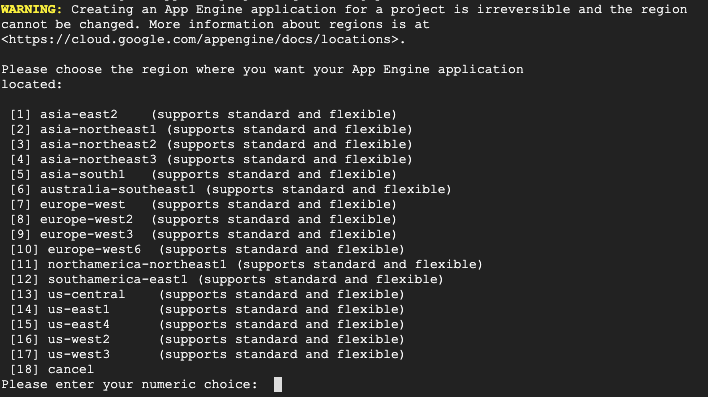
Initialize your App Engine app with your project and choose its region:
```
gcloud app create --project=$DEVSHELL_PROJECT_ID
```
When prompted, select the region where you want your App Engine application located.
Clone the source code repository for a sample application in the hello_world directory:
```
git clone https://github.com/GoogleCloudPlatform/python-docs-samples
```

Navigate to the source directory:
```
cd python-docs-samples/appengine/standard_python37/hello_world
```
## Run Hello World application locally
Execute the following command to download and update the packages list.
```
sudo apt-get update
```
Set up a virtual environment in which you will run your application.
Python virtual environments are used to isolate package installations from the system.
```
sudo apt-get install virtualenv
```
```
virtualenv -p python3 venv
```
If prompted [Y/n], press Y and then Enter.
Activate the virtual environment.
```
source venv/bin/activate
```
Navigate to your project directory and install dependencies.
```
pip install -r requirements.txt
```
Run the application:
```
python main.py
```
```python
from flask import Flask
# If `entrypoint` is not defined in app.yaml, App Engine will look for an app
# called `app` in `main.py`.
app = Flask(__name__)
@app.route('/')
def hello():
"""Return a friendly HTTP greeting."""
return 'Hello World!'
if __name__ == '__main__':
# This is used when running locally only. When deploying to Google App
# Engine, a webserver process such as Gunicorn will serve the app. This
# can be configured by adding an `entrypoint` to app.yaml.
app.run(host='127.0.0.1', port=8080, debug=True)
```
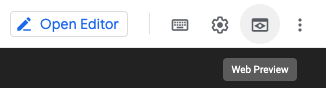
In Cloud Shell, click Web preview (Web Preview) > Preview on port 8080 to preview the application.
To access the Web preview icon, you may need to collapse the Navigation menu.
Result:

To end the test, return to Cloud Shell and press Ctrl+C to abort the deployed service.
Using the Cloud Console, verify that the app is not deployed. In the Cloud Console, on the Navigation menu (Navigation menu), click App Engine > Dashboard.
Notice that no resources are deployed.
## Deploy and run Hello World on App Engine
To deploy your application to the App Engine Standard environment:
Navigate to the source directory:
```
cd ~/python-docs-samples/appengine/standard_python37/hello_world
```
Deploy your Hello World application.
```
gcloud app deploy
```
This app deploy command uses the app.yaml file to identify project configuration.
```yml
runtime: python37
```
Launch your browser to view the app at http://YOUR_PROJECT_ID.appspot.com
```
gcloud app browse
```
Copy and paste the URL into a new browser window.
Result:

## Disable the application
App Engine offers no option to Undeploy an application. After an application is deployed, it remains deployed, although you could instead replace the application with a simple page that says something like "not in service."
However, you can disable the application, which causes it to no longer be accessible to users.
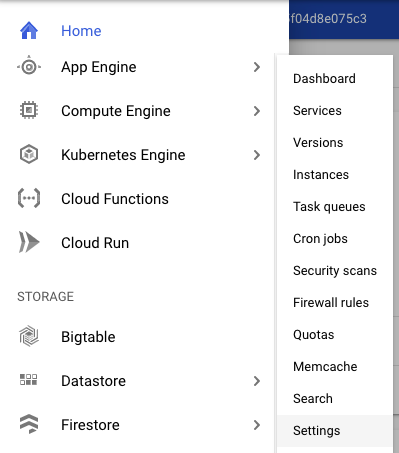
In the Cloud Console, on the Navigation menu (Navigation menu), click App Engine > Settings.
Click Disable application.
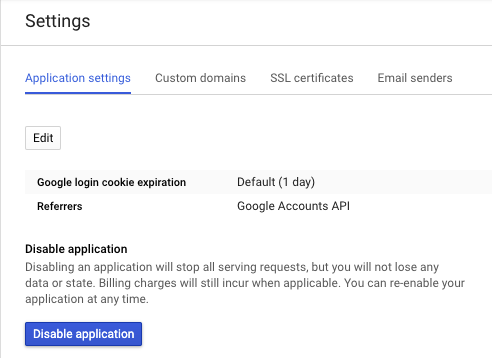
Read the dialog message. Enter the App ID and click DISABLE.
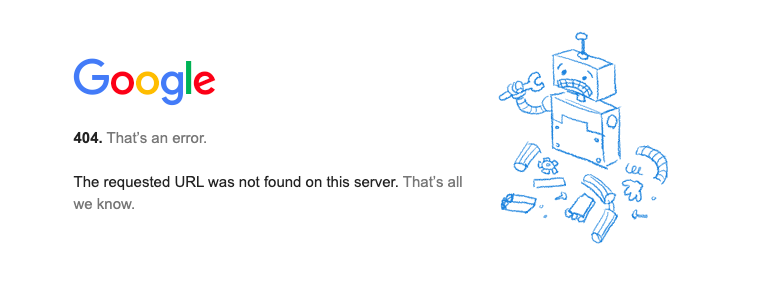
If you refresh the browser window you used to view to the application site, you'll get a 404 error.
Friday, 10 April 2020
Getting Started with Deployment Manager
## Objectives
- Create a Deployment Manager deployment.
- Update a Deployment Manager deployment.
## Prerequisites
- Existing GCP Project
## Confirm that needed APIs are enabled
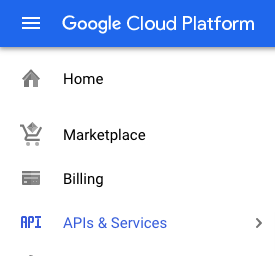
In the GCP Console, on the Navigation menu (Navigation menu), click APIs & services.
Scroll down in the list of enabled APIs, and confirm that these APIs are enabled:
- Cloud Deployment Manager v2 API
- Cloud Runtime Configuration API
If one or more APIs is missing, click the Enable APIs and Services button at top. Search for the above APIs by name and enable each for your current project.
## Create a Deployment Manager deployment
In GCP console, on the top right toolbar, click the Open Cloud Shell button (Activate Cloud Shell). Click Continue.
At the Cloud Shell prompt, type this partial command:
```
export MY_ZONE=
```
followed by the zone. Your complete command will look like this:
```
export MY_ZONE=us-central1-a
```
Create a YAML file
```
touch mydeploy.yaml
```
```yaml
resources:
- name: my-vm
type: compute.v1.instance
properties:
zone: ZONE
machineType: zones/ZONE/machineTypes/n1-standard-1
metadata:
items:
- key: startup-script
value: "apt-get update"
disks:
- deviceName: boot
type: PERSISTENT
boot: true
autoDelete: true
initializeParams:
sourceImage: https://www.googleapis.com/compute/v1/projects/debian-cloud/global/images/debian-9-stretch-v20180806
networkInterfaces:
- network: https://www.googleapis.com/compute/v1/projects/PROJECT_ID/global/networks/default
accessConfigs:
- name: External NAT
type: ONE_TO_ONE_NAT
```
Insert your Google Cloud Platform project ID into the file in place of the string PROJECT_ID using this command:
```
sed -i -e 's/PROJECT_ID/'$DEVSHELL_PROJECT_ID/ mydeploy.yaml
```
Insert your assigned Google Cloud Platform zone into the file in place of the string ZONE using this command:
```
sed -i -e 's/ZONE/'$MY_ZONE/ mydeploy.yaml
```
View the mydeploy.yaml file, with your modifications, with this command:
```
cat mydeploy.yaml
```
The file will look something like this:
```yaml
resources:
- name: my-vm
type: compute.v1.instance
properties:
zone: us-central1-a
machineType: zones/us-central1-a/machineTypes/n1-standard-1
metadata:
items:
- key: startup-script
value: "apt-get update"
disks:
- deviceName: boot
type: PERSISTENT
boot: true
autoDelete: true
initializeParams:
sourceImage: https://www.googleapis.com/compute/v1/projects/debian-cloud/global/images/debian-9-stretch-v20180806
networkInterfaces:
- network: https://www.googleapis.com/compute/v1/projects/wingkwong-gcp-playground/global/networks/default
accessConfigs:
- name: External NAT
type: ONE_TO_ONE_NAT
```
Do not use the above text literally in your own mydeploy.yaml file. Be sure that the zone that is named on the zone: and machineType: lines in your file matches the zone. Be sure that the GCP project ID on the network: line in your file matches the project ID, not the one in this example.
Build a deployment from the template:
```
gcloud deployment-manager deployments create my-first-depl --config mydeploy.yaml
```

If everything goes wrong, modify the file and you can either delete my-first-depl and create it again
```
gcloud deployment-manager deployments delete my-first-depl
```
or simply just update it
```
gcloud deployment-manager deployments update my-first-depl --config mydeploy.yaml
```
When the deployment operation is complete, the gcloud command displays a list of the resources named in the template and their current state.
Confirm that the deployment was successful. In the GCP Console, on the Navigation menu (Navigation menu), click Compute Engine > VM instances.

You will see that a VM instance called my-vm has been created, as specified by the template.
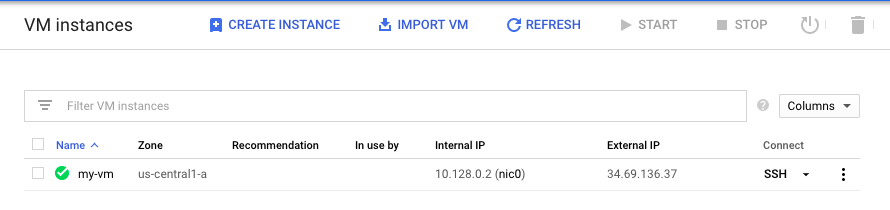
Click on the VM instance's name to open its VM instance details screen.
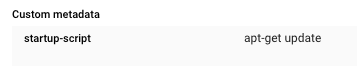
Scroll down to the Custom metadata section. Confirm that the startup script you specified in your Deployment Manager template has been installed.
## Update a Deployment Manager deployment
Return to your Cloud Shell prompt. Launch the vi text editor to edit the mydeploy.yaml file:
```
vi mydeploy.yaml
```
Find the line that sets the value of the startup script, value: "apt-get update", and edit it so that it looks like this:
```yml
value: "apt-get update; apt-get install nginx-light -y"
```
Do not disturb the spaces at the beginning of the line. The YAML templating language relies on indented lines as part of its syntax. As you edit the file, be sure that the v in the word value in this new line is immediately below the k in the word key on the line above it.
Press Ctrl+O and then press Enter to save your edited file.
Press Ctrl+X to exit the vi text editor.
Return to your Cloud Shell prompt. Enter this command to cause Deployment Manager to update your deployment to install the new startup script:
```
gcloud deployment-manager deployments update my-first-depl --config mydeploy.yaml
```
Wait for the gcloud command to display a message confirming that the update operation was completed successfully.
```
NAME TYPE STATE ERRORS INTENT
my-vm compute.v1.instance COMPLETED []
```
In the GCP console, on the Navigation menu (Navigation menu), click Compute Engine > VM instances.
Click on the my-vm VM instance's name to open its VM instance details pane.
Scroll down to the Custom metadata section. Confirm that the startup script has been updated to the value you declared in your Deployment Manager template.

Creating an Azure Function to Listen to Blob Created Events
## Scenario
You need to process images uploaded to a blob container. You decide to create an Azure Function that is triggered by an Event Grid wired to blob-created events in the storage account. To test the concept, you create the function, configure the Event Grid subscription, and write the event data to the functions log.
## Prerequisites
- Existing Resource Group
- Existing App Service plan
- Existing App Service
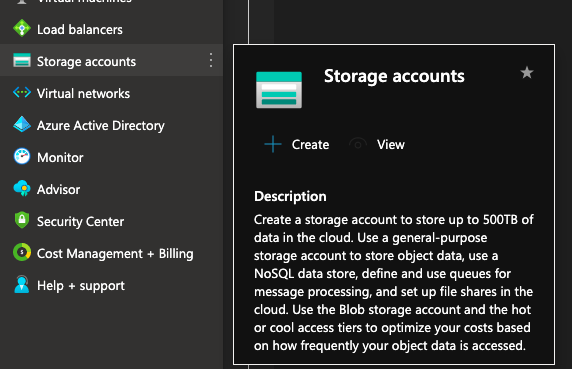
- Existing Storage Account
## Log In to the Azure Portal
Log in to the Azure Portal using your credentials
## Create the Event Grid-Triggered Function
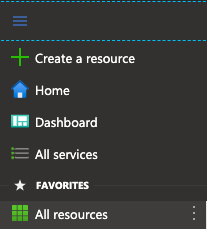
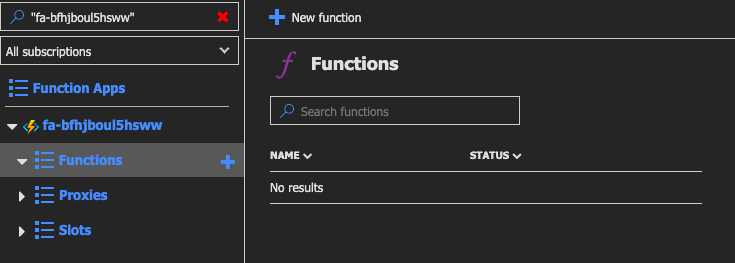
Open the menu in the top-left corner and select All resources.
Click on the app service.

In the left-hand pane, select the Functions row.
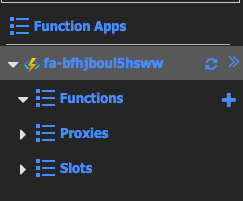
Click + New function.
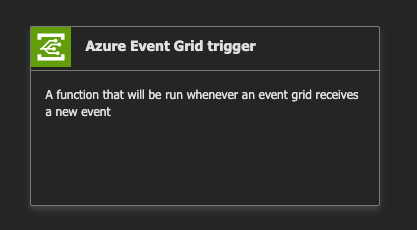
Select the Azure Event Grid trigger box from the list.
Enter "MyEventGridTrigger" without quotes in the Name box.
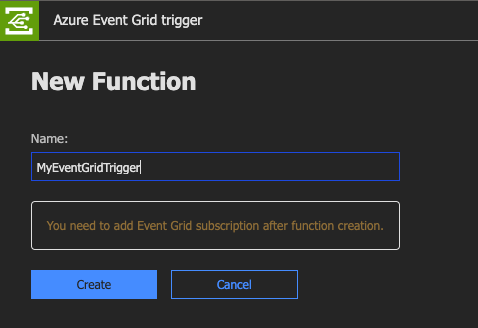
Click Create.
You should see the sample C# script (.csx).
```csharp
#r "Microsoft.Azure.EventGrid"
using Microsoft.Azure.EventGrid.Models;
public static void Run(EventGridEvent eventGridEvent, ILogger log)
{
log.LogInformation(eventGridEvent.Data.ToString());
}
```
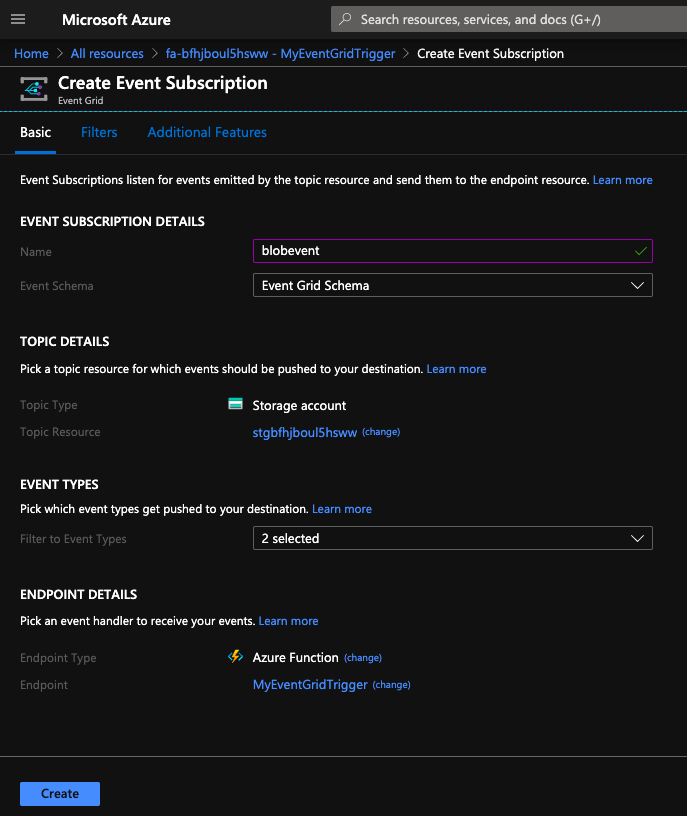
## Create the Event Grid Subscription
Click Add Event Grid subscription.

In the Name box, enter "blobevent" without quotes.
Use the Topic Types combo box to select Storage Accounts.
Click the Subscription combo box and select the only available option.
Click the Resource Group combo box and select the only available option.
Click the Resource combo box and select the only available option.
Click Create.
## Create a Blob in the Storage Account
At the top of the window, right-click on All resources and open it in a new tab.
Navigate to the new tab.
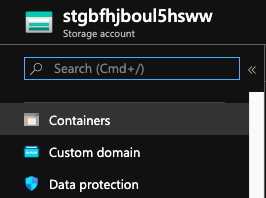
Click on the storage account.

In the main pane, click Containers.
Click + Container.
Enter a Name of "images" without quotes in the box provided.
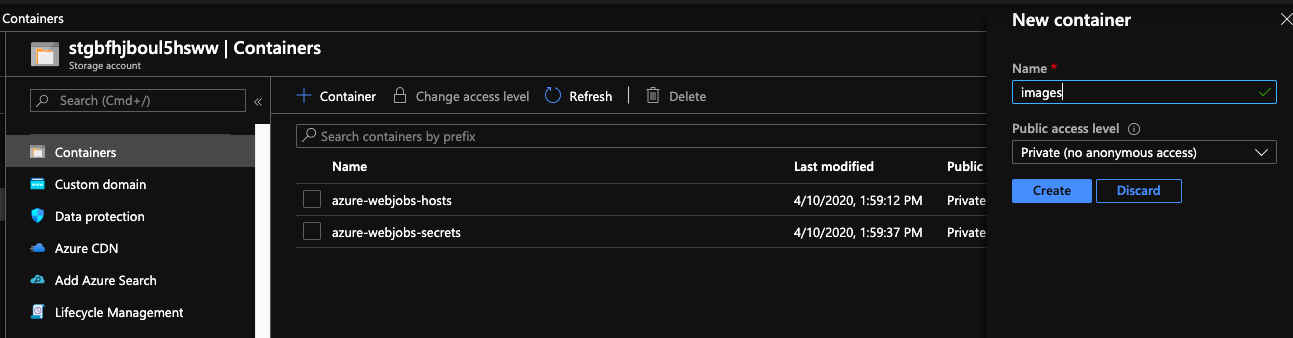
Click OK.
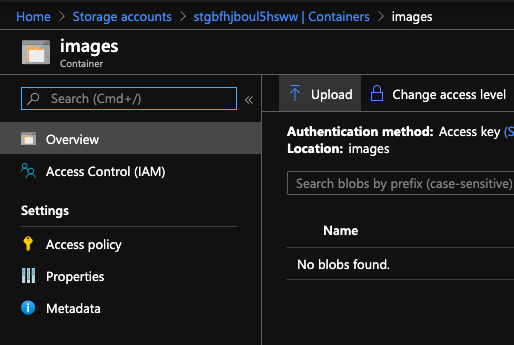
Click the images row.
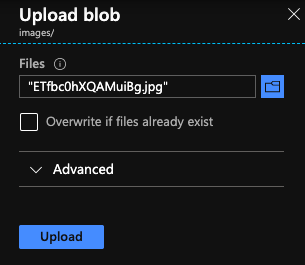
Click Upload.
Click the folder button to open the file browser.
Select a local file and then click Open. It is recommended to use a small file.
Click Upload.
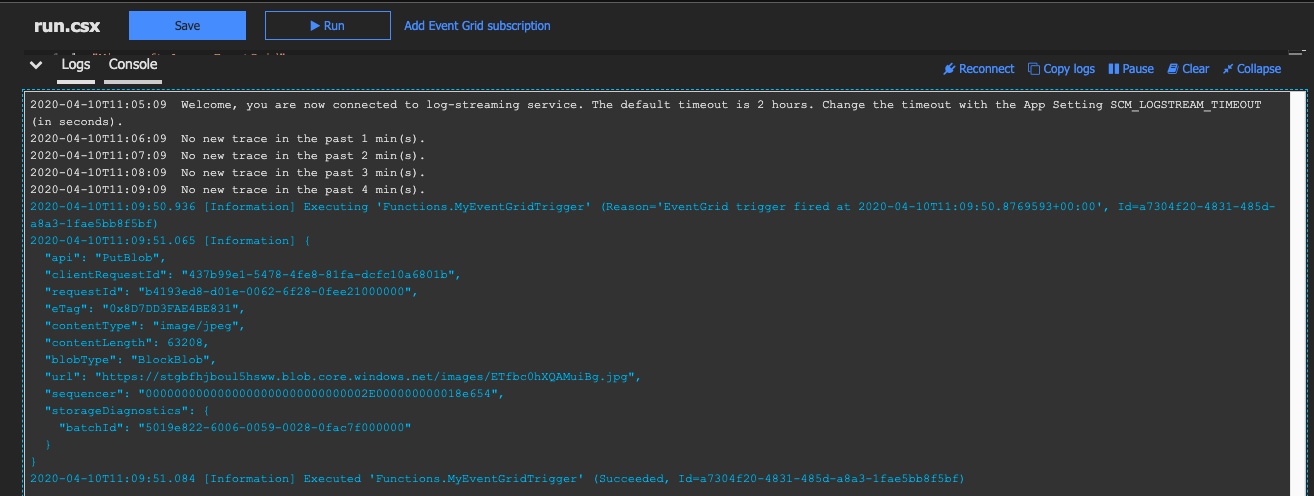
Examine the Function Logs to verify it ran
Return to the Event Grid trigger tab and verify the logs.
Thursday, 9 April 2020
Jenkins Installation
Some verions of CentOS ship with a java version that is not compatible with Jenkins, so you may have to remove it.
```
sudo yum -y remove java
```
Install java. Jenkins also works on the official Oracle JDK. Using OpenJDK just because it is a bit easier to install.
```
sudo yum -y install java-1.8.0-openjdk
```
Since Jenkins is not part of the default yum repositories, so we need to run the following commmand
```
sudo yum install epel-release
sudo wget -O /etc/yum.repos.d/jenkins.repo http://pkg.jenkins-ci.org/redhat-stable/jenkins.repo
sudo rpm --import https://jenkins-ci.org/redhat/jenkins-ci.org.key
```
Install Jenkins using yum
```
sudo yum -y install jenkins-2.164.2
```
Enable the Jenkins service
```
sudo systemctl enable jenkins
```
Start the Jenkins service
```
sudo systemctl start jenkins
```
You can now access Jenkins on your browswer.
The next step is to unlock Jenkins. run ``cat`` on ``/var/lib/jenkins/secrets/initialAdminPassword`` and copy the password and paste to the browser.
After a few minutes, setup your first admin user. Once finished, Jenkins is fully installed and set up.
Friday, 3 April 2020
Getting started with Argo CD on a k3s cluster using arkade and k3d
This post aims to demonstrate how to setup Argo CD on a k3s cluster using arkade and k3d.
This is just a learning playground
# Prerequisites
You need to install Docker on your machine and you need to register for a Docker Hub account as your Docker images will be stored there
# Install k3d
k3d is a little helper to run k3s in docker, where k3s is the lightweight Kubernetes distribution by Rancher. It actually removes millions of lines of code from k8s. If you just need a learning playground, k3s is definitely your choice.
Check out [k3d Github Page](https://github.com/rancher/k3d#get) to see the installation guide.
When creating a cluster, ``k3d`` utilises ``kubectl`` and ``kubectl`` is not part of ``k3d``. If you don't have ``kubectl``, please install and set up [here](https://kubernetes.io/docs/tasks/tools/install-kubectl/).
Once you've installed ``k3d`` and ``kubectl``, run
```
k3d create -n argocd-playground
```
We need to make ``kubectl`` to use the kubeconfig for that cluster.
```
export KUBECONFIG="$(k3d get-kubeconfig --name='argocd-playground')"
```
# Install arkade
Moving on to [arkade](https://github.com/alexellis/arkade), it provides a simple Golang CLI with strongly-typed flags to install charts and apps to your cluster in one command. Originally, the codebase is derived from [k3sup](https://github.com/alexellis/k3sup) which I've contributed last month.
```
curl -sLS https://dl.get-arkade.dev | sudo sh
```
Once you've installed it, you should see the following
```
New version of arkade installed to /usr/local/bin
_ _
__ _ _ __| | ____ _ __| | ___
/ _` | '__| |/ / _` |/ _` |/ _ \
| (_| | | | < (_| | (_| | __/
\__,_|_| |_|\_\__,_|\__,_|\___|
Get Kubernetes apps the easy way
Version: 0.2.2
Git Commit: 9063b6eb16deae5978805f71b0e749828c815490
```
Install Argo CD via arkade. You can use an alias ``ark`` or ``arkade``.
```
ark install argocd
```
You should see the following info
```
Using kubeconfig: /Users/wingkwong/.config/k3d/argocd-playground/kubeconfig.yaml
Node architecture: "amd64"
=======================================================================
= ArgoCD has been installed =
=======================================================================
# Get the ArgoCD CLI
brew tap argoproj/tap
brew install argoproj/tap/argocd
# Or download via https://github.com/argoproj/argo-cd/releases/latest
# Username is "admin", get the password
kubectl get pods -n argocd -l app.kubernetes.io/name=argocd-server -o name | cut -d'/' -f 2
# Port-forward
kubectl port-forward svc/argocd-server -n argocd 8081:443 &
http://localhost:8081
# Get started with ArgoCD at
# https://argoproj.github.io/argo-cd/#quick-start
Thanks for using arkade!
```
Follow the step to enable port forwarding
```
kubectl port-forward svc/argocd-server -n argocd 8081:443 &
```
```
Forwarding from [::1]:8081 -> 8080
```
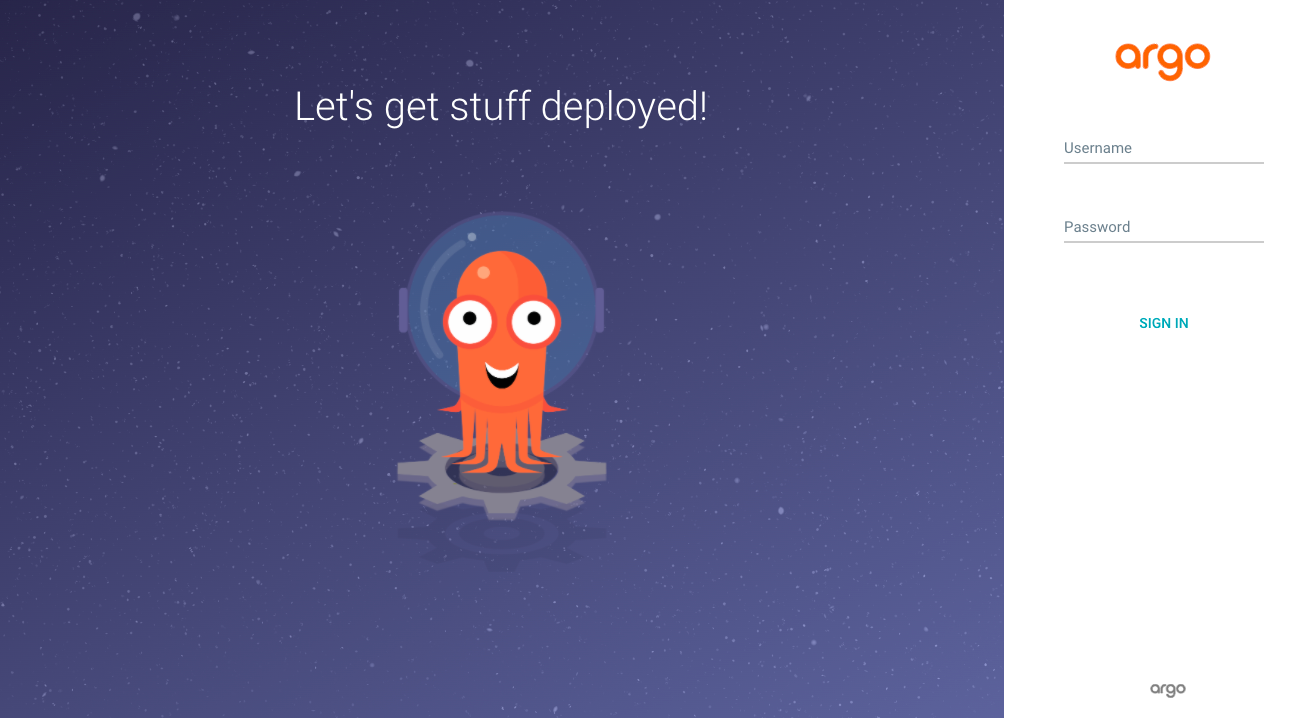
Open your browser and browse ``http://localhost:8080/``. You should see the Argo CD UI.
As stated in the console info upon the completion of installation, the username is ``admin`` and you can get hte password by running
```
kubectl get pods -n argocd -l app.kubernetes.io/name=argocd-server -o name | cut -d'/' -f 2
```
> If you want to check out the info, you can run ``ark info argocd``.
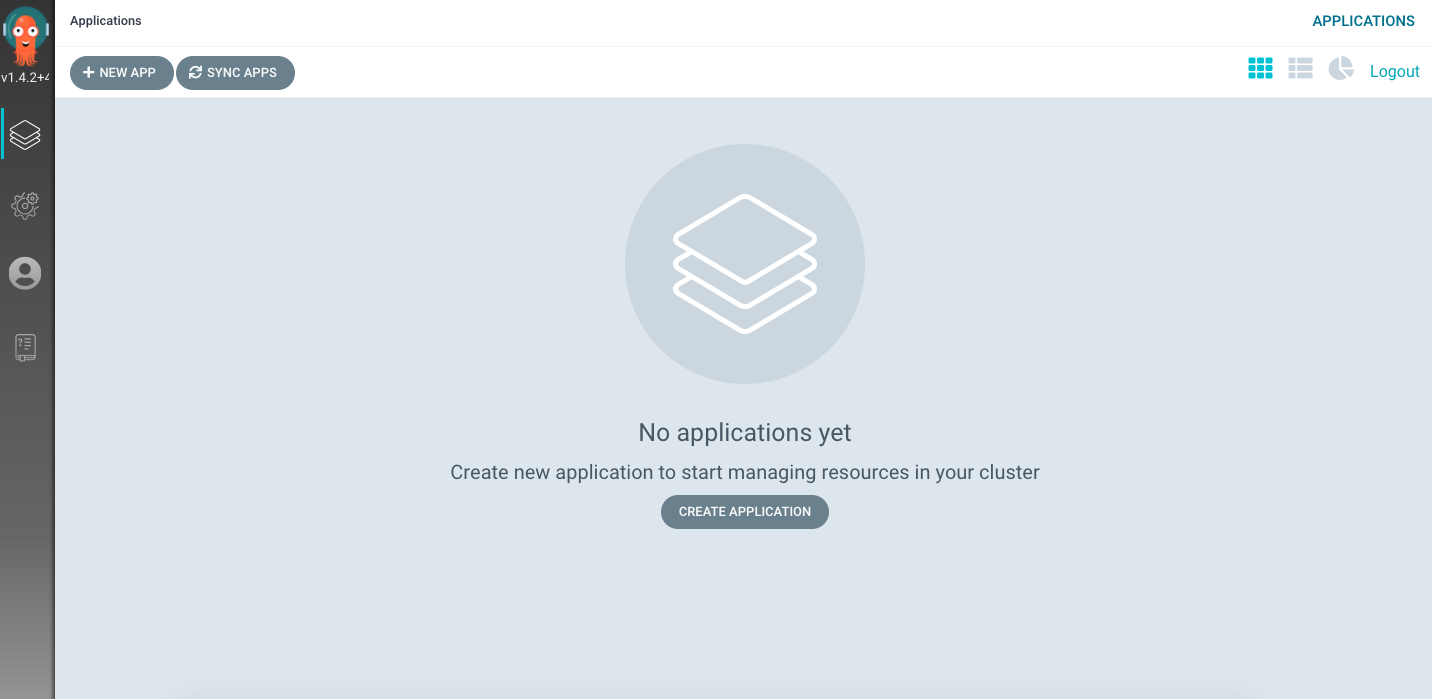
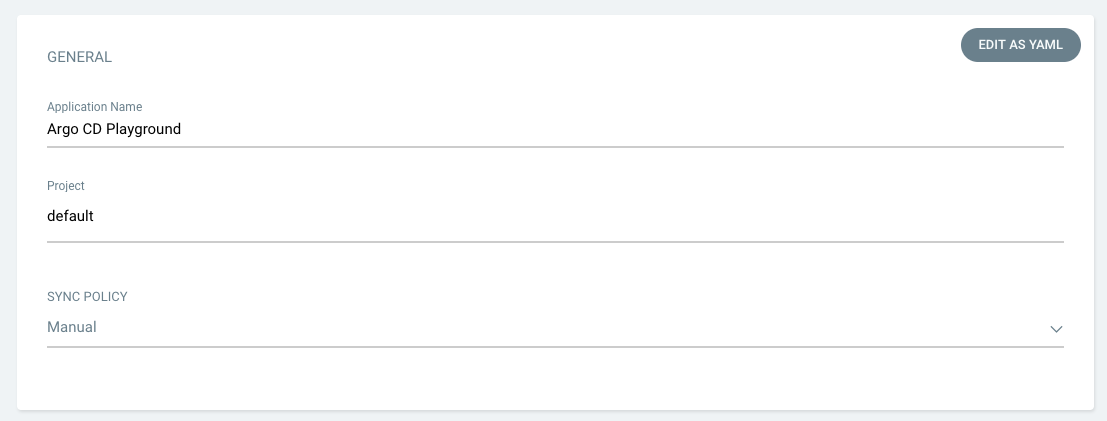
After logging in, you should see the application page.
Set your application name. Use the project ``default`` and choose the sync policy to ``Manual``.
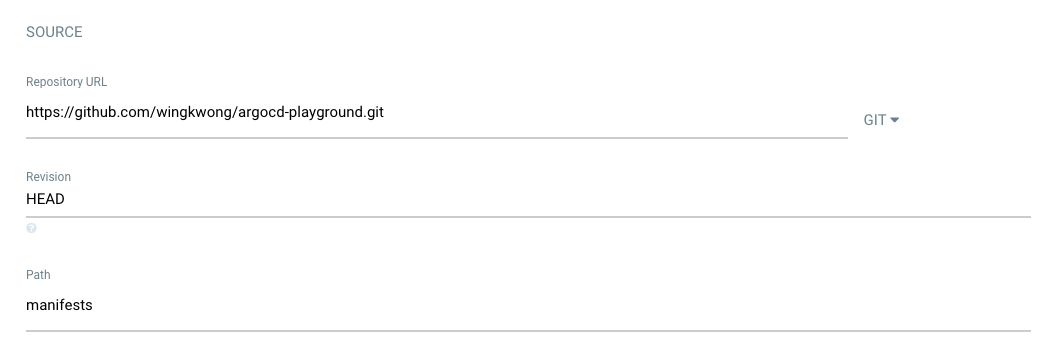
Connect your repository to Argo CD. Select the revision and the path where your manifests files are located.
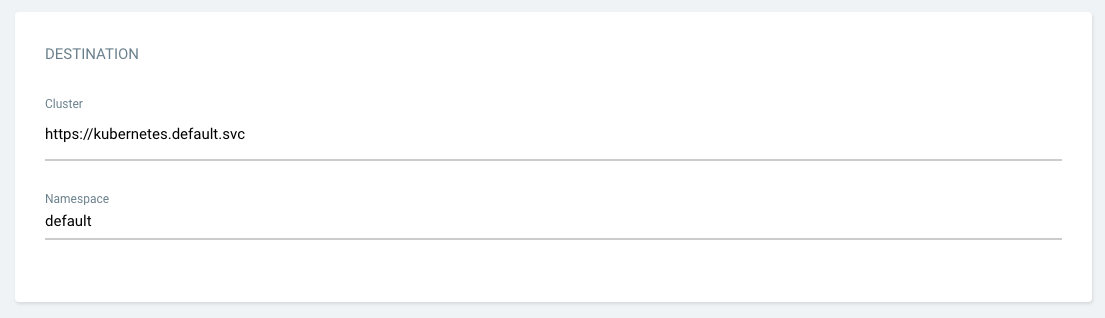
Set the cluster to ``https://kubernetes.default.svc`` with ``default`` namespace.
Click ``Create``. Then you should see there is an application on the portal.
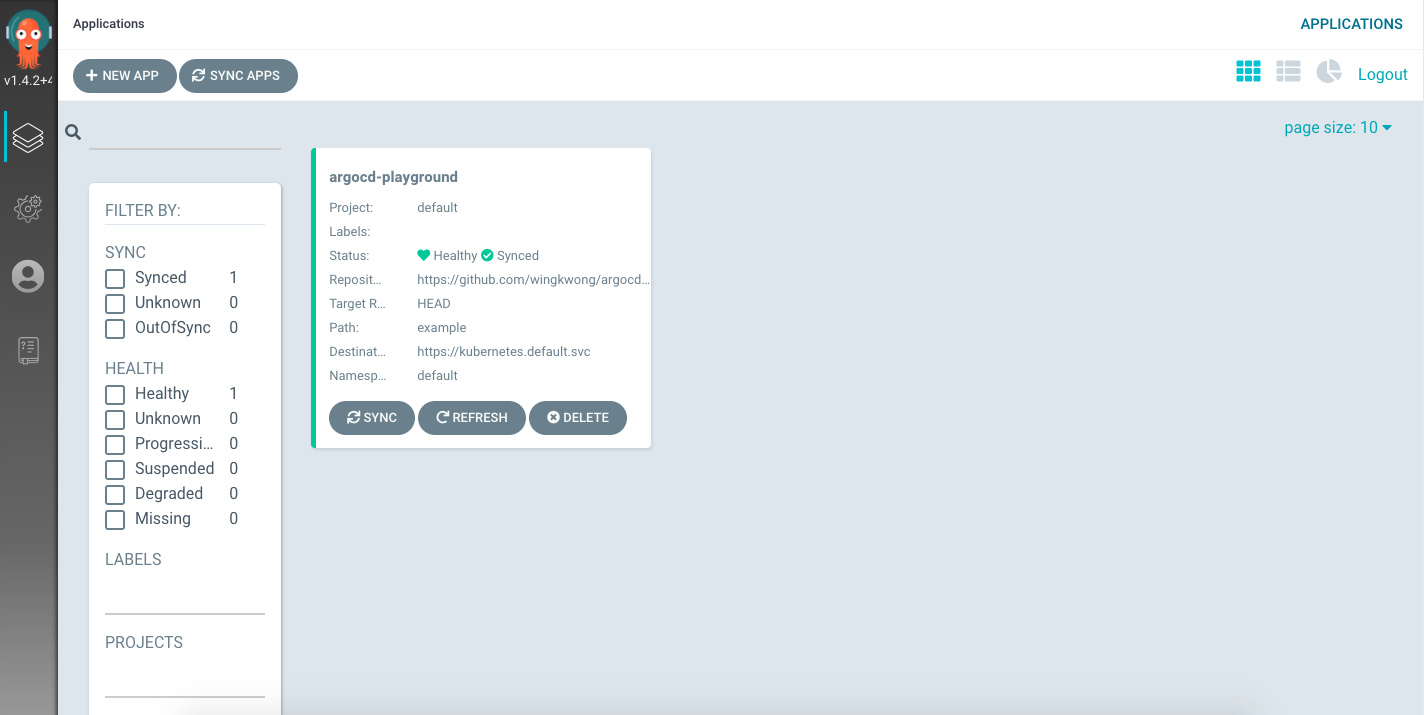
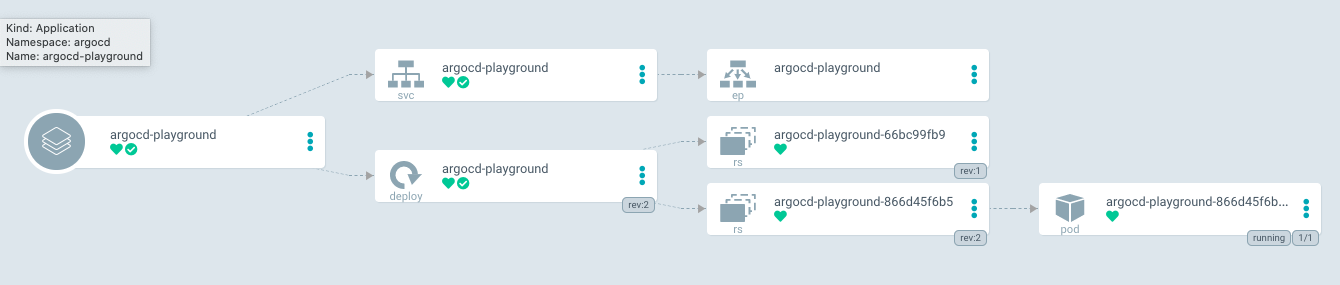
You can also switch it to the list view
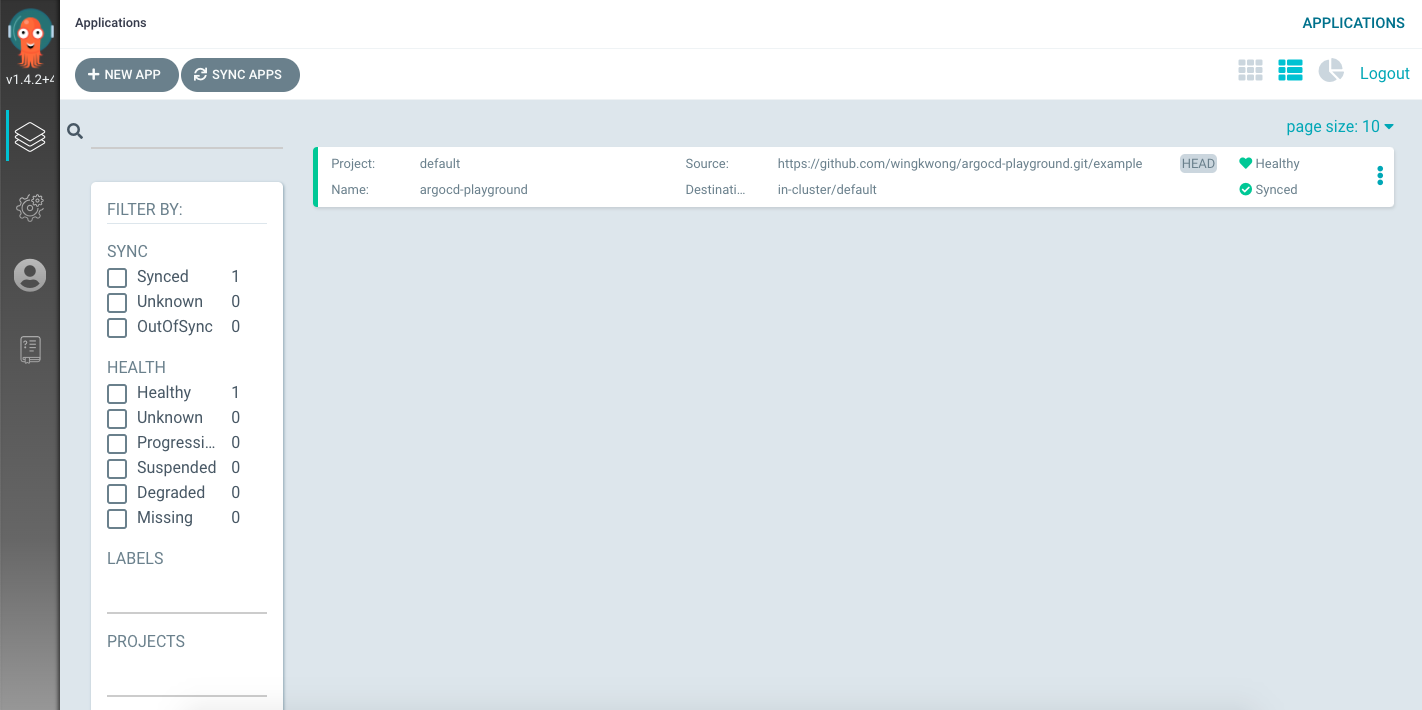
or summary view
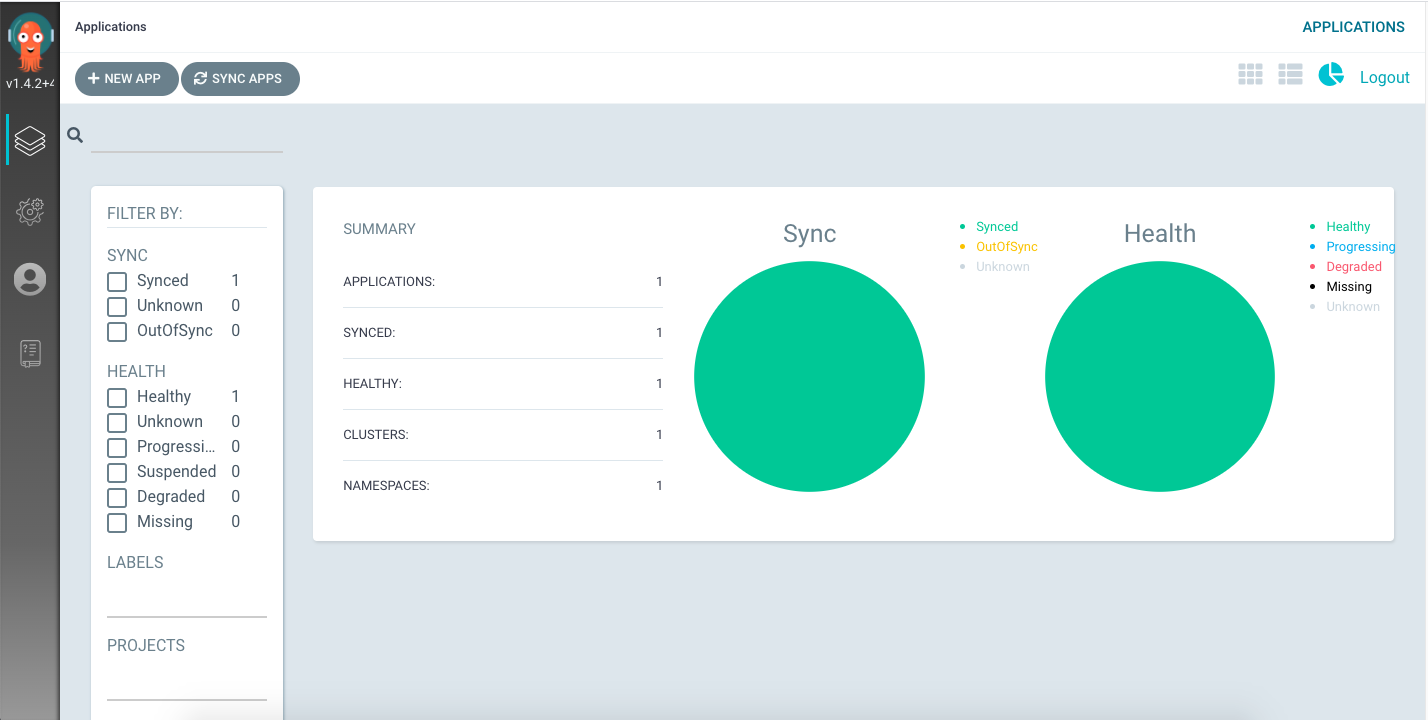
Here is my application
```
package main
import (
"io"
"log"
"net/http"
)
func main() {
http.HandleFunc("/", Handler)
if err := http.ListenAndServe(":8888", nil); err != nil {
log.Fatal(err)
}
}
func Handler(w http.ResponseWriter, r *http.Request) {
w.Header().Add("Content-Type", "application/json")
io.WriteString(w, `{"status":"ok"}`)
}
```
Let's add ``deployment.yaml``
```
apiVersion: apps/v1
kind: Deployment
metadata:
name: argocd-playground
spec:
replicas: 1
revisionHistoryLimit: 3
selector:
matchLabels:
app: argocd-playground
template:
metadata:
labels:
app: argocd-playground
spec:
containers:
- image: wingkwong/argocd-playground:v1
name: argocd-playground
ports:
- containerPort: 8888
```
and ``service.yaml``
```
apiVersion: v1
kind: Service
metadata:
name: argocd-playground
spec:
ports:
- port: 8888
targetPort: 8888
selector:
app: argocd-playground
```
Once you've pushed your commit, Argo CD detects changes under ``manifests``. It updates the status to ``OutOfSync``.
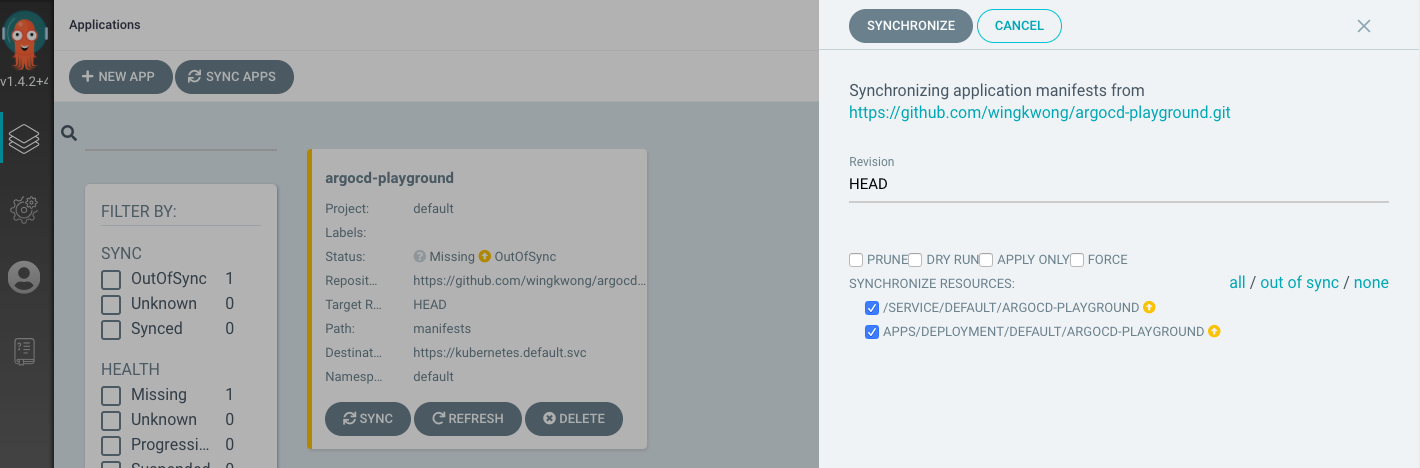
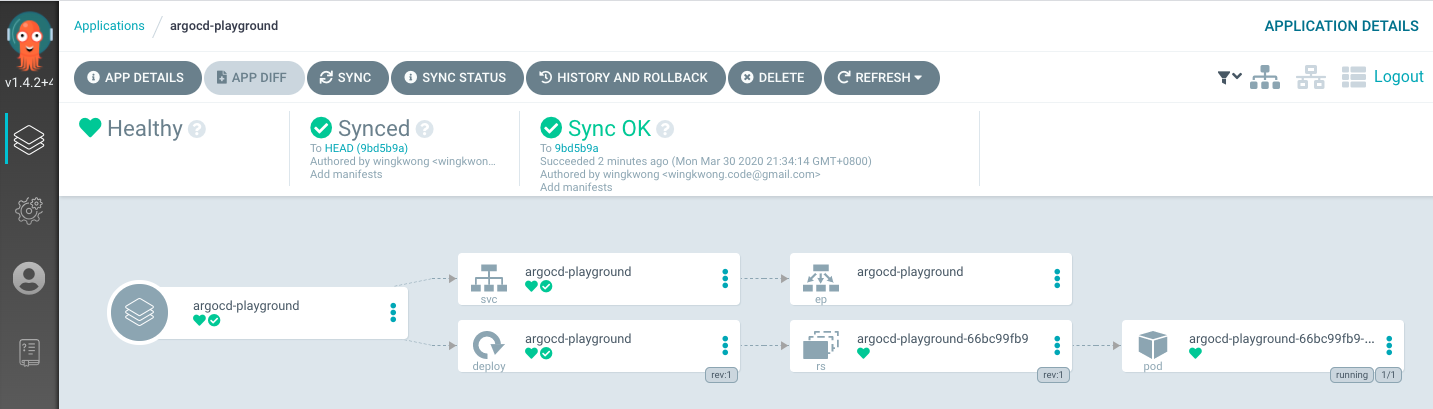
Let's sync.
Enable port forwarding
```
kubectl port-forward svc/argocd-playground 8888:8888
```
Verify v1 in the browser
```
http://localhost:8888/
```
You should see
```
{"status":"ok"}
```
Update the application

Build and push the docker image to docker hub. Then update the image tag to v2 in ``deployment.yaml``.
```
- image: wingkwong/argocd-playground:v2
```
Go back to Argo CD UI, the status becomes ``OutofSync``.

Click ``SYNC``
A new pod is being created, while the original one is still here.

Once it is ready, the original one will be deleted.
You should see the below error
```
E0331 20:24:00.727018 61938 portforward.go:400] an error occurred forwarding 8888 -> 8888: error forwarding port 8888 to pod 0f8b6902adcdbfdcde17a17bc1d182db8c4c849ba50ef369d90969e1349797b5, uid : failed to find sandbox "0f8b6902adcdbfdcde17a17bc1d182db8c4c849ba50ef369d90969e1349797b5" in store: does not exist
```
We should stop port forwarding before redeploying a different version. Let's kill it and do it again.
```
kubectl port-forward svc/argocd-playground 8888:8888
```
Go to
```
http://localhost:8888/
```
Now you can see the new changes
```
{"status":"ok", "message": "hello-world"}
```
# Clean up
```
k3d delete -n argocd-playground
```
# Compare with FluxCD
Argo CD allows users to sync in an application level instead of a repository level by setting the Path. It supports different templating such as kustomize, helm, ksonnet, jsonnet, etc. With an UI portal, users can simply manage the application there. However, it cannot monitor a docker repository and deploy from the repository. The docker image needs to be manually updated for each updates.
# Useful links
- [Argo CD](https://argoproj.github.io/argo-cd/)
- [arkade](https://github.com/alexellis/arkade#get-arkade)
- [k3d](https://github.com/rancher/k3d)
Subscribe to:
Posts (Atom)