Friday, 10 April 2020
Getting Started with Deployment Manager
## Objectives
- Create a Deployment Manager deployment.
- Update a Deployment Manager deployment.
## Prerequisites
- Existing GCP Project
## Confirm that needed APIs are enabled
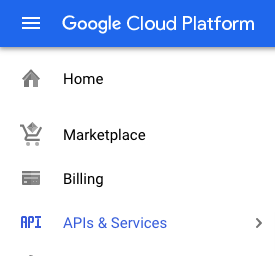
In the GCP Console, on the Navigation menu (Navigation menu), click APIs & services.
Scroll down in the list of enabled APIs, and confirm that these APIs are enabled:
- Cloud Deployment Manager v2 API
- Cloud Runtime Configuration API
If one or more APIs is missing, click the Enable APIs and Services button at top. Search for the above APIs by name and enable each for your current project.
## Create a Deployment Manager deployment
In GCP console, on the top right toolbar, click the Open Cloud Shell button (Activate Cloud Shell). Click Continue.
At the Cloud Shell prompt, type this partial command:
```
export MY_ZONE=
```
followed by the zone. Your complete command will look like this:
```
export MY_ZONE=us-central1-a
```
Create a YAML file
```
touch mydeploy.yaml
```
```yaml
resources:
- name: my-vm
type: compute.v1.instance
properties:
zone: ZONE
machineType: zones/ZONE/machineTypes/n1-standard-1
metadata:
items:
- key: startup-script
value: "apt-get update"
disks:
- deviceName: boot
type: PERSISTENT
boot: true
autoDelete: true
initializeParams:
sourceImage: https://www.googleapis.com/compute/v1/projects/debian-cloud/global/images/debian-9-stretch-v20180806
networkInterfaces:
- network: https://www.googleapis.com/compute/v1/projects/PROJECT_ID/global/networks/default
accessConfigs:
- name: External NAT
type: ONE_TO_ONE_NAT
```
Insert your Google Cloud Platform project ID into the file in place of the string PROJECT_ID using this command:
```
sed -i -e 's/PROJECT_ID/'$DEVSHELL_PROJECT_ID/ mydeploy.yaml
```
Insert your assigned Google Cloud Platform zone into the file in place of the string ZONE using this command:
```
sed -i -e 's/ZONE/'$MY_ZONE/ mydeploy.yaml
```
View the mydeploy.yaml file, with your modifications, with this command:
```
cat mydeploy.yaml
```
The file will look something like this:
```yaml
resources:
- name: my-vm
type: compute.v1.instance
properties:
zone: us-central1-a
machineType: zones/us-central1-a/machineTypes/n1-standard-1
metadata:
items:
- key: startup-script
value: "apt-get update"
disks:
- deviceName: boot
type: PERSISTENT
boot: true
autoDelete: true
initializeParams:
sourceImage: https://www.googleapis.com/compute/v1/projects/debian-cloud/global/images/debian-9-stretch-v20180806
networkInterfaces:
- network: https://www.googleapis.com/compute/v1/projects/wingkwong-gcp-playground/global/networks/default
accessConfigs:
- name: External NAT
type: ONE_TO_ONE_NAT
```
Do not use the above text literally in your own mydeploy.yaml file. Be sure that the zone that is named on the zone: and machineType: lines in your file matches the zone. Be sure that the GCP project ID on the network: line in your file matches the project ID, not the one in this example.
Build a deployment from the template:
```
gcloud deployment-manager deployments create my-first-depl --config mydeploy.yaml
```

If everything goes wrong, modify the file and you can either delete my-first-depl and create it again
```
gcloud deployment-manager deployments delete my-first-depl
```
or simply just update it
```
gcloud deployment-manager deployments update my-first-depl --config mydeploy.yaml
```
When the deployment operation is complete, the gcloud command displays a list of the resources named in the template and their current state.
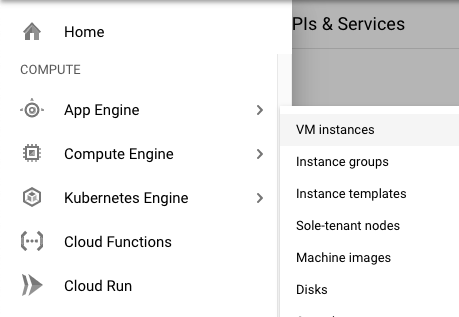
Confirm that the deployment was successful. In the GCP Console, on the Navigation menu (Navigation menu), click Compute Engine > VM instances.
You will see that a VM instance called my-vm has been created, as specified by the template.
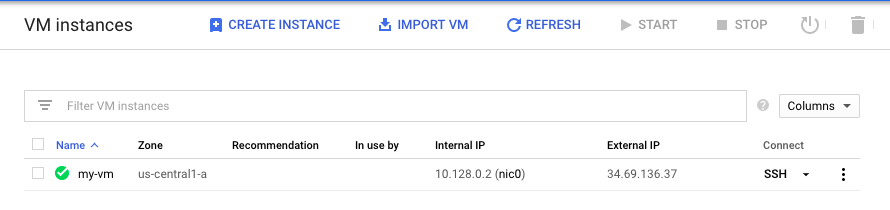
Click on the VM instance's name to open its VM instance details screen.
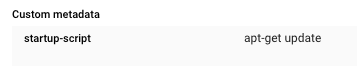
Scroll down to the Custom metadata section. Confirm that the startup script you specified in your Deployment Manager template has been installed.
## Update a Deployment Manager deployment
Return to your Cloud Shell prompt. Launch the vi text editor to edit the mydeploy.yaml file:
```
vi mydeploy.yaml
```
Find the line that sets the value of the startup script, value: "apt-get update", and edit it so that it looks like this:
```yml
value: "apt-get update; apt-get install nginx-light -y"
```
Do not disturb the spaces at the beginning of the line. The YAML templating language relies on indented lines as part of its syntax. As you edit the file, be sure that the v in the word value in this new line is immediately below the k in the word key on the line above it.
Press Ctrl+O and then press Enter to save your edited file.
Press Ctrl+X to exit the vi text editor.
Return to your Cloud Shell prompt. Enter this command to cause Deployment Manager to update your deployment to install the new startup script:
```
gcloud deployment-manager deployments update my-first-depl --config mydeploy.yaml
```
Wait for the gcloud command to display a message confirming that the update operation was completed successfully.
```
NAME TYPE STATE ERRORS INTENT
my-vm compute.v1.instance COMPLETED []
```
In the GCP console, on the Navigation menu (Navigation menu), click Compute Engine > VM instances.
Click on the my-vm VM instance's name to open its VM instance details pane.
Scroll down to the Custom metadata section. Confirm that the startup script has been updated to the value you declared in your Deployment Manager template.

Subscribe to:
Post Comments (Atom)
No comments:
Post a Comment