Showing posts with label azure. Show all posts
Showing posts with label azure. Show all posts
Wednesday, 25 November 2020
Choosing the right distributed tables in Azure Synapse Analytics
Each row in a distributed table stored across multiple distributions which are distributed with a hash or round-robin algorithm. The choice of choosing the correct one significantly affects the performance.
If you have a large fact table whose size is more than 2 GB and requires frequent insert, update, and delete operations. Hash-distributed tables work well in this case as the data movement during queries is minimized in dedicated SQL pool to acheive query performance improvement by distributing table rows across the Compute nodes using a deterministic hash function to assign each row to one distribution.
Here's the sample showing how to create a hash-distributed table with ProductKey as the distribution column.
```sql
CREATE TABLE [dbo].[FactInternetSales]
( [ProductKey] int NOT NULL
, [OrderDateKey] int NOT NULL
, [CustomerKey] int NOT NULL
, [PromotionKey] int NOT NULL
, [SalesOrderNumber] nvarchar(20) NOT NULL
, [OrderQuantity] smallint NOT NULL
, [UnitPrice] money NOT NULL
, [SalesAmount] money NOT NULL
)
WITH
( CLUSTERED COLUMNSTORE INDEX
, DISTRIBUTION = HASH([ProductKey])
)
;
```
A round-robin distributed table distributes table rows evenly across all distributions randomly. Even with the same values, the rows may not be distributed to the same distribution. Therefore, if we need to perform joining operations, it may lead to performance issues as the table usually requires reshuffling the rows. It is often used in a temporary staging table and there is no joining operations required.
Here's the example showing how to create a round-robin distributed table.
```sql
CREATE TABLE [dbo].[Date]
(
[DateID] int NOT NULL,
[Date] datetime NULL,
[DateBKey] char(10) COLLATE SQL_Latin1_General_CP1_CI_AS NULL,
[DayOfMonth] varchar(2) COLLATE SQL_Latin1_General_CP1_CI_AS NULL,
[DaySuffix] varchar(4) COLLATE SQL_Latin1_General_CP1_CI_AS NULL,
[DayName] varchar(9) COLLATE SQL_Latin1_General_CP1_CI_AS NULL,
[DayOfWeek] char(1) COLLATE SQL_Latin1_General_CP1_CI_AS NULL,
[DayOfWeekInMonth] varchar(2) COLLATE SQL_Latin1_General_CP1_CI_AS NULL,
[DayOfWeekInYear] varchar(2) COLLATE SQL_Latin1_General_CP1_CI_AS NULL,
[DayOfQuarter] varchar(3) COLLATE SQL_Latin1_General_CP1_CI_AS NULL,
[DayOfYear] varchar(3) COLLATE SQL_Latin1_General_CP1_CI_AS NULL,
[WeekOfMonth] varchar(1) COLLATE SQL_Latin1_General_CP1_CI_AS NULL,
[WeekOfQuarter] varchar(2) COLLATE SQL_Latin1_General_CP1_CI_AS NULL,
[WeekOfYear] varchar(2) COLLATE SQL_Latin1_General_CP1_CI_AS NULL,
[Month] varchar(2) COLLATE SQL_Latin1_General_CP1_CI_AS NULL,
[MonthName] varchar(9) COLLATE SQL_Latin1_General_CP1_CI_AS NULL,
[MonthOfQuarter] varchar(2) COLLATE SQL_Latin1_General_CP1_CI_AS NULL,
[Quarter] char(1) COLLATE SQL_Latin1_General_CP1_CI_AS NULL,
[QuarterName] varchar(9) COLLATE SQL_Latin1_General_CP1_CI_AS NULL,
[Year] char(4) COLLATE SQL_Latin1_General_CP1_CI_AS NULL,
[YearName] char(7) COLLATE SQL_Latin1_General_CP1_CI_AS NULL,
[MonthYear] char(10) COLLATE SQL_Latin1_General_CP1_CI_AS NULL,
[MMYYYY] char(6) COLLATE SQL_Latin1_General_CP1_CI_AS NULL,
[FirstDayOfMonth] date NULL,
[LastDayOfMonth] date NULL,
[FirstDayOfQuarter] date NULL,
[LastDayOfQuarter] date NULL,
[FirstDayOfYear] date NULL,
[LastDayOfYear] date NULL,
[IsHolidayUSA] bit NULL,
[IsWeekday] bit NULL,
[HolidayUSA] varchar(50) COLLATE SQL_Latin1_General_CP1_CI_AS NULL
)
WITH
(
DISTRIBUTION = ROUND_ROBIN,
CLUSTERED COLUMNSTORE INDEX
);
```

Monday, 10 August 2020
Getting Started with Azure Databricks
## Sample Cluster Setup

```json
{
    "num_workers": 5,
    "cluster_name": "Databricks-playground",
    "spark_version": "6.5.x-scala2.11",
    "spark_conf": {
        "spark.dynamicAllocation.enabled": "true",
        "spark.shuffle.compress": "true",
        "spark.shuffle.spill.compress": "true",
        "spark.executor.memory": "7849M",
        "spark.sql.shuffle.partitions": "1024",
        "spark.network.timeout": "600s",
        "spark.executor.instances": "0",
        "spark.driver.memory": "7849M",
        "spark.dynamicAllocation.executorIdleTimeout": "600s"
    },
    "node_type_id": "Standard_F8s",
    "driver_node_type_id": "Standard_F8s",
    "ssh_public_keys": [],
    "custom_tags": {},
    "cluster_log_conf": {
        "dbfs": {
            "destination": "dbfs:/cluster-logs"
        }
    },
    "spark_env_vars": {
        "PYSPARK_PYTHON": "/databricks/python3/bin/python3"
    },
    "autotermination_minutes": 0,
    "init_scripts": []
}
```

## Common commands

List the directory in DBFS

```
%fs ls
```

Create a directory in DBFS

```
%fs mkdirs src
```

Copy files from src to dist in DBFS

```
%fs cp -r dbfs:/src dbfs:/dist
```

## Setup Mount Point for Blob Storage

Using an old driver called WASB

### Create Secret Scope

By default, scopes are created with MANAGE permission for the user who created the scope. If your account does not have the Premium plan (or, for customers who subscribed to Databricks before March 3, 2020, the Operational Security package), you must override that default and explicitly grant the MANAGE permission to “users” (all users) when you create the scope

```
databricks secrets create-scope --scope  --initial-manage-principal users
```

To verify

```
databricks secrets list-scopes
```

### Create Secret
```
databricks secrets put --scope  --key  --string-value
```

The value of  can be retrieved from Storage Account -> Settings -> Access Keys

### Create Mount Point

```python
dbutils.fs.mount(
  source = "wasbs://@.blob.core.windows.net",
  mount_point = "/mnt/",
  extra_configs = {"":dbutils.secrets.get(scope = "", key = "")}
)
```

To verify in Databricks Notebook

```python
%fs dbfs:/mnt/
```

## Setup Mount Point for ADLS Gen 2

Requiring the following items

- ``application-id``: An ID that uniquely identifies the application.
- ``directory-id``: An ID that uniquely identifies the Azure AD instance.
- ``storage-account-name``: The name of the storage account.
- ``service-credential``: A string that the application uses to prove its identity.

### Create Mount Point

```python
configs = {"fs.azure.account.auth.type": "OAuth",
           "fs.azure.account.oauth.provider.type": "org.apache.hadoop.fs.azurebfs.oauth2.ClientCredsTokenProvider",
           "fs.azure.account.oauth2.client.id": "",
           "fs.azure.account.oauth2.client.secret": dbutils.secrets.get(scope="",key=""),
           "fs.azure.account.oauth2.client.endpoint": "https://login.microsoftonline.com//oauth2/token"}

# Optionally, you can add  to the source URI of your mount point.
dbutils.fs.mount(
  source = "abfss://@.dfs.core.windows.net/",
  mount_point = "/mnt/",
  extra_configs = configs)
```

## Performance Tuning

- Use Ganglia to see the metrics and gain insights

- Use Spark 3.0 if your application contians lots of joining logic
    - Adaptive Query Execution to speed up Spark SQL at runtime
    - Ref: https://databricks.com/blog/2020/05/29/adaptive-query-execution-speeding-up-spark-sql-at-runtime.html
    - Simply enable it by setting ``spark.sql.adaptive.enabled`` to ``true``

## Common issues

### No output files written in storage

Probably it is out of memory. Try adjust the hardware settings.

### Clusters settings not apply to jobs

Make sure the cluster is interactive or automated. Interactive one is for notebooks. If you create a job, you should be able to modify the cluster settings in the job creation page.

### Spark conf is not supported via cluster settings for spark-submit task

Self-explanatory

```
{"error_code":"INVALID_PARAMETER_VALUE","message":"Spark conf is not supported via cluster settings for spark-submit task. Please use spark-submit parameters to set spark conf."}
```

### Custom Dependencies cannot be found

Suppose your package is located in ``/dbfs/databricks/driver/jobs/``, add the following code in your entry point.

Python Example:

```python
import sys
sys.path.append("/dbfs/databricks/driver/jobs/")
```


## References:

- [Databricks File System (DBFS)](https://docs.databricks.com/data/databricks-file-system.html)
- [Create a Databricks-backed secret scope](https://docs.databricks.com/security/secrets/secret-scopes.html)
- [Azure Data Lake Storage Gen2](https://docs.microsoft.com/en-us/azure/databricks/data/data-sources/azure/azure-datalake-gen2)
Wednesday, 20 May 2020
Azure Synapse Analytics 101
- formerly Azure SQL Data Warehouse (SQL DW)
- Massively Parallel Processing (MPP) Data Warehouse
- Connection Security - Firewall rules are used by both the server and the database to reject connection attempts from IP addresses that haven't been explicitly whitelisted.
- Authentication - SQL pool currently supports SQL Server Authentication with a username and password, and with Azure Active Directory.
- Authorization - Authorization privileges are determined by role memberships and permissions. Authorization privileges are determined by role memberships and permissions.
- Data Encryption - protects against the threat of malicious activity by encrypting and decrypting your data at rest. Associated backups and transaction log files are encrypted without requiring any changes to your applications when encrypting your database.
- Advanced Data Security - provides a set of advanced SQL security capabilities, including data discovery & classification, vulnerability assessment, and Advanced Threat Protection.
## Transparent Data Encryption (TDE)
- It helps protect against the threat of malicious activity by encrypting and decrypting your data at rest. When you encrypt your database, associated backups and transaction log files are encrypted without requiring any changes to your applications. TDE encrypts the storage of an entire database by using a symmetric key called the database encryption key.
## Granular access controls
- Granular Permissions let you control which operations you can do on individual columns, tables, views, schemas, procedures, and other objects in the database. Use granular permissions to have the most control and grant the minimum permissions necessary.
- Database roles other than db_datareader and db_datawriter can be used to create more powerful application user accounts or less powerful management accounts. The built-in fixed database roles provide an easy way to grant permissions, but can result in granting more permissions than are necessary.
- Stored procedures can be used to limit the actions that can be taken on the database.
## Service Type
- Compute Optimized Gen1
- Compute Optimized Gen2
## Scalability
- Linear Scale on data warehouse unit
## Backup
- Use data warehouse snapshot to create a restore point
Monday, 13 April 2020
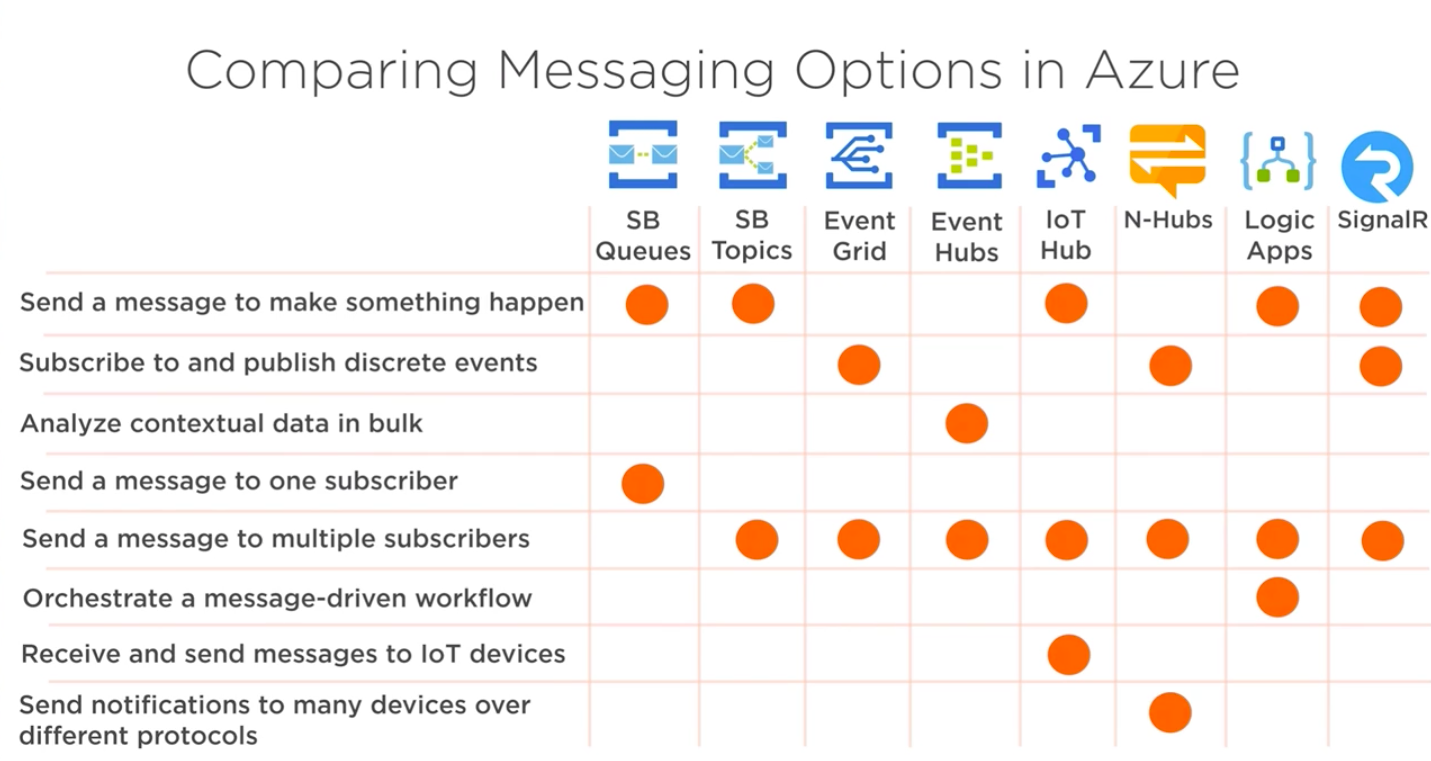
How to choose Azure services for working with messages in your application
## Options for working with messages in Azure
- Azure Storage Queue
- Azure Service Bus
- Azure Notification Hubs
- Azure Event Grid
- Azure Event Hubs
- Azure IoT Hub
- Azure Logic Apps
- Azure SignalR Service
### Azure Storage Queue
- Message lifetime <= 7 days
- Queue size > 80 GB
- Transaction logs
- Message size <= 64KB
### Azure Service Bus
- Message lifetime > 7 days
- Guaranteed (FIFO) ordered
- Duplicate detection
- Message size <= 1MB>
#### Queues
Put a message on the queue and one application takes it out for processing
#### Topics
Put a message on the queue and multiple applications can take it out for processing
### Azure Notification Hubs
Put a message to send notifications to Andrioid, iOS, Windows and all sort of other platform network notification services without having to write plumbing to talk to those notification services.
### Azure Event Grid
Subscribe to events and push those events to somewhere. For example, subscribe to an event in Azure storage when Blob gets uploaded and use that event to kickoff an Azure Function to process something.
### Azure Event Hubs
Ingest massive amounts of messages and push them off to be analyzed.
### Azure IoT Hub
Take in a lot of messages and have them analyzed but it can also communicate back (bi-directional messaging).
### Azure Logic Apps
Create processes in Azure. Easy to use.
### Azure SignalR Service
Connect clients together in real time and send messages to each other.
## Different Types of Messages
### Intent
#### Command
Services: Storage Queues, Service Bus, IoT Hub, Logic Apps, SignalR
- You want something to happen
- Could get a message back
- Increase temperature on thermostat
### Facts
#### Discrete data
Services: Event Grid, SignalR, Notification Hubs
- Does not happen continually
- Door open / closed
#### Stream of data
Services: Event Hub, IoT Hub
- Continuous stream of data
- Data is related to each other
- Temperature data
## Summary
Friday, 10 April 2020
Creating an Azure Function to Listen to Blob Created Events
## Scenario
You need to process images uploaded to a blob container. You decide to create an Azure Function that is triggered by an Event Grid wired to blob-created events in the storage account. To test the concept, you create the function, configure the Event Grid subscription, and write the event data to the functions log.
## Prerequisites
- Existing Resource Group
- Existing App Service plan
- Existing App Service
- Existing Storage Account
## Log In to the Azure Portal
Log in to the Azure Portal using your credentials
## Create the Event Grid-Triggered Function
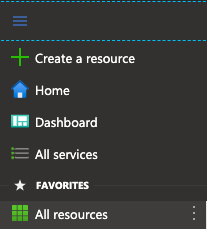
Open the menu in the top-left corner and select All resources.
Click on the app service.

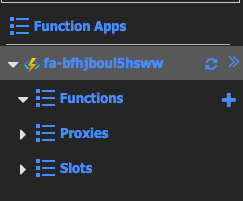
In the left-hand pane, select the Functions row.
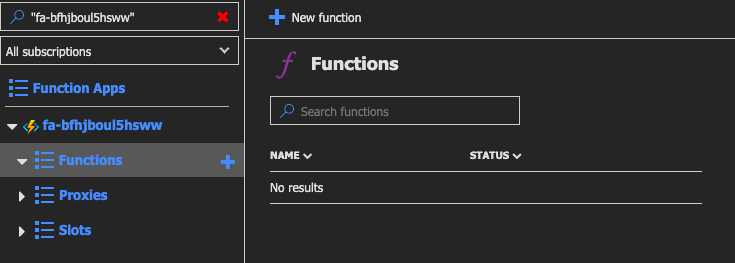
Click + New function.
Select the Azure Event Grid trigger box from the list.
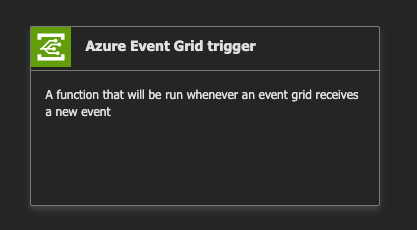
Enter "MyEventGridTrigger" without quotes in the Name box.
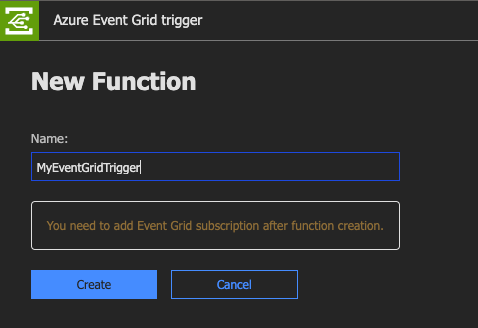
Click Create.
You should see the sample C# script (.csx).
```csharp
#r "Microsoft.Azure.EventGrid"
using Microsoft.Azure.EventGrid.Models;
public static void Run(EventGridEvent eventGridEvent, ILogger log)
{
log.LogInformation(eventGridEvent.Data.ToString());
}
```
## Create the Event Grid Subscription
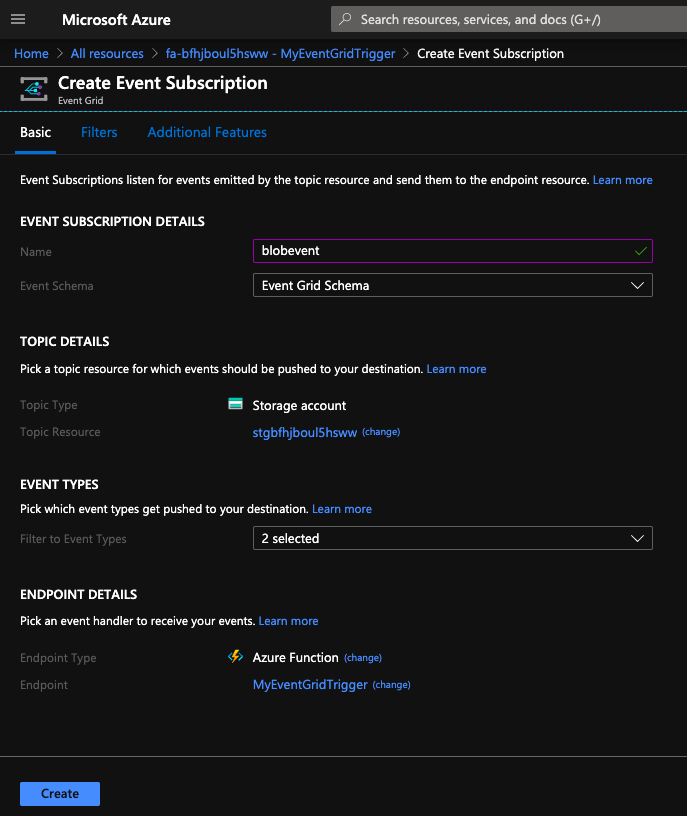
Click Add Event Grid subscription.

In the Name box, enter "blobevent" without quotes.
Use the Topic Types combo box to select Storage Accounts.
Click the Subscription combo box and select the only available option.
Click the Resource Group combo box and select the only available option.
Click the Resource combo box and select the only available option.
Click Create.
## Create a Blob in the Storage Account
At the top of the window, right-click on All resources and open it in a new tab.
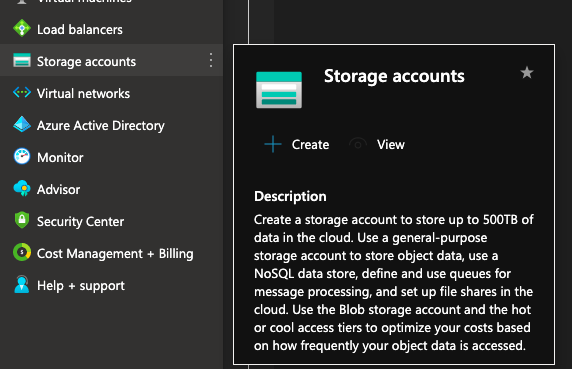
Navigate to the new tab.
Click on the storage account.

In the main pane, click Containers.
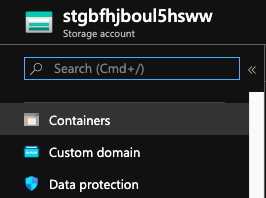
Click + Container.
Enter a Name of "images" without quotes in the box provided.
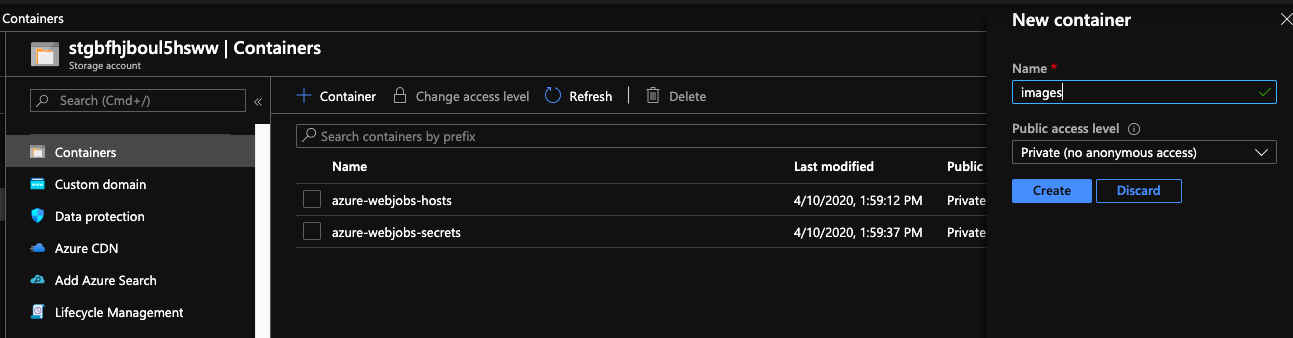
Click OK.
Click the images row.
Click Upload.
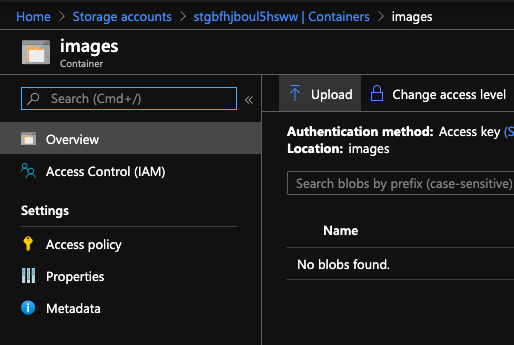
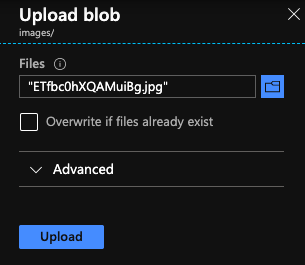
Click the folder button to open the file browser.
Select a local file and then click Open. It is recommended to use a small file.
Click Upload.
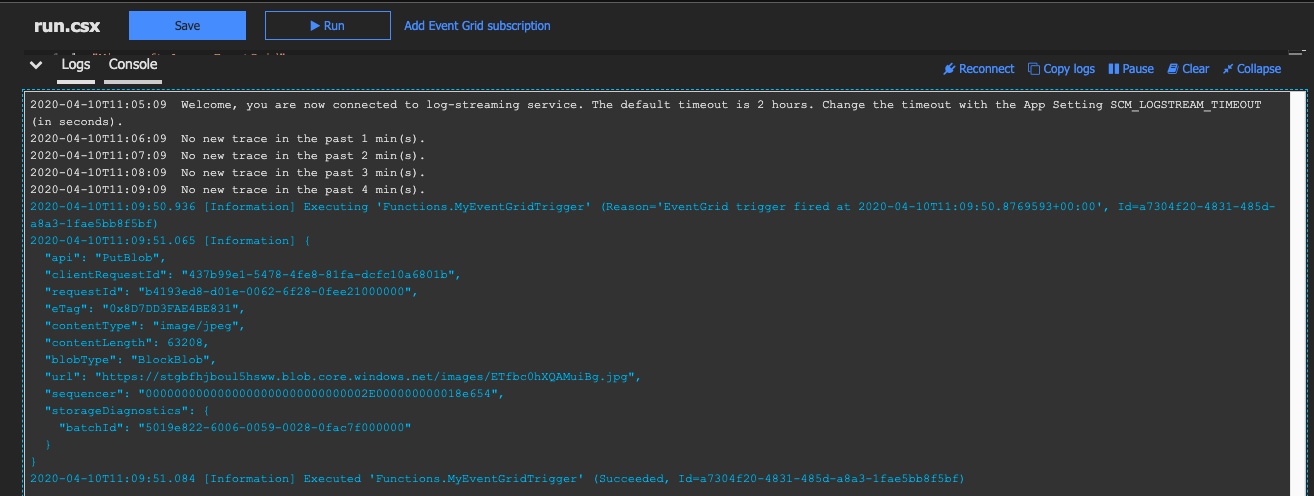
Examine the Function Logs to verify it ran
Return to the Event Grid trigger tab and verify the logs.
Wednesday, 1 January 2020
Copying Files from On-Premises to Azure Storage Accounts using AzCopy
In this tutorial, you will learn how to copy data using AzCopy
- From an on-premise to the Azure Storage Account
- From Azure Storage Account to another Azure Storage Account
- From the Azure Storage Account to an on-premise
# What is AzCopy
AzCopy is a command-line utility that you can use to copy blobs or files to or from a storage account.
# Disable Security Configuration
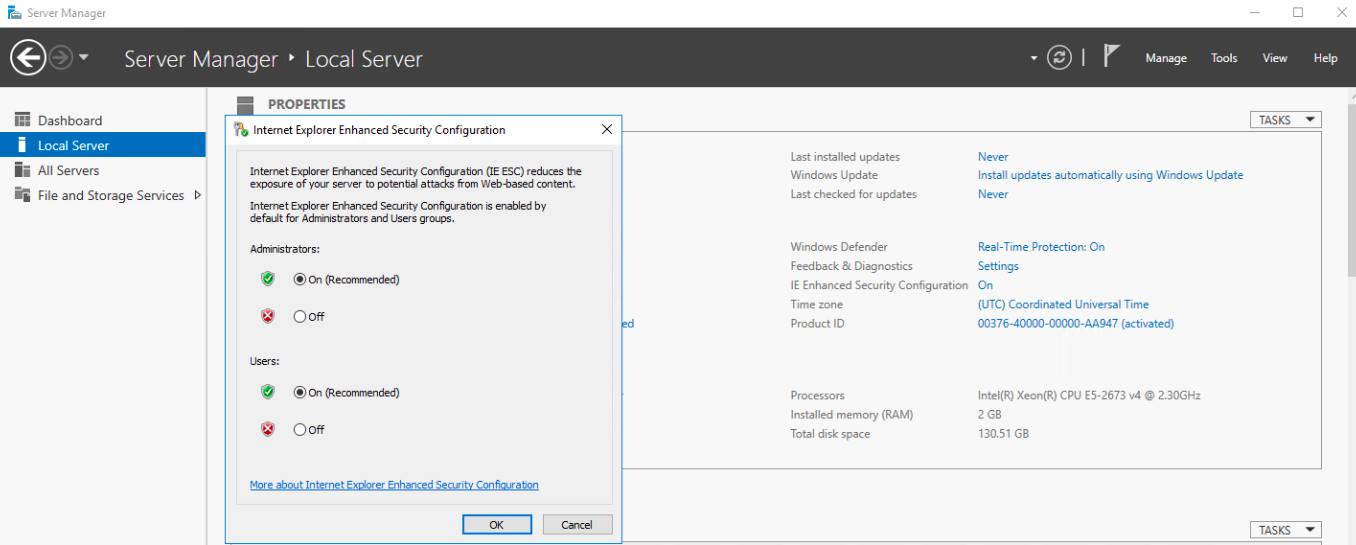
If you are using Virtual Machine, you need to change the security configuration in order to download AzCopy.
Login to your Virtual Machine and Open Server Manager
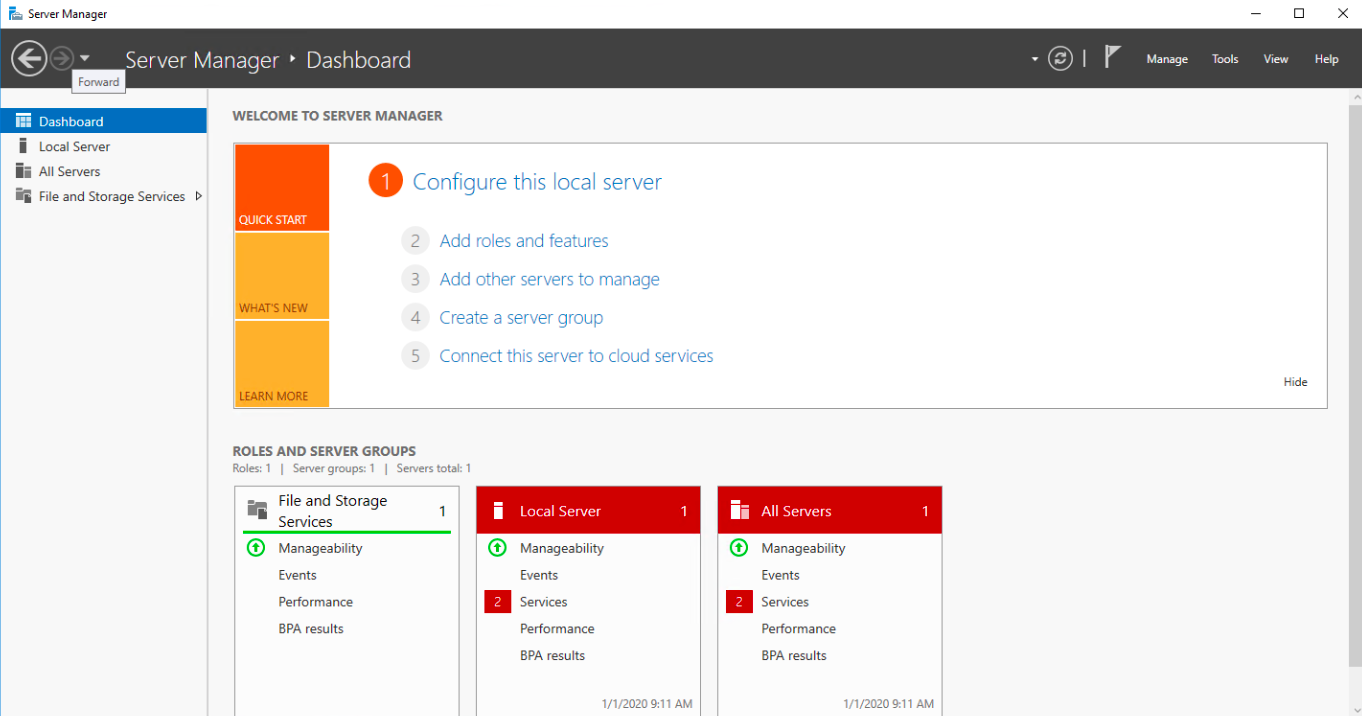
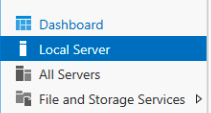
On the left navigation, click Local Server
Click On next to IE Enhanced Security Configuration.
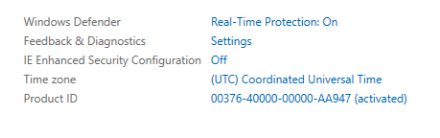
For Administrators, select Off and click OK.
# Download AzCopy
Now we can download AzCopy.
Open the browser and browse https://aka.ms/downloadazcopy
Click Run

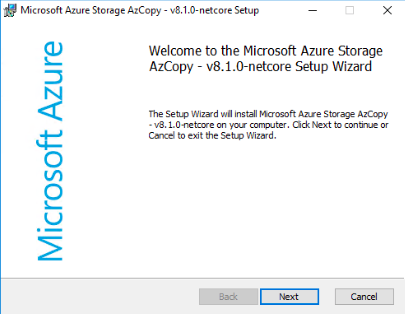
Click Next
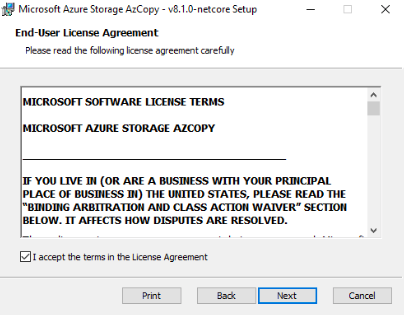
Tick I accept the terms in the License Agreement and click Next
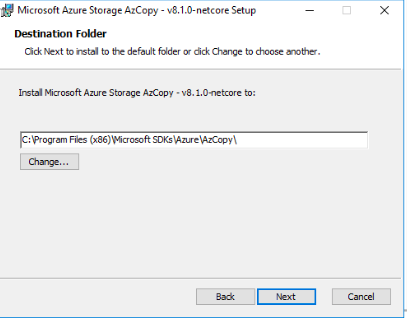
Select a destination folder and click Next
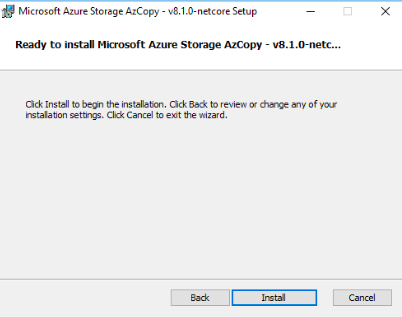
Click Install
# Create Storage Account
> A storage account provides a unique namespace in Azure for your data. Every object that you store in Azure Storage has an address that includes your unique account name. The combination of the account name and the Azure Storage blob endpoint forms the base address for the objects in your storage account.
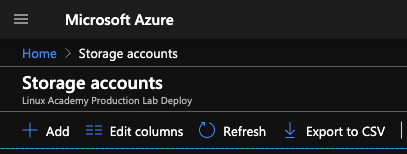
Go to Azure Portal and select Storage Accounts
Click Add
Select a Resource group if it is not populated. Enter the storage account name you want to use and leave other options as default. Click Review and Create.
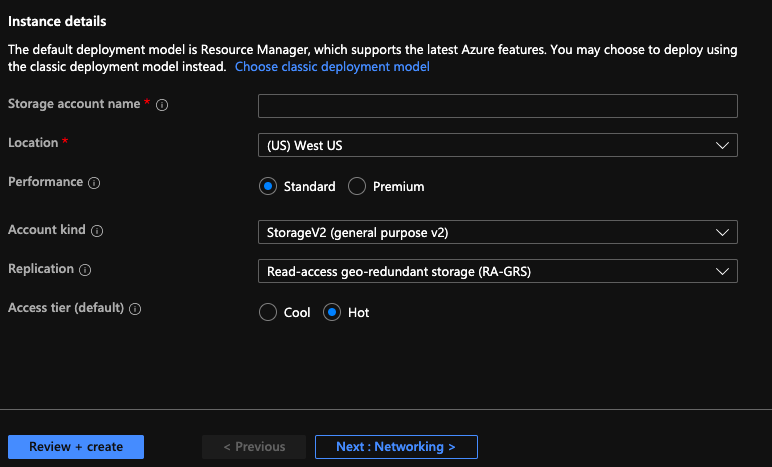
Click Create

Wait for the deployment. It may takes around 30 seconds or longer.
Once it's complete, click Go to Resource
# Create Blob Service Container
We will use Azure Blob storage for storing our data for this demonstration.
> Azure Blob storage is Microsoft's object storage solution for the cloud. Blob storage is optimised for storing massive amounts of unstructured data. Unstructured data is data that doesn't adhere to a particular data model or definition, such as text or binary data.
Under Blob service, click Containers.
> A container organises a set of blobs, similar to a directory in a file system. A storage account can include an unlimited number of containers, and a container can store an unlimited number of blobs.
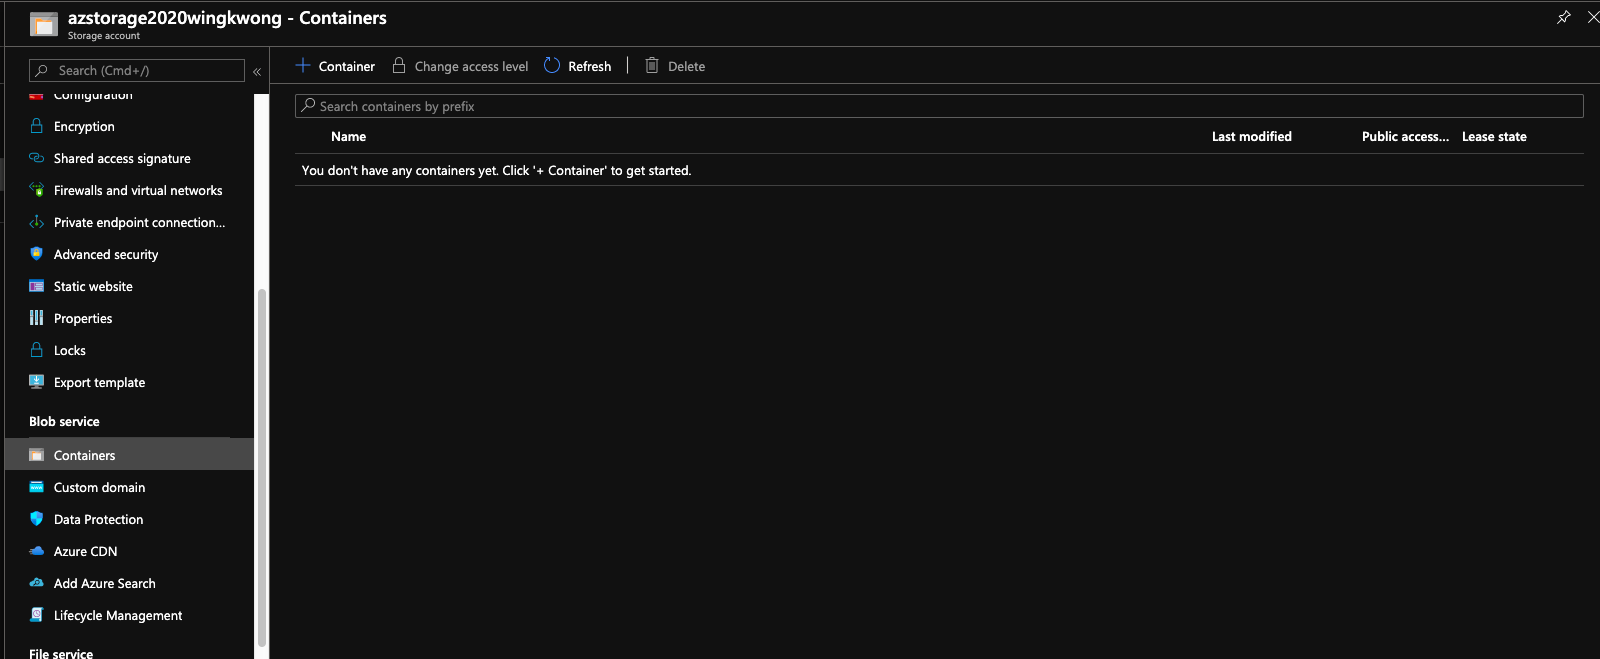
Create a new Container. Enter the name and click ok
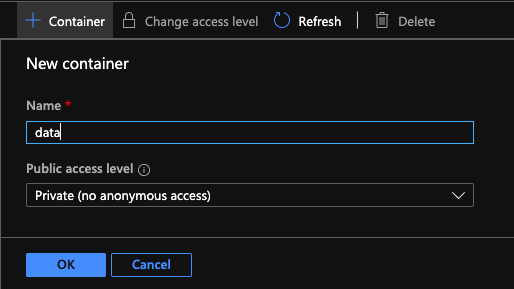
Now let's do the above steps again to create our second Storage Account.

Now we got two Storage Accounts.
# Copy data from an on-premise to Storage Account 1
Go to Storage Account 1, Navigate back to Blob service - Containers. Click the three dot button and click Container properties
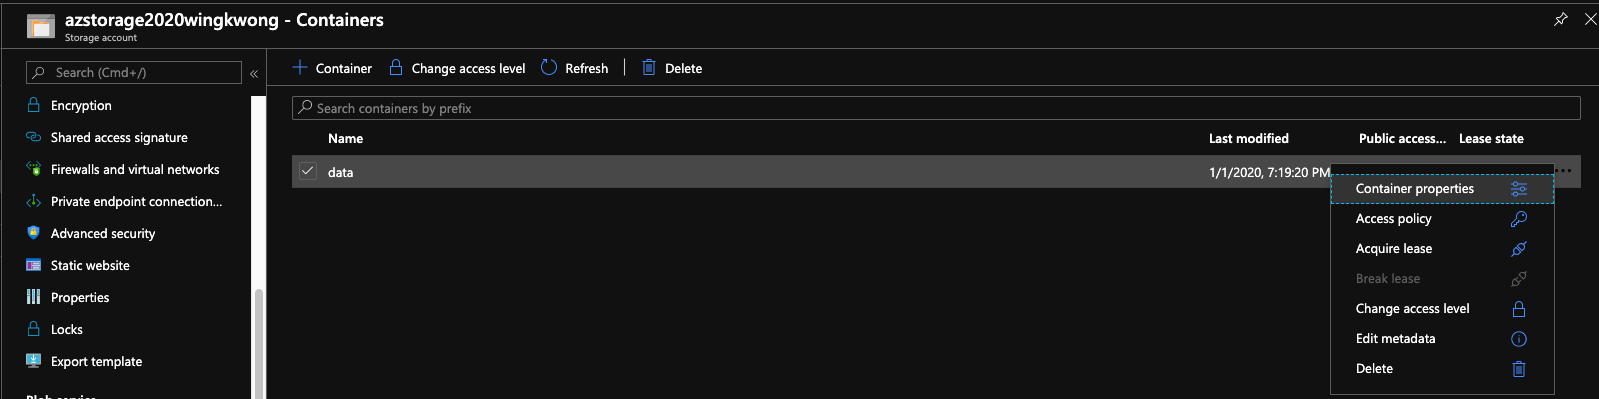
Copy the URL and paste it to a text editor first. We'll use it later.
Since the container is private, we need to access it with the container access key.
Under Settings, you can see ``Access keys``. Copy ``Key`` from key1.
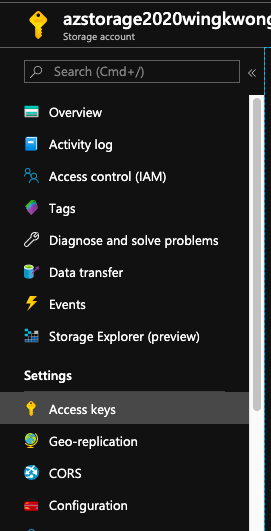
You may wonder why there are two access keys. It is designed for avoiding downtime and for temporary sharing of access keys. For more, please check out [Why does an Azure storage account have two access keys?](https://blogs.msdn.microsoft.com/mast/2013/11/06/why-does-an-azure-storage-account-have-two-access-keys/)
Go back to Virtual Machine, launch Command Prompt and type the below command and click Enter. Remember to replace and with the values you just copied.
For this demonstration, we're going to upload files under ``C:\Windows\System32\drivers``
```
azcopy
/Source:C:\Windows\System32\drivers
/Dest:
/DestKey:
```
You should see similar output
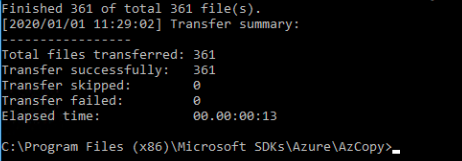
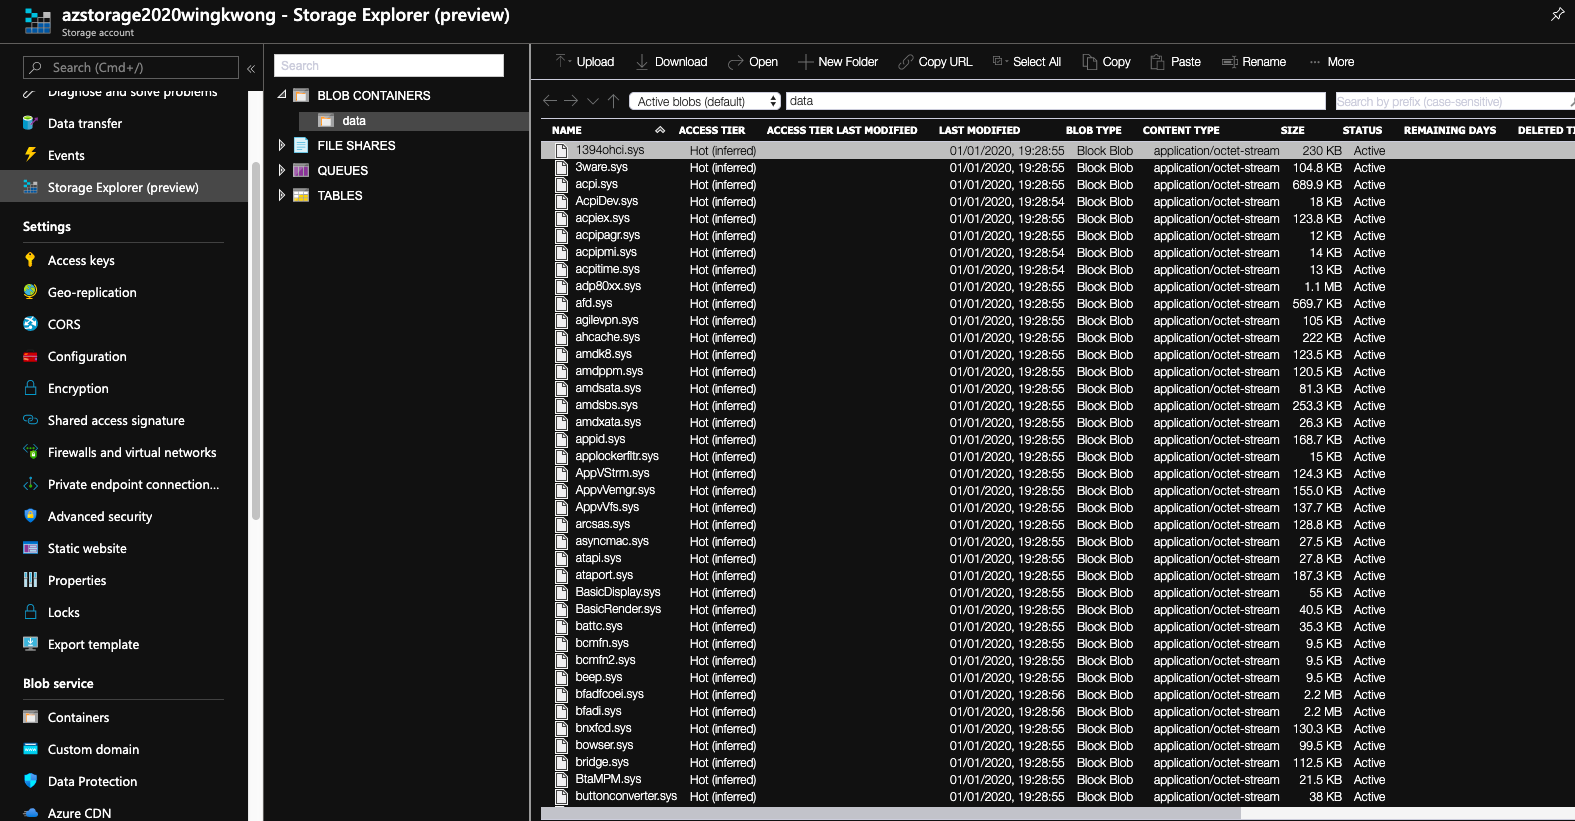
Back to the console, click Storage Explorer(preview). Under BLOB CONTAINERS, click ``data``. You should see the files that you just uploaded using AzCopy.
# Copy data from Storage Account 1 to Storage Account 2
What if you want to copy files from one blob container in a Storage Account to that in another Storage Account?
Similarly, copy the source URL in the second Storage Account.
Go back to Command Prompt,
```
azcopy
/source:
/Dest:
/sourcekey:
/DestKey
/s
```
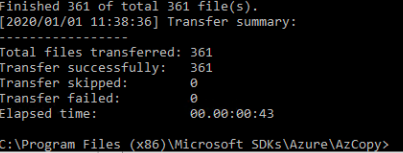
Go back to the console, check Storage Explorer in Storage Account 2.
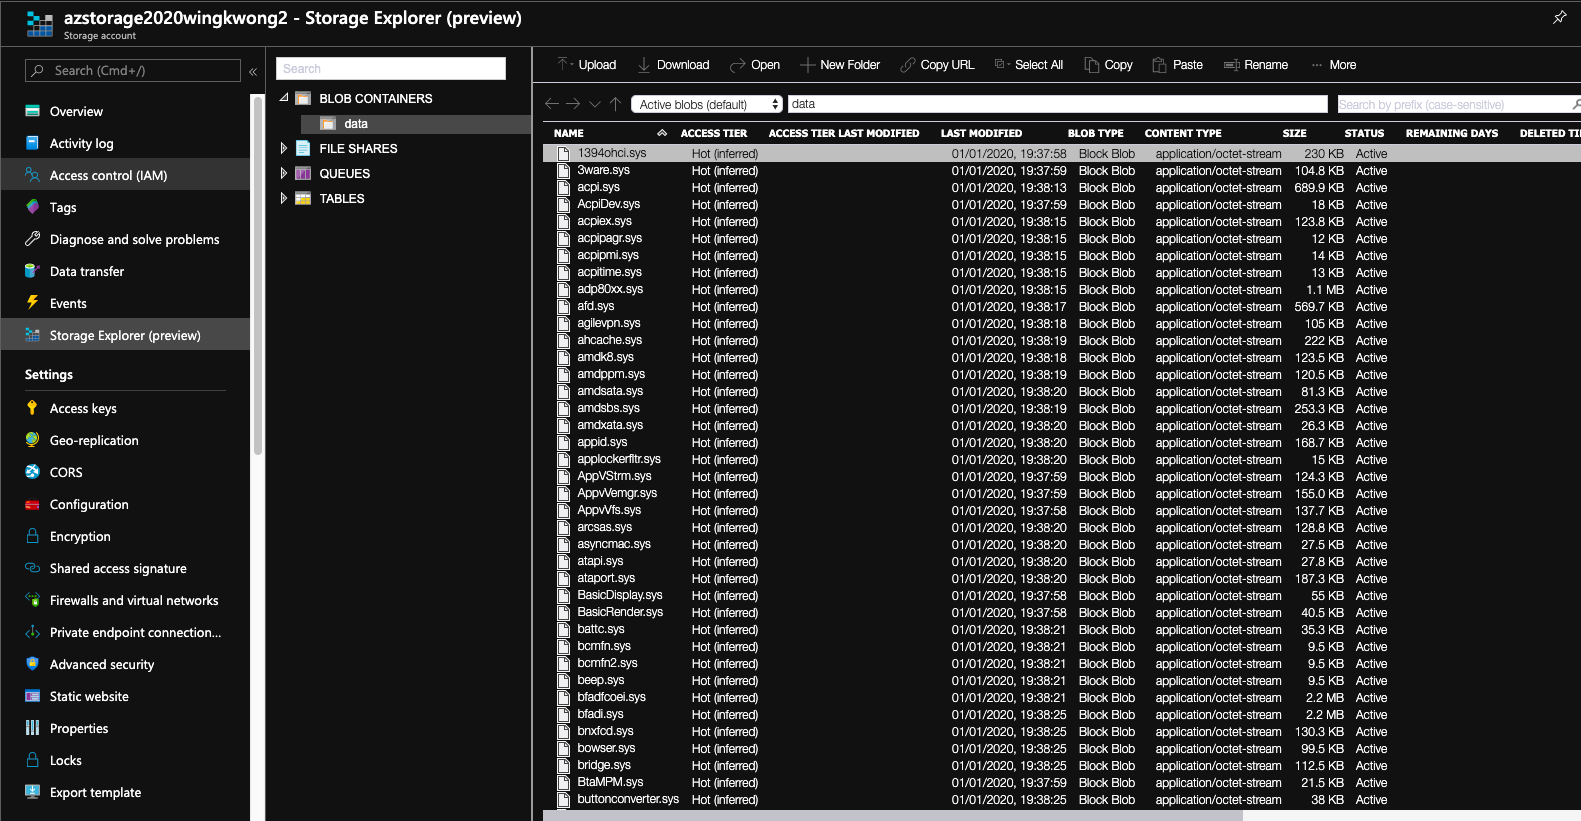
We've successfully copied the files from Storage Account 1 to Storage Account 2.
# Copy data from Storage Account to an on-premise
What if we want to copy the files from Storage Account to our local system? You may already know the answer.
```
azcopy
/source:
/Dest
/SourceKey:
/s
```
That's it.
Subscribe to:
Posts (Atom)