Showing posts with label aws. Show all posts
Showing posts with label aws. Show all posts
Saturday, 3 April 2021
Integrating AWS Systems Manager Parameter Store with a Spring Boot Application
AWS Systems Manager Parameter Store allows you to store data such as passwords, database strings, AMI IDs, etc as parameter values in plain text or encryped data format. It is similar to AWS Secrets Manager. However, if you need built-in password generator and automated secret rotation, then you should go for AWS Secrets Manager.
Supposing you have a parameter name ``/config/demoapp/backend_dev/welcome.message`` and the value is ``TEST123``, you want to take this value from AWS Systems Manager Parameter Store instead of retrieving from ``application.properties``.
To integrate it with a Spring Boot Application, you need to add the dependency in your ``pom.xml``. Make sure you are using Spring Cloud 2.x (Greenwich).
```
org.springframework.cloud
spring-cloud-starter-aws-parameter-store-config
2.1.3.RELEASE
```
Then we need to modify ``bootstrap.properties`` to configure the bootstrap context.
```
aws.paramstore.prefix=
aws.paramstore.name=
aws.paramstore.enabled=
aws.paramstore.profileSeparator=<[a-zA-Z0-9.\-_/]+>
```
For example,
```
aws.paramstore.prefix=/config/demoapp
aws.paramstore.name=backend
aws.paramstore.enabled=true
aws.paramstore.profileSeparator=_
```
In your application.properties
```
aws.region=ap-east-1
spring.application.name=backend
spring.profiles.active=dev
server.port=8080
```
In your Controller, use ``@Value`` annotation to inject the value.
```
@Value("${welcome.message}")
private String message;
```
Setup your AWS credential
```
[default]
aws_access_key_id = your_access_key_id
aws_secret_access_key = your_secret_access_key
```
Follow the below code and run the application to test it
```
package com.demo;
import org.springframework.beans.factory.annotation.Value;
import org.springframework.boot.CommandLineRunner;
import org.springframework.boot.SpringApplication;
import org.springframework.boot.autoconfigure.SpringBootApplication;
import org.springframework.context.ApplicationContext;
import org.springframework.context.annotation.Bean;
@SpringBootApplication
public class StartWebApplication {
@Value("${welcome.message}")
private String message;
public static void main(String[] args) {
SpringApplication.run(StartWebApplication.class, args);
}
@Bean
public CommandLineRunner commandLineRunner(ApplicationContext ctx) {
return args -> {
System.out.println("Message from AWS Parameter Store: " + message);
};
}
}
```
```
Message from AWS Parameter Store: TEST123
```

Friday, 2 April 2021
How to solve RESOURCE:ENI error when creating an ECS task on EC2 server instance?
Supposing there are two ECS services with ``awsvpc`` networking on a ``m5.large`` EC2 instance, each service has two target tasks, and now you are adding a new service with the same settings. It is expected to see the below error under Tasks tab.
service was unable to place a task because no container instance met all of its requirements. The closest matching container-instance XXXXXXXXXXXXXXXXXXXXXXXXXXXXXXXX encountered error "RESOURCE:ENI". For more information, see the Troubleshooting section.
For ``RESOURCE:ENI`` errors, it means that there are not enough elastic network interface (ENI) attachment points in your cluster. By running the below command, you can see that the maximum network interface for each m5 types.
aws ec2 describe-instance-types --filters Name=instance-type,Values=m5.* --query "InstanceTypes[].{Type: InstanceType, MaxENI: NetworkInfo.MaximumNetworkInterfaces, IPv4addr: NetworkInfo.Ipv4AddressesPerInterface}"
For ``m5.large``, the ``maxENI`` is ``3``. From [the official documentation](https://docs.aws.amazon.com/AmazonECS/latest/developerguide/task-networking.html), it states that
Each Amazon ECS task that uses the awsvpc network mode receives its own elastic network interface (ENI), which is attached to the Amazon EC2 instance that hosts it. There is a default limit to the number of network interfaces that can be attached to an Amazon EC2 instance, and the primary network interface counts as one. For example, by default a c5.large instance may have up to three ENIs attached to it. The primary network interface for the instance counts as one, so you can attach an additional two ENIs to the instance. Because each task using the awsvpc network mode requires an ENI, you can typically only run two such tasks on this instance type. For more information on the default ENI limits for each instance type, see IP addresses per network interface per instance type in the Amazon EC2 User Guide for Linux Instances.
Hence, let's do the math.
Since there are two EC2 instances, the maxENI is 3 * 2 = 6 for this ECS cluster. We need 1 primary network interface for each instance, which means now we only have 4 available ENI to use. A service has two target tasks, each task takes 1 ENI. Therefore, two services take 4. Hence, before adding a new service, the available ENI is actually ``6 - 1 - 1 - 2 - 2 = 0``. Therefore, when we try to add a new service, even with one target task, it will still fail as there is no available ENI.
Therer are several solutions.
- You can choose a different instance type. For the number, you can run ``describe-instance-types`` to check it.
- You can change the task count to free some ENI.
- You can raise the limit by using Elastic network interface trunking.
Thursday, 22 October 2020
Getting started with Amazon MSK
Amazon MSK is a fully managed service that enables you to build and run applications that use Apache Kafka to process streaming data.
## Create MSK Cluster
### Via Console
Please check out [here](https://docs.aws.amazon.com/msk/latest/developerguide/getting-started.html)
### Via Amazon CDK
The source code is available [here](https://github.com/wingkwong/aws-playground/tree/master/msk/cdk)
Using CDK, we will create a VPC for Your MSK Cluster with a Single Public Subnet where you can modify ``lib/msk-stack.ts`` to meet your requirements.
```
const vpc = new Vpc(this, 'AWSKafkaVPC', {
cidr: '10.0.0.0/16',
maxAzs: 3,
subnetConfiguration: [
{ cidrMask: 24, name: 'kafka', subnetType: SubnetType.PUBLIC }
]
});
```
and then CDK will provision a MSK Cluster which is also defined in ``lib/msk-stack.ts``.
```
const cluster = new CfnCluster(this, 'mskCluster', {
clusterName: 'AWSKafkaCluster',
kafkaVersion: KafkaVersion.VERSION_2_3_1,
encryptionInfo: {
encryptionInTransit: {
inCluster: true,
clientBroker: 'TLS'
}
},
numberOfBrokerNodes: 2,
brokerNodeGroupInfo: {
clientSubnets: [
vpc.publicSubnets[0].subnetId,
vpc.publicSubnets[1].subnetId,
vpc.publicSubnets[2].subnetId
],
brokerAzDistribution: 'DEFAULT',
instanceType: KafkaInstanceType.T3_SMALL,
storageInfo: {
ebsStorageInfo: {
volumeSize: 10
}
}
}
});
```
Copy .env.sample and paste as .env and update the environment varibles.
```
CDK_DEFAULT_REGION=XXXXXXXXXXXXXXXXXXXX
CDK_DEFAULT_ACCOUNT=XXXXXXXXXXXXXXXXXXX
```
Run ``npm run build`` to compile typescript to js
Run ``cdk deploy`` to deploy this stack to your default AWS account/region
## Create a bastion machine
You need a machine to create a topic that produces and consumes data. Let's create a t2.xlarge instance of Amazon Linux 2 AMI (HVM), SSD Volume Type with Public IP enabled.
## Create Kafka Topic on the bastion machine
```
#!/bin/sh
zookeeperConnectString="" # retrieved from "View Client Information" in Amazon MSK Console
kafka_topic=""
replication_factor=1
partitions=1
# Change directory to Kafka bin
cd ~/kafka_2.13-2.6.0/bin/
# Execute kafka-topics.sh
./kafka-topics.sh --create --zookeeper $zookeeperConnectString --replication-factor $replication_factor --partitions $partitions --topic $kafka_topic
```
## Produce Data
Here's a sample producer
```
from time import sleep
from json import dumps
from kafka import KafkaProducer
# Define Amazon MSK Brokers
brokers=[':9092', ':9092']
# Define Kafka topic to be produced to
kafka_topic=''
# A Kafka client that publishes records to the Kafka cluster
producer = KafkaProducer(bootstrap_servers=brokers, value_serializer=lambda x: dumps(x).encode('utf-8'))
# To produce 1000 numbers from 0 to 999
for num in range(1000):
data = {'number' : num}
producer.send(kafka_topic, value=data)
sleep(1)
```
## Consume Data
Here's a sample consumer
```
from kafka import KafkaConsumer
from json import loads
# Define Amazon MSK Brokers
brokers=[':9092', ':9092']
# Define Kafka topic to be consumed from
kafka_topic=''
# A Kafka client that consumes records from a Kafka cluster
consumer = KafkaConsumer(
kafka_topic,
bootstrap_servers=brokers,
auto_offset_reset='earliest',
enable_auto_commit=True,
group_id='my-group',
value_deserializer=lambda x: loads(x.decode('utf-8')))
for message in consumer:
message = message.value
print('{}'.format(message))
```
Saturday, 10 October 2020
Writing middlewares using Middy for AWS Lambda
[Middy](https://github.com/middyjs/middy) is the stylish Node.js middleware engine for AWS Lambda. It allows us to focus on the strict business logic of your Lambda and attach common modular elements such as authentication, authorization, validation etc.
To install middy via NPM
```
npm install --save @middy/core
```
Middy supports multiple middlewares, we can create a new folder called ``middlewares`` and define the middlewares there.
Let's create ``middlewares/index.js``. In this file, it includes other middlewares. You can treat it as an entry point of all middlewares.
```js
const middy = require('@middy/core')
const middleware1 = require("./middleware1");
const middleware2 = require("./middleware2");
const middleware3 = require("./middleware3");
const middlewares = [
middleware1(),
middleware2(),
middleware3()
];
module.exports = { middlewares };
```
For example, if you wanna update your handler header for each Lambda function, you can create a middleware like
```js
const NEW_RESPONSE_HEADER = {
"Access-Control-Allow-Origin": "*",
"Access-Control-Allow-Credentials": true,
"Access-Control-Allow-Methods": "POST,GET",
"Access-Control-Allow-Headers": "*",
"Strict-Transport-Security": "max-age= 63072000",
"X-Content-Type-Options": "nosniff",
"X-Frame-Options": "DENY",
"X-XSS-Protection": "1; mode=block",
"Referrer-Policy": "same-origin",
};
const updateHandlerHeaders = (handler) => {
if (!handler.response) {
handler.response = {};
}
handler.response.headers = {
...RESPONSE_SECURITY_HEADER,
...handler.response.headers,
};
};
const headers = () => ({
before: async (handler) => updateHandlerHeaders(handler),
after: async (handler) => updateHandlerHeaders(handler),
onError: async (handler) => updateHandlerHeaders(handler),
});
module.exports = headers;
```
In your ``handle.js``, import core and your middlewares
```js
const middy = require('@middy/core')
const { middlewares }= require("../middleware");
```
Then define your business logic
```js
const func = (event, context, callback) => {
const { data } = event.body
// business logic goes here
return callback(null, { result: 'success', message: 'hello world'})
}
const handler = middy(func).use(middlewares)
```
Middlewares have two phases - ``before`` and ``after``. Therefore, the order does matter. In the previous example, there are three middlewares, the expected order of execution is
```
middleware1 (before)
middleware2 (before)
middleware3 (before)
handler
middleware3 (after)
middleware2 (after)
middleware1 (after)
```
By using Middy, we can address some common concerns like setting CORS headers and keep our business logic clean. For more details, please check out [here](https://github.com/middyjs/middy).
Sunday, 13 September 2020
Loading environment variables into Serverless
Storing config in the environment is one of the factors in The Twelve-Factor App. We do not want to store our environment variables in our code.
Normally the environment variables is stored in a file called ``.env`` in the root of the application and this file should be added to ``.gitignore`` so that no one can see the values. You may leave a file called ``.env.sample`` to let other team members to know what keys should be included.
Each line is composed in ``KEY=VALUE`` format. Blank lines and lines beginning with ``#`` are ignored.
Example:
```
AWS_REGION=ap-east-1
```
In order to load the environment variables so that the Lambda function can run successfully , we need to use ``serverless-dotenv-plugin`` to do so.
To install it, simply run
```
npm i -D serverless-dotenv-plugin
```
Then, add the following in your ``serverless.yml``
```
plugins:
- serverless-dotenv-plugin
```
Now you can include your environment variables in your serverless config by referencing them as ``${env:VAR_NAME}``.
```
region: ${env:AWS_REGION}
```
These variables are also injected into lambda functions so that you can reference them as ``process.env.SOMETHING``.
Friday, 4 September 2020
Streaming Data to Amazon S3 Using Kafka Connect S3
There is not a direct way to stream data to Amazon S3. You need a S3 Connector. The following demostration is performed in ``ap-east-1`` region and the Apache Kafka version is ``2.2.1``.
## Prerequisites
You should have
- MSK Cluster
- Client Machine
- Apache Kafka topic
- Producer
- S3 bucket
## Installation
Since we are not using Confluent Cloud, we need to download and install it manually.
Go to [https://www.confluent.io/hub/confluentinc/kafka-connect-s3](https://www.confluent.io/hub/confluentinc/kafka-connect-s3) to download Kafka Connect S3
Extract the ZIP file contents and copy the contents to the desired location. For example, you can create a directory named ``/home/ec2-user/kafka-plugins`` then copy the connector plugin contents.
## Configuration
Add this to the plugin path in your Connect properties file ``connect.properties``
```
plugin.path=/home/ec2-user/kafka-plugins/
```
Update ``bootstrap.servers``
```
bootstrap.servers=X-X.XXXXXXXXXXX-XX.XXXXXX.XX.kafka.ap-east-1.amazonaws.com:9092,X-X.XXXXXXXXXXX-XX.XXXXXX.XX.kafka.ap-east-1.amazonaws.com:9092
```
Update ``topic``
```
topic=<YOUR_KAFKA_TOPIC>
```
Define desired converter key and value. By default the value is empty, if you don't specify them, you will get ``JDBC Sink: JsonConverter with schemas.enable requires "schema" and "payload" fields and may not contain additional fields.`` error.
```
key.converter=org.apache.kafka.connect.storage.StringConverter
key.converter.schemas.enable=false
value.converter=org.apache.kafka.connect.storage.StringConverter
value.converter.schemas.enable=false
```
If you want to convert the data to parquet format. You must use the AvroConverter with ParquetFormat. Attempting to use other Converter will result in a runtime exception.
```
key.converter=io.confluent.connect.avro.AvroConverter
key.converter.schema.registry.url=http://10.0.0.0:8081
value.converter=io.confluent.connect.avro.AvroConverter
value.converter.schema.registry.url=http://10.0.0.0:8081
```
Then, define sink connector properties. A sample properties file is available under ``etc/`` in the zip.
```
name=s3-sink
connector.class=io.confluent.connect.s3.S3SinkConnector
tasks.max=1
topics=<YOUR_KAFKA_TOPIC>
s3.region=ap-east-1
s3.bucket.name=<YOUR_BUCKET>
s3.part.size=5242880
flush.size=1
storage.class=io.confluent.connect.s3.storage.S3Storage
format.class=io.confluent.connect.s3.format.avro.AvroFormat
partitioner.class=io.confluent.connect.storage.partitioner.DefaultPartitioner
schema.compatibility=NONE
```
With ``flush.size`` > 1 and ``value.converter`` = ``JsonConverter`` , you may get ``org.apache.avro.AvroRuntimeException: already open`` error.
In order to contacting S3 successfully, you need to provide AWS credentials to authenticate for the S3 connector.
```
export AWS_ACCESS_KEY_ID=foo
export AWS_SECRET_ACCESS_KEY=bar
```
## Producing the data
Here's a sample producer
```py
from time import sleep
from json import dumps
from kafka import KafkaProducer
# Define Amazon MSK Brokers
brokers=['<YOUR_MSK_BROKER_1>:9092', '<YOUR_MSK_BROKER_2>:9092']
# Define Kafka topic to be produced to
kafka_topic='<YOUR_KAFKA_TOPIC>'
# A Kafka client that publishes records to the Kafka cluster
producer = KafkaProducer(bootstrap_servers=brokers, value_serializer=lambda x: dumps(x).encode('utf-8'))
# To produce 1000 numbers from 0 to 999
for num in range(1000):
data = {'number' : num}
producer.send(kafka_topic, value=data)
sleep(1)
```
Start to produce data to the topic
```
python3 ./producer.py
```
## Streaming data to S3
Run
```
~/kafka_2.13-2.6.0/bin/connect-standalone.sh ~/kafka-plugins/confluentinc-kafka-connect-s3-5.5.1/etc/connector.properties ~/kafka-plugins/confluentinc-kafka-connect-s3-5.5.1/etc/s3-sink.properties
```
## Result
You should see those objects with keys:
```
topics/<YOUR_KAFKA_TOPIC>/partition=0/<YOUR_KAFKA_TOPIC>+0+0000000000.avro
topics/<YOUR_KAFKA_TOPIC>/partition=0/<YOUR_KAFKA_TOPIC>+0+0000000001.avro
topics/<YOUR_KAFKA_TOPIC>/partition=0/<YOUR_KAFKA_TOPIC>+0+0000000002.avro
...
```
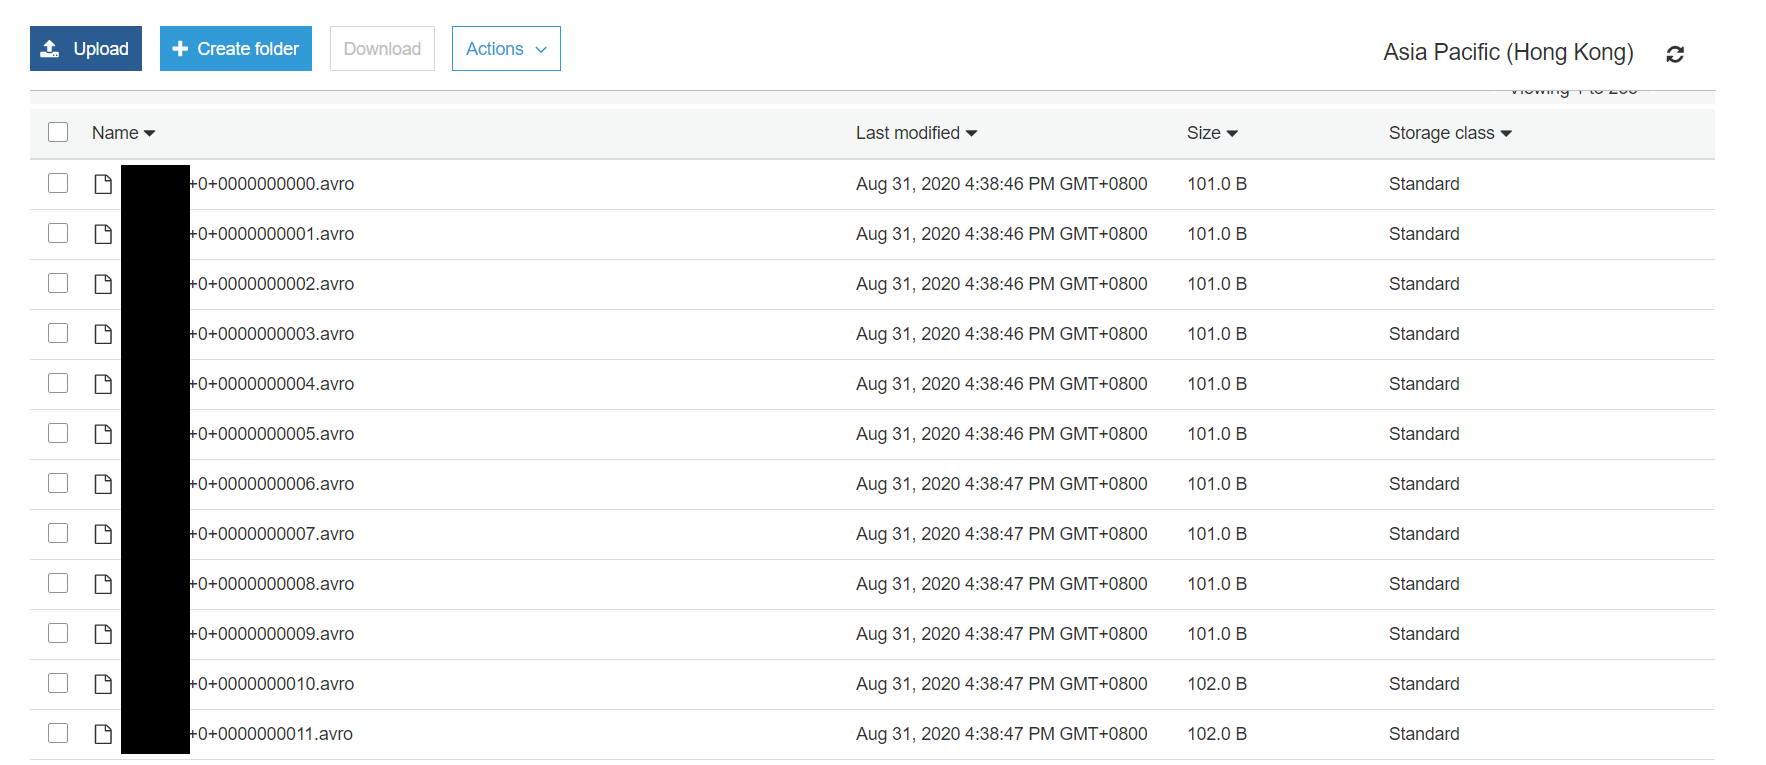
Download the first one verify. You can either use Avor Viewer to view it and export it as json
```json
[
{
"boolean": null,
"bytes": null,
"double": null,
"float": null,
"int": null,
"long": null,
"string": null,
"array": null,
"map": [
{
"key": {
"boolean": null,
"bytes": null,
"double": null,
"float": null,
"int": null,
"long": null,
"string": "number",
"array": null,
"map": null
},
"value": {
"boolean": null,
"bytes": null,
"double": null,
"float": null,
"int": null,
"long": 0,
"string": null,
"array": null,
"map": null
}
}
]
}
]
```
or use ``avro-tools-1.7.7.jar`` ([download here](http://mirror.metrocast.net/apache/avro/avro-1.7.7/java/avro-tools-1.7.7.jar)) to convert it back to json
```
java -jar avro-tools-1.7.7.jar tojson <YOUR_KAFKA_TOPIC>+0+0000000000.avro
```
```json
{"number":0}
```
If you want multiple records inside one .avro file, increase the value of ``flush.size``.
## Common issues
NoClassDefFoundError is thrown when using ``io.confluent.connect.s3.format.parquet.ParquetFormat ``
`` java.lang.NoClassDefFoundError: com/google/common/base/Preconditions``
Solution
Download the missing jar [guava-17.0.jar](https://www.findjar.com/jar/com/google/guava/guava/17.0/guava-17.0.jar.html) and add it back to ``/lib``
## Useful links
- [Amazon S3 Sink Connector for Confluent Platform](https://docs.confluent.io/current/connect/kafka-connect-s3/index.html)
- [Avor Viewer](https://zymeworks.github.io/avro-viewer/)
Getting started with Amazon Managed Streaming for Apache Kafka (Amazon MSK)
Amazon MSK is a fully managed service that enables you to build and run applications that use Apache Kafka to process streaming data.
## Create MSK Cluster
- [Via Console](https://docs.aws.amazon.com/msk/latest/developerguide/getting-started.html)
- [Via Amazon CDK](https://github.com/wingkwong/aws-playground/tree/master/msk/cdk)
## Create a Client Machine
- Create an EC2 instance to create a topic that produces and consumes data as you cannot access Amazon MSK directly from a local machine. The brokers and zookeeper connect string are private.
- Download [Apache Kafka](https://kafka.apache.org/downloads)
- Upload to ``~/`` and unzip it. Example: ``~/kafka_2.13-2.6.0/``
- Install ``python3`` by running ``sudo yum install -y python3``
- Install ``java`` by running ``sudo yum install java-1.8.0-openjdk``
- Install ``kafka-python`` by running ``sudo pip install kafka-python``
## Create Kafka Topic
Connect to the client machine
```bash
#!/bin/sh
zookeeperConnectString="<YOUR_ZOOKEEPER_CONNECT_STRING>" # retrieved from "View Client Information" in Amazon MSK Console
kafka_topic="<YOUR_KAFKA_TOPIC>"
replication_factor=1
partitions=1
# Change directory to Kafka bin
cd ~/kafka_2.13-2.6.0/bin/
# Execute kafka-topics.sh
./kafka-topics.sh --create --zookeeper $zookeeperConnectString --replication-factor $replication_factor --partitions $partitions --topic $kafka_topic
```
## Produce Data
```py
from time import sleep
from json import dumps
from kafka import KafkaProducer
# Define Amazon MSK Brokers
brokers=['<YOUR_MSK_BROKER_1>:9092', '<YOUR_MSK_BROKER_2>:9092']
# Define Kafka topic to be produced to
kafka_topic='<YOUR_KAFKA_TOPIC>'
# A Kafka client that publishes records to the Kafka cluster
producer = KafkaProducer(bootstrap_servers=brokers, value_serializer=lambda x: dumps(x).encode('utf-8'))
# To produce 1000 numbers from 0 to 999
for num in range(1000):
data = {'number' : num}
producer.send(kafka_topic, value=data)
sleep(1)
```
## Consume Data
```py
from kafka import KafkaConsumer
from json import loads
# Define Amazon MSK Brokers
brokers=['<YOUR_MSK_BROKER_1>:9092', '<YOUR_MSK_BROKER_2>:9092']
# Define Kafka topic to be consumed from
kafka_topic='<YOUR_KAFKA_TOPIC>'
# A Kafka client that consumes records from a Kafka cluster
consumer = KafkaConsumer(
kafka_topic,
bootstrap_servers=brokers,
auto_offset_reset='earliest',
enable_auto_commit=True,
group_id='my-group',
value_deserializer=lambda x: loads(x.decode('utf-8')))
for message in consumer:
message = message.value
print('{}'.format(message))
```
## Common Issues
Thrown the following error while creating a Kafka topic
```
Exception in thread "main" kafka.zookeeper.ZooKeeperClientTimeoutException: Timed out waiting for connection while in state: CONNECTING
at kafka.zookeeper.ZooKeeperClient.waitUntilConnected(ZooKeeperClient.scala:262)
at kafka.zookeeper.ZooKeeperClient.<init>(ZooKeeperClient.scala:119)
at kafka.zk.KafkaZkClient$.apply(KafkaZkClient.scala:1865)
at kafka.admin.TopicCommand$ZookeeperTopicService$.apply(TopicCommand.scala:360)
at kafka.admin.TopicCommand$.main(TopicCommand.scala:55)
at kafka.admin.TopicCommand.main(TopicCommand.scala)
```
Solution:
Check Securty Group to make sure that the inbound is allowed.
Wednesday, 2 September 2020
Building a CI/CD pipeline for a SAM application written in Go
This tutorial shows how to build a CI/CD Pipeline for a SAM Application written in Go with CodeCommit, CodeBuild, CodePipeline, CloudFormation and the AWS CDK.
## Prerequisites
You need to have an AWS account and installed and configured AWS CLI and Go.
## Initialize The Hello World SAM project
- Run ``sam init``
- Type 1 to select AWS Quick Start Templates
- Choose ``go1.x`` for runtime
- Leave default ``sam-app`` for project name
- Type 1 to select the Hello World Example
- Verify if ``sam-app`` have been created
When deploying this project, it will create an API Gateway, a Lambda function and a IAM Role. They are defined in ``template.yaml``.
```
HelloWorldAPI:
Description: "API Gateway endpoint URL for Prod environment for First Function"
Value: !Sub "https://${ServerlessRestApi}.execute-api.${AWS::Region}.amazonaws.com/Prod/hello/"
HelloWorldFunction:
Description: "First Lambda Function ARN"
Value: !GetAtt HelloWorldFunction.Arn
HelloWorldFunctionIamRole:
Description: "Implicit IAM Role created for Hello World function"
Value: !GetAtt HelloWorldFunctionRole.Arn
```
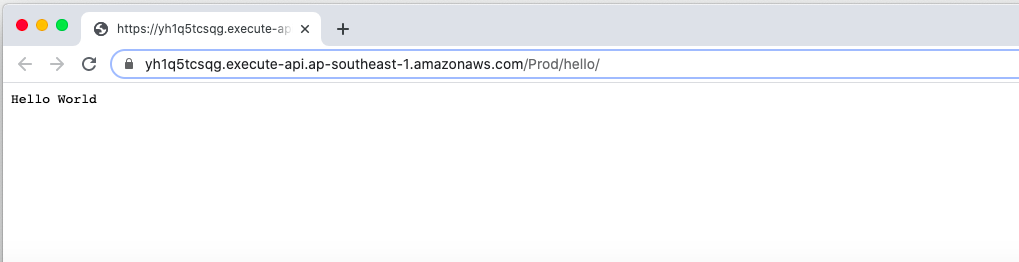
The Lambda function simply prints out ``Hello World``.
```
func handler(request events.APIGatewayProxyRequest) (events.APIGatewayProxyResponse, error) {
return events.APIGatewayProxyResponse{
Body: "Hello World!",
StatusCode: 200,
}, nil
}
```
## Run SAM Application Locally
SAM allows your to run your serverless application locally for your development and testing by running the following command. The default local port number is ``3000``. If you are running your app on Cloud9 workspace, you need to override it with ``--port`` as Cloud 9 only support 8080, 8081 or 8082 in the local browser.
```
sam local start-api --port 8080
```
You should see
```
Mounting HelloWorldFunction at http://127.0.0.1:8080/hello [GET]
You can now browse to the above endpoints to invoke your functions. You do not need to restart/reload SAM CLI while working on your functions, changes will be reflected instantly/automatically. You only need to restart SAM CLI if you update your AWS SAM template
* Running on http://127.0.0.1:8080/ (Press CTRL+C to quit)
```
Let's verify it
```
curl http://127.0.0.1:8080/hello
```
You should see
```
Hello World
```
## Deploy to AWS
Run ``sam build`` to build the project.
```
sam build
```
A hidden directory has been created by SAM
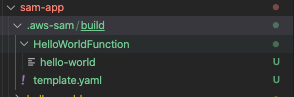
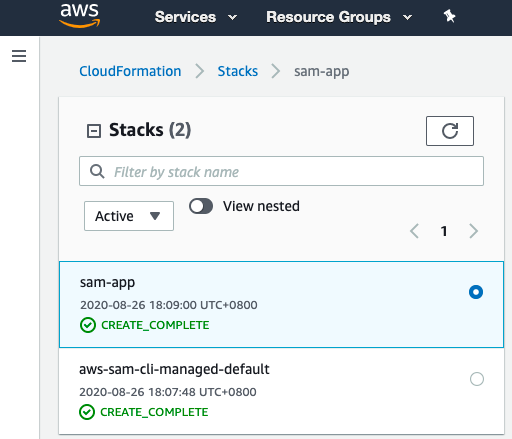
Run ``sam deploy`` to deploy your application. SAM will createa a CloudFormation stack and you can have a guided interactive mode by specifying ``--guided`` parameter.
```
sam deploy --guided
```
Configuring SAM deploy
```
Looking for samconfig.toml : Not found
Setting default arguments for 'sam deploy'
=========================================
Stack Name [sam-app]:
AWS Region [us-east-1]: ap-southeast-1
#Shows you resources changes to be deployed and require a 'Y' to initiate deploy
Confirm changes before deploy [y/N]: y
#SAM needs permission to be able to create roles to connect to the resources in your template
Allow SAM CLI IAM role creation [Y/n]: Y
HelloWorldFunction may not have authorization defined, Is this okay? [y/N]: Y
Save arguments to samconfig.toml [Y/n]: Y
Looking for resources needed for deployment: Not found.
Creating the required resources...
Successfully created!
Managed S3 bucket: aws-sam-cli-managed-default-samclisourcebucket-542w25h26du5
A different default S3 bucket can be set in samconfig.toml
Saved arguments to config file
Running 'sam deploy' for future deployments will use the parameters saved above.
The above parameters can be changed by modifying samconfig.toml
Learn more about samconfig.toml syntax at
https://docs.aws.amazon.com/serverless-application-model/latest/developerguide/serverless-sam-cli-config.html
Uploading to sam-app/9a42d6084bb2aaa2f7eaf7b2201e115a 5094701 / 5094701.0 (100.00%)
```
Deploying with following values
```
Stack name : sam-app
Region : ap-southeast-1
Confirm changeset : True
Deployment s3 bucket : aws-sam-cli-managed-default-samclisourcebucket-542w25h26du5
Capabilities : ["CAPABILITY_IAM"]
Parameter overrides : {}
```
Initiating deployment
```
HelloWorldFunction may not have authorization defined.
Uploading to sam-app/21a49766581b625811536c904121d4ba.template 1154 / 1154.0 (100.00%)
Waiting for changeset to be created..
CloudFormation stack changeset
---------------------------------------------------------------------------------------------------------------------------------------------------------------------------
Operation LogicalResourceId ResourceType
---------------------------------------------------------------------------------------------------------------------------------------------------------------------------
+ Add HelloWorldFunctionCatchAllPermissionProd AWS::Lambda::Permission
+ Add HelloWorldFunctionRole AWS::IAM::Role
+ Add HelloWorldFunction AWS::Lambda::Function
+ Add ServerlessRestApiDeployment47fc2d5f9d AWS::ApiGateway::Deployment
+ Add ServerlessRestApiProdStage AWS::ApiGateway::Stage
+ Add ServerlessRestApi AWS::ApiGateway::RestApi
---------------------------------------------------------------------------------------------------------------------------------------------------------------------------
Changeset created successfully. arn:aws:cloudformation:ap-southeast-1:XXXXXXXXXXX:changeSet/samcli-deploy1598436540/ea868c52-9c9a-4d27-a008-ef6157f65b9b
```
Previewing CloudFormation changeset before deployment
```
Deploy this changeset? [y/N]: y
2020-08-26 18:09:42 - Waiting for stack create/update to complete
CloudFormation events from changeset
-----------------------------------------------------------------------------------------------------------------------------------------------------------------------------
ResourceStatus ResourceType LogicalResourceId ResourceStatusReason
-----------------------------------------------------------------------------------------------------------------------------------------------------------------------------
CREATE_IN_PROGRESS AWS::IAM::Role HelloWorldFunctionRole -
CREATE_IN_PROGRESS AWS::IAM::Role HelloWorldFunctionRole Resource creation Initiated
CREATE_COMPLETE AWS::IAM::Role HelloWorldFunctionRole -
CREATE_IN_PROGRESS AWS::Lambda::Function HelloWorldFunction -
CREATE_IN_PROGRESS AWS::Lambda::Function HelloWorldFunction Resource creation Initiated
CREATE_COMPLETE AWS::Lambda::Function HelloWorldFunction -
CREATE_IN_PROGRESS AWS::ApiGateway::RestApi ServerlessRestApi -
CREATE_IN_PROGRESS AWS::ApiGateway::RestApi ServerlessRestApi Resource creation Initiated
CREATE_COMPLETE AWS::ApiGateway::RestApi ServerlessRestApi -
CREATE_IN_PROGRESS AWS::Lambda::Permission HelloWorldFunctionCatchAllPermissionProd Resource creation Initiated
CREATE_IN_PROGRESS AWS::ApiGateway::Deployment ServerlessRestApiDeployment47fc2d5f9d -
CREATE_IN_PROGRESS AWS::Lambda::Permission HelloWorldFunctionCatchAllPermissionProd -
CREATE_IN_PROGRESS AWS::ApiGateway::Deployment ServerlessRestApiDeployment47fc2d5f9d Resource creation Initiated
CREATE_COMPLETE AWS::ApiGateway::Deployment ServerlessRestApiDeployment47fc2d5f9d -
CREATE_IN_PROGRESS AWS::ApiGateway::Stage ServerlessRestApiProdStage -
CREATE_IN_PROGRESS AWS::ApiGateway::Stage ServerlessRestApiProdStage Resource creation Initiated
CREATE_COMPLETE AWS::ApiGateway::Stage ServerlessRestApiProdStage -
CREATE_COMPLETE AWS::Lambda::Permission HelloWorldFunctionCatchAllPermissionProd -
CREATE_COMPLETE AWS::CloudFormation::Stack sam-app -
-----------------------------------------------------------------------------------------------------------------------------------------------------------------------------
CloudFormation outputs from deployed stack
-----------------------------------------------------------------------------------------------------------------------------------------------------------------------------
Outputs
-----------------------------------------------------------------------------------------------------------------------------------------------------------------------------
Key HelloWorldFunctionIamRole
Description Implicit IAM Role created for Hello World function
Value arn:aws:iam::XXXXXXXXXXX:role/sam-app-HelloWorldFunctionRole-CXSDBGUHPMFS
Key HelloWorldAPI
Description API Gateway endpoint URL for Prod environment for First Function
Value https://yh1q5tcsqg.execute-api.ap-southeast-1.amazonaws.com/Prod/hello/
Key HelloWorldFunction
Description First Lambda Function ARN
Value arn:aws:lambda:ap-southeast-1:XXXXXXXXXXX:function:sam-app-HelloWorldFunction-13LO5HE0Y7BKS
-----------------------------------------------------------------------------------------------------------------------------------------------------------------------------
Successfully created/updated stack - sam-app in ap-southeast-1
```
To verifiy it, click the HelloWorldApi Value in sam-app Output.
## Building the pipeline
With a continous delivery pipeline using AWS Code Pipeline, we can automate the build, package, and deploy commands. Other services will be used such as CodeCommit, CloudFormation and the AWS CDK.
The general flow would be like
```
Developer -- pushes changes --> Git Repository -- build --> deploy --> AWS
```
## Setting up CodeCommit
Let's create a CodeCommit repository
```
aws codecommit create-repository --repository-name sam-app
```
You should see the following output
```json
{
"repositoryMetadata": {
"accountId": "XXXXXXXXXXXX",
"repositoryId": "XXXXXXXX-XXXX-XXXX-XXXX-XXXXXXXXXXXX",
"repositoryName": "sam-app",
"lastModifiedDate": "2020-08-26T18:26:36.257000+08:00",
"creationDate": "2020-08-26T18:26:36.257000+08:00",
"cloneUrlHttp": "https://git-codecommit.ap-southeast-1.amazonaws.com/v1/repos/sam-app",
"cloneUrlSsh": "ssh://git-codecommit.ap-southeast-1.amazonaws.com/v1/repos/sam-app",
"Arn": "arn:aws:codecommit:ap-southeast-1:XXXXXXXXXXXX:sam-app"
}
}
```
To configurate git credentials
```
git config --global credential.helper '!aws codecommit credential-helper $@'
git config --global credential.UseHttpPath true
git config --global user.name "wingkwong"
git config --global user.email "wingkwong.code@gmail.com"
```
Go to the root directory of your SAM project and run
```
cd ./sam-app
git init
git add .
git commit -m "Initial commit"
```
Setup Git origin
```
git remote add origin
```
Push the code to origin
```
git push -u origin master
```
You should see
```
Counting objects: 17, done.
Delta compression using up to 4 threads.
Compressing objects: 100% (13/13), done.
Writing objects: 100% (17/17), 4.86 MiB | 1.55 MiB/s, done.
Total 17 (delta 0), reused 0 (delta 0)
To https://git-codecommit.ap-southeast-1.amazonaws.com/v1/repos/sam-app
* [new branch] master -> master
Branch 'master' set up to track remote branch 'master' from 'origin'.
```
## Setting up CodePipline
We will use Amazon CDK to provision the pipeline.
### Install CDK
```
npm install -g aws-cdk
```
### Initialize the project
```
cdk init --language typescript
```
### To bulid and deploy
```
npm run build
cdk deploy
```
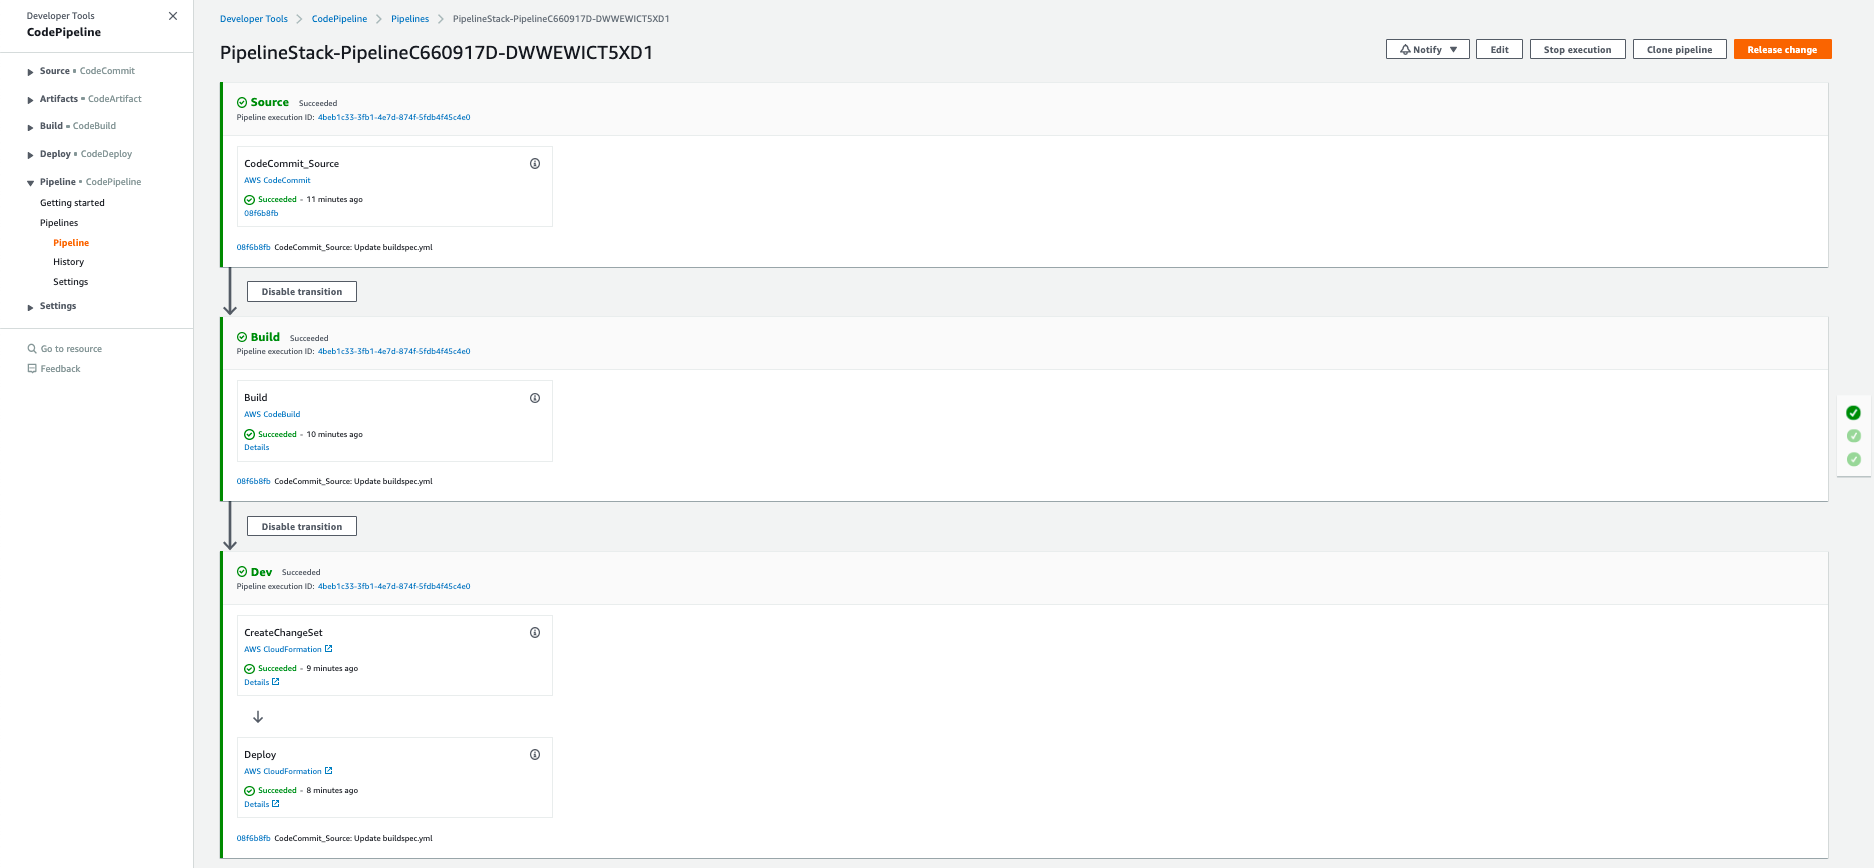
You should see ``PipelineStack`` has been created
Go to AWS Console -> Developer Tools -> CodePipeline -> Pipelines
## Clean up
```
cdk destroy PipelineStack
```
```
Are you sure you want to delete: PipelineStack (y/n)? y
PipelineStack: destroying...
11:21:26 PM | DELETE_IN_PROGRESS | AWS::CloudFormation::Stack | PipelineStack
11:22:34 PM | DELETE_IN_PROGRESS | AWS::IAM::Role | Pipeline/Dev/Creat...PipelineActionRole
11:22:34 PM | DELETE_IN_PROGRESS | AWS::IAM::Role | Pipeline/Build/Bui...PipelineActionRole
11:22:34 PM | DELETE_IN_PROGRESS | AWS::IAM::Role | Build/Role
✅ PipelineStack: destroyed
```
Friday, 14 August 2020
Develop, release and operate Container Apps on AWS with the AWS Copilot CLI
Originally Copilot was called Amazon ECS CLI v2.
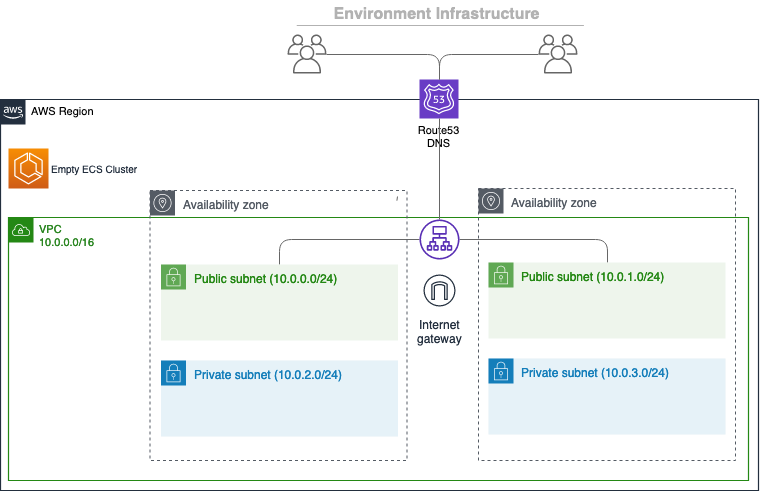
The AWS Copilot CLI is a tool for developers to create, release and manage production ready containerized applications on Amazon ECS and AWS Fargate. From getting started, pushing to a test environment and releasing to production, Copilot helps you through the entire life of your app development.
In short, you can develop, release and operate Container Apps on AWS with a few commands.
## Prerequisites
Before using Copilot, make sure you have installed AWS command line tool and setup your aws credentials. To do that, you can run ``aws configure`` to perform your setup. The region for this demonstration is ``ap-southeast-1``.
After the configuration setup, you can run the below command to verify
```bash
aws sts get-caller-identity
```
## Install
```
curl -Lo /usr/local/bin/copilot https://github.com/aws/copilot-cli/releases/download/v0.1.0/copilot-darwin-v0.1.0 &&
chmod +x /usr/local/bin/copilot &&
copilot --help
```
or through Homebrew
```
brew install aws/tap/copilot-cli
```
## Getting started
Run
```
copilot
```
to see the commands
```
👩✈️ Launch and manage applications on Amazon ECS and AWS Fargate.
Commands
Getting Started 🌱
init Create a new ECS application.
docs Open the copilot docs.
Develop ✨
app Commands for applications.
Applications are a collection of services and environments.
env Commands for environments.
Environments are deployment stages shared between services.
svc Commands for services.
Services are long-running Amazon ECS services.
Release 🚀
pipeline Commands for pipelines.
Continuous delivery pipelines to release services.
deploy Deploy your service.
Settings ⚙️
version Print the version number.
completion Output shell completion code.
Flags
-h, --help help for copilot
-v, --version version for copilot
Examples
Displays the help menu for the "init" command.
`$ copilot init --help`
```
## Init
Copilot will locate the Dockerfile automatically and ask you several questions. After that, it will create a new application containing your service(s).
A sample Dockerfile
```dockerfile
FROM nginx:alpine
EXPOSE 80
COPY . /usr/share/nginx/html
```
Run
```
copilot init
```
```
Application name: hello-world
Service type: Load Balanced Web Service
Service name: copilot-lb
Dockerfile: ./Dockerfile
Ok great, we'll set up a Load Balanced Web Service named copilot-lb in application hello-world listening on port 80.
✔ Created the infrastructure to manage services under application hello-world.
✔ Wrote the manifest for service copilot-lb at ../copilot-lb/manifest.yml
Your manifest contains configurations like your container size and port (:80).
✔ Created ECR repositories for service copilot-lb.
All right, you're all set for local development.
Deploy: Yes
✔ Created the infrastructure for the test environment.
- Virtual private cloud on 2 availability zones to hold your services [Complete]
- Virtual private cloud on 2 availability zones to hold your services [Complete]
- Internet gateway to connect the network to the internet [Complete]
- Public subnets for internet facing services [Complete]
- Private subnets for services that can't be reached from the internet [Complete]
- Routing tables for services to talk with each other [Complete]
- ECS Cluster to hold your services [Complete]
- Application load balancer to distribute traffic [Complete]
✔ Linked account XXXXXXXXXXXX and region ap-southeast-1 to application hello-world.
```
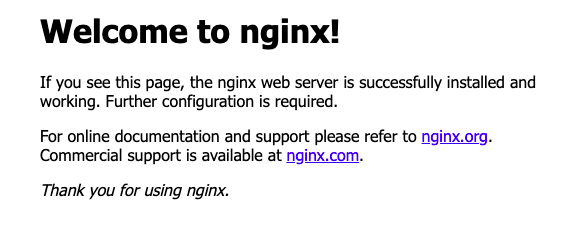
You should be able to see the link at the end.
Click the link and verify that a simple nginx app is up and running
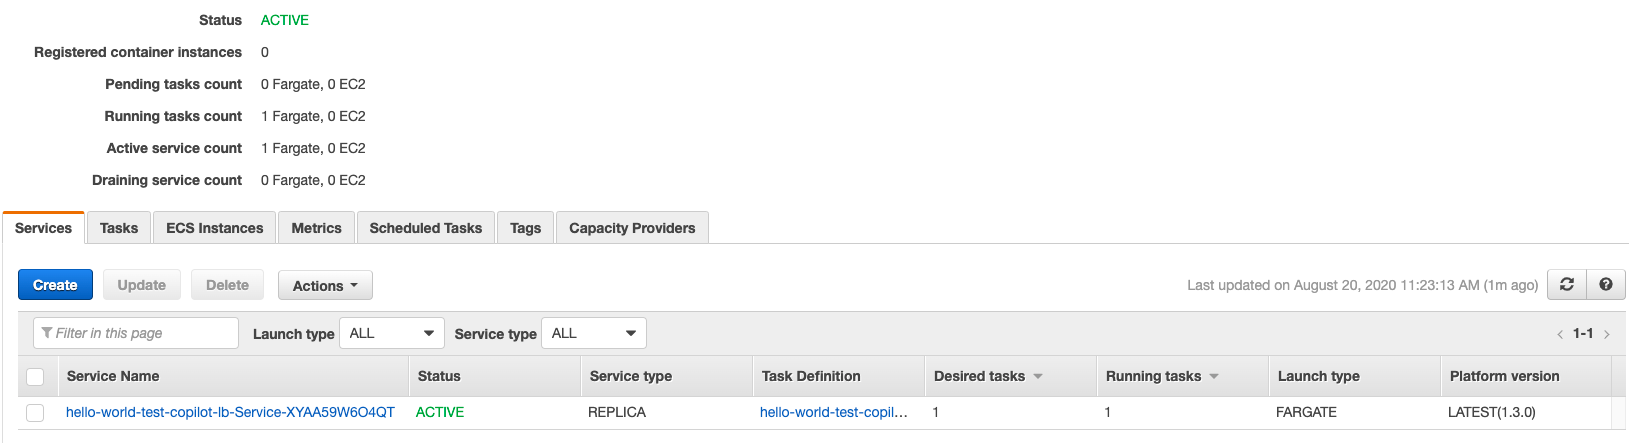
Go to ECS and you should see a cluster has been provisioned
You can also take a look at ECS - Task Definition / ECR / EC2 - Load Balancer
## Logs
Copilot provides ``svc logs`` to allow users to check the service logs more easily. You can stream the logs or display the logs within a specfic timeslot
```
-a, --app string Name of the application.
--end-time string Optional. Only return logs before a specific date (RFC3339).
Defaults to all logs. Only one of end-time / follow may be used.
-e, --env string Name of the environment.
--follow Optional. Specifies if the logs should be streamed.
-h, --help help for logs
--json Optional. Outputs in JSON format.
--limit int Optional. The maximum number of log events returned. (default 10)
-n, --name string Name of the service.
--since duration Optional. Only return logs newer than a relative duration like 5s, 2m, or 3h.
Defaults to all logs. Only one of start-time / since may be used.
--start-time string Optional. Only return logs after a specific date (RFC3339).
Defaults to all logs. Only one of start-time / since may be used.
```
To stream the logs
```
copilot svc logs --follow
```
To display the logs within a specfic timeslot
```
copilot svc logs --start-time 2006-01-02T15:04:05+00:00 --end-time 2006-01-02T15:05:05+00:00
```
## Deploy
The application was deployed to the testing environment, which is a single small container to Fargate. It is only for development purposes.
To deploy in production, run the following command to create a new environment
```
copilot env init
```
Update the manifest file to tell Copilot the application is going to be deployed to production
```
environments:
production:
count: 2
cpu: 1024
memory: 2048
```
Copilot will create the infrastructure fro the production environment
```
What is your environment's name? prod
Which named profile should we use to create prod? default
✔ Created the infrastructure for the prod environment.
- Virtual private cloud on 2 availability zones to hold your services [Complete]
- Virtual private cloud on 2 availability zones to hold your services [Complete]
- Internet gateway to connect the network to the internet [Complete]
- Public subnets for internet facing services [Complete]
- Private subnets for services that can't be reached from the internet [Complete]
- Routing tables for services to talk with each other [Complete]
- ECS Cluster to hold your services [Complete]
- Application load balancer to distribute traffic [Complete]
✔ Linked account XXXXXXXXXXXX and region ap-southeast-1 to application hello-world.
✔ Created environment prod in region ap-southeast-1 under application hello-world.
```
Deploy your service to production
```
copilot svc deploy --env production
```
## Clean up
```
copilot env list
```
I got
```
test
prod
```
Force delete the application with environments "test" and "prod"
```
copilot app delete --yes --env-profiles test=default,prod=prod-profile
```
## Conclusion
Copilot can help you to deploy your service containerized to production with a few commands. What you need is just Copilot and Dockerfile.
Copilot is still in beta. Some services like provisioning storage are not supported yet. (As of 20/08/2020)
## For more
- https://github.com/aws/copilot-cli
Thursday, 26 March 2020
Building Serverless CRUD services in Go with DynamoDB - Part 6 (Bonus)
Welcome to the part 6. This is the last part of this series. In this post, we will create ``loginHandler.go``.
# Getting started
First, let's add the config under functions in serverless.yml
```
login:
handler: bin/handlers/loginHandler
package:
include:
- ./bin/handlers/loginHandler
events:
- http:
path: iam/login
method: post
cors: true
```
Create a file ``loginHandler.go`` under src/handlers
Similarly, we have the below structure.
```
package main
import (
"context"
"encoding/json"
"fmt"
"os"
"github.com/aws/aws-lambda-go/events"
"github.com/aws/aws-lambda-go/lambda"
"github.com/aws/aws-sdk-go/aws"
"github.com/aws/aws-sdk-go/aws/session"
"github.com/aws/aws-sdk-go/service/dynamodb"
"github.com/aws/aws-sdk-go/service/dynamodb/dynamodbattribute"
utils "../utils"
)
type Credentials struct {
// TODO1
}
type User struct {
ID string `json:"id,omitempty"`
UserName string `json:"user_name,omitempty"`
FirstName string `json:"first_name,omitempty"`
LastName string `json:"last_name,omitempty"`
Age int `json:"age,omitempty"`
Phone string `json:"phone,omitempty"`
Password string `json:"password,omitempty"`
Email string `json:"email,omitempty"`
Role string `json:"role,omitempty"`
IsActive bool `json:"is_active,omitempty"`
CreatedAt string `json:"created_at,omitempty"`
ModifiedAt string `json:"modified_at,omitempty"`
DeactivatedAt string `json:"deactivated_at,omitempty"`
}
type Response struct {
Response User `json:"response"`
}
var svc *dynamodb.DynamoDB
func init() {
region := os.Getenv("AWS_REGION")
// Initialize a session
if session, err := session.NewSession(&aws.Config{
Region: ®ion,
}); err != nil {
fmt.Println(fmt.Sprintf("Failed to initialize a session to AWS: %s", err.Error()))
} else {
// Create DynamoDB client
svc = dynamodb.New(session)
}
}
func Login(ctx context.Context, request events.APIGatewayProxyRequest) (events.APIGatewayProxyResponse, error) {
var (
tableName = aws.String(os.Getenv("IAM_TABLE_NAME"))
)
//TODO2
}
func main() {
lambda.Start(Login)
}
```
Basically we are going to make an API with POST method. Users are expected to pass their credentials to ``iam/login`` to authorise their identities.
In this tutorials, we only send username and password. You may change username to email if you want. Let's update the below code and remove the comment ``// TODO1``.
```
type Credentials struct {
UserName string `json:"user_name"`
Password string `json:"password"`
}
```
As we only need to return a single object, we can use same response struct used in ``getHandler.go``
```
type Response struct {
Response User `json:"response"`
}
```
The next step is to write our logic under ``//TODO2``. The general idea is that users send their credentials which are further used to check the data in Amazon DynamoDB. It then returns the user object if it matches.
First, we need to initialise ``Credentials`` to hold our users input.
```
creds := &Credentials{}
```
Like what we did previously, parse the request body to creds
```
json.Unmarshal([]byte(request.Body), creds)
```
The next step is to utilise Query API operation for Amazon DynamoDB. In this tutorial, it finds items based on primary key values. You can also query any table or secondary index which has a composite primary key.
Query takes QueryInput. It should includes ``TableName``, ``IndexName``, ``KeyConditions``.
``TableName`` is a required field which tells the client service which table you want to perform Query.
``IndexName`` is the name of an index to query. It can be local secondary index or global secondary index on the table.
``KeyConditions`` includes ``Condition`` which is used when querying a table or an index with comparison operators such as EQ | LE | LT | GE | GT | BEGINS_WITH | BETWEEN. It can also apply ``QueryFilter``.
```
result, err := svc.Query(&dynamodb.QueryInput{
TableName: tableName,
IndexName: aws.String("IAM_GSI"),
KeyConditions: map[string]*dynamodb.Condition{
"user_name": {
ComparisonOperator: aws.String("EQ"),
AttributeValueList: []*dynamodb.AttributeValue{
{
S: aws.String(creds.UserName),
},
},
},
},
})
```
Like other handler, we retrieve the value of IAM_TABLE_NAME in our configuration file and set it to tableName.
```
tableName = aws.String(os.Getenv("IAM_TABLE_NAME"))
```
We select ``IAM_GSI`` to query, which is also defined in serverless.yml in part 1.
```
GlobalSecondaryIndexes:
- IndexName: IAM_GSI
KeySchema:
- AttributeName: user_name
KeyType: HASH
Projection:
ProjectionType: ALL
ProvisionedThroughput:
ReadCapacityUnits: 5
WriteCapacityUnits: 5
```
We then define a ``dynamodb.Condition`` struct holding our condition. As you can see, we only have one condition which is to check if ``user_name`` and ``creds.UserName`` are equal (EQ).
Check if there is an error
```
if err != nil {
fmt.Println("Got error calling Query:")
fmt.Println(err.Error())
// Status Internal Server Error
return events.APIGatewayProxyResponse{
Body: err.Error(),
StatusCode: 500,
}, nil
}
```
If there is no error, we can see a User object in ``result.Items``. However, if there is no item returned from Amazon DynamoDB, we can return an empty object in response.
```
user := User{}
if len(result.Items) == 0 {
body, _ := json.Marshal(&Response{
Response: user,
})
// Status OK
return events.APIGatewayProxyResponse{
Body: string(body),
StatusCode: 200,
}, nil
}
```
The response should look like this
```json
{
"response": {}
}
```
If there is a record found, we can pass it to user.
```
if err := dynamodbattribute.UnmarshalMap(result.Items[0], &user); err != nil {
fmt.Println("Got error unmarshalling:")
fmt.Println(err.Error())
return events.APIGatewayProxyResponse{
Body: err.Error(),
StatusCode: 500,
}, nil
}
```
Now we only check if the password in user input matches with the one in the record.
Remember we've created ``utils/password.go`` in Part 1? We've only created ``HashPassword``. We use this function to hash the password. In order to compare a bcrypt hashed password with its possible plaintext equivalent, we need another function here.
```
func CheckPasswordHash(password, hash string) bool {
err := bcrypt.CompareHashAndPassword([]byte(hash), []byte(password))
return err == nil
}
```
It's simple. We also use bcrypt to perform checking by using ``CompareHashAndPassword``.
Back to ``loginHandler.go``
```
match := utils.CheckPasswordHash(creds.Password, user.Password)
```
If it matches, then we can return user to Response.
```
if match {
body, _ := json.Marshal(&Response{
Response: user,
})
// Status OK
return events.APIGatewayProxyResponse{
Body: string(body),
StatusCode: 200,
}, nil
}
```
If not, we just return an empty user
```
body, _ := json.Marshal(&Response{
Response: User{},
})
// Status Unauthorized
return events.APIGatewayProxyResponse{
Body: string(body),
StatusCode: 401,
}, nil
```
Run the below command to deploy our code
```
./scripts/deploy.sh
```
# Testing
If you go to AWS Lambda Console, you will see there is a function called ``serverless-iam-dynamodb-dev-login``
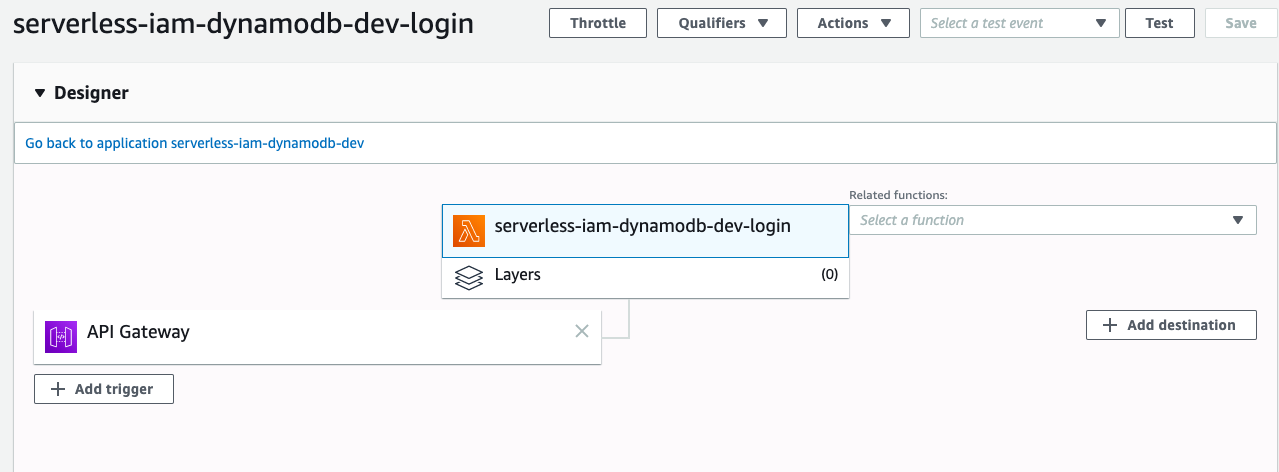
Go to API Gateway Console to test it,
```json
{
"user_name": "wingkwong",
"password": "password"
}
```
You should see the corresponding data.
```json
{
"response": {
"id": "6405bc74-a706-4987-86a9-82cf69d386c2",
"user_name": "wingkwong",
"password": "$2a$15$abtf69CeWZwGPJxIS/D/teXV26kBfY3SmHFNSNTbhP8gNa1OUeoiy",
"email": "wingkwong.me@gmail.com",
"role": "user",
"is_active": true,
"created_at": "2020-03-07 07:29:23.336349405 +0000 UTC m=+0.087254950",
"modified_at": "2020-03-07 07:30:47.531266176 +0000 UTC m=+0.088812866"
}
}
```
Let's try a wrong password
```json
{
"user_name": "wingkwong",
"password": "password2"
}
```
You should see an empty object
```json
{
"response": {}
}
```
# Cleanup
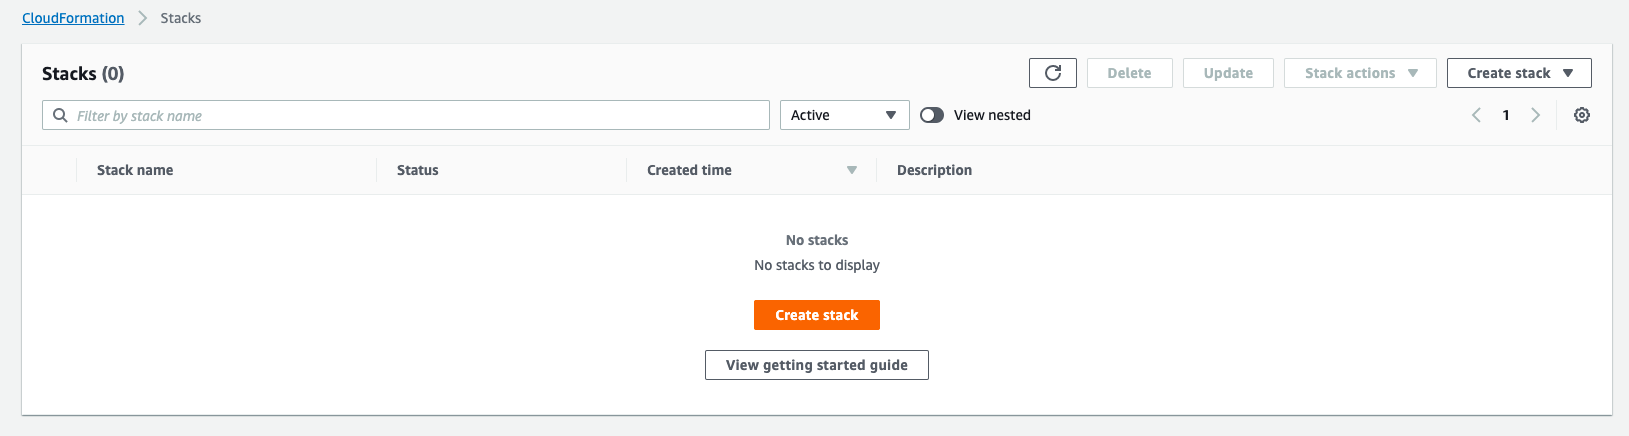
As mentioned in Part 1, serverless provisions / updates a single CloudFormation stack every time we deploy. To cleanup, we just need to delete the stack.
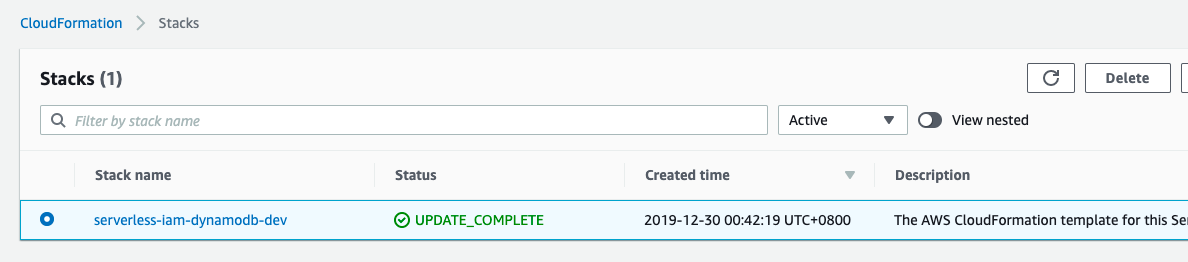
Click Delete stack
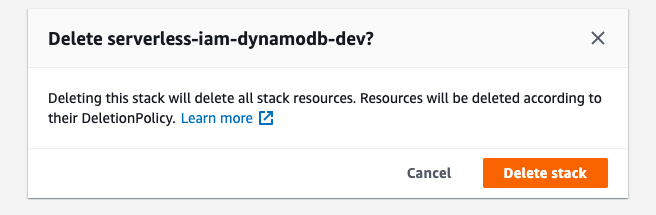
You should see the status is now DELETE_IN_PROGRESS.
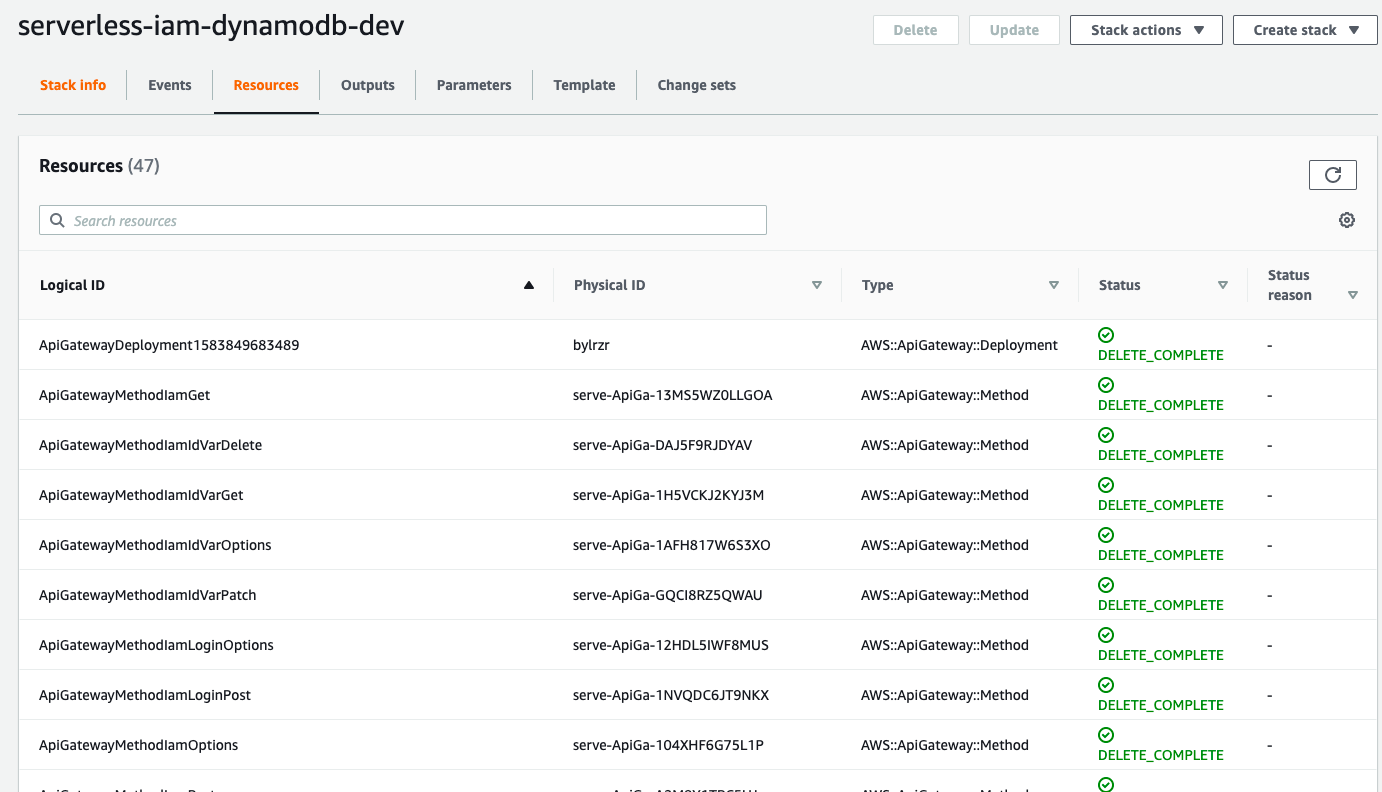
Once it's done, you should see the stack has been deleted.
# Source Code
{% github go-serverless/serverless-iam-dynamodb %}
Tuesday, 24 March 2020
Deploying Your Application to Amazon EKS with GitHub Actions and Weave Flux
Last month I've published a tutorial to show you how to build and push a docker image to Amazon ECR with GitHub Actions.
However, if you are using Amazon EKS, you may need to manually update the image URI every time you have a new release. is there a way to automate the whole process that the image URI can be updated automatically? Yes. Here's the solution for you.
Flux is the operator that makes GitOps happen in your cluster. It ensures that the cluster config matches the one in git and automates your deployments.
Suppose you've already provisioned your Amazon EKS cluster. If not, please check out my previous post.
Configure your kubectl so that you can connect to an Amazon EKS cluster by running
```bash
export AWS_REGION="ap-southeast-1"
export CLUSTER_NAME="your-cluster-name"
aws eks --region ${AWS_REGION} update-kubeconfig --name ${CLUSTER_NAME}
```
If you enable load balancer ingress access, make sure that you have the corresponding IAM role.
```bash
aws iam get-role --role-name "AWSServiceRoleForElasticLoadBalancing" || aws iam create-service-linked-role --aws-service-name "elasticloadbalancing.amazonaws.com"
```
Run your manifest files
```bash
kubectl apply -f manifests/deployment.yaml
kubectl apply -f manifests/service.yaml
kubectl apply -f manifests/ingress.yaml
```
A sample deployment can be found [here](https://github.com/github-developer/example-actions-flux-eks/blob/master/manifests/deployment.yml). Make sure you have ``fluxcd.io/automated: "true"`` under ``annotations``.
The next step is to run Flux on our EKS cluster. Let's create a new namespace ``flux`` in where flux objects will be installed.
```bash
kubectl create ns flux
```
Install flux objects under ``flux`` namespace. By doing so, flux is monitoring the manifests folder for the changes.
```bash
export GHUSER=your-github-user
export GHREPO=your-github-repo
fluxctl install \
--git-user=${GHUSER} \
--git-email=${GHUSER}@users.noreply.github.com \
--git-url=git@github.com:${GHUSER}/${GHREPO} \
--git-path=manifests \
--namespace=flux | kubectl apply -f -
```
You should see the following
```bash
serviceaccount/flux created
clusterrole.rbac.authorization.k8s.io/flux unchanged
clusterrolebinding.rbac.authorization.k8s.io/flux configured
deployment.apps/flux created
secret/flux-git-deploy created
deployment.apps/memcached created
service/memcached created
```
Let's verify if they are running or not
```bash
kubectl get all -n flux
```
```bash
NAME READY STATUS RESTARTS AGE
pod/flux-6449c6bd94-7gz88 1/1 Running 0 5m
pod/memcached-86869f57fd-52cwn 1/1 Running 0 5m
NAME TYPE CLUSTER-IP EXTERNAL-IP PORT(S) AGE
service/memcached ClusterIP 10.100.152.74 11211/TCP 5m
NAME READY UP-TO-DATE AVAILABLE AGE
deployment.apps/flux 1/1 1 1 5m
deployment.apps/memcached 1/1 1 1 5m
NAME DESIRED CURRENT READY AGE
replicaset.apps/flux-6449c6bd94 1 1 0 5m
replicaset.apps/memcached-86869f57fd 1 1 1 5m
```
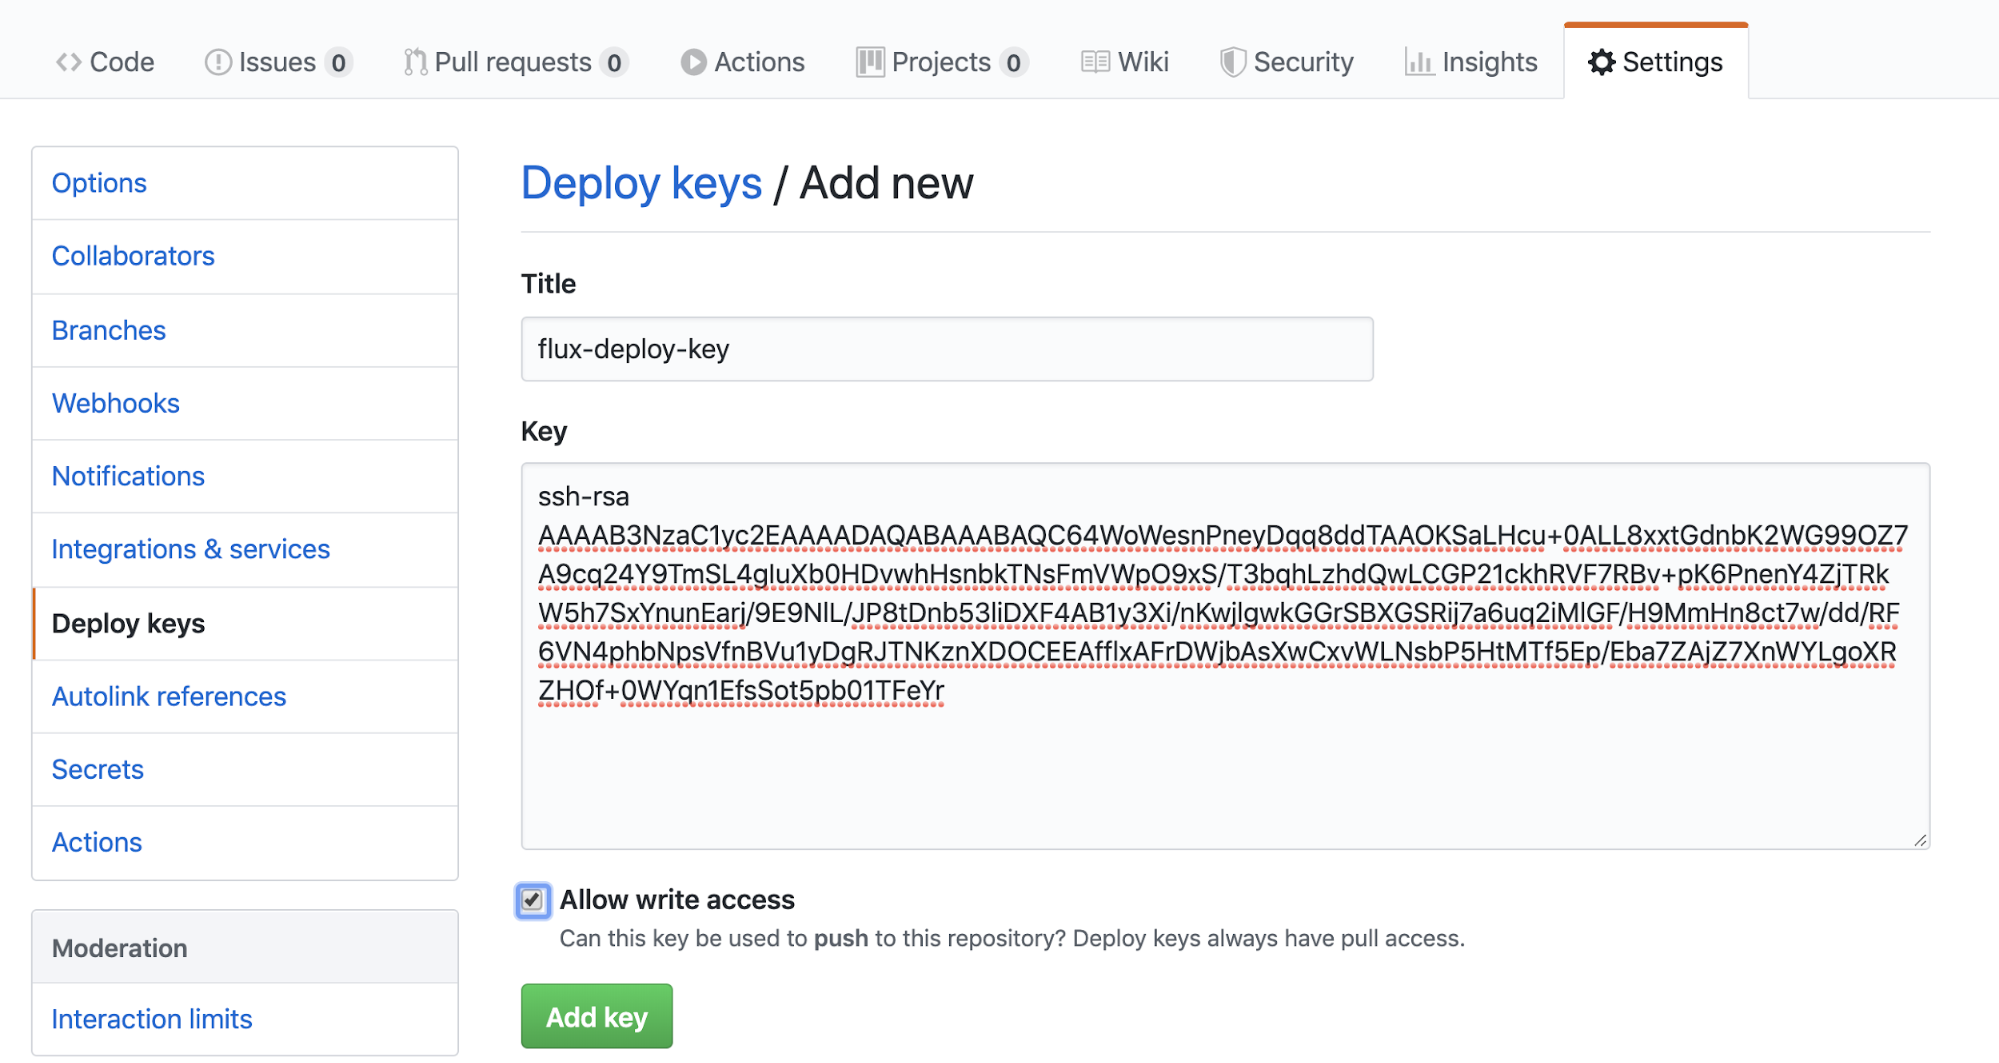
Upon the completion of deployment, the docker image URI in deployment.yaml should be updated. To do so, we need to grand read/write access to the repository with a deploy key so that Flux can be able to write it back every time it deploys.
By running
```bash
fluxctl identity --k8s-fwd-ns flux
```
You should get a deploy key.
```bash
ssh-rsa
AAAAB3NzaC1yc2EAAAADAQABAAABAQC64WoWesnPneyDqq8ddTAAOKSaLHcu+0ALL8xxtGdnbK2WG99OZ7A9cq24Y9TmSL4gIuXb0HDvwhHsnbkTNsFmVWpO9xS/T3bqhLzhdQwLCGP21ckhRVF7RBv+pK6PnenY4ZjTRkW5h7SxYnunEarj/9E9NlL/JP8tDnb53liDXF4AB1y3Xi/nKwjlgwkGGrSBXGSRij7a6uq2iMlGF/H9MmHn8ct7w/dd/RF6VN4phbNpsVfnBVu1yDgRJTNKznXDOCEEAfflxAFrDWjbAsXwCxvWLNsbP5HtMTf5Ep/Eba7ZAjZ7XnWYLgoXRZHOf+0WYqn1EfsSot5pb01TFeYr
```
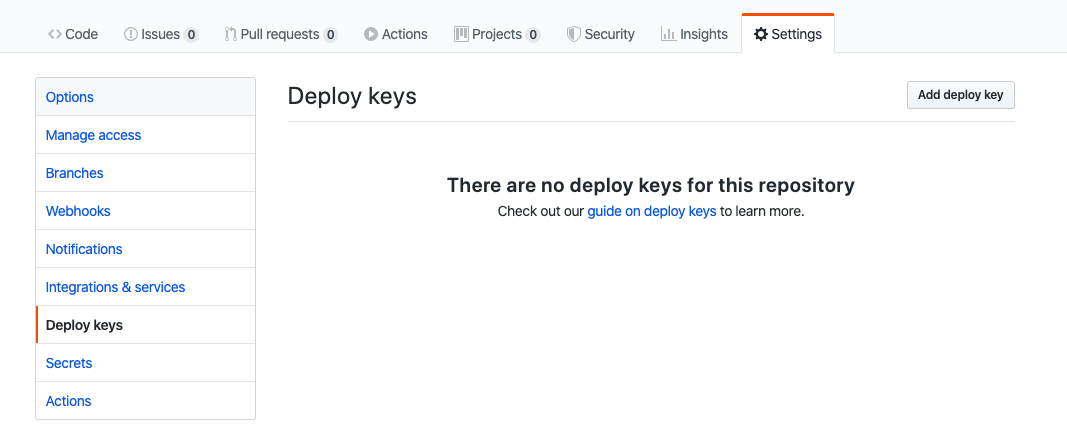
Go to Settings > Deploy keys and click 'Add deploy key'
Enter the title and the key you just generated. Make sure you tick 'Allow write access'
Then we can go back to the console and run the following command to sync Flux and Github.
```bash
fluxctl sync --k8s-fwd-ns flux
```
For the first time, you should see
```bash
Synchronizing with git@github.com:wingkwong/eks-flux-playground
Revision of master to apply is a8e3b45
Waiting for a8e3b45 to be applied ...
Done.
```
If you make a change and push to master, Github Actions helps to build and push the docker image to Amazon ECR, and Flux helps to deploy the latest image to Amazon EKS.
Go back to the repository, you should see there is a new commit on your deployment.yaml while the change is only updating the image URI.
```bash
Auto-release xxxxxxxxxxxx.dkr.ecr.ap-southeast-1.amazonaws.com/eks-flux…
Monday, 23 March 2020
Building Serverless CRUD services in Go with DynamoDB - Part 5
Welcome to Part 5. Last time we've learnt how to delete a single item in a table by primary key. In this post, we'll learn how to secure our APIs.
# Getting started
First, let's add the config under functions in serverless.yml
```
auth:
package:
include:
- ./bin/handlers/authHandler
handler: bin/handlers/authHandler
```
Previously, we've already created ``list``, ``create``, ``update`` and ``delete``. We would like to secure these APIs. To do so, we just need to simply to just add ``authorizer: auth`` to allow us to run an AWS Lambda Function before your targeted AWS Lambda Function.
Take ``list`` as an example:
```
list:
handler: bin/handlers/listHandler
package:
include:
- ./bin/handlers/listHandler
events:
- http:
path: iam
method: get
cors: true
authorizer: auth
```
Then also add it to ``create``, ``update`` and ``delete``.
Before running our business logic, we can perform some Authorisation. It's also useful for micro-service Architectures.
The next step is to create ``authHandler.go`` under ``src/handlers/``. We need a custom authoriser calling an AWS Lambda Function.
About few months ago, I wrote a tutorial to teach how to build a simple authoriser. If you miss it, please check it out via below link and come back later. We'll use the exact code for this tutorial.
{% link https://dev.to/wingkwong/a-simple-amazon-api-gateway-lambda-authoriser-in-go-4cgd %}
In this example, our authentication strategy is to use bearer token like JWT to authorise our requests before reaching to our endpoints.
Under your environment in serverless.yml, you should add your JWT_SECRET_KEY.
```
environment:
IAM_TABLE_NAME: ${self:custom.iamTableName}
JWT_SECRET_KEY:
```
Run the below command to deploy our code
```
./scripts/deploy.sh
```
# Testing
Go to Amazon API Gateway Console, Select your API and Click Authorizers.
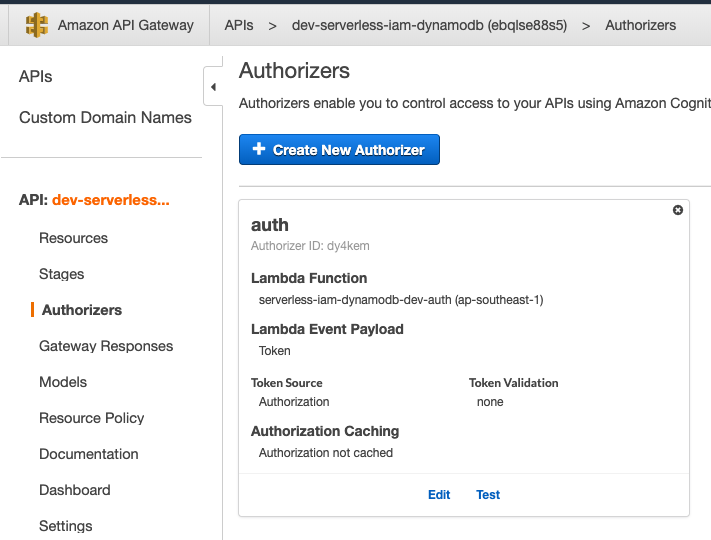
If you test it without the token, you are expected to see the below messages.
```
Response
Response Code: 401
Latency 344
Execution log for request [HIDDEN]
Mon Dec 30 08:56:58 UTC 2019 : Starting authorizer: [HIDDEN]
Mon Dec 30 08:56:58 UTC 2019 : Incoming identity: [HIDDEN]
Mon Dec 30 08:56:58 UTC 2019 : Endpoint request URI: [HIDDEN]
Mon Dec 30 08:56:58 UTC 2019 : Endpoint request headers: [HIDDEN]
Mon Dec 30 08:56:58 UTC 2019 : Endpoint request body after transformations: [HIDDEN]
Mon Dec 30 08:56:58 UTC 2019 : Sending request to [HIDDEN]
Mon Dec 30 08:56:58 UTC 2019 : Unauthorized request: [HIDDEN]
Mon Dec 30 08:56:58 UTC 2019 : Unauthorized
```
With the token, you should see the policy statement authorise our requests.
```json
{
"Version": "2012-10-17",
"Statement": [
{
"Action": [
"execute-api:Invoke"
],
"Effect": "Allow",
"Resource": [
"arn:aws:execute-api:ap-southeast-1:*:a123456789/ESTestInvoke-stage/GET/"
]
}
]
}
```
That's it for part 5. In the next part, we'll create ``loginHandler.go``.
Friday, 20 March 2020
Building Serverless CRUD services in Go with DynamoDB - Part 4
Welcome back! It's been a while. Here's the part 4. In this post, we will create ``deleteHandler.go``.
# Getting started
First, let's add the config under functions in serverless.yml
```
delete:
handler: bin/handlers/deleteHandler
package:
include:
- ./bin/handlers/deleteHandler
events:
- http:
path: iam/{id}
method: delete
cors: true
```
Create a file deleteHandler.go under src/handlers
Similarly, we have the below structure.
```
package main
import (
"context"
"fmt"
"github.com/aws/aws-lambda-go/events"
"github.com/aws/aws-lambda-go/lambda"
"github.com/aws/aws-sdk-go/aws"
"github.com/aws/aws-sdk-go/aws/session"
"github.com/aws/aws-sdk-go/service/dynamodb"
"os"
)
var svc *dynamodb.DynamoDB
func init() {
region := os.Getenv("AWS_REGION")
// Initialize a session
if session, err := session.NewSession(&aws.Config{
Region: ®ion,
}); err != nil {
fmt.Println(fmt.Sprintf("Failed to initialize a session to AWS: %s", err.Error()))
} else {
// Create DynamoDB client
svc = dynamodb.New(session)
}
}
func Delete(ctx context.Context, request events.APIGatewayProxyRequest) (events.APIGatewayProxyResponse, error) {
var (
tableName = aws.String(os.Getenv("IAM_TABLE_NAME"))
id = aws.String(request.PathParameters["id"])
)
// TODO: Add delete logic
}
func main() {
lambda.Start(Delete)
}
```
Deleting a record is pretty simple, we just need the record id (primary key) which can be retrieved from the request path parameters ``id``.
```
func (c *DynamoDB) DeleteItem(input *DeleteItemInput) (*DeleteItemOutput, error)
```
In order to call DeleteItem API operation for Amazon DynamoDB, we need to build ``DeleteItemInput`` first.
```
input := &dynamodb.DeleteItemInput{
Key: map[string]*dynamodb.AttributeValue{
"id": {
S: id,
},
},
TableName: tableName,
}
```
If you define a composite primary key, you must provide values for both the partition key and the sort key. In this case, we just need to provide the first one. We also need to tell which table your records are located in.
call ``DeleteItem`` to delete a single item in a table by primary key
```
_, err := svc.DeleteItem(input)
if err != nil {
fmt.Println("Got error calling DeleteItem:")
fmt.Println(err.Error())
// Status Internal Server Error
return events.APIGatewayProxyResponse{
Body: err.Error(),
StatusCode: 500,
}, nil
}
// Status No Content
return events.APIGatewayProxyResponse{
StatusCode: 204,
}, nil
```
Run the below command to deploy our code
```
./scripts/deploy.sh
```
# Testing
If you go to AWS Lambda Console, you will see there is a function called ``serverless-iam-dynamodb-dev-delete``
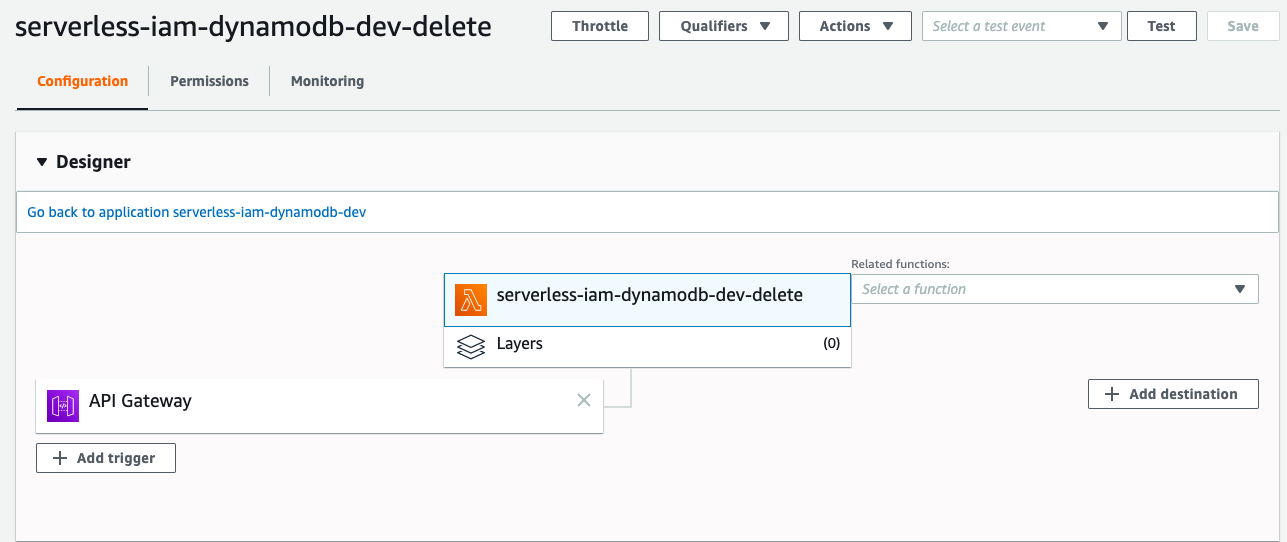
You can test your code either in Lambda or API Gateway.
Upon the success deletion, you should see that the status code returns 204.
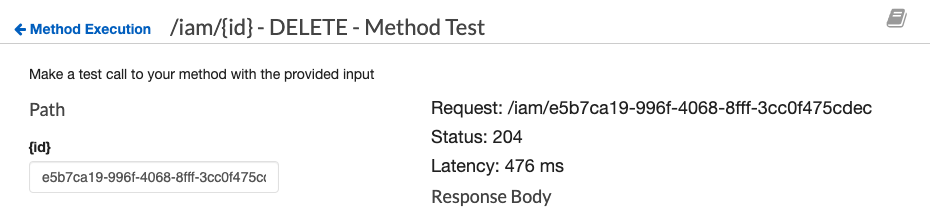
That's it for part 4. In the next post, we'll create ``authHandler.go`` to secure our APIs.
Saturday, 14 March 2020
Migrating Your Existing Applications to a New Node Worker Group in Amazon EKS
Supposing you've an existing node group in your cluster and you want to migrate your applications to it.
```bash
eksctl get nodegroups --cluster=demo
```
```bash
CLUSTER NODEGROUP CREATED MIN SIZE MAX SIZE DESIRED CAPACITY INSTANCE TYPE IMAGE ID
demo ng-a1234567 2020-03-11T13:46:19Z 1 1 1 t3.small
```
Create a new node group using ``eksctl``
```bash
eksctl create nodegroup \
--cluster demo \
--version auto \
--name ng-b1234567 \
--node-type t3.medium \
--nodes 1 \
--region=ap-southeast-1 \
--alb-ingress-access \
--full-ecr-access \
--node-ami auto
```
If you see the following message
```
[ℹ] nodegroup "ng-b1234567" has 0 node(s)
[ℹ] waiting for at least 1 node(s) to become ready in "ng-b1234567"
```
then label the node
```
kubectl label nodes -l alpha.eksctl.io/cluster-name=demo alpha.eksctl.io/nodegroup-name=ng-b1234567 --overwrite
```
Once you execute the above command, you should see
```bash
[ℹ] nodegroup "ng-b1234567" has 1 node(s)
[ℹ] node "ip-192-168-1-11.ap-southeast-1.compute.internal" is ready
[✔] created 1 nodegroup(s) in cluster "demo"
[✔] created 0 managed nodegroup(s) in cluster "demo"
[ℹ] checking security group configuration for all nodegroups
[ℹ] all nodegroups have up-to-date configuration
```
Get the node groups again
```bash
eksctl get nodegroups --cluster=demo
```
A new node group is created
```bash
CLUSTER NODEGROUP CREATED MIN SIZE MAX SIZE DESIRED CAPACITY INSTANCE TYPE IMAGE ID
demo ng-b1234567 2020-03-13T13:42:26Z 1 1 1 t3.medium ami-08805da128ddc2ee1
demo ng-a1234567 2020-03-11T13:46:19Z 1 1 1 t3.small
```
Check if your worker nodes are in ``READY`` state or not by running
```bash
kubectl get nodes
```
Delete the original node group.
> This will drain all pods from that nodegroup before the instances are deleted.
```bash
eksctl delete nodegroup --cluster demo --name ng-a1234567
```
If you run
```bash
kubectl get pod
```
You see the old pods are terminating and the new ones are creating
```bash
NAME READY STATUS RESTARTS AGE
app1-789d756b58-k8qvm 0/1 Terminating 0 46h
app1-789d756b58-pnbjz 0/1 Pending 0 35s
app2-f9b4b849c-2j2gd 0/1 Pending 0 35s
app2-f9b4b849c-znwqs 0/1 Terminating 0 26h
```
After a while, you should see both pods back to Running state.
Reference:
[EKS Managed Nodegroups](https://eksctl.io/usage/eks-managed-nodegroups/)
Wednesday, 11 March 2020
Building Serverless CRUD services in Go with DynamoDB - Part 3
So far we've created ``createHandler.go`` and ``listHandler.go``. In part 3, we will learn how to build ``updateHandler.go``
# Getting started
First, let's add the config under functions in serverless.yml
```
update:
handler: bin/handlers/updateHandler
package:
include:
- ./bin/handlers/updateHandler
events:
- http:
path: iam/{id}
method: patch
cors: true
```
Create a file updateHandler.go under src/handlers
Similarly, we have the below structure.
```
package main
import (
"context"
"encoding/json"
"fmt"
"github.com/aws/aws-lambda-go/events"
"github.com/aws/aws-lambda-go/lambda"
"github.com/aws/aws-sdk-go/aws"
"github.com/aws/aws-sdk-go/aws/session"
"github.com/aws/aws-sdk-go/service/dynamodb"
"github.com/aws/aws-sdk-go/service/dynamodb/expression"
"gopkg.in/go-playground/validator.v9"
"os"
"reflect"
"strings"
"time"
)
var svc *dynamodb.DynamoDB
func init() {
region := os.Getenv("AWS_REGION")
// Initialize a session
if session, err := session.NewSession(&aws.Config{
Region: ®ion,
}); err != nil {
fmt.Println(fmt.Sprintf("Failed to initialize a session to AWS: %s", err.Error()))
} else {
// Create DynamoDB client
svc = dynamodb.New(session)
}
}
type User struct {
ID *string `json:"id,omitempty"`
UserName *string `json:"user_name,omitempty" validate:"omitempty,min=4,max=20"`
FirstName *string `json:"first_name,omitempty"`
LastName *string `json:"last_name,omitempty"`
Age *int `json:"age,omitempty"`
Phone *string `json:"phone,omitempty"`
Email *string `json:"email,omitempty" validate:"omitempty,email"`
Role *string `json:"role,omitempty" validate:"omitempty,min=4,max=20"`
IsActive *bool `json:"is_active,omitempty"`
CreatedAt *string `json:"created_at,omitempty"`
ModifiedAt string `json:"modified_at,omitempty"`
DeactivatedAt *string `json:"deactivated_at,omitempty"`
}
func Update(ctx context.Context, request events.APIGatewayProxyRequest) (events.APIGatewayProxyResponse, error) {
var (
tableName = aws.String(os.Getenv("IAM_TABLE_NAME"))
id = aws.String(request.PathParameters["id"])
)
// TODO: Add Update logic
}
func main() {
lambda.Start(Update)
}
```
When we update a record, we need to update the column ``ModifiedAt``.
```
user := &User{
ModifiedAt: time.Now().String(),
}
```
Similar to ``createHandler.go``, we parse the request body and perform validation.
```
// Parse request body
json.Unmarshal([]byte(request.Body), user)
// Validate user struct
var validate *validator.Validate
validate = validator.New()
err := validate.Struct(user)
if err != nil {
// Status Bad Request
return events.APIGatewayProxyResponse{
Body: err.Error(),
StatusCode: 400,
}, nil
}
```
We need to create a ``dynamodb.UpdateItemInput`` for DynamoDB service to update the item. You may see that some people use the following code.
```
input := &dynamodb.UpdateItemInput{
Key: map[string]*dynamodb.AttributeValue{
"id": {
S: aws.String(id),
},
UpdateExpression: aws.String("set #a = :a, #b = :b, #c = :c"),
ExpressionAttributeNames: map[string]*string{
"#a": &a,
"#b": &b,
"#c": &c,
},
ExpressionAttributeValues: map[string]*dynamodb.AttributeValue{
":a": {
BOOL: aws.Bool(true),
},
":b": {
BOOL: aws.Bool(true),
},
":c": {
BOOL: aws.Bool(true),
},
},
ReturnValues: aws.String("UPDATED_NEW"),
TableName: "tableName",
}
```
The above example uses ``set`` to update attribute ``a``, ``b``, and ``c`` with mapped attribute values provided in ``ExpressionAttributeValues``.
With such approach, the expression cannot be dynamic as we allow users to update some specific attributes only.
To do that, we use reflect to get the input struct and get the json name without a corresponding tag. Then we append each json field name and its value to UpdateBuilder by using ``UpdateBuilder.Set``.
```
u := reflect.ValueOf(user).Elem()
t := u.Type()
for i := 0; i < u.NumField(); i++ {
f := u.Field(i)
// check if it is empty
if !reflect.DeepEqual(f.Interface(), reflect.Zero(f.Type()).Interface()) {
jsonFieldName := t.Field(i).Name
// get json field name
if jsonTag := t.Field(i).Tag.Get("json"); jsonTag != "" && jsonTag != "-" {
if commaIdx := strings.Index(jsonTag, ","); commaIdx > 0 {
jsonFieldName = jsonTag[:commaIdx]
}
}
// construct update
update = update.Set(expression.Name(jsonFieldName), expression.Value(f.Interface()))
}
}
```
Create a new Builder with Update
```
builder := expression.NewBuilder().WithUpdate(update)
```
Call ``Build()`` to get the expression and error
```
expression, err := builder.Build()
```
Verify if there is an error
```
if err != nil {
// Status Bad Request
return events.APIGatewayProxyResponse{
Body: err.Error(),
StatusCode: 400,
}, nil
}
```
Create ``dynamodb.UpdateItemInput``
```
// Update a record by id
input := &dynamodb.UpdateItemInput{
Key: map[string]*dynamodb.AttributeValue{
"id": {
S: id,
},
},
ExpressionAttributeNames: expression.Names(),
ExpressionAttributeValues: expression.Values(),
UpdateExpression: expression.Update(),
ReturnValues: aws.String("UPDATED_NEW"),
TableName: tableName,
}
```
Feed it into ``UpdateItem``
```
_, err = svc.UpdateItem(input)
```
Check if it can be updated or not
```
if err != nil {
fmt.Println("Got error calling UpdateItem:")
fmt.Println(err.Error())
// Status Internal Server Error
return events.APIGatewayProxyResponse{
Body: err.Error(),
StatusCode: 500,
}, nil
}
// Status OK
return events.APIGatewayProxyResponse{
Body: request.Body,
StatusCode: 200,
}, nil
```
Run the below command to deploy our code
```
./scripts/deploy.sh
```
# Testing
If you go to AWS Lambda Console, you will see there is a function called ``serverless-iam-dynamodb-dev-update``
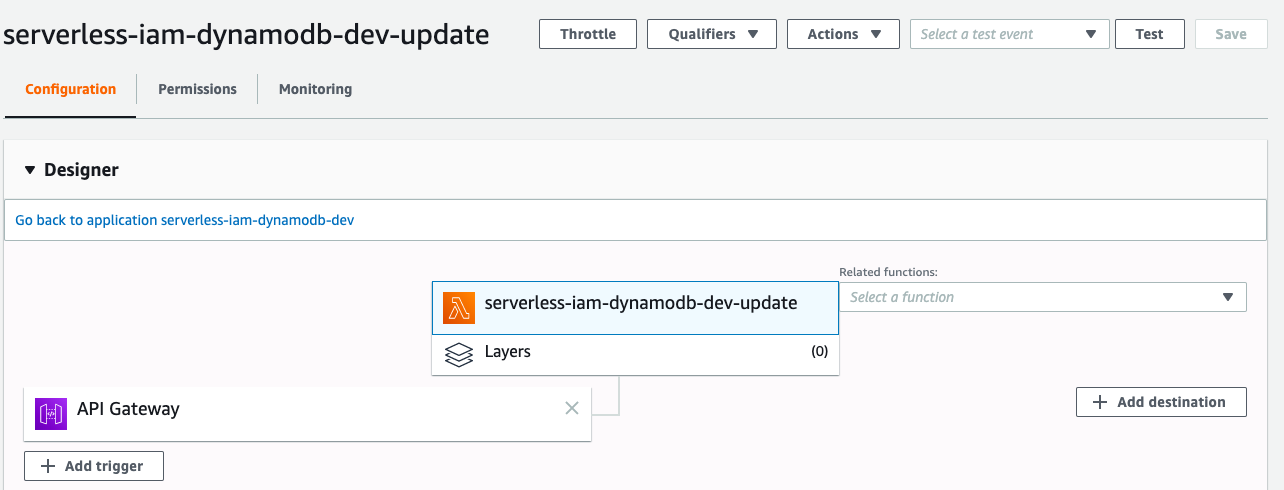
Go to API Gateway Console to test it, this time we need to set an id.
```json
{
"email": "wingkwong@gmail.com"
}
```
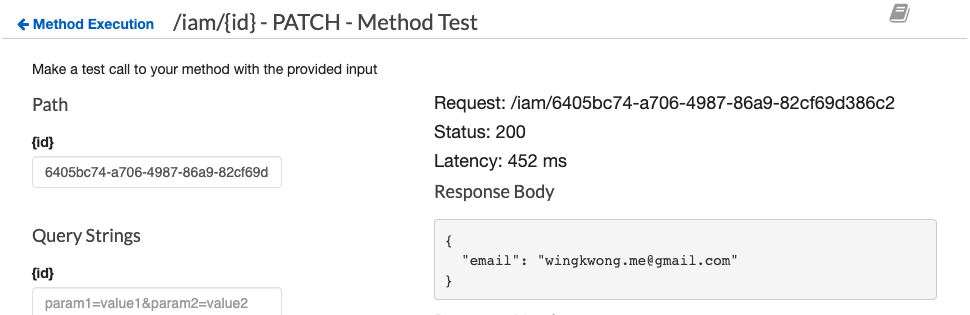
If the update returns 200, then go to DynamoDB to verify the result.

We should see that only the email has been updated.
That's it for part 3. In part 4, we will create ``deleteHandler.go``.
Sunday, 8 March 2020
Building Serverless CRUD services in Go with DynamoDB - Part 2
In the previous post, we've created ``createHandler``. In this post, we'll create ``listHandler``.
# Getting started
First, let's add the config under ``functions`` in ``serverless.yml``
```
list:
handler: bin/handlers/listHandler
package:
include:
- ./bin/handlers/listHandler
events:
- http:
path: iam
method: get
cors: true
```
Create a file ``listHandler.go`` under src/handlers
Similarly, we have the below structure.
```
package main
import (
"context"
"encoding/json"
"fmt"
"os"
"github.com/aws/aws-lambda-go/events"
"github.com/aws/aws-lambda-go/lambda"
"github.com/aws/aws-sdk-go/aws"
"github.com/aws/aws-sdk-go/aws/session"
"github.com/aws/aws-sdk-go/service/dynamodb"
"github.com/aws/aws-sdk-go/service/dynamodb/dynamodbattribute"
)
// TODO1: Define User Struct
// TODO2: Define User Response Struct
var svc *dynamodb.DynamoDB
func init() {
region := os.Getenv("AWS_REGION")
// Initialize a session
if session, err := session.NewSession(&aws.Config{
Region: ®ion,
}); err != nil {
fmt.Println(fmt.Sprintf("Failed to initialize a session to AWS: %s", err.Error()))
} else {
// Create DynamoDB client
svc = dynamodb.New(session)
}
}
func List(ctx context.Context, request events.APIGatewayProxyRequest) (events.APIGatewayProxyResponse, error) {
var (
tableName = aws.String(os.Getenv("IAM_TABLE_NAME"))
)
// TODO3: Add DynamoDB retrival logic
}
func main() {
lambda.Start(List)
}
```
For TODO1, this time we don't need omitempty tags because we want to retrieve every field. Ths struct would be
```
type User struct {
ID string `json:"id"`
UserName string `json:"user_name"`
FirstName string `json:"first_name"`
LastName string `json:"last_name"`
Age int `json:"age"`
Phone string `json:"phone"`
Password string `json:"password"`
Email string `json:"email"`
Role string `json:"role"`
IsActive bool `json:"is_active"`
CreatedAt string `json:"created_at"`
ModifiedAt string `json:"modified_at"`
DeactivatedAt string `json:"deactivated_at"`
}
```
We also need another struct for holding our user response. Let's create a new one and remove TODO2 comment.
```
type Response struct {
Response []User `json:"response"`
}
```
By doing so, our response should look like
```json
{
"response": [
{
// user record #1
},
{
// user record #2
}
// and so on
]
}
```
When I was coding the response part, one mistake I made was I accidentally added an extra space after ``json:`` like
```
type Response struct {
Response []User `json: "response"`
}
```
and I got the below result
```json
{
"Response": [
{
// user record #1
},
{
// user record #2
}
// and so on
]
}
```
If there is no json tag or the tag cannot be read, it will reflect the json field name instead.
This time we need to use ``svc`` to retrieve the users from DynamoDB. First of all, we need to build the query input parameters
```
params := &dynamodb.ScanInput{
TableName: tableName,
}
```
Make the DynamoDB Query API call
```
result, err := svc.Scan(params)
if err != nil {
fmt.Println("Query API call failed:")
fmt.Println((err.Error()))
// Status Bad Request
return events.APIGatewayProxyResponse{
Body: err.Error(),
StatusCode: 400,
}, nil
}
```
Construct users from response
```
var users []User
for _, i := range result.Items {
user := User{}
if err := dynamodbattribute.UnmarshalMap(i, &user); err != nil {
fmt.Println("Got error unmarshalling:")
fmt.Println(err.Error())
return events.APIGatewayProxyResponse{
Body: err.Error(),
StatusCode: 400,
}, nil
}
users = append(users, user)
}
```
Marshal the user response and return APIGatewayProxyResponse
```
body, _ := json.Marshal(&Response{
Response: users,
})
return events.APIGatewayProxyResponse{
Body: string(body),
StatusCode: 200,
}, nil
```
Let's deploy and test it
```
./scripts/deploy.sh
```
# Testing
If you go to AWS Lambda Console, you should see there is a function called ``serverless-iam-dynamodb-dev-get``
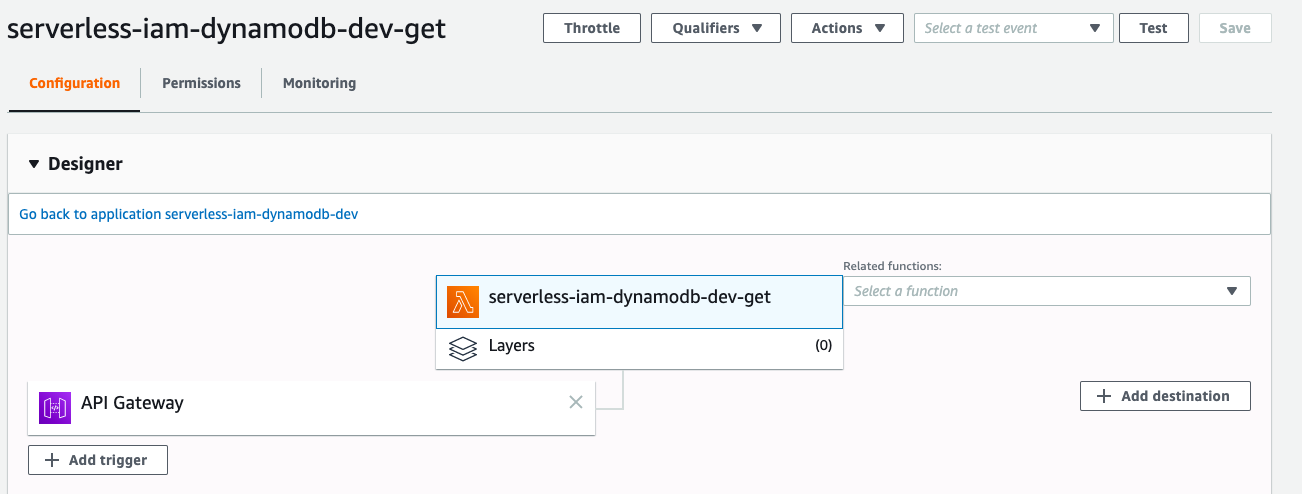
You can test your code either in Lambda or API Gateway.
Since this is a GET method, a request body is not supported. The response should look like
```json
{
"response": [
{
"id": "bd6fde14-3f6a-4551-95f3-349077a5501f",
"user_name": "wingkwong",
"first_name": null,
"last_name": null,
"age": null,
"phone": null,
"password": "$2a$14$iwyLz8DOnbcolxXezZGXG.uXN9kCxJ8aYzMFftYZ06j1Ybb4uThC2",
"email": "wingkwong@gmail.com",
"role": "user",
"is_active": true,
"created_at": "2019-12-28 13:16:41.09607401 +0000 UTC m=+0.077451001",
"modified_at": "2019-12-28 13:16:41.096188175 +0000 UTC m=+0.077565137",
"deactivated_at": null
}
]
}
```
That's it for part 2. In the next post, we'll create ``updateHandler.go``.
Tuesday, 3 March 2020
Building Serverless CRUD services in Go with DynamoDB - Part 1
[AWS Lamdba](https://aws.amazon.com/lambda/) is a serverless compute service which allows you to run your code without provisioning or managing servers. It costs only the compute time that you consume. It also supports continuous scaling. [AWS DynamoDB](https://aws.amazon.com/dynamodb/) is a serverless database for applications that need high performance at any scale. We'll also use [Serverless Framework](https://serverless.com/) to deploy our services on AWS.
In this series, we'll go through how to implement serverless CRUD services with DynamoDB in Go.
# Project structure
/.serverless
It will be created automatically when running ``serverless deploy`` in where deployment zip files, cloudformation stack files will be generated
/bin
This is the folder where our built Go codes are placed
/scripts
General scripts for building Go codes and deployment
/src/handlers
All Lambda handlers will be placed here
# Prerequisites
Install serverless cli
```
npm install -g serverless
```
Install aws cli
```
pip install awscli
```
Setup your aws credentials
```
aws configure
```
Of course you need to install [Go](https://golang.org/doc/install)
# Getting started
First of all, we need to create ``serverless.yml`` which is the main config for your service. When you run ``serverless deploy``, the framework will use this config file to help provision the corresponding resources.
First, let's name our service. You can name whatever your like.
```
service: serverless-iam-dynamodb
```
Then, let's create the primary section - provider. We can choose our serverless provider such as AWS, Google Cloud or Azure and specify the programming language we use. In this example, we'll use aws with go 1.x. We can need to set the stage, region, environment variables and IAM role statements here.
```
provider:
name: aws
runtime: go1.x
stage: dev
region: ap-southeast-1
environment:
IAM_TABLE_NAME: ${self:custom.iamTableName}
iamRoleStatements:
- Effect: Allow
Action:
- dynamodb:Scan
- dynamodb:Query
- dynamodb:GetItem
- dynamodb:PutItem
- dynamodb:UpdateItem
- dynamodb:DeleteItem
Resource:
- ${self:custom.iamTableArn}
- Fn::Join:
- /
- - ${self:custom.iamTableArn}
- index/*
```
Every Lambda function requires certain permissions to interact with AWS resources and they are set via an AWS IAM Role. In this example, we allow the function to perform multiple dynamodb actions on the resource ``${self:custom.iamTableArn}``.
Since we'll use ``dynamodb:Query`` and by default index is not allowed so we have to allow it here. Below snippet shows how to join our ARN and the string index/*.
```
- Fn::Join:
- /
- - ${self:custom.iamTableArn}
- index/*
```
What is ``${self:custom.iamTableArn}``? We haven't defined it yet. Let's do it.
```
custom:
iamTableName: ${self:service}-${self:provider.stage}-iam
iamTableArn:
Fn::Join:
- ":"
- - arn
- aws
- dynamodb
- Ref: AWS::Region
- Ref: AWS::AccountId
- table/${self:custom.iamTableName}
```
This ``custom`` section just allows us to create our custom variables. In this example, we define our table name and table ARN.
After that, we need to define how to package our code.
```
package:
individually: true
exclude:
- ./**
```
It's pretty self-explanatory. This is to package our functions separately (See the below ``functions`` section) and exclude everything in the root directory.
Moving on to next section ``functions``. This is where we define our Lambda functions. We'll create a function called ``create`` where the handler is ``bin/handlers/createHandler`` which will be built by our script later. Inside ``events``, we can define our HTTP endpoint. This example is a POST method with the path ``/iam``. To handle preflight requests, we can set ``cors: true`` to the HTTP endpoint.
```
functions:
create:
handler: bin/handlers/createHandler
package:
include:
- ./bin/handlers/createHandler
events:
- http:
path: iam
method: post
cors: true
```
The last section is to define what resources we need to provision. These resources are AWS infrastructure resources that our functions depend on. In this example, we need to deploy DynamoDB.
```
resources:
Resources:
iamTable:
Type: AWS::DynamoDB::Table
Properties:
TableName: ${self:custom.iamTableName}
ProvisionedThroughput:
ReadCapacityUnits: 1
WriteCapacityUnits: 1
AttributeDefinitions:
- AttributeName: id
AttributeType: S
- AttributeName: user_name
AttributeType: S
KeySchema:
- AttributeName: id
KeyType: HASH
GlobalSecondaryIndexes:
- IndexName: IAM_GSI
KeySchema:
- AttributeName: user_name
KeyType: HASH
Projection:
ProjectionType: ALL
ProvisionedThroughput:
ReadCapacityUnits: 5
WriteCapacityUnits: 5
```
There are other sections you can use. For more, please check out serverless framework documentation [here](https://serverless.com/framework/docs/).
After defining our serverless.yml, we can start writing our Go codes. Let's create ``src/handlers/createHandler.go`` which is responsible for handling a POST request.
First, we need to define the package name as ``main``
```
package main
```
or else you will get something like this
```
{
"errorMessage": "fork/exec /var/task/main: no such file or directory",
"errorType": "PathError"
}
```
Import the packages that will be used later
```
import (
"context"
"encoding/json"
"fmt"
"os"
"time"
"github.com/aws/aws-lambda-go/events"
"github.com/aws/aws-lambda-go/lambda"
"github.com/aws/aws-sdk-go/aws"
"github.com/aws/aws-sdk-go/aws/session"
"github.com/aws/aws-sdk-go/service/dynamodb"
"github.com/aws/aws-sdk-go/service/dynamodb/dynamodbattribute"
"gopkg.in/go-playground/validator.v9"
"github.com/satori/go.uuid"
utils "../utils"
)
```
Create a User struct. Since some fields are optional, we can use ``omitempty`` to omit them.
```
type User struct {
ID string `json:"id" validate:"required"`
UserName string `json:"user_name" validate:"required,min=4,max=20"`
FirstName *string `json:"first_name,omitempty"`
LastName *string `json:"last_name,omitempty"`
Age *int `json:"age,omitempty"`
Phone *string `json:"phone,omitempty"`
Password string `json:"password" validate:"required,min=4,max=50"`
Email string `json:"email" validate:"required,email"`
Role string `json:"role" validate:"required,min=4,max=20"`
IsActive bool `json:"is_active" validate:"required"`
CreatedAt string `json:"created_at,omitempty"`
ModifiedAt string `json:"modified_at,omitempty"`
DeactivatedAt *string `json:"deactivated_at,omitempty"`
}
```
Declare a global variable ``svc``
```
var svc *dynamodb.DynamoDB
```
Create an init function which is executed when the handler is loaded. In this function, we simply initialize a session to AWS and create a DynamoDB client service.
```
func init() {
region := os.Getenv("AWS_REGION")
// Initialize a session
if session, err := session.NewSession(&aws.Config{
Region: ®ion,
}); err != nil {
fmt.Println(fmt.Sprintf("Failed to initialize a session to AWS: %s", err.Error()))
} else {
// Create DynamoDB client
svc = dynamodb.New(session)
}
}
```
Create a main function. It is the entry point that executes our Lambda function code ``Create``
```
func main() {
lambda.Start(Create)
}
```
Create a function called ``Create`` which is our Lambda function. Please note that the handler name has to be captialized.
```
func Create(ctx context.Context, request events.APIGatewayProxyRequest) (events.APIGatewayProxyResponse, error) {
// TODO
}
```
Inside ``Create``, declare two variables which will be used later
```
var (
id = uuid.Must(uuid.NewV4()).String()
tableName = aws.String(os.Getenv("IAM_TABLE_NAME"))
)
```
Initialize ``user`` with default values
```
user := &User{
ID: id,
IsActive: true,
Role: "user",
CreatedAt: time.Now().String(),
ModifiedAt: time.Now().String(),
}
```
Use json.Unmarshal to parse the request body
```
json.Unmarshal([]byte(request.Body), user)
```
You may notice that there are some validation tags in the user struct. Validation should be done in both frontend and backend. Here's the way to validate the user input. If validation fails, it will end immediately and return an APIGatewayProxyResponse.
```
var validate *validator.Validate
validate = validator.New()
err := validate.Struct(user)
if err != nil {
// Status Bad Request
return events.APIGatewayProxyResponse{
Body: err.Error(),
StatusCode: 400,
}, nil
}
```
We need to generate a hash password before storing in dynamodb
```
// Encrypt password
user.Password, err = utils.HashPassword(user.Password)
if err != nil {
fmt.Println("Got error calling HashPassword:")
fmt.Println(err.Error())
// Status Bad Request
return events.APIGatewayProxyResponse{
Body: err.Error(),
StatusCode: 400,
}, nil
}
```
utils/password.go
```
package utils
import (
"golang.org/x/crypto/bcrypt"
)
func HashPassword(password string) (string, error) {
hash, err := bcrypt.GenerateFromPassword([]byte(password), 15)
return string(hash), err
}
```
We need to convert the User Go type to a dynamodb.AttributeValue type by using MarshalMap so that we can use the values to make a PutItem API request.
```
item, err := dynamodbattribute.MarshalMap(user)
if err != nil {
fmt.Println("Got error calling MarshalMap:")
fmt.Println(err.Error())
// Status Bad Request
return events.APIGatewayProxyResponse{
Body: err.Error(),
StatusCode: 400,
}, nil
}
```
Create PutItemInput parameters
```
params := &dynamodb.PutItemInput{
Item: item,
TableName: tableName,
}
```
Use the service to trigger call PutItem with the parameters we just created
```
if _, err := svc.PutItem(params); err != nil {
// Status Internal Server Error
return events.APIGatewayProxyResponse{
Body: err.Error(),
StatusCode: 500,
}, nil
} else {
body, _ := json.Marshal(user)
// Status OK
return events.APIGatewayProxyResponse{
Body: string(body),
StatusCode: 200,
}, nil
}
```
# Buliding our code
For building our code, we can write a simple bash script to do that.
/scripts/build.sh
```bash
#!/usr/bin/env bash
dep ensure
echo "************************************************"
echo "* Compiling functions to bin/handlers/ ... "
echo "************************************************"
rm -rf bin/
cd src/handlers/
for f in *.go; do
filename="${f%.go}"
if GOOS=linux go build -o "../../bin/handlers/$filename" ${f}; then
echo "* Compiled $filename"
else
echo "* Failed to compile $filename!"
exit 1
fi
done
echo "************************************************"
echo "* Formatting Code ... "
echo "************************************************"
go fmt
echo "************************************************"
echo "* Build Completed "
echo "************************************************"
```
``dep`` is a dependency management tool for Go. We use ``dep`` to delivers a safe, complete, and reproducible set of dependencies.
We need to create some rules in ``Gopkg.toml`` to let ``dep`` catch up the changes.
```toml
[[constraint]]
name = "github.com/aws/aws-lambda-go"
version = "1.0.1"
[[constraint]]
name = "github.com/aws/aws-sdk-go"
version = "1.12.70"
[[constraint]]
name = "github.com/satori/go.uuid"
version = "1.2.0"
[[constraint]]
name = "gopkg.in/go-playground/validator.v9"
version = "9.31.0"
[[constraint]]
name = "golang.org/x/crypto/bcrypt"
```
Then we remove ``rm -rf bin/``, build our Go codes and format the code before exiting.
Once the build is done, you can find your executable files under ``/bin``
# Deploying your lambda code
To deploy our code, we just need to run ``serverless deploy``. However, we need to make sure that we've built our code and the build completed successfully.
```bash
#!/usr/bin/env bash
echo "************************************************"
echo "* Building ... "
echo "************************************************"
./scripts/build.sh
if [ $? == 0 ]; then
echo "************************************************"
echo "* Deploying ... "
echo "************************************************"
serverless deploy
fi
```
Run the below command to deploy our code
```
./scripts/deploy.sh
```
You should see something like
```
************************************************
* Building ...
************************************************
************************************************
* Compiling functions to bin/handlers/ ...
************************************************
* Compiled createHandler
************************************************
* Formatting Code ...
************************************************
createHandler.go
************************************************
* Build Completed
************************************************
************************************************
* Deploying ...
************************************************
Serverless: Packaging service...
Serverless: Excluding development dependencies...
Serverless: Excluding development dependencies...
Serverless: Excluding development dependencies...
Serverless: Excluding development dependencies...
Serverless: Uploading CloudFormation file to S3...
Serverless: Uploading artifacts...
Serverless: Uploading service create.zip file to S3 (13.54 KB)...
Serverless: Validating template...
Serverless: Updating Stack...
Serverless: Checking Stack update progress...
........................
Serverless: Stack update finished...
Service Information
service: serverless-iam-dynamodb
stage: dev
region: ap-southeast-1
stack: serverless-iam-dynamodb-dev
resources: 30
api keys:
None
endpoints:
POST - https://.execute-api.ap-southeast-1.amazonaws.com/dev/iam
functions:
create: serverless-iam-dynamodb-dev-create
layers:
None
Serverless: Removing old service artifacts from S3...
Serverless: Run the "serverless" command to setup monitoring, troubleshooting and testing
```
Every time you run this script to deploy, serverless will create or update a single AWS CloudFormation stack to provision / update corresponding resources. You can see the resources in CloudFormation Portal.
CloudFormation > Stacks > serverless-iam-dynamodb-dev
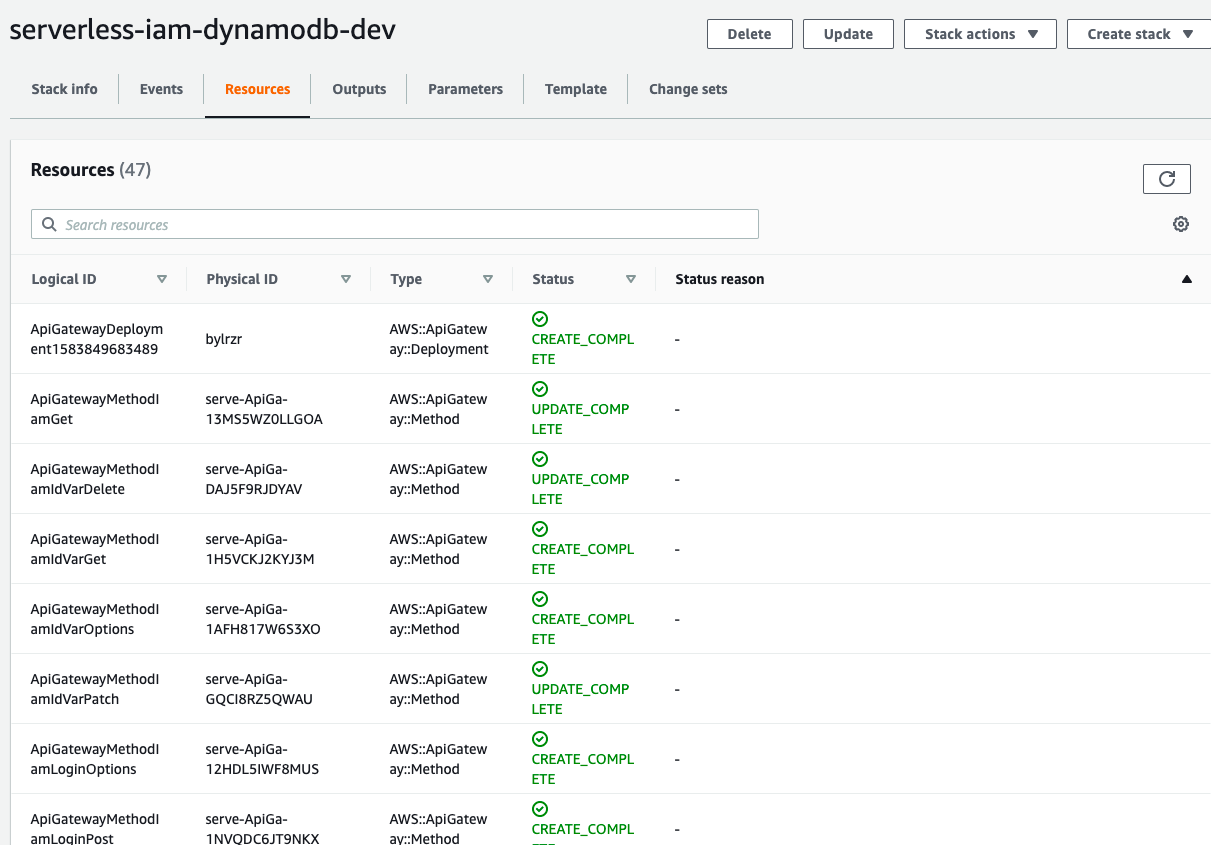
# Testing
If you go to AWS Lambda Console, you will see there is a function called ``serverless-iam-dynamodb-dev-create``
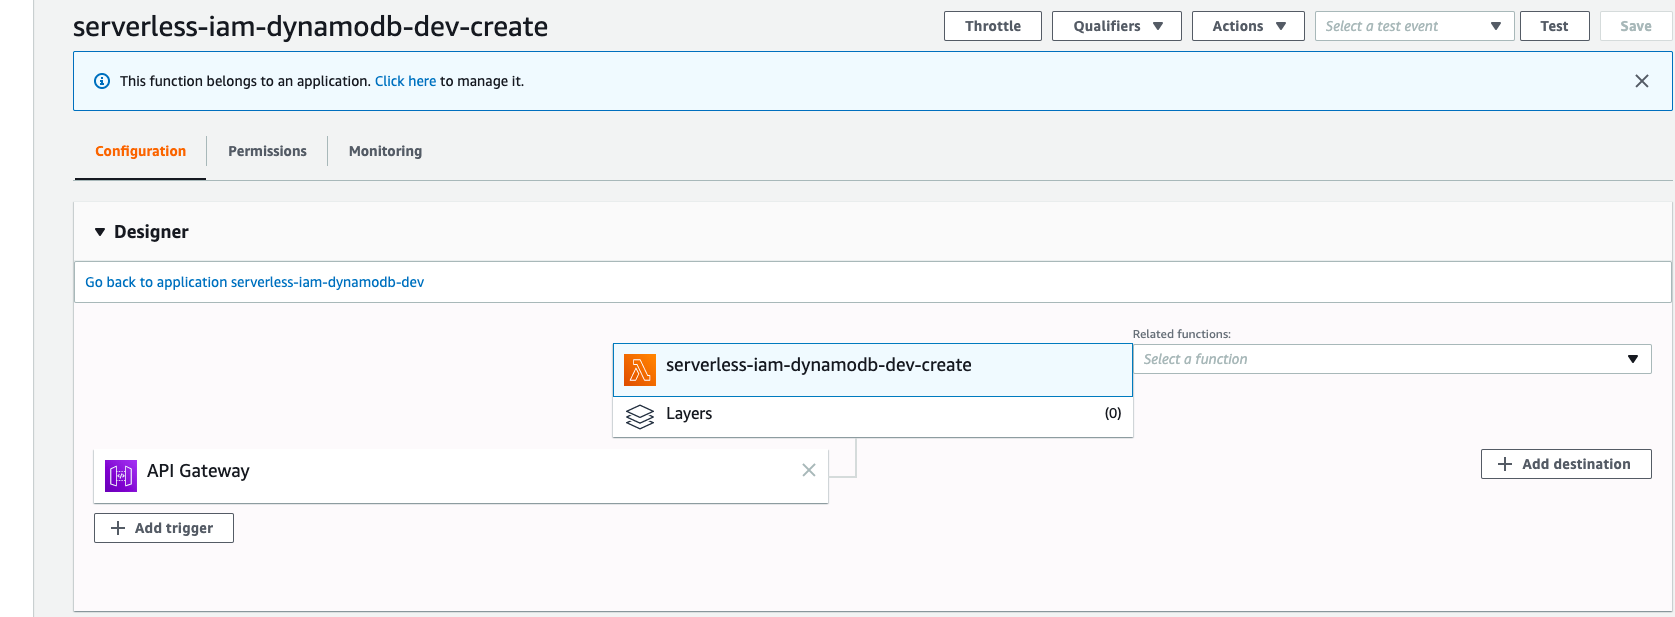
You can test your code either in Lambda or API Gateway.
A sample request
```json
{
"user_name": "wingkwong",
"email": "wingkwong@gmail.com",
"password": "password"
}
```
A sample response
```json
{
"id": "bd6fde14-3f6a-4551-95f3-349077a5501f",
"user_name": "wingkwong",
"first_name": null,
"last_name": null,
"age": null,
"phone": null,
"email": "wingkwong@gmail.com",
"password": "$2a$14$iwyLz8DOnbcolxXezZGXG.uXN9kCxJ8aYzMFftYZ06j1Ybb4uThC2",
"role": "user",
"is_active": true,
"created_at": "2019-12-28 11:08:10.684640037 +0000 UTC m=+0.077910868",
"modified_at": "2019-12-28 11:08:10.684757949 +0000 UTC m=+0.078028753"
}
```
Go to DynamoDB and verify the result. The record has been inserted to ``serverless-iam-dynamodb-dev-iam``
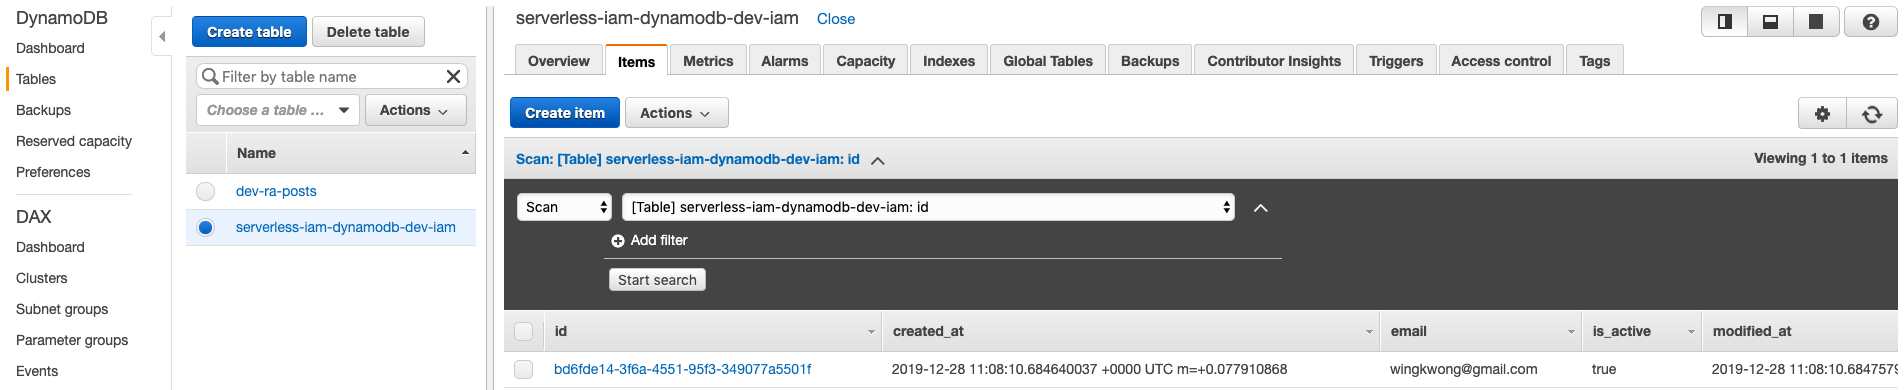
If you have any errors, you can go to CloudWatch > Logs > Log groups to view the log streams under ``/aws/lambda/serverless-iam-dynamodb-dev-create``
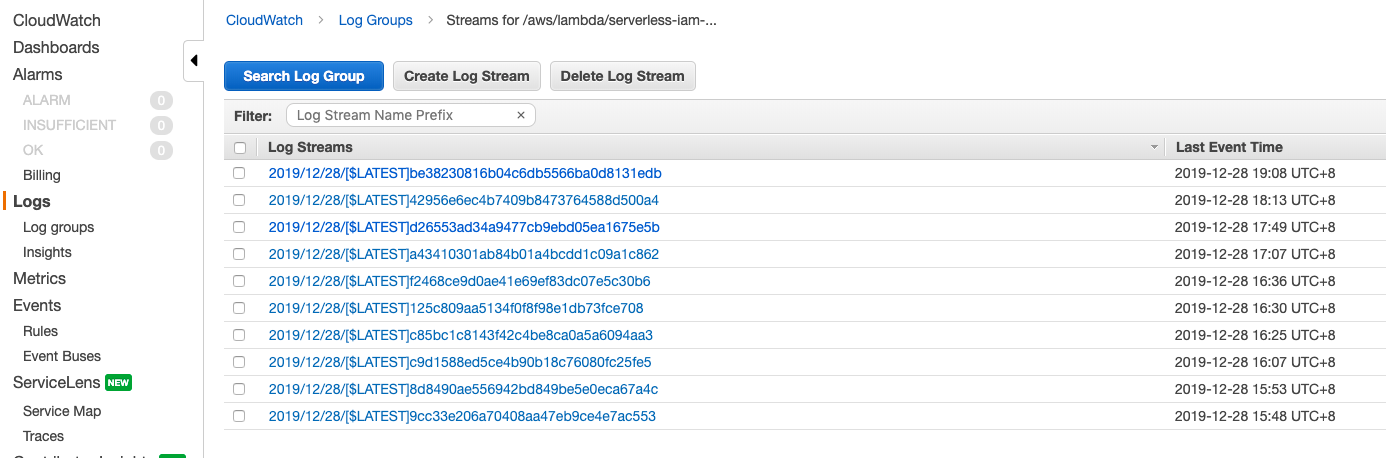
That's it for part 1. In the next post, we'll continue to create ``listHandler``.
Some useful links:
- [Go](https://golang.org/)
- [Dep Doc](https://golang.github.io/dep/docs/introduction.html)
- [Serverless Framework](https://serverless.com/)
- [Configure AWS Credentials](https://docs.aws.amazon.com/cli/latest/userguide/cli-chap-configure.html)
- [AWS SDK for Go API Reference](https://docs.aws.amazon.com/sdk-for-go/api/service/dynamodb/)
Monday, 24 February 2020
Building and pushing a docker image to Amazon ECR with GitHub Actions
GitHub Actions enables you to create custom software development life cycle (SDLC) workflows directly in your GitHub repository.
Workflows are custom automated processes that you can set up in your repository to build, test, package, release, or deploy any project on GitHub. With workflows you can automate your software development life cycle with a wide range of tools and services.
In this post, you'll learn how to use a GitHub Actions workflow to build and push a new container image to Amazon ECR upon code change.
You must store workflows in the ``.github/workflows`` directory in the root of your repository. The files are in ``.yml`` or ``.yaml`` format.
Let's create one called ``build.yml``.
The first part is the name of your workflow. It is used to display on your repository's actions page.
```
name: Building and pushing a docker image to Amazon ECR
```
The second part is ``on``, which is the name of the GitHub event triggering the workflow.
You can provide a single event
```
on: push
```
or a list of events
```
on: [push, pull_request]
```
We can also add more configurations. For example, we can specify activity types. The below example shows it triggers the workflow on push or pull request only for the master branch and for the paths under ``app/**``.
```
on:
pull_request:
paths:
- app/**
branches:
- master
push:
paths:
- app/**
branches:
- master
```
The next part is ``env``. We'll setup environment variables to provide configuration option and credentials via Github.
```
env:
AWS_DEFAULT_REGION: ap-southeast-1
AWS_DEFAULT_OUTPUT: json
AWS_ACCOUNT_ID: ${{ secrets.AWS_ACCOUNT_ID }}
AWS_ACCESS_KEY_ID: ${{ secrets.AWS_ACCESS_KEY_ID }}
AWS_SECRET_ACCESS_KEY: ${{ secrets.AWS_SECRET_ACCESS_KEY }}
CONTAINER_IMAGE: example-container:${{ github.sha }}
```
Go to Github, navigate to Settings in your repository. Click Secrets.
Add three new secrets namely ``AWS_ACCOUNT_ID``, ``AWS_ACCESS_KEY_ID``, and ``AWS_SECRET_ACCESS_KEY``.
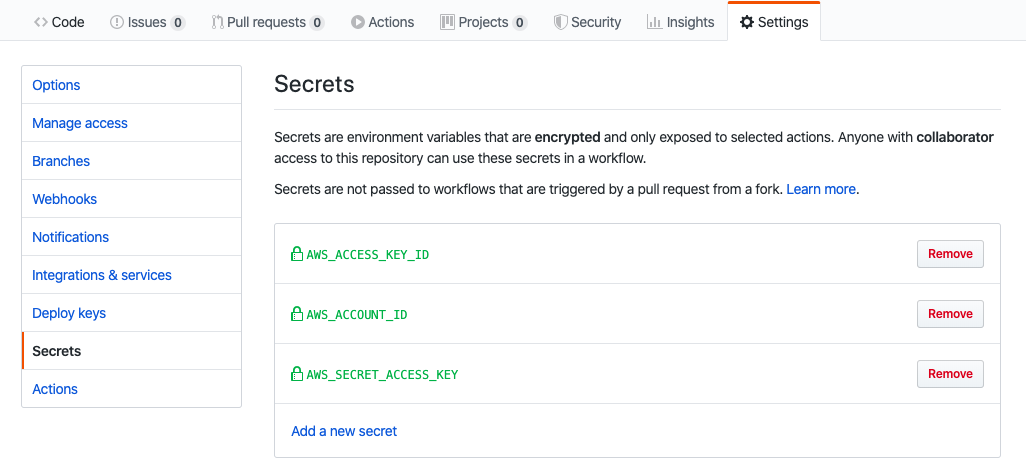
A workflow run is made up of one or more jobs. They run in parallel by default. Each job runs in an environment specified by ``runs-on``.
A job contains a sequence of tasks called steps. Steps can run commands, run setup tasks, or run an action in your repository, a public repository, or an action published in a Docker registry.
```
jobs:
build-and-push:
name: Building and pushing image to AWS ECR
runs-on: ubuntu-latest
steps:
- name: Checkout
uses: actions/checkout@master
- name: Setup ECR
run: |
$( aws ecr get-login --no-include-email )
- name: Build and tag the image
run: |
docker build \
-t $CONTAINER_IMAGE \
-t $AWS_ACCOUNT_ID.dkr.ecr.$AWS_DEFAULT_REGION.amazonaws.com/$CONTAINER_IMAGE ./app
- name: Push
if: github.ref == 'refs/heads/master'
run: |
docker push $AWS_ACCOUNT_ID.dkr.ecr.$AWS_DEFAULT_REGION.amazonaws.com/$CONTAINER_IMAGE
```
Let's break it out. There is a job called ``build-and-push``. There are four steps running on a virtual environment which is Ubuntu 18.04.
The first step is to check out the master.
```
- name: Checkout
uses: actions/checkout@master
```
Then, we need to setup our Amazon ECR in order to push our image to it.
```
run: |
$( aws ecr get-login --no-include-email )
```
The third step is to build and tag the docker image. Notice that we are using the environment variables defined in ``env``.
```
- name: Build and tag the image
run: |
docker build \
-t $CONTAINER_IMAGE \
-t $AWS_ACCOUNT_ID.dkr.ecr.$AWS_DEFAULT_REGION.amazonaws.com/$CONTAINER_IMAGE ./app
```
The last step is to run ``docker push`` to push the image built in the previous step to Amazon ECR.
```
- name: Push
if: github.ref == 'refs/heads/master'
run: |
docker push $AWS_ACCOUNT_ID.dkr.ecr.$AWS_DEFAULT_REGION.amazonaws.com/$CONTAINER_IMAGE
```
Commit something under app directory and push the changes to master.
Navigate to Actions. You should see a workflow is being processed.

You can see the status or check the log for each step.
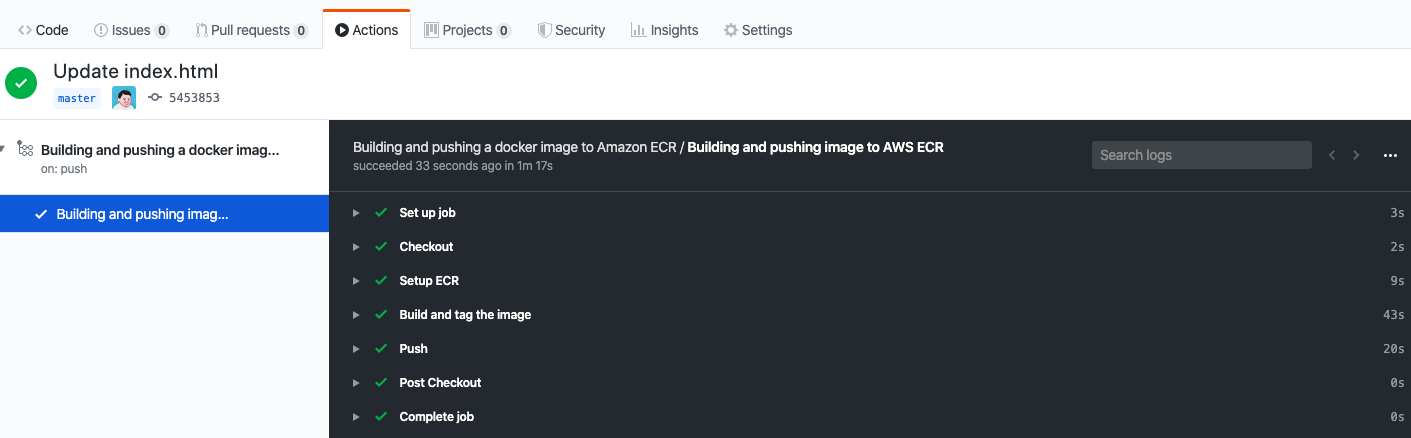
You can see the latest tag name when you expand ``Build and tag the image``.
```
Successfully built a1ffb1e3955b
Successfully tagged example-container:545385325b99e079cb7ee69d3809efd90cbffba9
Successfully tagged ***.dkr.ecr.ap-southeast-1.amazonaws.com/example-container:545385325b99e079cb7ee69d3809efd90cbffba9
```
Go to AWS ECR Console, you should see the image there.
That's it. Here's the complete build yaml file.
```
name: Building and pushing a docker image to Amazon ECR
on:
pull_request:
paths:
- app/**
branches:
- master
push:
paths:
- app/**
branches:
- master
env:
AWS_DEFAULT_REGION: ap-southeast-1
AWS_DEFAULT_OUTPUT: json
AWS_ACCOUNT_ID: ${{ secrets.AWS_ACCOUNT_ID }}
AWS_ACCESS_KEY_ID: ${{ secrets.AWS_ACCESS_KEY_ID }}
AWS_SECRET_ACCESS_KEY: ${{ secrets.AWS_SECRET_ACCESS_KEY }}
CONTAINER_IMAGE: example-container:${{ github.sha }}
jobs:
build-and-push:
name: Building and pushing image to AWS ECR
runs-on: ubuntu-latest
steps:
- name: Checkout
uses: actions/checkout@master
- name: Setup ECR
run: |
$( aws ecr get-login --no-include-email )
- name: Build and tag the image
run: |
docker build \
-t $CONTAINER_IMAGE \
-t $AWS_ACCOUNT_ID.dkr.ecr.$AWS_DEFAULT_REGION.amazonaws.com/$CONTAINER_IMAGE ./app
- name: Push
if: github.ref == 'refs/heads/master'
run: |
docker push $AWS_ACCOUNT_ID.dkr.ecr.$AWS_DEFAULT_REGION.amazonaws.com/$CONTAINER_IMAGE
```
For more, please check out [GitHub Actions Documentation](https://help.github.com/en/actions)
Subscribe to:
Posts (Atom)