Tuesday, 3 March 2020
Building Serverless CRUD services in Go with DynamoDB - Part 1
[AWS Lamdba](https://aws.amazon.com/lambda/) is a serverless compute service which allows you to run your code without provisioning or managing servers. It costs only the compute time that you consume. It also supports continuous scaling. [AWS DynamoDB](https://aws.amazon.com/dynamodb/) is a serverless database for applications that need high performance at any scale. We'll also use [Serverless Framework](https://serverless.com/) to deploy our services on AWS.
In this series, we'll go through how to implement serverless CRUD services with DynamoDB in Go.
# Project structure
/.serverless
It will be created automatically when running ``serverless deploy`` in where deployment zip files, cloudformation stack files will be generated
/bin
This is the folder where our built Go codes are placed
/scripts
General scripts for building Go codes and deployment
/src/handlers
All Lambda handlers will be placed here
# Prerequisites
Install serverless cli
```
npm install -g serverless
```
Install aws cli
```
pip install awscli
```
Setup your aws credentials
```
aws configure
```
Of course you need to install [Go](https://golang.org/doc/install)
# Getting started
First of all, we need to create ``serverless.yml`` which is the main config for your service. When you run ``serverless deploy``, the framework will use this config file to help provision the corresponding resources.
First, let's name our service. You can name whatever your like.
```
service: serverless-iam-dynamodb
```
Then, let's create the primary section - provider. We can choose our serverless provider such as AWS, Google Cloud or Azure and specify the programming language we use. In this example, we'll use aws with go 1.x. We can need to set the stage, region, environment variables and IAM role statements here.
```
provider:
name: aws
runtime: go1.x
stage: dev
region: ap-southeast-1
environment:
IAM_TABLE_NAME: ${self:custom.iamTableName}
iamRoleStatements:
- Effect: Allow
Action:
- dynamodb:Scan
- dynamodb:Query
- dynamodb:GetItem
- dynamodb:PutItem
- dynamodb:UpdateItem
- dynamodb:DeleteItem
Resource:
- ${self:custom.iamTableArn}
- Fn::Join:
- /
- - ${self:custom.iamTableArn}
- index/*
```
Every Lambda function requires certain permissions to interact with AWS resources and they are set via an AWS IAM Role. In this example, we allow the function to perform multiple dynamodb actions on the resource ``${self:custom.iamTableArn}``.
Since we'll use ``dynamodb:Query`` and by default index is not allowed so we have to allow it here. Below snippet shows how to join our ARN and the string index/*.
```
- Fn::Join:
- /
- - ${self:custom.iamTableArn}
- index/*
```
What is ``${self:custom.iamTableArn}``? We haven't defined it yet. Let's do it.
```
custom:
iamTableName: ${self:service}-${self:provider.stage}-iam
iamTableArn:
Fn::Join:
- ":"
- - arn
- aws
- dynamodb
- Ref: AWS::Region
- Ref: AWS::AccountId
- table/${self:custom.iamTableName}
```
This ``custom`` section just allows us to create our custom variables. In this example, we define our table name and table ARN.
After that, we need to define how to package our code.
```
package:
individually: true
exclude:
- ./**
```
It's pretty self-explanatory. This is to package our functions separately (See the below ``functions`` section) and exclude everything in the root directory.
Moving on to next section ``functions``. This is where we define our Lambda functions. We'll create a function called ``create`` where the handler is ``bin/handlers/createHandler`` which will be built by our script later. Inside ``events``, we can define our HTTP endpoint. This example is a POST method with the path ``/iam``. To handle preflight requests, we can set ``cors: true`` to the HTTP endpoint.
```
functions:
create:
handler: bin/handlers/createHandler
package:
include:
- ./bin/handlers/createHandler
events:
- http:
path: iam
method: post
cors: true
```
The last section is to define what resources we need to provision. These resources are AWS infrastructure resources that our functions depend on. In this example, we need to deploy DynamoDB.
```
resources:
Resources:
iamTable:
Type: AWS::DynamoDB::Table
Properties:
TableName: ${self:custom.iamTableName}
ProvisionedThroughput:
ReadCapacityUnits: 1
WriteCapacityUnits: 1
AttributeDefinitions:
- AttributeName: id
AttributeType: S
- AttributeName: user_name
AttributeType: S
KeySchema:
- AttributeName: id
KeyType: HASH
GlobalSecondaryIndexes:
- IndexName: IAM_GSI
KeySchema:
- AttributeName: user_name
KeyType: HASH
Projection:
ProjectionType: ALL
ProvisionedThroughput:
ReadCapacityUnits: 5
WriteCapacityUnits: 5
```
There are other sections you can use. For more, please check out serverless framework documentation [here](https://serverless.com/framework/docs/).
After defining our serverless.yml, we can start writing our Go codes. Let's create ``src/handlers/createHandler.go`` which is responsible for handling a POST request.
First, we need to define the package name as ``main``
```
package main
```
or else you will get something like this
```
{
"errorMessage": "fork/exec /var/task/main: no such file or directory",
"errorType": "PathError"
}
```
Import the packages that will be used later
```
import (
"context"
"encoding/json"
"fmt"
"os"
"time"
"github.com/aws/aws-lambda-go/events"
"github.com/aws/aws-lambda-go/lambda"
"github.com/aws/aws-sdk-go/aws"
"github.com/aws/aws-sdk-go/aws/session"
"github.com/aws/aws-sdk-go/service/dynamodb"
"github.com/aws/aws-sdk-go/service/dynamodb/dynamodbattribute"
"gopkg.in/go-playground/validator.v9"
"github.com/satori/go.uuid"
utils "../utils"
)
```
Create a User struct. Since some fields are optional, we can use ``omitempty`` to omit them.
```
type User struct {
ID string `json:"id" validate:"required"`
UserName string `json:"user_name" validate:"required,min=4,max=20"`
FirstName *string `json:"first_name,omitempty"`
LastName *string `json:"last_name,omitempty"`
Age *int `json:"age,omitempty"`
Phone *string `json:"phone,omitempty"`
Password string `json:"password" validate:"required,min=4,max=50"`
Email string `json:"email" validate:"required,email"`
Role string `json:"role" validate:"required,min=4,max=20"`
IsActive bool `json:"is_active" validate:"required"`
CreatedAt string `json:"created_at,omitempty"`
ModifiedAt string `json:"modified_at,omitempty"`
DeactivatedAt *string `json:"deactivated_at,omitempty"`
}
```
Declare a global variable ``svc``
```
var svc *dynamodb.DynamoDB
```
Create an init function which is executed when the handler is loaded. In this function, we simply initialize a session to AWS and create a DynamoDB client service.
```
func init() {
region := os.Getenv("AWS_REGION")
// Initialize a session
if session, err := session.NewSession(&aws.Config{
Region: ®ion,
}); err != nil {
fmt.Println(fmt.Sprintf("Failed to initialize a session to AWS: %s", err.Error()))
} else {
// Create DynamoDB client
svc = dynamodb.New(session)
}
}
```
Create a main function. It is the entry point that executes our Lambda function code ``Create``
```
func main() {
lambda.Start(Create)
}
```
Create a function called ``Create`` which is our Lambda function. Please note that the handler name has to be captialized.
```
func Create(ctx context.Context, request events.APIGatewayProxyRequest) (events.APIGatewayProxyResponse, error) {
// TODO
}
```
Inside ``Create``, declare two variables which will be used later
```
var (
id = uuid.Must(uuid.NewV4()).String()
tableName = aws.String(os.Getenv("IAM_TABLE_NAME"))
)
```
Initialize ``user`` with default values
```
user := &User{
ID: id,
IsActive: true,
Role: "user",
CreatedAt: time.Now().String(),
ModifiedAt: time.Now().String(),
}
```
Use json.Unmarshal to parse the request body
```
json.Unmarshal([]byte(request.Body), user)
```
You may notice that there are some validation tags in the user struct. Validation should be done in both frontend and backend. Here's the way to validate the user input. If validation fails, it will end immediately and return an APIGatewayProxyResponse.
```
var validate *validator.Validate
validate = validator.New()
err := validate.Struct(user)
if err != nil {
// Status Bad Request
return events.APIGatewayProxyResponse{
Body: err.Error(),
StatusCode: 400,
}, nil
}
```
We need to generate a hash password before storing in dynamodb
```
// Encrypt password
user.Password, err = utils.HashPassword(user.Password)
if err != nil {
fmt.Println("Got error calling HashPassword:")
fmt.Println(err.Error())
// Status Bad Request
return events.APIGatewayProxyResponse{
Body: err.Error(),
StatusCode: 400,
}, nil
}
```
utils/password.go
```
package utils
import (
"golang.org/x/crypto/bcrypt"
)
func HashPassword(password string) (string, error) {
hash, err := bcrypt.GenerateFromPassword([]byte(password), 15)
return string(hash), err
}
```
We need to convert the User Go type to a dynamodb.AttributeValue type by using MarshalMap so that we can use the values to make a PutItem API request.
```
item, err := dynamodbattribute.MarshalMap(user)
if err != nil {
fmt.Println("Got error calling MarshalMap:")
fmt.Println(err.Error())
// Status Bad Request
return events.APIGatewayProxyResponse{
Body: err.Error(),
StatusCode: 400,
}, nil
}
```
Create PutItemInput parameters
```
params := &dynamodb.PutItemInput{
Item: item,
TableName: tableName,
}
```
Use the service to trigger call PutItem with the parameters we just created
```
if _, err := svc.PutItem(params); err != nil {
// Status Internal Server Error
return events.APIGatewayProxyResponse{
Body: err.Error(),
StatusCode: 500,
}, nil
} else {
body, _ := json.Marshal(user)
// Status OK
return events.APIGatewayProxyResponse{
Body: string(body),
StatusCode: 200,
}, nil
}
```
# Buliding our code
For building our code, we can write a simple bash script to do that.
/scripts/build.sh
```bash
#!/usr/bin/env bash
dep ensure
echo "************************************************"
echo "* Compiling functions to bin/handlers/ ... "
echo "************************************************"
rm -rf bin/
cd src/handlers/
for f in *.go; do
filename="${f%.go}"
if GOOS=linux go build -o "../../bin/handlers/$filename" ${f}; then
echo "* Compiled $filename"
else
echo "* Failed to compile $filename!"
exit 1
fi
done
echo "************************************************"
echo "* Formatting Code ... "
echo "************************************************"
go fmt
echo "************************************************"
echo "* Build Completed "
echo "************************************************"
```
``dep`` is a dependency management tool for Go. We use ``dep`` to delivers a safe, complete, and reproducible set of dependencies.
We need to create some rules in ``Gopkg.toml`` to let ``dep`` catch up the changes.
```toml
[[constraint]]
name = "github.com/aws/aws-lambda-go"
version = "1.0.1"
[[constraint]]
name = "github.com/aws/aws-sdk-go"
version = "1.12.70"
[[constraint]]
name = "github.com/satori/go.uuid"
version = "1.2.0"
[[constraint]]
name = "gopkg.in/go-playground/validator.v9"
version = "9.31.0"
[[constraint]]
name = "golang.org/x/crypto/bcrypt"
```
Then we remove ``rm -rf bin/``, build our Go codes and format the code before exiting.
Once the build is done, you can find your executable files under ``/bin``
# Deploying your lambda code
To deploy our code, we just need to run ``serverless deploy``. However, we need to make sure that we've built our code and the build completed successfully.
```bash
#!/usr/bin/env bash
echo "************************************************"
echo "* Building ... "
echo "************************************************"
./scripts/build.sh
if [ $? == 0 ]; then
echo "************************************************"
echo "* Deploying ... "
echo "************************************************"
serverless deploy
fi
```
Run the below command to deploy our code
```
./scripts/deploy.sh
```
You should see something like
```
************************************************
* Building ...
************************************************
************************************************
* Compiling functions to bin/handlers/ ...
************************************************
* Compiled createHandler
************************************************
* Formatting Code ...
************************************************
createHandler.go
************************************************
* Build Completed
************************************************
************************************************
* Deploying ...
************************************************
Serverless: Packaging service...
Serverless: Excluding development dependencies...
Serverless: Excluding development dependencies...
Serverless: Excluding development dependencies...
Serverless: Excluding development dependencies...
Serverless: Uploading CloudFormation file to S3...
Serverless: Uploading artifacts...
Serverless: Uploading service create.zip file to S3 (13.54 KB)...
Serverless: Validating template...
Serverless: Updating Stack...
Serverless: Checking Stack update progress...
........................
Serverless: Stack update finished...
Service Information
service: serverless-iam-dynamodb
stage: dev
region: ap-southeast-1
stack: serverless-iam-dynamodb-dev
resources: 30
api keys:
None
endpoints:
POST - https://.execute-api.ap-southeast-1.amazonaws.com/dev/iam
functions:
create: serverless-iam-dynamodb-dev-create
layers:
None
Serverless: Removing old service artifacts from S3...
Serverless: Run the "serverless" command to setup monitoring, troubleshooting and testing
```
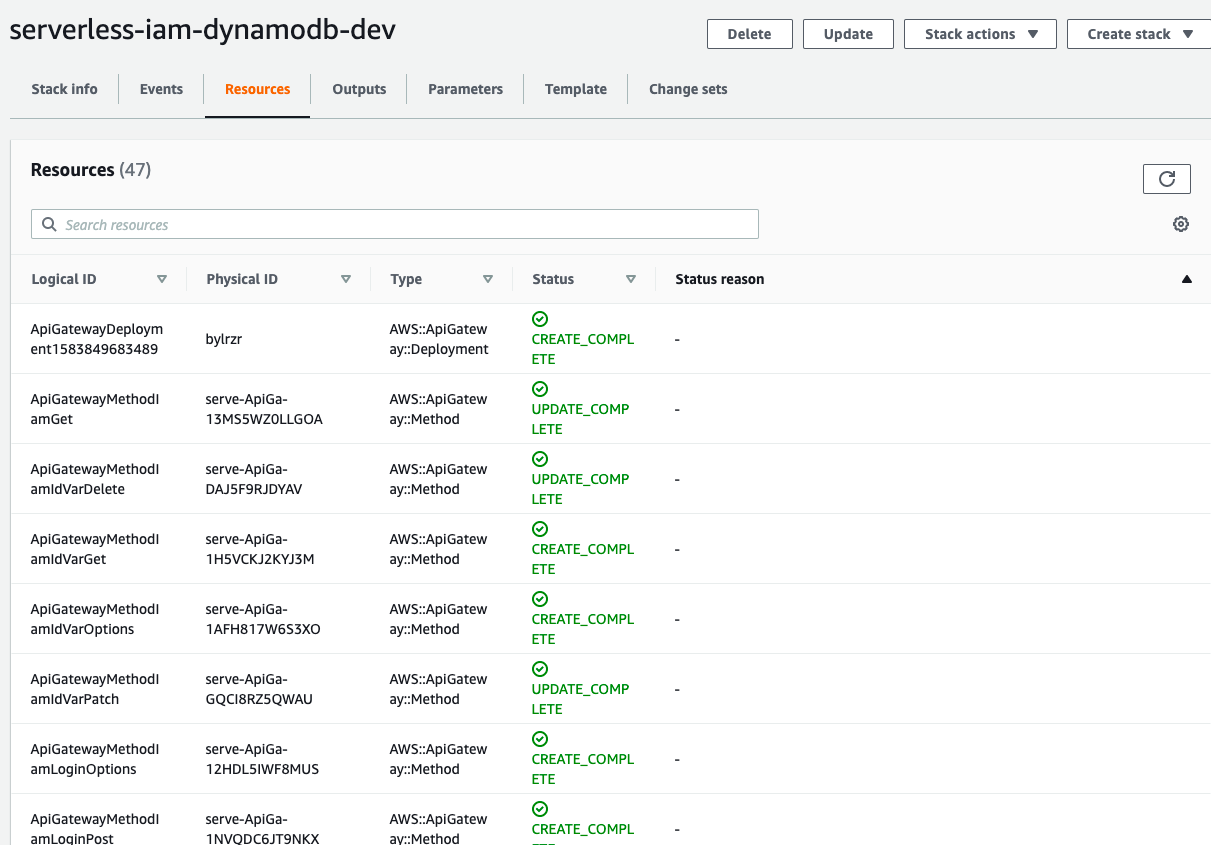
Every time you run this script to deploy, serverless will create or update a single AWS CloudFormation stack to provision / update corresponding resources. You can see the resources in CloudFormation Portal.
CloudFormation > Stacks > serverless-iam-dynamodb-dev

# Testing
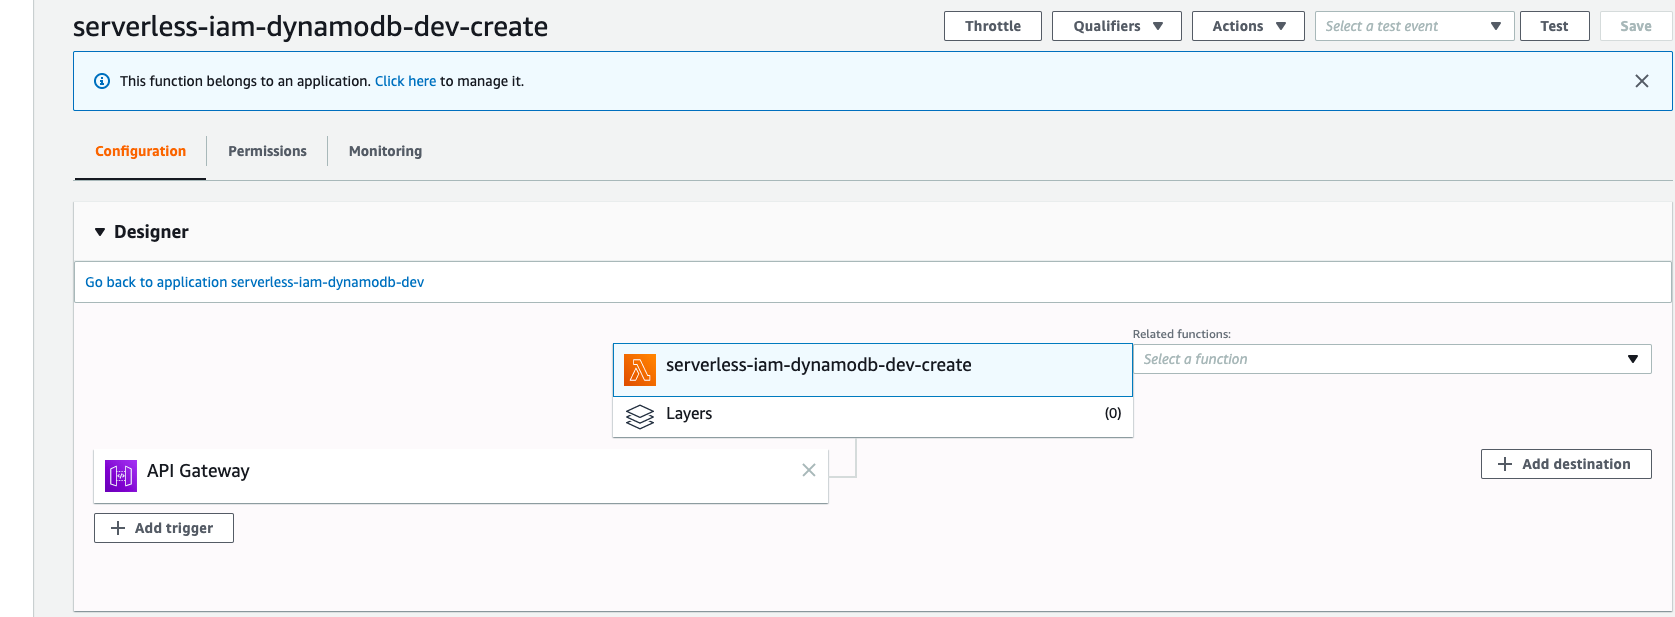
If you go to AWS Lambda Console, you will see there is a function called ``serverless-iam-dynamodb-dev-create``

You can test your code either in Lambda or API Gateway.
A sample request
```json
{
"user_name": "wingkwong",
"email": "wingkwong@gmail.com",
"password": "password"
}
```
A sample response
```json
{
"id": "bd6fde14-3f6a-4551-95f3-349077a5501f",
"user_name": "wingkwong",
"first_name": null,
"last_name": null,
"age": null,
"phone": null,
"email": "wingkwong@gmail.com",
"password": "$2a$14$iwyLz8DOnbcolxXezZGXG.uXN9kCxJ8aYzMFftYZ06j1Ybb4uThC2",
"role": "user",
"is_active": true,
"created_at": "2019-12-28 11:08:10.684640037 +0000 UTC m=+0.077910868",
"modified_at": "2019-12-28 11:08:10.684757949 +0000 UTC m=+0.078028753"
}
```
Go to DynamoDB and verify the result. The record has been inserted to ``serverless-iam-dynamodb-dev-iam``

If you have any errors, you can go to CloudWatch > Logs > Log groups to view the log streams under ``/aws/lambda/serverless-iam-dynamodb-dev-create``

That's it for part 1. In the next post, we'll continue to create ``listHandler``.
Some useful links:
- [Go](https://golang.org/)
- [Dep Doc](https://golang.github.io/dep/docs/introduction.html)
- [Serverless Framework](https://serverless.com/)
- [Configure AWS Credentials](https://docs.aws.amazon.com/cli/latest/userguide/cli-chap-configure.html)
- [AWS SDK for Go API Reference](https://docs.aws.amazon.com/sdk-for-go/api/service/dynamodb/)
Subscribe to:
Post Comments (Atom)
A Fun Problem - Math
# Problem Statement JATC's math teacher always gives the class some interesting math problems so that they don't get bored. Today t...
-
SHA stands for Secure Hashing Algorithm and 2 is just a version number. SHA-2 revises the construction and the big-length of the signature f...
-
## SQRT Decomposition Square Root Decomposition is an technique optimizating common operations in time complexity O(sqrt(N)). The idea of t...
No comments:
Post a Comment