Showing posts with label k8s. Show all posts
Showing posts with label k8s. Show all posts
Monday, 15 February 2021
Sealed Secrets Example
Demonstrating how to use ``sealed-secrets`` to encrypt and store Kubernetes secrets in git on a k3s cluster using k3d. The full source code can be found [here](https://github.com/wingkwong/sealed-secrets-example).
# What Problem does sealed-secrets Solve?
Secrets cannot be managed in git. Sealed Secrets can help encrypt your Secrets into SealedSecret which is safe to store in a public repository. It can be decrypted only by the controller running in the target cluster.
# Install k3d
k3d is a little helper to run k3s in docker, where k3s is the lightweight Kubernetes distribution by Rancher. It actually removes millions of lines of code from k8s. If you just need a learning playground, k3s is definitely your choice.
Check out [k3d Github Page](https://github.com/rancher/k3d#get) to see the installation guide.
> When creating a cluster, ``k3d`` utilises ``kubectl`` and ``kubectl`` is not part of ``k3d``. If you don't have ``kubectl``, please install and set up [here](https://kubernetes.io/docs/tasks/tools/install-kubectl/).
Once you've installed ``k3d`` and ``kubectl``, run
```
➜ k3d create -n sealed-secrets-example
```
We need to make ``kubectl`` to use the kubeconfig for that cluster.
```
➜ export KUBECONFIG="$(k3d get-kubeconfig --name='sealed-secrets-example')"
```
# Install kubeseal
The kubeseal utility is the first part of Sealed Secrets, and it uses asymmetric crypto to encrypt secrets that only the controller can decrypt.
```
➜ brew install kubeseal
```
# Apply sealed-secrets controller
The second part of Sealed Secrets is a cluster-side controller / operator.
```
➜ kubectl apply -f https://github.com/bitnami-labs/sealed-secrets/releases/download/v0.14.1/controller.yaml
rolebinding.rbac.authorization.k8s.io/sealed-secrets-controller created
clusterrolebinding.rbac.authorization.k8s.io/sealed-secrets-controller created
serviceaccount/sealed-secrets-controller created
customresourcedefinition.apiextensions.k8s.io/sealedsecrets.bitnami.com created
rolebinding.rbac.authorization.k8s.io/sealed-secrets-service-proxier created
role.rbac.authorization.k8s.io/sealed-secrets-service-proxier created
role.rbac.authorization.k8s.io/sealed-secrets-key-admin created
clusterrole.rbac.authorization.k8s.io/secrets-unsealer created
deployment.apps/sealed-secrets-controller created
service/sealed-secrets-controller created
```
```
➜ kubectl logs --tail=-1 -f -l name=sealed-secrets-controller -n kube-system
```
```
controller version: v0.14.1
2021/02/15 04:24:29 Starting sealed-secrets controller version: v0.14.1
2021/02/15 04:24:29 Searching for existing private keys
2021/02/15 04:24:32 New key written to kube-system/sealed-secrets-keynvpcz
2021/02/15 04:24:32 Certificate is
-----BEGIN CERTIFICATE-----
MIIErjCCApagAwIBAgIRAIh+6dntUQrrqSAWQ4gcwJ8wDQYJKoZIhvcNAQELBQAw
ADAeFw0yMTAyMTUwNDI0MzJaFw0zMTAyMTMwNDI0MzJaMAAwggIiMA0GCSqGSIb3
DQEBAQUAA4ICDwAwggIKAoICAQDxXLMWTnq5Z42APQ6pZZGTAaXS1BsNDOcJuIIE
Yv+bqKS0tb1cTbXDCpPxxqCj35iuI/jLy9LhjqTlzJFtDevUf2F2b2RzvRaEtHIY
pvAXMfNCVTkUMOuTGB72rTLx2KI1mYg6OI+PDh26BrWkxlbW8oFe7knoeXO3n6dJ
j8W9Ypg5ZXNxLqcagk/HmSAoGLQkzaq9rQiVVM2jA+LPUImH4jIph9BYvWjL+cLv
ax0WhybTYk/YAb+/4sV7OMI6AHl4e8jNgrVVj3DdWDhv3sNmuxshk0OypZ2fwrqV
s9N8so+7JADWQnXw1MTOAec4CS6RbVLl3RTwegDszgpZ9jXafy0WH3CNrdeVSJUl
3NJ8Qy40Y1mnrz3Qa+TbGjV9LTn2FpC3g59Zib2mtb62RYy0jOko54MjURtUao/n
p26P1/BtkPN024hpNngbKwN5JluNdeP6KDFiLwsAsYGs/YhyVoUa7vo+iMmHNwVr
FsyaGOEPSPRdi6KXj/HgxYAxMNpYY6b41rvOeQ1paf4c9f6L7NJamKyM+a8R/zt7
F06c7aHJFdvU4M4bMbRqVC7jmRa8y6fPRu/9jSfQ1lR2B1BJgEAGbk149bvbWiZ9
jP+vz5T3qLpWVqv05RTdAfusEDcmImSbrzSU3l2y67nmshAkPoZpM8PqBSVfrA6N
R99tiwIDAQABoyMwITAOBgNVHQ8BAf8EBAMCAAEwDwYDVR0TAQH/BAUwAwEB/zAN
BgkqhkiG9w0BAQsFAAOCAgEAxLMHynW7ZzAEVblRnB8bydlcCG4ddSTghLh085vN
OkzQOLDDaC++vTWzQA6CWyzNNkpuXpp9r3tzy6qcFvYfXSJrT1ZwyzWzgv2K+Bjm
M/OuLtOYLNT4L2SZxIPSc60lUn77RV11I7dFY3UNkqRvH7Gu+qQSYZFU1PZSTt5n
BSXHT2/+GaVD9bdK9/lfF6vNDeut3iEfY9pi3BR8d3G/EDz9B5fS/NPXV8gzXPUf
Bth3bUIZv+a06PNO7t02RarkskN7JIOb1WniYUjWxdYq7PGR6yriItGvLdRzrX9s
wtWrrUfhBSbNJW5CYMjZyxPQDdrh0SGm2aiAUTQux++jS63cehhhjAUSvKiklCEg
i2uuq5VuV1cbyq8gf3jCFXh9d5EjJE4eCMUEamh3NwIc2Tbl4C+KarVNxgFvPL8+
Nmnc8aVgHISuVxxcUz28Q0//I8VZrcsyw0b4T7X5exRRcEk0bW/CzX+Tqrjk3Pep
6FKvQP1iXV5WIocodGoMmOBhhihNjZOWugaaQpk41PCUqMkOnOyXmQ8bLI7E/wvB
VpDKjKQeCRbUAkDmFgRHoT8jYkaEeI43G2kWQTlPACNY6spsabKDw570j8gzHUTn
kEsUTISM/1/lnTpMV3me24VEDOlUFELBp/kXx3QAA0xO5IpHdaIMnse68oVIT9kZ
PBc=
-----END CERTIFICATE-----
2021/02/15 04:24:32 HTTP server serving on :8080
```
# Verify the sealed-secrets controller
```
➜ kubectl get pods -n kube-system
```
```
sealed-secrets-controller-59f9b7b6f4-4qsbq 1/1 Running 1 2m20s
```
```
➜ kubectl get secrets -n kube-system
```
```
sealed-secrets-controller-token-27cjx kubernetes.io/service-account-token 3 4m29s
sealed-secrets-keynvpcz kubernetes.io/tls 2 3m33s
```
Take a look at the secret ``sealed-secrets-keynvpcz``
```
➜ kubectl get secrets sealed-secrets-keynvpcz -n kube-system -o yaml
```
```
apiVersion: v1
data:
tls.crt: LS0tLS1CRUdJTiBDRVJUSUZJQ0FURS0tLS0tCk1JSUVyakNDQXBhZ0F3SUJBZ0lSQUloKzZkbnRVUXJycVNBV1E0Z2N3Sjh3RFFZSktvWklodmNOQVFFTEJRQXcKQURBZUZ3MHlNVEF5TVRVd05ESTBNekphRncwek1UQXlNVE13TkRJME16SmFNQUF3Z2dJaU1BMEdDU3FHU0liMwpEUUVCQVFVQUE0SUNEd0F3Z2dJS0FvSUNBUUR4WExNV1RucTVaNDJBUFE2cFpaR1RBYVhTMUJzTkRPY0p1SUlFCll2K2JxS1MwdGIxY1RiWERDcFB4eHFDajM1aXVJL2pMeTlMaGpxVGx6SkZ0RGV2VWYyRjJiMlJ6dlJhRXRISVkKcHZBWE1mTkNWVGtVTU91VEdCNzJyVEx4MktJMW1ZZzZPSStQRGgyNkJyV2t4bGJXOG9GZTdrbm9lWE8zbjZkSgpqOFc5WXBnNVpYTnhMcWNhZ2svSG1TQW9HTFFremFxOXJRaVZWTTJqQStMUFVJbUg0aklwaDlCWXZXakwrY0x2CmF4MFdoeWJUWWsvWUFiKy80c1Y3T01JNkFIbDRlOGpOZ3JWVmozRGRXRGh2M3NObXV4c2hrME95cFoyZndycVYKczlOOHNvKzdKQURXUW5YdzFNVE9BZWM0Q1M2UmJWTGwzUlR3ZWdEc3pncFo5alhhZnkwV0gzQ05yZGVWU0pVbAozTko4UXk0MFkxbW5yejNRYStUYkdqVjlMVG4yRnBDM2c1OVppYjJtdGI2MlJZeTBqT2tvNTRNalVSdFVhby9uCnAyNlAxL0J0a1BOMDI0aHBObmdiS3dONUpsdU5kZVA2S0RGaUx3c0FzWUdzL1loeVZvVWE3dm8raU1tSE53VnIKRnN5YUdPRVBTUFJkaTZLWGovSGd4WUF4TU5wWVk2YjQxcnZPZVExcGFmNGM5ZjZMN05KYW1LeU0rYThSL3p0NwpGMDZjN2FISkZkdlU0TTRiTWJScVZDN2ptUmE4eTZmUFJ1LzlqU2ZRMWxSMkIxQkpnRUFHYmsxNDlidmJXaVo5CmpQK3Z6NVQzcUxwV1ZxdjA1UlRkQWZ1c0VEY21JbVNicnpTVTNsMnk2N25tc2hBa1BvWnBNOFBxQlNWZnJBNk4KUjk5dGl3SURBUUFCb3lNd0lUQU9CZ05WSFE4QkFmOEVCQU1DQUFFd0R3WURWUjBUQVFIL0JBVXdBd0VCL3pBTgpCZ2txaGtpRzl3MEJBUXNGQUFPQ0FnRUF4TE1IeW5XN1p6QUVWYmxSbkI4YnlkbGNDRzRkZFNUZ2hMaDA4NXZOCk9relFPTEREYUMrK3ZUV3pRQTZDV3l6Tk5rcHVYcHA5cjN0enk2cWNGdllmWFNKclQxWnd5eld6Z3YySytCam0KTS9PdUx0T1lMTlQ0TDJTWnhJUFNjNjBsVW43N1JWMTFJN2RGWTNVTmtxUnZIN0d1K3FRU1laRlUxUFpTVHQ1bgpCU1hIVDIvK0dhVkQ5YmRLOS9sZkY2dk5EZXV0M2lFZlk5cGkzQlI4ZDNHL0VEejlCNWZTL05QWFY4Z3pYUFVmCkJ0aDNiVUladithMDZQTk83dDAyUmFya3NrTjdKSU9iMVduaVlVald4ZFlxN1BHUjZ5cmlJdEd2TGRSenJYOXMKd3RXcnJVZmhCU2JOSlc1Q1lNalp5eFBRRGRyaDBTR20yYWlBVVRRdXgrK2pTNjNjZWhoaGpBVVN2S2lrbENFZwppMnV1cTVWdVYxY2J5cThnZjNqQ0ZYaDlkNUVqSkU0ZUNNVUVhbWgzTndJYzJUYmw0QytLYXJWTnhnRnZQTDgrCk5tbmM4YVZnSElTdVZ4eGNVejI4UTAvL0k4VlpyY3N5dzBiNFQ3WDVleFJSY0VrMGJXL0N6WCtUcXJqazNQZXAKNkZLdlFQMWlYVjVXSW9jb2RHb01tT0JoaGloTmpaT1d1Z2FhUXBrNDFQQ1VxTWtPbk95WG1ROGJMSTdFL3d2QgpWcERLaktRZUNSYlVBa0RtRmdSSG9UOGpZa2FFZUk0M0cya1dRVGxQQUNOWTZzcHNhYktEdzU3MGo4Z3pIVVRuCmtFc1VUSVNNLzEvbG5UcE1WM21lMjRWRURPbFVGRUxCcC9rWHgzUUFBMHhPNUlwSGRhSU1uc2U2OG9WSVQ5a1oKUEJjPQotLS0tLUVORCBDRVJUSUZJQ0FURS0tLS0tCg==
tls.key: LS0tLS1CRUdJTiBSU0EgUFJJVkFURSBLRVktLS0tLQpNSUlKS0FJQkFBS0NBZ0VBOFZ5ekZrNTZ1V2VOZ0QwT3FXV1Jrd0dsMHRRYkRRem5DYmlDQkdML202aWt0TFc5ClhFMjF3d3FUOGNhZ285K1lyaVA0eTh2UzRZNms1Y3lSYlEzcjFIOWhkbTlrYzcwV2hMUnlHS2J3RnpIelFsVTUKRkREcmt4Z2U5cTB5OGRpaU5abUlPamlQanc0ZHVnYTFwTVpXMXZLQlh1NUo2SGx6dDUrblNZL0Z2V0tZT1dWegpjUzZuR29KUHg1a2dLQmkwSk0ycXZhMElsVlROb3dQaXoxQ0poK0l5S1lmUVdMMW95L25DNzJzZEZvY20wMkpQCjJBRy92K0xGZXpqQ09nQjVlSHZJellLMVZZOXczVmc0Yjk3RFpyc2JJWk5Ec3FXZG44SzZsYlBUZkxLUHV5UUEKMWtKMThOVEV6Z0huT0FrdWtXMVM1ZDBVOEhvQTdNNEtXZlkxMm44dEZoOXdqYTNYbFVpVkpkelNmRU11TkdOWgpwNjg5MEd2azJ4bzFmUzA1OWhhUXQ0T2ZXWW05cHJXK3RrV010SXpwS09lREkxRWJWR3FQNTZkdWo5ZndiWkR6CmROdUlhVFo0R3lzRGVTWmJqWFhqK2lneFlpOExBTEdCclAySWNsYUZHdTc2UG9qSmh6Y0ZheGJNbWhqaEQwajAKWFl1aWw0L3g0TVdBTVREYVdHT20rTmE3em5rTmFXbitIUFgraSt6U1dwaXNqUG12RWY4N2V4ZE9uTzJoeVJYYgoxT0RPR3pHMGFsUXU0NWtXdk11bnowYnYvWTBuME5aVWRnZFFTWUJBQm01TmVQVzcyMW9tZll6L3I4K1U5Nmk2ClZsYXI5T1VVM1FIN3JCQTNKaUprbTY4MGxONWRzdXU1NXJJUUpENkdhVFBENmdVbFg2d09qVWZmYllzQ0F3RUEKQVFLQ0FnQWF4eVViV1hPbU5FWHZyMVo4RnNleTNxRHVKaGdtTjRNK2dkank4YVRZT1Rxa3pmRUhWNXZOMnRPVgpKR3RZSXd1R2JubEE2d2tuZXpMeVIrTHVqWGZYcUpaQWxKVTVmZ1lNalJTSGhhWG5mT1EzUE10TFlTNFJzTUJtCnI4cVNLRzIrc3B6NWtLTGt4VFVwR1d0M3I0V2M3V1RMQ25icXN1YlN2WVRLMVllanZsZVRMcDFETm1EVndSVm0KMktkSHE0MzQ4MVI1SE1SeUJPbVhwMnUzZ29EdnNYbk5QOE11eFR6bVBIeVRJWGdsc3JMdEN1QSszOXJOU0RTTwp1anBhUXdrM0E4ekFlRHIwRmlqNGRidzFOU3JLc0FHUGxRNFN1T3NtK1d6SUJSNTJuRHowRDBlRWZmVWwxZ1ZMCnNjeGNYREJ0ZEFxWmRCREpxVStHOWtrUnVBNDdTMjZMSEg0RHhMZUlrcGQ0U3pYajNSa0IybENpeVhCZGpvZGcKaVRsSXNlQkl5OWpTcUltdDUrMS9oMlJKK2pSOVVpSTJuYWtlUDNNRWFHUDNaR0dWd1lFRkQ0UFVpdkhWUHl3aAppTCtaK2dqL3hDSGdrK0x5U2NHMXZXT0I2L2ljWjd1MXJ1czZ2Y0ZDdWpaSWoweWx1eGp3ejFlTU9XUmdvQ0VpClhmOGRsaVJTQVV4L204Slg5RTFYU2ZzRDQxZzZQZFZWeGlONFFORGpkZ2tzQVorVjNKVlc5QUNlWEY5ZFU3NGgKSnFSOFhKWU5Lbng2cUZtZURObXV5WXVEa245NmRlVHErS2xKT3NMb3ZEVDR6M1VNVzA5VEVwclVmdGxaSStaZApwenJZaGlVKzBiaUdTOVhVN0dyUkNzN3IrRm5KTGF1TDN3bloxUFk0SXpJaWJZOXFtUUtDQVFFQTk0Q3VjRmJxCmVTVkhJakxxdXV1eHJpT2I5TDRVZDhxdk1DcDAyZHdTRWZaY2VCcUE1NmdVa01RZ2dCQ1BYbWJOT1dRbkgyYloKUU8xOEJSWTRjbkdMVzZEL3EwYVhiQzh2WEFDVlpzZnBYcldxbjNTSGNjOWZpNnZlOGlHNGtKZEVOUmRnQlU4VwpsR2o3aDhTZ2lHSkNzbHQvTTdtZ0lqa0FCZ0xNQitsRUFrSzBWa0pJVEE0N0xzRlNScElMTnJhUkt2aG5INUVQCkVoVlViazNYZm5XSkJOTTZyci9pb1NicjgvWU1uZENZbzlBWFJOalFmU0RmMHBVYWpSNmJraXBnVVZiUDliZGYKNVhyZ2MxSlNQQlVUTkxSR3hNVEhXTlgrbGJzcWhpQysrU3RZUTN3dmFCZXBOemZ0cXhVV0lXTzNKbXVyV3BUYQpQZ1NyOTYwVVpJbjhIUUtDQVFFQSthWU1ZeSs5Ty9sWWRpb1Q0dWhFZVZaQ2pDcGdhSVpham1aUnp6SXA5eVFaCm9jam1aRk1seXJKYUlmaFNyMHFKZVZtSWtGQ0tyNDdaY0ROaGhtMFV0cWlPbGovQWtuQWowQkV1b1UwYTVxSFkKR0M2UnZVUG1xSEVTRTR5Zmpub1huczB6VnFRN1krSEhUNWR5Y2NpZzJxYUZaNk8vR3BoUUZVd01mMG41eHd3Kwo2WCtPam50eTREUTd4MmwzOGNRUmYrdkh3MGhuWllBcllqZytmR0QzQ0ZpeDZueVVtRDg1amErTURmckNOTkFBCnpZMyszV0FPQzJ1L3lNSjRydjVmazJyajBRNU5sN3NRc1Fwc3Q5WGhiTHNUTWRmeDNqQmdxbXFsN2J5Vnp3MloKM29JdFlncjVCZmtLS3lIOC9RMndMMndOeVRXQ1l6MWtyclBmZnZYUHh3S0NBUUJIMFg1TXVOdlhCWHNyc0V5dQpxci9uUVF2N0s4RHl0Y3k2RkVmT0ErNzJhVitSdGxjYllZbCtMSHNsemloY0EwYWYxYkVJaXFhV0VaT0FRbDlrCnpnL2JLYyttbXBoTDJ6Rko2QjF5TXFaRVJrRFpmazNqTjRLSkcvbFlsM0pmK3BUZk53WTA1Q3N3SzNwNWZoUDcKSDFBdFF5R1pGODhndnh1RG93SWpkWXUzZ0RXbUpodW1maWFzUFlxclVhdVJWODZ1QW1DaUoweVJPY0ZETkxGSQpUOERQdHA5N245Q2FaSm5wTThlYmI3RXJMN0hnMTIxQU1lN2d3MFZ1RjZpYTlGTDRwMUUzQXR2LzBmVVpZWlRkClBGeFRXZENEUG5wK0M3S1JManQ3cWpyZ1FMU2UrSVVsRm1DUzFsYlA0eEdGNU5KN2dwaTVjeUlWQnZRRHJhU1MKTy92OUFvSUJBUURGeXYxOWlGRlJ0eGlUWm5zakNBdFlaek9LZ2Zpb1YrcGZjRW5ZODFHMGNYR3RjTks1SWZlTApSUXVNWm9aOFEzM3dHelBMdzBSZUc3dkMzYktqSXNHS2hybVI2U2pWM090QzZwb2JTay9KOHVpWElDNXYyZUJpCkRGUGFFVXhKUWdwODB1K2Q4YmpzUmZIMzZYSFBITG4xQW9JbnZ1Q21YWTcxa0s5R0dvSS9aa0JpRjZJRzJXQUcKcXR2Qi9wbjlmdTZ1ZjB4aU9IZFRQOTBma0poUlN6SHQ5dmZmWkowR2t2RXloS2RlWEJLS2JWSjFpYzhuN2ZheQpyY2ZoYzlMU01zL2VxSTJmRU1vQk1VRGtRL0luSk5uWm44NXhhenBDWStueW0xU2pxd3EyWlh4SGdyUWFQYjlYCk1CMFNWM2R0dHU2a1krUDRTdURuWjdqaGdibk5pVXY1QW9JQkFEU0JKRUxCVkJBOS9QU0lSYXpDNmlCVm5vckoKamd6TUQxbVcrM0JYOUFFK0pOWm5QMGtqaHp2TTJ1QU1PRFRWbVJQNkF5d2ZlbGVlR0Vjc2MzSHhNKzBtQXdCdQpOY2FEbXR5aTVMbmoxSXM2VEltOWEwR0dFYWJRQjVzbFJtUU5GUFVjeFBKVGF2R0dwYWZxckxoZkJWRXYxU3lUCldiRDhyT2Yxd2QyMzZYYkl1SDhPZnU1WGtJVUR5dFdVMk8rNkN4bFJCZmFKNkQvUk1VQWk1TlZJY09ybjhxUnkKU3hNcFpBY3hBd1BpVmNVL3NSc0JqWVdPdTNleXIrcjdKZktUdnB2dTI3a1l6ODZFMlhDZUtZblpock85WDN1YgpseGN6WW9CaFpaeGRIRjdmRnoyb29UZUlxVEtKNkx4OFF2N1VHR2lhUmdIN3hrMmQ5MWdWejBGRmVKVT0KLS0tLS1FTkQgUlNBIFBSSVZBVEUgS0VZLS0tLS0K
kind: Secret
metadata:
creationTimestamp: "2021-02-15T04:24:32Z"
generateName: sealed-secrets-key
labels:
sealedsecrets.bitnami.com/sealed-secrets-key: active
name: sealed-secrets-keynvpcz
namespace: kube-system
resourceVersion: "1141"
selfLink: /api/v1/namespaces/kube-system/secrets/sealed-secrets-keynvpcz
uid: fd35e6a1-6cb9-4a9c-b50c-91a9a03f6cd5
type: kubernetes.io/tls
```
# Create Namespace for testing sealed-secrets
```
➜ kubectl apply -f k3s/02-namespace.yaml
namespace/foo created
```
Verify it by running
```
➜ kubectl get ns
NAME STATUS AGE
default Active 27m
kube-system Active 27m
kube-public Active 27m
kube-node-lease Active 27m
foo Active 41s
```
# Create Secret
Create a regular Secret as a template to seal it later
```
➜ echo -n 'sealed-secrets-example' | base64
c2VhbGVkLXNlY3JldHMtZXhhbXBsZQ==
```
Replace ```` with the generated toke in ``03-secret.yaml``
```
➜ kubectl apply -f k3s/03-secret.yaml
secret/credentials created
```
# Configure sealed-secrets
We need the key certificate to seal secrets. We can use ``kubeseal`` to fetch it from the controller at runtime or we can store it locally using the below command and use it offline.
```
➜ kubeseal --controller-namespace kube-system --fetch-cert > cert.pem
```
Decode the certificate to take a look
```
➜ openssl x509 -in cert.pem -text -noout
Certificate:
Data:
Version: 3 (0x2)
Serial Number:
88:7e:e9:d9:ed:51:0a:eb:a9:20:16:43:88:1c:c0:9f
Signature Algorithm: sha256WithRSAEncryption
Issuer:
Validity
Not Before: Feb 15 04:24:32 2021 GMT
Not After : Feb 13 04:24:32 2031 GMT
Subject:
Subject Public Key Info:
Public Key Algorithm: rsaEncryption
Public-Key: (4096 bit)
Modulus:
00:f1:5c:b3:16:4e:7a:b9:67:8d:80:3d:0e:a9:65:
91:93:01:a5:d2:d4:1b:0d:0c:e7:09:b8:82:04:62:
ff:9b:a8:a4:b4:b5:bd:5c:4d:b5:c3:0a:93:f1:c6:
a0:a3:df:98:ae:23:f8:cb:cb:d2:e1:8e:a4:e5:cc:
91:6d:0d:eb:d4:7f:61:76:6f:64:73:bd:16:84:b4:
72:18:a6:f0:17:31:f3:42:55:39:14:30:eb:93:18:
1e:f6:ad:32:f1:d8:a2:35:99:88:3a:38:8f:8f:0e:
1d:ba:06:b5:a4:c6:56:d6:f2:81:5e:ee:49:e8:79:
73:b7:9f:a7:49:8f:c5:bd:62:98:39:65:73:71:2e:
a7:1a:82:4f:c7:99:20:28:18:b4:24:cd:aa:bd:ad:
08:95:54:cd:a3:03:e2:cf:50:89:87:e2:32:29:87:
d0:58:bd:68:cb:f9:c2:ef:6b:1d:16:87:26:d3:62:
4f:d8:01:bf:bf:e2:c5:7b:38:c2:3a:00:79:78:7b:
c8:cd:82:b5:55:8f:70:dd:58:38:6f:de:c3:66:bb:
1b:21:93:43:b2:a5:9d:9f:c2:ba:95:b3:d3:7c:b2:
8f:bb:24:00:d6:42:75:f0:d4:c4:ce:01:e7:38:09:
2e:91:6d:52:e5:dd:14:f0:7a:00:ec:ce:0a:59:f6:
35:da:7f:2d:16:1f:70:8d:ad:d7:95:48:95:25:dc:
d2:7c:43:2e:34:63:59:a7:af:3d:d0:6b:e4:db:1a:
35:7d:2d:39:f6:16:90:b7:83:9f:59:89:bd:a6:b5:
be:b6:45:8c:b4:8c:e9:28:e7:83:23:51:1b:54:6a:
8f:e7:a7:6e:8f:d7:f0:6d:90:f3:74:db:88:69:36:
78:1b:2b:03:79:26:5b:8d:75:e3:fa:28:31:62:2f:
0b:00:b1:81:ac:fd:88:72:56:85:1a:ee:fa:3e:88:
c9:87:37:05:6b:16:cc:9a:18:e1:0f:48:f4:5d:8b:
a2:97:8f:f1:e0:c5:80:31:30:da:58:63:a6:f8:d6:
bb:ce:79:0d:69:69:fe:1c:f5:fe:8b:ec:d2:5a:98:
ac:8c:f9:af:11:ff:3b:7b:17:4e:9c:ed:a1:c9:15:
db:d4:e0:ce:1b:31:b4:6a:54:2e:e3:99:16:bc:cb:
a7:cf:46:ef:fd:8d:27:d0:d6:54:76:07:50:49:80:
40:06:6e:4d:78:f5:bb:db:5a:26:7d:8c:ff:af:cf:
94:f7:a8:ba:56:56:ab:f4:e5:14:dd:01:fb:ac:10:
37:26:22:64:9b:af:34:94:de:5d:b2:eb:b9:e6:b2:
10:24:3e:86:69:33:c3:ea:05:25:5f:ac:0e:8d:47:
df:6d:8b
Exponent: 65537 (0x10001)
X509v3 extensions:
X509v3 Key Usage: critical
Encipher Only
X509v3 Basic Constraints: critical
CA:TRUE
Signature Algorithm: sha256WithRSAEncryption
c4:b3:07:ca:75:bb:67:30:04:55:b9:51:9c:1f:1b:c9:d9:5c:
08:6e:1d:75:24:e0:84:b8:74:f3:9b:cd:3a:4c:d0:38:b0:c3:
68:2f:be:bd:35:b3:40:0e:82:5b:2c:cd:36:4a:6e:5e:9a:7d:
af:7b:73:cb:aa:9c:16:f6:1f:5d:22:6b:4f:56:70:cb:35:b3:
82:fd:8a:f8:18:e6:33:f3:ae:2e:d3:98:2c:d4:f8:2f:64:99:
c4:83:d2:73:ad:25:52:7e:fb:45:5d:75:23:b7:45:63:75:0d:
92:a4:6f:1f:b1:ae:fa:a4:12:61:91:54:d4:f6:52:4e:de:67:
05:25:c7:4f:6f:fe:19:a5:43:f5:b7:4a:f7:f9:5f:17:ab:cd:
0d:eb:ad:de:21:1f:63:da:62:dc:14:7c:77:71:bf:10:3c:fd:
07:97:d2:fc:d3:d7:57:c8:33:5c:f5:1f:06:d8:77:6d:42:19:
bf:e6:b4:e8:f3:4e:ee:dd:36:45:aa:e4:b2:43:7b:24:83:9b:
d5:69:e2:61:48:d6:c5:d6:2a:ec:f1:91:eb:2a:e2:22:d1:af:
2d:d4:73:ad:7f:6c:c2:d5:ab:ad:47:e1:05:26:cd:25:6e:42:
60:c8:d9:cb:13:d0:0d:da:e1:d1:21:a6:d9:a8:80:51:34:2e:
c7:ef:a3:4b:ad:dc:7a:18:61:8c:05:12:bc:a8:a4:94:21:20:
8b:6b:ae:ab:95:6e:57:57:1b:ca:af:20:7f:78:c2:15:78:7d:
77:91:23:24:4e:1e:08:c5:04:6a:68:77:37:02:1c:d9:36:e5:
e0:2f:8a:6a:b5:4d:c6:01:6f:3c:bf:3e:36:69:dc:f1:a5:60:
1c:84:ae:57:1c:5c:53:3d:bc:43:4f:ff:23:c5:59:ad:cb:32:
c3:46:f8:4f:b5:f9:7b:14:51:70:49:34:6d:6f:c2:cd:7f:93:
aa:b8:e4:dc:f7:a9:e8:52:af:40:fd:62:5d:5e:56:22:87:28:
74:6a:0c:98:e0:61:86:28:4d:8d:93:96:ba:06:9a:42:99:38:
d4:f0:94:a8:c9:0e:9c:ec:97:99:0f:1b:2c:8e:c4:ff:0b:c1:
56:90:ca:8c:a4:1e:09:16:d4:02:40:e6:16:04:47:a1:3f:23:
62:46:84:78:8e:37:1b:69:16:41:39:4f:00:23:58:ea:ca:6c:
69:b2:83:c3:9e:f4:8f:c8:33:1d:44:e7:90:4b:14:4c:84:8c:
ff:5f:e5:9d:3a:4c:57:79:9e:db:85:44:0c:e9:54:14:42:c1:
a7:f9:17:c7:74:00:03:4c:4e:e4:8a:47:75:a2:0c:9e:c7:ba:
f2:85:48:4f:d9:19:3c:17
```
# Encrypt Secret
```
➜ kubeseal < k3s/03-secret.yaml --cert cert.pem -o yaml > k3s/04-sealed-secret.yaml
```
04-sealed-secret.yaml
```
apiVersion: bitnami.com/v1alpha1
kind: SealedSecret
metadata:
creationTimestamp: null
name: credentials
namespace: foo
spec:
encryptedData:
token: AgB46venfU8xaT2KA+1FstQApxf51r9DnGF33ZXkewaeaPg6KckWCEtaZ6sfcILPbpGZRmMW29R5lWF0HLzbnWB3ZmhouUjibWqEfeskVpCmsKntXNHI0h//8sLwoECgqreDaU34WjMGJzMIjdWZXGbym57OqJqwDGTBxBQJG2lwrRQ1EjS57juhnYuNm0V7HPEPDKCfUUhhwfqZ+GMrAJVK1JWPzztQEJY0RVeUw1AzL6PTK8HBHMSSl680ZNwC+IAZUBM36vIxHbnehbm9yB4QAeceqMMQDp8tPaK5Qw+440hYm2OdfX9+Y5ePNmXyN1h6XWMmUWUToneZk/5yTn9o9hnDelznmGl3DslAi4lzCTew56eagikXQGZE9IDpoYv1ptKTMNYjdESYSdynMTHjZYiNM5dXpCRwWxXwmuMQU3NLlmEaOupUPeNSavewoU6NvVm1Cq+DBv7SSSMQUjvHgBSFNDLRpBh3egvOqp2RKXyUq/1OCByHwlhg/HW0ZpzATUHrTDa4aRDgnaEwo+vazrOtPKlSHSop57daF7+Xx54bxguXzHQAgCBk6prqEQSuMRNOgCknuxNnFaNSYBgdsmrxTyreNwCXhAYzGja6LGSibXP843ZS3Ph1YfDtFGIzbXqB8bxd5Pbx1N0tJCIGrqIs1MoB94hdmCYWH+qe8tFZ2VgrLjOPWzQzn9EH+++ZQWLSnKQyzZyyRR4gArDnXXt3cCn3
template:
metadata:
creationTimestamp: null
name: credentials
namespace: foo
type: Opaque
```
```
➜ kubectl apply -f k3s/04-sealed-secret.yaml
sealedsecret.bitnami.com/credentials created
```
If you update credentials in sealedsecrets, it will also update that in secrets.
```
➜ kubectl get sealedsecrets -n foo
NAME AGE
credentials 40s
```
```
➜ kubectl get secrets -n foo
NAME TYPE DATA AGE
default-token-4g77w kubernetes.io/service-account-token 3 35m
credentials Opaque 1 27m
```
```
➜ kubectl get secrets credentials -o yaml -n foo
```
```
apiVersion: v1
data:
token: c2VhbGVkLXNlY3JldHMtZXhhbXBsZQ==
kind: Secret
metadata:
annotations:
kubectl.kubernetes.io/last-applied-configuration: |
{"apiVersion":"v1","data":{"token":"c2VhbGVkLXNlY3JldHMtZXhhbXBsZQ=="},"kind":"Secret","metadata":{"annotations":{},"name":"credentials","namespace":"foo"},"type":"Opaque"}
creationTimestamp: "2021-02-15T04:43:23Z"
name: credentials
namespace: foo
resourceVersion: "1925"
selfLink: /api/v1/namespaces/foo/secrets/credentials
uid: b80b9465-d35b-422e-8ab4-6cd73d3be5b3
type: Opaque
```
To decode the token
```
➜ echo "c2VhbGVkLXNlY3JldHMtZXhhbXBsZQ==" | base64 -d
sealed-secrets-example
```
# Create an Express application
server.js
```js
'use strict';
const express = require('express');
const PORT = 8080;
const HOST = '0.0.0.0';
const app = express();
app.get('/', (req, res) => {
res.send('Hello World');
});
app.listen(PORT, HOST);
console.log(`Running on http://${HOST}:${PORT}`);
console.log(`The Token is ${process.env.TOKEN}`);
```
Dockerfile
```
FROM node:14
# Create app directory
WORKDIR /usr/src/app
# Install app dependencies
# A wildcard is used to ensure both package.json AND package-lock.json are copied
# where available (npm@5+)
COPY package*.json ./
RUN npm install
# If you are building your code for production
# RUN npm ci --only=production
# Bundle app source
COPY . .
EXPOSE 8080
CMD [ "node", "server.js" ]
```
.dockerignore
```
node_modules
npm-debug.log
```
Build the image
```
➜ docker build -t wingkwong/sealed-secrets-example .
```
Your image will be listed by Docker
```
➜ docker images
REPOSITORY TAG IMAGE ID CREATED SIZE
wingkwong/sealed-secrets-example latest a7710ac9878f 2 minutes ago 946MB
```
Run the image
```
➜ docker run -p 8080:8080 -d wingkwong/sealed-secrets-example
1b59a182529ab9b6022eae20b1c3cc9f8c97f25e133334158f3cdf2b97d6046f
```
```
➜ docker ps
CONTAINER ID IMAGE COMMAND CREATED STATUS PORTS NAMES
1b59a182529a wingkwong/sealed-secrets-example "docker-entrypoint.s…" 24 seconds ago Up 20 seconds 0.0.0.0:8080->8080/tcp unruffled_boyd
```
``<token>`` is undefined as we don't define it in environment.
```
➜ docker logs 1b59a182529a
Running on http://0.0.0.0:8080
The Token is undefined
```
Push to Docker Hub
```
➜ docker push wingkwong/sealed-secrets-example
The push refers to repository [docker.io/wingkwong/sealed-secrets-example]
9c504e9b67e2: Pushed
9443efda2621: Pushed
4f5d94c4d9a0: Pushed
c190d83c7139: Pushed
7ad435f34cd1: Mounted from library/node
c52fdd5ebc39: Mounted from library/node
5faa7f35f547: Mounted from library/node
9b88fe065b35: Mounted from library/node
4ca605ea46de: Mounted from library/node
601f04850201: Mounted from library/node
846bd2f3b216: Mounted from library/node
2b3e667f5e92: Mounted from library/node
e891be0c59b2: Mounted from library/node
latest: digest: sha256:0af214e064458380d4a5ea740176c7312e9bcf638b8aaa207b401bb9e64ea35c size: 3047
```
# Deploy an Express application to test sealed-secrets
05-deployment.yaml
```
apiVersion: apps/v1
kind: Deployment
metadata:
name: sealed-secrets-example-deployment
namespace: foo
spec:
replicas: 1
selector:
matchLabels:
app: sealed-secrets-example
template:
metadata:
labels: # labels to select/identify the deployment
app: sealed-secrets-example
spec: # pod spec
containers:
- name: sealed-secrets-example
image: wingkwong/sealed-secrets-example:latest # image we pushed
ports:
- containerPort: 8080
env:
- name: TOKEN
valueFrom:
secretKeyRef:
key: token
name: credentials
```
```
➜ kubectl apply -f k3s/05-deployment.yaml
deployment.apps/sealed-secrets-example-deployment created
```
```
➜ kubectl get pods -n foo
NAME READY STATUS RESTARTS AGE
sealed-secrets-example-deployment-6bb786499c-2rbtq 1/1 Running 0 9m24s
```
```
➜ kubectl describe pods sealed-secrets-example-deployment-6bb786499c-2rbtq -n foo
Normal Pulling 6m30s kubelet, k3d-sealed-secrets-example-server Pulling image "wingkwong/sealed-secrets-example:latest"
Normal Pulled 43s kubelet, k3d-sealed-secrets-example-server Successfully pulled image "wingkwong/sealed-secrets-example:lates
```
```
➜ kubectl logs -l app=sealed-secrets-example -n foo
Running on http://0.0.0.0:8080
The Token is sealed-secrets-example
```
# Clean up
```
k3d delete -n sealed-secrets-example
```
# References
- ["Sealed Secrets" for Kubernetes](https://github.com/bitnami-labs/sealed-secrets)

Sunday, 10 May 2020
Getting Started with Kubernetes Engine
## Objectives
- Provision a Kubernetes cluster using Kubernetes Engine.
- Deploy and manage Docker containers using kubectl.
## Prerequisites
- Existing GCP Project
- Kubernetes Engine API and Google Container Registry API have been enabled
## Start a Kubernetes Engine cluster
In GCP console, on the top right toolbar, click the Open Cloud Shell button.
Click Continue.
Place the zone into an environment variable called MY_ZONE. At the Cloud Shell prompt, type this partial command:
```
export MY_ZONE=us-central1-a
```
Start a Kubernetes cluster managed by Kubernetes Engine. Name the cluster ``webfrontend`` and configure it to run ``2`` nodes:
```
gcloud container clusters create webfrontend --zone $MY_ZONE --num-nodes 2
```
It takes several minutes to create a cluster as Kubernetes Engine provisions virtual machines for you.
```
NAME LOCATION MASTER_VERSION MASTER_IP MACHINE_TYPE NODE_VERSION NUM_NODES STATUS
webfrontend us-central1-a 1.14.10-gke.27 35.223.99.22 n1-standard-1 1.14.10-gke.27 2 RUNNING
```
After the cluster is created, check your installed version of Kubernetes using the ``kubectl version`` command:
kubectl version
The ``gcloud container clusters create`` command automatically authenticated kubectl for you.
```
kubectl version
```
```
Client Version: version.Info{Major:"1", Minor:"14+", GitVersion:"v1.14.10-dispatcher", GitCommit:"f5757a1dee5a89cc5e29cd7159076648bf21a02b", GitTreeState:"clean", BuildDate:"2020-02
-06T03:29:33Z", GoVersion:"go1.12.12b4", Compiler:"gc", Platform:"linux/amd64"}
Server Version: version.Info{Major:"1", Minor:"14+", GitVersion:"v1.14.10-gke.27", GitCommit:"145f9e21a4515947d6fb10819e5a336aff1b6959", GitTreeState:"clean", BuildDate:"2020-02-21T
18:01:40Z", GoVersion:"go1.12.12b4", Compiler:"gc", Platform:"linux/amd64"}
```
View your running nodes in the GCP Console. On the Navigation menu (Navigation menu), click Compute Engine > VM Instances. Your Kubernetes cluster is now ready for use.

## Run and deploy a container
From your Cloud Shell prompt, launch a single instance of the nginx container. (Nginx is a popular web server.)
```
kubectl run nginx --image=nginx:1.10.0
```
In Kubernetes, all containers run in pods. This use of the kubectl run command caused Kubernetes to create a deployment consisting of a single pod containing the nginx container. A Kubernetes deployment keeps a given number of pods up and running even in the event of failures among the nodes on which they run. In this command, you launched the default number of pods, which is 1.
> Note: If you see any deprecation warning about future version you can simply ignore it for now and can proceed furthe
View the pod running the nginx container:
```
kubectl get pods
```
```
NAME READY STATUS RESTARTS AGE
nginx-fb9c7b94d-p7x4x 1/1 Running 0 2m32s
```
Expose the nginx container to the Internet:
```
kubectl expose deployment nginx --port 80 --type LoadBalancer
```
```
service/nginx exposed
```
Kubernetes created a service and an external load balancer with a public IP address attached to it. The IP address remains the same for the life of the service. Any network traffic to that public IP address is routed to pods behind the service: in this case, the nginx pod.
View the new service:
```
kubectl get services
```
```
NAME TYPE CLUSTER-IP EXTERNAL-IP PORT(S) AGE
kubernetes ClusterIP 10.51.240.1 443/TCP 5m42s
nginx LoadBalancer 10.51.242.185 80:31576/TCP 15s
```
You can use the displayed external IP address to test and contact the nginx container remotely.
It may take a few seconds before the External-IP field is populated for your service. This is normal. Just re-run the kubectl get services command every few seconds until the field is populated.
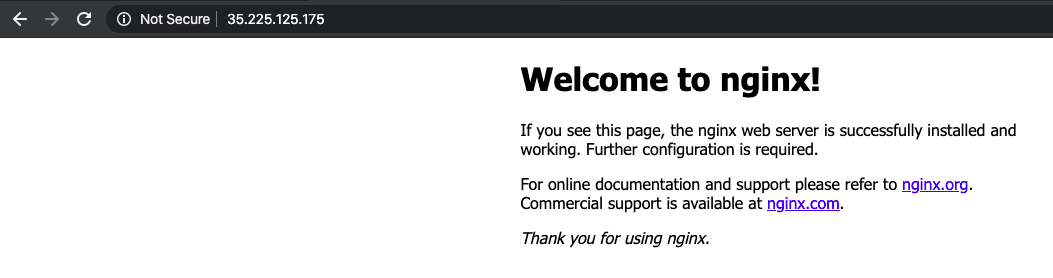
Open a new web browser tab and paste your cluster's external IP address into the address bar. The default home page of the Nginx browser is displayed.
Scale up the number of pods running on your service:
```
kubectl scale deployment nginx --replicas 3
```
```
deployment.extensions/nginx scaled
```
Scaling up a deployment is useful when you want to increase available resources for an application that is becoming more popular.
Confirm that Kubernetes has updated the number of pods:
```
kubectl get pods
```
```
NAME READY STATUS RESTARTS AGE
nginx-fb9c7b94d-p7x4x 1/1 Running 0 3m51s
nginx-fb9c7b94d-qvm4b 1/1 Running 0 18s
nginx-fb9c7b94d-sk4rm 1/1 Running 0 18s
```
Confirm that your external IP address has not changed:
```
kubectl get services
```
```
NAME TYPE CLUSTER-IP EXTERNAL-IP PORT(S) AGE
kubernetes ClusterIP 10.51.240.1 443/TCP 6m53s
nginx LoadBalancer 10.51.242.185 35.225.125.175 80:31576/TCP 86s
```
Return to the web browser tab in which you viewed your cluster's external IP address. Refresh the page to confirm that the nginx web server is still responding.
Tuesday, 24 March 2020
Deploying Your Application to Amazon EKS with GitHub Actions and Weave Flux
Last month I've published a tutorial to show you how to build and push a docker image to Amazon ECR with GitHub Actions.
However, if you are using Amazon EKS, you may need to manually update the image URI every time you have a new release. is there a way to automate the whole process that the image URI can be updated automatically? Yes. Here's the solution for you.
Flux is the operator that makes GitOps happen in your cluster. It ensures that the cluster config matches the one in git and automates your deployments.
Suppose you've already provisioned your Amazon EKS cluster. If not, please check out my previous post.
Configure your kubectl so that you can connect to an Amazon EKS cluster by running
```bash
export AWS_REGION="ap-southeast-1"
export CLUSTER_NAME="your-cluster-name"
aws eks --region ${AWS_REGION} update-kubeconfig --name ${CLUSTER_NAME}
```
If you enable load balancer ingress access, make sure that you have the corresponding IAM role.
```bash
aws iam get-role --role-name "AWSServiceRoleForElasticLoadBalancing" || aws iam create-service-linked-role --aws-service-name "elasticloadbalancing.amazonaws.com"
```
Run your manifest files
```bash
kubectl apply -f manifests/deployment.yaml
kubectl apply -f manifests/service.yaml
kubectl apply -f manifests/ingress.yaml
```
A sample deployment can be found [here](https://github.com/github-developer/example-actions-flux-eks/blob/master/manifests/deployment.yml). Make sure you have ``fluxcd.io/automated: "true"`` under ``annotations``.
The next step is to run Flux on our EKS cluster. Let's create a new namespace ``flux`` in where flux objects will be installed.
```bash
kubectl create ns flux
```
Install flux objects under ``flux`` namespace. By doing so, flux is monitoring the manifests folder for the changes.
```bash
export GHUSER=your-github-user
export GHREPO=your-github-repo
fluxctl install \
--git-user=${GHUSER} \
--git-email=${GHUSER}@users.noreply.github.com \
--git-url=git@github.com:${GHUSER}/${GHREPO} \
--git-path=manifests \
--namespace=flux | kubectl apply -f -
```
You should see the following
```bash
serviceaccount/flux created
clusterrole.rbac.authorization.k8s.io/flux unchanged
clusterrolebinding.rbac.authorization.k8s.io/flux configured
deployment.apps/flux created
secret/flux-git-deploy created
deployment.apps/memcached created
service/memcached created
```
Let's verify if they are running or not
```bash
kubectl get all -n flux
```
```bash
NAME READY STATUS RESTARTS AGE
pod/flux-6449c6bd94-7gz88 1/1 Running 0 5m
pod/memcached-86869f57fd-52cwn 1/1 Running 0 5m
NAME TYPE CLUSTER-IP EXTERNAL-IP PORT(S) AGE
service/memcached ClusterIP 10.100.152.74 11211/TCP 5m
NAME READY UP-TO-DATE AVAILABLE AGE
deployment.apps/flux 1/1 1 1 5m
deployment.apps/memcached 1/1 1 1 5m
NAME DESIRED CURRENT READY AGE
replicaset.apps/flux-6449c6bd94 1 1 0 5m
replicaset.apps/memcached-86869f57fd 1 1 1 5m
```
Upon the completion of deployment, the docker image URI in deployment.yaml should be updated. To do so, we need to grand read/write access to the repository with a deploy key so that Flux can be able to write it back every time it deploys.
By running
```bash
fluxctl identity --k8s-fwd-ns flux
```
You should get a deploy key.
```bash
ssh-rsa
AAAAB3NzaC1yc2EAAAADAQABAAABAQC64WoWesnPneyDqq8ddTAAOKSaLHcu+0ALL8xxtGdnbK2WG99OZ7A9cq24Y9TmSL4gIuXb0HDvwhHsnbkTNsFmVWpO9xS/T3bqhLzhdQwLCGP21ckhRVF7RBv+pK6PnenY4ZjTRkW5h7SxYnunEarj/9E9NlL/JP8tDnb53liDXF4AB1y3Xi/nKwjlgwkGGrSBXGSRij7a6uq2iMlGF/H9MmHn8ct7w/dd/RF6VN4phbNpsVfnBVu1yDgRJTNKznXDOCEEAfflxAFrDWjbAsXwCxvWLNsbP5HtMTf5Ep/Eba7ZAjZ7XnWYLgoXRZHOf+0WYqn1EfsSot5pb01TFeYr
```
Go to Settings > Deploy keys and click 'Add deploy key'
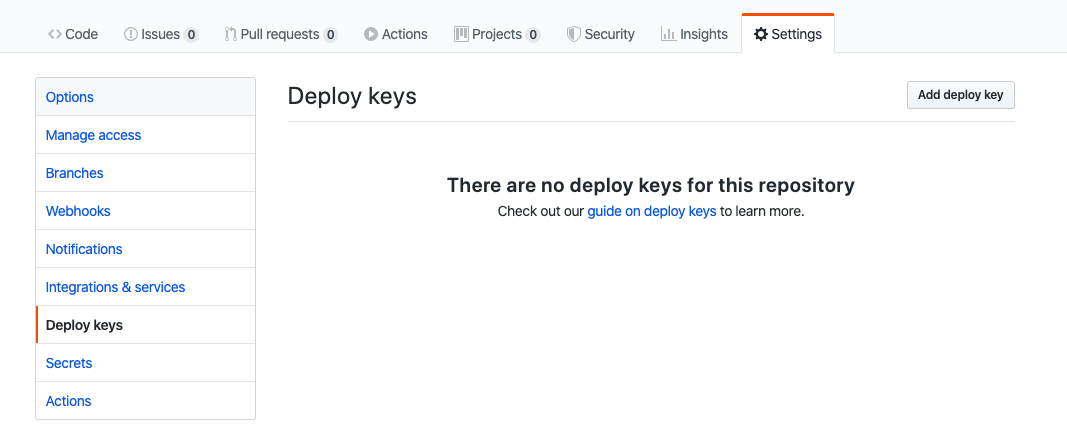
Enter the title and the key you just generated. Make sure you tick 'Allow write access'
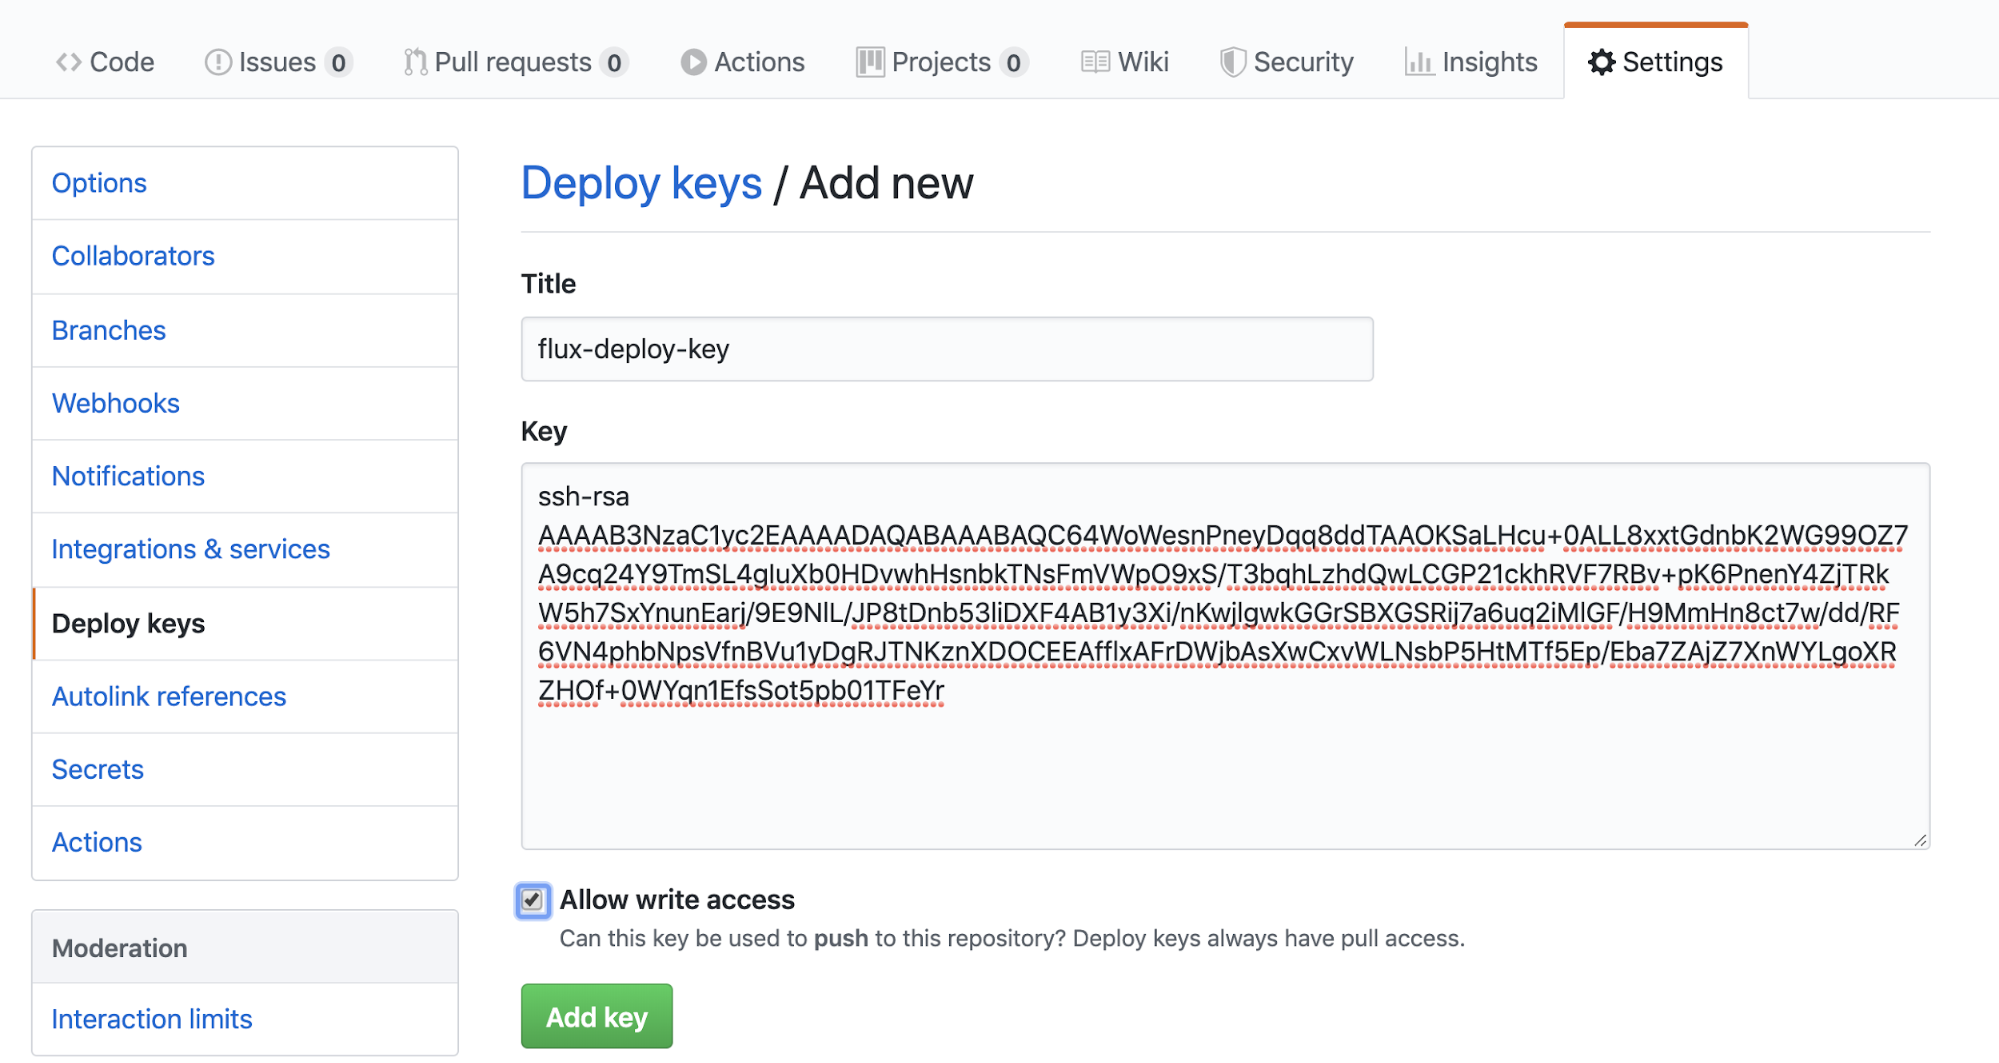
Then we can go back to the console and run the following command to sync Flux and Github.
```bash
fluxctl sync --k8s-fwd-ns flux
```
For the first time, you should see
```bash
Synchronizing with git@github.com:wingkwong/eks-flux-playground
Revision of master to apply is a8e3b45
Waiting for a8e3b45 to be applied ...
Done.
```
If you make a change and push to master, Github Actions helps to build and push the docker image to Amazon ECR, and Flux helps to deploy the latest image to Amazon EKS.
Go back to the repository, you should see there is a new commit on your deployment.yaml while the change is only updating the image URI.
```bash
Auto-release xxxxxxxxxxxx.dkr.ecr.ap-southeast-1.amazonaws.com/eks-flux…
Wednesday, 18 March 2020
How to debug CrashLoopBackOff when starting a pod in Kubernetes
Recently I tried to deploy a nodeJS application to Amazon EKS and found that the deployment was not ready and the pod was stuck at ``CrashLoopBackOff``. I had no idea what's happening.
```bash
$ kubectl get pod
NAME READY STATUS RESTARTS AGE
app1-789d756b58-k8qvm 1/1 Running 0 13h
app2-84cf49f896-4945d 0/1 CrashLoopBackOff 7 13m
```
In order to troubleshoot, I increased kubectl output verbosity to --v=9. For more: [Kubectl output verbosity and debugging](https://kubernetes.io/docs/reference/kubectl/cheatsheet/#kubectl-output-verbosity-and-debugging).
```bash
$ kubectl describe pod app2-84cf49f896-4945d -v=9
```
It should return much info on your console. Search the keyword ``reason`` for more insight.
```json
{"reason":"ContainersNotReady","message":"containers with unready status: [app]"}
```
Then I checked Dockerfile and found that the entry point was not correct. It should be app.js in my case.
```
CMD [ "node", "index.js" ]
```
Since I've setup Github Actions to automatically build and push the docker image to Amazon ECR, I could just retrieve the new docker image URI in the console. If you're interested in it, please check out my previous post.
Edit the existing deployment by running
```
$ kubectl edit deployment app2
```
and replace the existing image URI with the new one under spec -> containers -> image.
Once it's saved, it will automatically update it. Verify the result.
```bash
$ kubectl get pod
NAME READY STATUS RESTARTS AGE
app1-789d756b58-k8qvm 1/1 Running 0 13h
app2-84cf49f896-4945d 1/1 Running 0 14m
```
It's back to Running now.
Saturday, 14 March 2020
Migrating Your Existing Applications to a New Node Worker Group in Amazon EKS
Supposing you've an existing node group in your cluster and you want to migrate your applications to it.
```bash
eksctl get nodegroups --cluster=demo
```
```bash
CLUSTER NODEGROUP CREATED MIN SIZE MAX SIZE DESIRED CAPACITY INSTANCE TYPE IMAGE ID
demo ng-a1234567 2020-03-11T13:46:19Z 1 1 1 t3.small
```
Create a new node group using ``eksctl``
```bash
eksctl create nodegroup \
--cluster demo \
--version auto \
--name ng-b1234567 \
--node-type t3.medium \
--nodes 1 \
--region=ap-southeast-1 \
--alb-ingress-access \
--full-ecr-access \
--node-ami auto
```
If you see the following message
```
[ℹ] nodegroup "ng-b1234567" has 0 node(s)
[ℹ] waiting for at least 1 node(s) to become ready in "ng-b1234567"
```
then label the node
```
kubectl label nodes -l alpha.eksctl.io/cluster-name=demo alpha.eksctl.io/nodegroup-name=ng-b1234567 --overwrite
```
Once you execute the above command, you should see
```bash
[ℹ] nodegroup "ng-b1234567" has 1 node(s)
[ℹ] node "ip-192-168-1-11.ap-southeast-1.compute.internal" is ready
[✔] created 1 nodegroup(s) in cluster "demo"
[✔] created 0 managed nodegroup(s) in cluster "demo"
[ℹ] checking security group configuration for all nodegroups
[ℹ] all nodegroups have up-to-date configuration
```
Get the node groups again
```bash
eksctl get nodegroups --cluster=demo
```
A new node group is created
```bash
CLUSTER NODEGROUP CREATED MIN SIZE MAX SIZE DESIRED CAPACITY INSTANCE TYPE IMAGE ID
demo ng-b1234567 2020-03-13T13:42:26Z 1 1 1 t3.medium ami-08805da128ddc2ee1
demo ng-a1234567 2020-03-11T13:46:19Z 1 1 1 t3.small
```
Check if your worker nodes are in ``READY`` state or not by running
```bash
kubectl get nodes
```
Delete the original node group.
> This will drain all pods from that nodegroup before the instances are deleted.
```bash
eksctl delete nodegroup --cluster demo --name ng-a1234567
```
If you run
```bash
kubectl get pod
```
You see the old pods are terminating and the new ones are creating
```bash
NAME READY STATUS RESTARTS AGE
app1-789d756b58-k8qvm 0/1 Terminating 0 46h
app1-789d756b58-pnbjz 0/1 Pending 0 35s
app2-f9b4b849c-2j2gd 0/1 Pending 0 35s
app2-f9b4b849c-znwqs 0/1 Terminating 0 26h
```
After a while, you should see both pods back to Running state.
Reference:
[EKS Managed Nodegroups](https://eksctl.io/usage/eks-managed-nodegroups/)
A Workaround for Syncing and Updating Multiple Repositories with Flux
Flux is the GitOps Kubernetes operator, which is most useful when used as a deployment tool at the end of a Continuous Delivery pipeline. Flux will make sure that your new container images and config changes are propagated to the cluster.
However, at this moment, flux only works with a single git repository containing Kubernetes manifests.
Let's say you have three applications from three different repositories. If you run ``fluxctl install`` for each application on different namespace, and list the controllers with the last namespace you created.
```bash
fluxctl list-controllers --k8s-fwd-ns=app3
```
```bash
WORKLOAD CONTAINER IMAGE RELEASE POLICY
default:deployment/app1 app1 123456789123.dkr.ecr.ap-southeast-1.amazonaws.com/app1:f8ebcf87b02cd334b4228c1d22fe001dafff9ca6 ready
default:deployment/app2 app2 123456789123.dkr.ecr.ap-southeast-1.amazonaws.com/app2:92218e4aeefa8f19f5e9a900bc7d07f38b8622c6 ready
default:deployment/app3 app3 123456789123.dkr.ecr.ap-southeast-1.amazonaws.com/app3:a1a8231ff2ac89eb70fc353eeceb2470ee2d0ec3 ready automated
```
If you list the controllers with namespace ``app1``
```bash
fluxctl list-controllers --k8s-fwd-ns=app1
```
There is no workload for it
```bash
WORKLOAD CONTAINER IMAGE
```
Same as ``app1``
```bash
fluxctl list-controllers --k8s-fwd-ns=app2
```
No workload is expected
```bash
WORKLOAD CONTAINER IMAGE
```
Therefore, even you make a commit to repo ``app1`` or ``app2``, it never triggers the controller to sync and update the repo. Your deployment would remain unchanged.
To fix it, run
```bash
kubectl edit clusterrolebinding.rbac.authorization.k8s.io/flux
```
You should see
```
apiVersion: rbac.authorization.k8s.io/v1
kind: ClusterRoleBinding
metadata:
annotations:
kubectl.kubernetes.io/last-applied-configuration: |
{"apiVersion":"rbac.authorization.k8s.io/v1beta1","kind":"ClusterRoleBinding","metadata":{"annotations":{},"labels":{"name":"flux"},"name":"flux"},"roleRef":{"apiGroup":"rbac.authorization.k8s.io","kind":"ClusterRole","name":"flux"},"subjects":[{"kind":"ServiceAccount","name":"flux","namespace":"app3"}]}
creationTimestamp: "2020-03-13T16:31:43Z"
labels:
name: flux
name: flux
resourceVersion: "85027"
selfLink: /apis/rbac.authorization.k8s.io/v1/clusterrolebindings/flux
uid: 202463ba-6548-11ea-a8a2-025c790809a6
roleRef:
apiGroup: rbac.authorization.k8s.io
kind: ClusterRole
name: flux
subjects:
- kind: ServiceAccount
name: flux
namespace: app3
```
Since you create ``app3`` at the end, the cluster role binding config is modified when you run ``fluxctl install``.
```
clusterrolebinding.rbac.authorization.k8s.io/flux configured
```
If you check out flux RBAC template, you can see there is only one subject.
```
apiVersion: rbac.authorization.k8s.io/v1beta1
kind: ClusterRoleBinding
metadata:
name: {{ template "flux.clusterRoleName" . }}
labels:
app: {{ template "flux.name" . }}
chart: {{ template "flux.chart" . }}
release: {{ .Release.Name }}
heritage: {{ .Release.Service }}
roleRef:
apiGroup: rbac.authorization.k8s.io
kind: ClusterRole
name: {{ template "flux.clusterRoleName" . }}
subjects:
- name: {{ template "flux.serviceAccountName" . }}
namespace: {{ .Release.Namespace | quote }}
kind: ServiceAccount
{{- end -}}
{{- end -}}
```
Therefore, to allow three applications at the same time, we need to add the missing two.
```
apiVersion: rbac.authorization.k8s.io/v1
kind: ClusterRoleBinding
metadata:
annotations:
kubectl.kubernetes.io/last-applied-configuration: |
{"apiVersion":"rbac.authorization.k8s.io/v1beta1","kind":"ClusterRoleBinding","metadata":{"annotations":{},"labels":{"name":"flux"},"name":"flux"},"roleRef":{"apiGroup":"rbac.authorization.k8s.io","kind":"ClusterRole","name":"flux"},"subjects":[{"kind":"ServiceAccount","name":"flux","namespace":"app1"}]}
creationTimestamp: "2020-03-13T16:31:43Z"
labels:
name: flux
name: flux
resourceVersion: "85027"
selfLink: /apis/rbac.authorization.k8s.io/v1/clusterrolebindings/flux
uid: 202463ba-6548-11ea-a8a2-025c790809a6
roleRef:
apiGroup: rbac.authorization.k8s.io
kind: ClusterRole
name: flux
subjects:
- kind: ServiceAccount
name: flux
namespace: app1
- kind: ServiceAccount
name: flux
namespace: app2
- kind: ServiceAccount
name: flux
namespace: app3
```
Once you save the file, it will update the config in the background. Now we can verify the result.
```bash
fluxctl list-controllers --k8s-fwd-ns=app1
```
```bash
WORKLOAD CONTAINER IMAGE RELEASE POLICY
default:deployment/app1 app1 123456789123.dkr.ecr.ap-southeast-1.amazonaws.com/app1:f8ebcf87b02cd334b4228c1d22fe001dafff9ca6 ready automated
default:deployment/app2 app2 123456789123.dkr.ecr.ap-southeast-1.amazonaws.com/app2:92218e4aeefa8f19f5e9a900bc7d07f38b8622c6 ready
default:deployment/app3 app3 123456789123.dkr.ecr.ap-southeast-1.amazonaws.com/app3:a1a8231ff2ac89eb70fc353eeceb2470ee2d0ec3 ready
```
```bash
fluxctl list-controllers --k8s-fwd-ns=app2
```
```bash
WORKLOAD CONTAINER IMAGE RELEASE POLICY
default:deployment/app1 app1 123456789123.dkr.ecr.ap-southeast-1.amazonaws.com/app1:f8ebcf87b02cd334b4228c1d22fe001dafff9ca6 ready
default:deployment/app2 app2 123456789123.dkr.ecr.ap-southeast-1.amazonaws.com/app2:92218e4aeefa8f19f5e9a900bc7d07f38b8622c6 ready automated
default:deployment/app3 app3 123456789123.dkr.ecr.ap-southeast-1.amazonaws.com/app3:a1a8231ff2ac89eb70fc353eeceb2470ee2d0ec3 ready
```
```bash
fluxctl list-controllers --k8s-fwd-ns=app3
```
```bash
WORKLOAD CONTAINER IMAGE RELEASE POLICY
default:deployment/app1 app1 123456789123.dkr.ecr.ap-southeast-1.amazonaws.com/app1:f8ebcf87b02cd334b4228c1d22fe001dafff9ca6 ready
default:deployment/app2 app2 123456789123.dkr.ecr.ap-southeast-1.amazonaws.com/app2:92218e4aeefa8f19f5e9a900bc7d07f38b8622c6 ready
default:deployment/app3 app3 123456789123.dkr.ecr.ap-southeast-1.amazonaws.com/app3:a1a8231ff2ac89eb70fc353eeceb2470ee2d0ec3 ready automated
```
Then when you make a commit to your repo ``app1``, ``app2`` and ``app3``, it should auto release your application and your deployment.yml should be updated by flux with a latest docker image URI.
Saturday, 22 February 2020
Kubernetes Application Bible for Developers
This is a bible for certified Kubernetes application developers. It covers the features and how to design and build applications to run on Kubernetes.
> Updates on 22 Feb 2020
- Updated version to 1.17.3-00 for kubelet, kubeadm and kubectl
- Updated kube-flannel as ``extensions/v1beta1`` was removed
# Creating a cluster
```bash
# Setup Docker & Kubernetes repositories
curl -fsSL https://download.docker.com/linux/ubuntu/gpg | sudo apt-key add -
sudo add-apt-repository "deb [arch=amd64] https://download.docker.com/linux/ubuntu \
$(lsb_release -cs) \
stable"
curl -s https://packages.cloud.google.com/apt/doc/apt-key.gpg | sudo apt-key add -
cat << EOF | sudo tee /etc/apt/sources.list.d/kubernetes.list
deb https://apt.kubernetes.io/ kubernetes-xenial main
EOF
# Install Docker & Kubernetes
sudo apt-get update
sudo apt-get install -y docker-ce=18.06.1~ce~3-0~ubuntu kubelet=1.17.3-00 kubeadm=1.17.3-00 kubectl=1.17.3-00
sudo apt-mark hold docker-ce kubelet kubeadm kubectl
# Enable iptables bridge call
echo "net.bridge.bridge-nf-call-iptables=1" | sudo tee -a /etc/sysctl.conf
# Make that change take effect immediately
sudo sysctl -p
```
## Setting up the Kube master server
```bash
# Initalize the cluster
sudo kubeadm init --pod-network-cidr=10.244.0.0/16
# Setup local kube config
mkdir -p $HOME/.kube
sudo cp -i /etc/kubernetes/admin.conf $HOME/.kube/config
sudo chown $(id -u):$(id -g) $HOME/.kube/config
# Install Flannel networking
kubectl apply -f https://raw.githubusercontent.com/coreos/flannel/master/Documentation/kube-flannel.yml
```
## Setting up the Kube node server
```bash
# The command is part of output of kubeadm init running on your master
sudo kubeadm join $controller_private_ip:6443 --token $token --discovery-token-ca-cert-hash $hash
```
# Working with Kubernetes Objects
> Kubernetes Objects are persistent entities in the Kubernetes system. Kubernetes uses these entities to represent the state of your cluster.
Ref: [https://kubernetes.io/docs/concepts/overview/working-with-objects/kubernetes-objects/](https://kubernetes.io/docs/concepts/overview/working-with-objects/kubernetes-objects/)
List all the object types
```
kubectl api-resources -o name
```
```bash
# Some examples
Pod
Node
Service
ServiceAccount
...
```
Example of a Kubernetes Object : deployment.yml
```
apiVersion: apps/v1
kind: Deployment
metadata:
name: nginx-deployment
spec:
selector:
matchLabels:
app: nginx
replicas: 2 # tells deployment to run 2 pods matching the template
template:
metadata:
labels:
app: nginx
spec:
containers:
- name: nginx
image: nginx:1.7.9
ports:
- containerPort: 80
```
Use ``kubectl apply``
```
kubectl apply -f deployment.yml --record
```
# Working with Pods
> A Pod is the basic execution unit of a Kubernetes application–the smallest and simplest unit in the Kubernetes object model that you create or deploy. A Pod represents processes running on your Cluster.
Ref: [https://kubernetes.io/docs/concepts/workloads/pods/pod-overview/](https://kubernetes.io/docs/concepts/workloads/pods/pod-overview/)
Example of pod definition: my-pod.yml
```yml
apiVersion: v1
kind: Pod
metadata:
name: myapp-pod
labels:
app: myapp
spec:
containers:
- name: myapp-container
image: busybox
command: ['sh', '-c', 'echo Hello Kubernetes! && sleep 3600']
```
```bash
# Create a pod from the definition file in yaml format
kubectl create -f my-pod.yml
# Edit a pod and re-apply a pod definition
kubectl apply -f my-pod.yml
# Another way to edit a pod (Changes will be taken effect immediately)
kubectl edit pod my-pod
# Delete a pod
kubectl delete pod my-pod
```
# Working with Namespace
> Kubernetes supports multiple virtual clusters backed by the same physical cluster. These virtual clusters are called namespaces.
Ref: [https://kubernetes.io/docs/concepts/overview/working-with-objects/namespaces/](https://kubernetes.io/docs/concepts/overview/working-with-objects/namespaces/)
By default, a Kubernetes cluster will instantiate a default namespace.
```
NAME STATUS AGE
default Active 13m
```
Create a namespace
```
kubectl create ns development
```
Spcify a namespace in ``metadata.namespace`` attribute
```
apiVersion: v1
kind: Pod
metadata:
name: my-pod
namespace: my-namespace
labels:
app: myapp
spec:
containers:
- name: myapp-container
image: busybox
command: ['sh', '-c', 'echo Hello World! && sleep 3600']
```
```
kubectl create -f my-namespace.yml
```
Get a list of the namespaces in the cluster
```
kubectl get namespaces
```
```
NAME STATUS AGE
development Active 5m
default Active 1d
kube-system Active 1d
kube-public Active 1d
```
Specify a namespace when using ``kubectl get``
```
kubectl get pods -n my-namespace
```
Specify a namespace when using ``kubectl describe``
```
kubectl describe pod my-pod -n my-namespace
```
# Working with ConfigMaps
> ConfigMaps allow you to decouple configuration artifacts from image content to keep containerized applications portable.
Ref: [https://kubernetes.io/docs/tasks/configure-pod-container/configure-pod-configmap/](https://kubernetes.io/docs/tasks/configure-pod-container/configure-pod-configmap/)
## Consuming ConfigMap as Environment Variables
```
apiVersion: v1
kind: ConfigMap
metadata:
name: my-config-map
data:
myKey: myValue
anotherKey: anotherValue
```
```
apiVersion: v1
kind: Pod
metadata:
name: my-configmap-pod
spec:
containers:
- name: myapp-container
image: busybox
command: ['sh', '-c', "echo $(MY_VAR) && sleep 3600"]
env:
- name: MY_VAR
valueFrom:
configMapKeyRef:
name: my-config-map
key: myKey
```
## Consuming ConfigMap as Mounted Volume
```
apiVersion: v1
kind: Pod
metadata:
name: my-configmap-volume-pod
spec:
containers:
- name: myapp-container
image: busybox
command: ['sh', '-c', "echo $(cat /etc/config/myKey) && sleep 3600"]
volumeMounts:
- name: config-volume
mountPath: /etc/config
volumes:
- name: config-volume
configMap:
name: my-config-map
```
# Working with SecurityContexts
> A security context defines privilege and access control settings for a Pod or Container.
Ref: [https://kubernetes.io/docs/tasks/configure-pod-container/security-context/](https://kubernetes.io/docs/tasks/configure-pod-container/security-context/)
```
apiVersion: v1
kind: Pod
metadata:
name: my-securitycontext-pod
spec:
securityContext:
runAsUser: 2001
fsGroup: 3001
containers:
- name: myapp-container
image: busybox
command: ['sh', '-c', "cat /message/message.txt && sleep 3600"]
volumeMounts:
- name: message-volume
mountPath: /message
volumes:
- name: message-volume
hostPath:
path: /etc/message
```
# Working with Resource Requests
> When you specify a Pod, you can optionally specify how much CPU and memory (RAM) each Container needs. When Containers have resource requests specified, the scheduler can make better decisions about which nodes to place Pods on. And when Containers have their limits specified, contention for resources on a node can be handled in a specified manner. For more details about the difference between requests and limits, see [Resource QoS](https://git.k8s.io/community/contributors/design-proposals/node/resource-qos.md).
Ref: [https://kubernetes.io/docs/concepts/configuration/manage-compute-resources-container/#resource-requests-and-limits-of-pod-and-container](https://kubernetes.io/docs/concepts/configuration/manage-compute-resources-container/#resource-requests-and-limits-of-pod-and-container)
```
apiVersion: v1
kind: Pod
metadata:
name: my-resource-pod
spec:
containers:
- name: myapp-container
image: busybox
command: ['sh', '-c', 'echo Hello Kubernetes! && sleep 3600']
resources:
requests:
memory: "64Mi"
cpu: "250m"
limits:
memory: "128Mi"
cpu: "500m"
```
# Working with Secrets
> Kubernetes secret objects let you store and manage sensitive information, such as passwords, OAuth tokens, and ssh keys. Putting this information in a secret is safer and more flexible than putting it verbatim in a Pod definition or in a container image.
Ref: [https://kubernetes.io/docs/concepts/configuration/secret/](https://kubernetes.io/docs/concepts/configuration/secret/)
Create a secret using a yaml definition
```
apiVersion: v1
kind: Secret
metadata:
name: my-secret
stringData:
username: YWRtaW4=
password: MWYyZDFlMmU2N2Rm
```
For best practice, delete the definition after you create it
```bash
kubectl apply -f my-secret.yml
rm my-secret.yml
```
Pass the sensitive data to containers as an environment variable
```
apiVersion: v1
kind: Pod
metadata:
name: my-secret-pod
spec:
containers:
- name: myapp-container
image: busybox
command: ['sh', '-c', "echo Hello, Kubernetes! && sleep 3600"]
env:
- name: SECRET_USERNAME
valueFrom:
secretKeyRef:
name: mysecret
key: username
- name: SECRET_PASSWORD
valueFrom:
secretKeyRef:
name: mysecret
key: password
```
# Working with ServiceAccounts
> A service account provides an identity for processes that run in a Pod.
Ref:
- [https://kubernetes.io/docs/tasks/configure-pod-container/configure-service-account/](https://kubernetes.io/docs/tasks/configure-pod-container/configure-service-account/)
- [https://kubernetes.io/docs/reference/access-authn-authz/service-accounts-admin/](https://kubernetes.io/docs/reference/access-authn-authz/service-accounts-admin/)
Create a ServiceAccount
```bash
kubectl create serviceaccount my-serviceaccount
```
```
apiVersion: v1
kind: Pod
metadata:
name: my-serviceaccount-pod
spec:
serviceAccountName: my-serviceaccount
containers:
- name: myapp-container
image: busybox
command: ['sh', '-c', "echo Hello, Kubernetes! && sleep 3600"]
```
# Working with Multi-Container Pods
> Multi-container pods provide an opportunity to enhance containers with helper containers that provide additional functionality
Ref:
- [https://kubernetes.io/docs/concepts/cluster-administration/logging/#using-a-sidecar-container-with-the-logging-agent](https://kubernetes.io/docs/concepts/cluster-administration/logging/#using-a-sidecar-container-with-the-logging-agent)
- [https://kubernetes.io/docs/tasks/access-application-cluster/communicate-containers-same-pod-shared-volume/](https://kubernetes.io/docs/tasks/access-application-cluster/communicate-containers-same-pod-shared-volume/)
- [https://kubernetes.io/docs/tasks/access-application-cluster/communicate-containers-same-pod-shared-volume/](https://kubernetes.io/docs/tasks/access-application-cluster/communicate-containers-same-pod-shared-volume/)
```
apiVersion: v1
kind: Pod
metadata:
name: multi-container-pod
spec:
containers:
- name: nginx
image: nginx:1.15.8
ports:
- containerPort: 80
- name: busybox-sidecar
image: busybox
command: ['sh', '-c', 'while true; do sleep 30; done;']
```
# Working with Probes
> A Probe is a diagnostic performed periodically by the kubelet on a Container.
``livenessProbe``: Indicates whether the Container is running. If the liveness probe fails, the kubelet kills the Container, and the Container is subjected to its restart policy. If a Container does not provide a liveness probe, the default state is Success.
```
apiVersion: v1
kind: Pod
metadata:
labels:
test: liveness
name: liveness-exec
spec:
containers:
- name: liveness
image: k8s.gcr.io/busybox
args:
- /bin/sh
- -c
- touch /tmp/healthy; sleep 30; rm -rf /tmp/healthy; sleep 600
livenessProbe:
exec:
command:
- cat
- /tmp/healthy
initialDelaySeconds: 5
periodSeconds: 5
```
``readinessProbe``: Indicates whether the Container is ready to service requests. If the readiness probe fails, the endpoints controller removes the Pod’s IP address from the endpoints of all Services that match the Pod. The default state of readiness before the initial delay is Failure. If a Container does not provide a readiness probe, the default state is Success.
```
apiVersion: v1
kind: Pod
metadata:
labels:
test: liveness
name: liveness-exec
spec:
containers:
- name: liveness
image: k8s.gcr.io/busybox
args:
- /bin/sh
- -c
- touch /tmp/healthy; sleep 30; rm -rf /tmp/healthy; sleep 600
readinessProbe:
exec:
command:
- cat
- /tmp/healthy
initialDelaySeconds: 5
periodSeconds: 5
```
``startupProbe``: Indicates whether the application within the Container is started. All other probes are disabled if a startup probe is provided, until it succeeds. If the startup probe fails, the kubelet kills the Container, and the Container is subjected to its restart policy. If a Container does not provide a startup probe, the default state is Success.
```
apiVersion: v1
kind: Pod
metadata:
labels:
test: liveness
name: liveness-exec
spec:
containers:
- name: liveness
image: k8s.gcr.io/busybox
args:
- /bin/sh
- -c
- touch /tmp/healthy; sleep 30; rm -rf /tmp/healthy; sleep 600
startupProbe:
httpGet:
path: /healthz
port: liveness-port
failureThreshold: 30
periodSeconds: 10
```
Ref:
- [https://kubernetes.io/docs/concepts/workloads/pods/pod-lifecycle/#container-probes](https://kubernetes.io/docs/concepts/workloads/pods/pod-lifecycle/#container-probes)
- [https://kubernetes.io/docs/tasks/configure-pod-container/configure-liveness-readiness-probes/](https://kubernetes.io/docs/tasks/configure-pod-container/configure-liveness-readiness-probes/)
- [https://kubernetes.io/docs/tasks/configure-pod-container/configure-liveness-readiness-startup-probes/](https://kubernetes.io/docs/tasks/configure-pod-container/configure-liveness-readiness-startup-probes/)
# Working with Container Logging
Ref: [https://kubernetes.io/docs/concepts/cluster-administration/logging/](https://kubernetes.io/docs/concepts/cluster-administration/logging/)
Get the container's logs
```
kubectl logs
```
Get the specfic container's logs in a multi-container pod
```
kubectl logs -c
```
```
kubectl logs >
```
# Working with Monitoring Applications
Ref: [https://kubernetes.io/docs/tasks/debug-application-cluster/resource-usage-monitoring/](https://kubernetes.io/docs/tasks/debug-application-cluster/resource-usage-monitoring/)
```bash
# Get resource usage for all pods in the default namespace
kubectl top pods
# Get resource usage for a single pod
kubectl top pod
# Get resource usage for all pods in a specific namespace
kubectl top pods -n kube-system
# Get resource usage for nodes
kubectl top nodes
```
# Working with Labels, Selectors and Annotations
Ref:
- [https://kubernetes.io/docs/concepts/overview/working-with-objects/labels/](https://kubernetes.io/docs/concepts/overview/working-with-objects/labels/)
- [https://kubernetes.io/docs/concepts/overview/working-with-objects/annotations/](https://kubernetes.io/docs/concepts/overview/working-with-objects/annotations/)
```
apiVersion: v1
kind: Pod
metadata:
name: my-production-label-pod
labels:
app: my-app
environment: production
spec:
containers:
- name: nginx
image: nginx
```
```
apiVersion: v1
kind: Pod
metadata:
name: my-development-label-pod
labels:
app: my-app
environment: development
spec:
containers:
- name: nginx
image: nginx
```
```bash
# show labels for each pods
kubectl get pods --show-labels
# get pods using equality-based selectors
kubectl get pods -l environment=production
kubectl get pods -l environment=development
# get pods using inequality-based selectors
kubectl get pods -l environment!=production
# get pods using set-based selectors
kubectl get pods -l 'environment in (development,production)'
# get pods using chained multiple selectors with a comma-delimited list
kubectl get pods -l app=my-app,environment=production
# to view existing labels and annotations
kubectl describe pod
```
# Working with Deployment
> A Deployment provides declarative updates for Pods and ReplicaSets. You describe a desired state in a Deployment, and the Deployment Controller changes the actual state to the desired state at a controlled rate. You can define Deployments to create new ReplicaSets, or to remove existing Deployments and adopt all their resources with new Deployments.
Ref: [https://kubernetes.io/docs/concepts/workloads/controllers/deployment/](https://kubernetes.io/docs/concepts/workloads/controllers/deployment/)
```
apiVersion: apps/v1
kind: Deployment
metadata:
name: nginx-deployment
spec:
replicas: 3
selector:
matchLabels:
app: nginx
template:
metadata:
labels:
app: nginx
spec:
containers:
- name: nginx
image: nginx:1.7.9
ports:
- containerPort: 80
```
```
kubectl get deployments
kubectl get deployment
kubectl describe deployment
kubectl edit deployment
kubectl delete deployment
```
# Working with Rolling Update
```
apiVersion: apps/v1
kind: Deployment
metadata:
name: rolling-deployment
spec:
replicas: 3
selector:
matchLabels:
app: nginx
template:
metadata:
labels:
app: nginx
spec:
containers:
- name: nginx
image: nginx:1.7.1
ports:
- containerPort: 80
```
```bash
# Perform a rolling update
kubectl set image deployment/rolling-deployment nginx=nginx:1.7.9 --record
# Explore the rollout history of the deployment
kubectl rollout history deployment/rolling-deployment
kubectl rollout history deployment/rolling-deployment --revision=2
# Roll back to the previous revision
kubectl rollout undo deployment/rolling-deployment
# Roll back to a specific earlier revision by providing the revision number
kubectl rollout undo deployment/rolling-deployment --to-revision=1
```
Proportional scaling by setting ``maxSurge`` and ``maxUnavailable`` in the deployment spec
```
spec:
strategy:
rollingUpdate:
maxSurge: 3
maxUnavailable: 2
```
# Working with Jobs and CronJobs
Ref:
- [https://kubernetes.io/docs/concepts/workloads/controllers/jobs-run-to-completion/](https://kubernetes.io/docs/concepts/workloads/controllers/jobs-run-to-completion/)
- [https://kubernetes.io/docs/concepts/workloads/controllers/cron-jobs/](https://kubernetes.io/docs/concepts/workloads/controllers/cron-jobs/)
- [https://kubernetes.io/docs/tasks/job/automated-tasks-with-cron-jobs/](https://kubernetes.io/docs/tasks/job/automated-tasks-with-cron-jobs/)
This job calculates the first 2000 digits of pi
```
apiVersion: batch/v1
kind: Job
metadata:
name: pi
spec:
template:
spec:
containers:
- name: pi
image: perl
command: ["perl", "-Mbignum=bpi", "-wle", "print bpi(2000)"]
restartPolicy: Never
backoffLimit: 4
```
Check the status of Jobs. It may take several seconds to finish.
```bash
kubectl get jobs
```
By running ``kubectl get pods``, you should see a new pod with STATUS ``Completed``
```bash
kubectl get pods
```
Check the output
```bash
kubectl logs
```
A cronjob example
```
apiVersion: batch/v1beta1
kind: CronJob
metadata:
name: hello
spec:
schedule: "*/1 * * * *"
jobTemplate:
spec:
template:
spec:
containers:
- name: hello
image: busybox
args:
- /bin/sh
- -c
- date; echo Hello from the Kubernetes cluster
restartPolicy: OnFailure
```
List and check the status of CronJobs
```bash
kubectl get cronjobs
```
# Working with Services
Ref:
- [https://kubernetes.io/docs/concepts/services-networking/service/](https://kubernetes.io/docs/concepts/services-networking/service/)
- [https://kubernetes.io/docs/tutorials/kubernetes-basics/expose/expose-intro/](https://kubernetes.io/docs/tutorials/kubernetes-basics/expose/expose-intro/)
```
apiVersion: apps/v1
kind: Deployment
metadata:
name: nginx-deployment
spec:
replicas: 3
selector:
matchLabels:
app: nginx
template:
metadata:
labels:
app: nginx
spec:
containers:
- name: nginx
image: nginx:1.7.9
ports:
- containerPort: 80
```
```
apiVersion: apps/v1
kind: Deployment
metadata:
name: nginx-deployment
spec:
replicas: 3
selector:
matchLabels:
app: nginx
template:
metadata:
labels:
app: nginx
spec:
containers:
- name: nginx
image: nginx:1.7.9
ports:
- containerPort: 80
```
```bash
# Get services
kubectl get svc
# Get endpoints
kubectl get endpoints my-service
```
# Working with Network Policies
> A network policy is a specification of how groups of pods are allowed to communicate with each other and other network endpoints.
Ref: [https://kubernetes.io/docs/concepts/services-networking/network-policies/](https://kubernetes.io/docs/concepts/services-networking/network-policies/)
In order to use NetworkPolicies in the cluster, we need to have a network plugin called ``canal``
```
wget -O canal.yaml https://docs.projectcalico.org/v3.5/getting-started/kubernetes/installation/hosted/canal/canal.yaml
kubectl apply -f canal.yaml
```
Create a sample nginx pod
```
apiVersion: v1
kind: Pod
metadata:
name: network-policy-secure-pod
labels:
app: secure-app
spec:
containers:
- name: nginx
image: nginx
ports:
- containerPort: 80
```
Create a client pod used to test network access to the nginx pod
```
apiVersion: v1
kind: Pod
metadata:
name: network-policy-client-pod
spec:
containers:
- name: busybox
image: radial/busyboxplus:curl
command: ["/bin/sh", "-c", "while true; do sleep 3600; done"]
```
Get the cluster ip address of the nginx pod
```
kubectl get pod network-policy-secure-pod -o wide
```
By executing the below command, you should see the network is accessible
```
kubectl exec network-policy-client-pod -- curl
```
Create a network policy to restricts all access to the secure pod except pods with ``allow-access: "true"`` label
```
apiVersion: networking.k8s.io/v1
kind: NetworkPolicy
metadata:
name: my-network-policy
spec:
podSelector:
matchLabels:
app: secure-app
policyTypes:
- Ingress
- Egress
ingress:
- from:
- podSelector:
matchLabels:
allow-access: "true"
ports:
- protocol: TCP
port: 80
egress:
- to:
- podSelector:
matchLabels:
allow-access: "true"
ports:
- protocol: TCP
port: 80
```
Apply before network policy and execute the curl command again, you should see the network is not accessible
```
kubectl exec network-policy-client-pod -- curl
```
Get more info about NetworkPolicy in the cluster
```
kubectl get networkpolicies
kubectl describe networkpolicy my-network-policy
```
Edit the client pod
```
kubectl edit pod network-policy-client-pod
```
under metadata, add
```
labels:
allow-access: "true"
```
Re-run the curl command again, the secure pod is accessible from the client pod
# Working with Volumes
> On-disk files in a Container are ephemeral, which presents some problems for non-trivial applications when running in Containers. First, when a Container crashes, kubelet will restart it, but the files will be lost - the Container starts with a clean state. Second, when running Containers together in a Pod it is often necessary to share files between those Containers. The Kubernetes Volume abstraction solves both of these problems.
Ref: [https://kubernetes.io/docs/concepts/storage/volumes/](https://kubernetes.io/docs/concepts/storage/volumes/)
```
apiVersion: v1
kind: Pod
metadata:
name: volume-pod
spec:
containers:
- image: busybox
name: busybox
command: ["/bin/sh", "-c", "while true; do sleep 3600; done"]
volumeMounts:
- mountPath: /tmp/storage
name: my-volume
volumes:
- name: my-volume
emptyDir: {}
```
# Working with PersistentVolumes and PersistentVolumeClaims
> PersistentVolumes (PVs) and PersistentVolumeClaims (PVCs) provide a way to easily consume storage resources, especially in the context of a complex production environment that uses multiple storage solutions.
Ref:
- [https://kubernetes.io/docs/concepts/storage/persistent-volumes/](https://kubernetes.io/docs/concepts/storage/persistent-volumes/)
- [https://kubernetes.io/docs/tasks/configure-pod-container/configure-persistent-volume-storage/](https://kubernetes.io/docs/tasks/configure-pod-container/configure-persistent-volume-storage/)
```
kind: PersistentVolume
apiVersion: v1
metadata:
name: my-pv
spec:
storageClassName: local-storage
capacity:
storage: 1Gi
accessModes:
- ReadWriteOnce
hostPath:
path: "/mnt/data"
```
```
apiVersion: v1
kind: PersistentVolumeClaim
metadata:
name: my-pvc
spec:
storageClassName: local-storage
accessModes:
- ReadWriteOnce
resources:
requests:
storage: 512Mi
```
```
kubectl get pv
kubectl get pvc
```
```
kind: Pod
apiVersion: v1
metadata:
name: my-pvc-pod
spec:
containers:
- name: busybox
image: busybox
command: ["/bin/sh", "-c", "while true; do sleep 3600; done"]
volumeMounts:
- mountPath: "/mnt/storage"
name: my-storage
volumes:
- name: my-storage
persistentVolumeClaim:
claimName: my-pvc
```
Wednesday, 29 January 2020
Forwarding Port Traffic in Kubernete
Supposing you've migrated your services to kubernetes and there is a service with a hardcoded port 8755 from your legacy application listing some products in a JSON format a where the requirement declares the standard port is 80. To address this problem, you can use the ambassador design to export access to the service on port 80.
First of all, create a ConfigMap definition, pipe the configuration to ``haproxy.cfg`` and save it as ``my-service-ambassador-config.yml``
```
apiVersion: v1
kind: ConfigMap
metadata:
name: my-service-ambassador-config
data:
haproxy.cfg: |-
global
daemon
maxconn 256
defaults
mode http
timeout connect 5000ms
timeout client 50000ms
timeout server 50000ms
listen http-in
bind *:80
server server1 127.0.0.1:8775 maxconn 32
```
```
kubectl apply -f my-service-ambassador-config.yml
```
Create a pod definition called ``my-service.yml``. As you can see, there is an ambassador container running the ``haproxy:1.7`` image and proxying the incoming traffic on port 80 to the legacy service on port 8775.
```
apiVersion: v1
kind: Pod
metadata:
name: my-service
spec:
containers:
- name: legacy-service
image: legacy-service:1
- name: haproxy-ambassador
image: haproxy:1.7
ports:
- containerPort: 80
- name: config-volume
mountPath: /usr/local/etc/haproxy
volumes:
- name: config-volume
configMap:
name: my-service-ambassador-config
```
```
kubectl apply -f my-service.yml
```
Let's test it by creating a busybox pod
```
apiVersion: v1
kind: Pod
metadata:
name: busybox
spec:
containers:
- name: myapp-container
image: radial/busyboxplus:curl
command: ['sh', '-c', 'while true; do sleep 3600; done']
```
```
kubectl apply -f busybox.yml
```
The sub-command ``$(kubectl get pod my-service -o=custom-columns=IP:.status.podIP --no-headers)`` is used to get the IP address of ``my-service``.
```
kubectl exec busybox -- curl $(kubectl get pod my-service -o=custom-columns=IP:.status.podIP --no-headers):80
```
For more about ambassador pattern, please check out [Design patterns for container-based distributed systems](https://static.googleusercontent.com/media/research.google.com/en//pubs/archive/45406.pdf)
Tuesday, 28 January 2020
How to fix Insufficient pods issue when deploying to Amazon EKS?
Recently I tried to deploy a nodeJS application to Amazon EKS and found that the deployment was not ready and the pod was stuck at Pending state indefinitely. I had no idea what's happening.
In order to troubleshoot, I increased kubectl output verbosity to ``--v=9``. For more: [Kubectl output verbosity and debugging](https://kubernetes.io/docs/reference/kubectl/cheatsheet/#kubectl-output-verbosity-and-debugging).
To get more details, I ran ``kubectl describe pod`` and got the below message:
```
Events:
Type Reason Age From Message
---- ------ ---- ---- -------
Warning FailedScheduling 17s (x14 over 18m) default-scheduler 0/1 nodes are available: 1 Insufficient pods.
```
I was wondering the maximum number of pods per each node, so I ran
```
kubectl get nodes -o yaml | grep pods
```
It returned
```
4
```
Then, I wanted to know how many pods which were currently running.
```
kubectl get pods --all-namespaces | grep Running | wc -l
```
I also got
```
4
```
From [Architecting Kubernetes clusters — choosing a worker node size](https://learnk8s.io/kubernetes-node-size), we know the below info:
```
On Amazon Elastic Kubernetes Service (EKS),
the maximum number of pods per node depends on the node type and ranges from 4 to 737.
On Google Kubernetes Engine (GKE),
the limit is 100 pods per node, regardless of the type of node.
On Azure Kubernetes Service (AKS),
the default limit is 30 pods per node but it can be increased up to 250.
```
As more pods need to be provisioned, the maximum number of pods are not enough in this case. As I was just working on a demonstration, so I chose a small node type ``t2.micro`` to minimise the cost.
How to increase this value? This is calculated from [AWS ENI documentation](https://docs.aws.amazon.com/AWSEC2/latest/UserGuide/using-eni.html#AvailableIpPerENI). The formula is
```
N * (M-1) + 2
```
where
```
N is the number of Elastic Network Interfaces (ENI) of the instance type
M is the number of IP addresses of a single ENI
```
So I was using ``t2.micro``, the calculation is ``2 * (2-1) + 2 = 4``.
AWS also provides a mapping file [here](https://github.com/awslabs/amazon-eks-ami/blob/master/files/eni-max-pods.txt) so that you don't need to calculate yourself.
The final solution is to change the node type from ``t2.micro`` to ``t3.small`` in my case.
Monday, 13 January 2020
Autoscaling an EKS Cluster with Cluster Autoscaler
Last time we introduced how to use ``eksctl`` to create an EKS cluster. If you miss the previous post, please check out [Creating an EKS Cluster in AWS Using eksctl](https://dev.to/wingkwong/creating-an-eks-cluster-in-aws-using-eksctl-10ik). In this article, you will learn how to autoscale an EKS cluster using a default Kubernetes component - [Cluster Autoscaler](https://github.com/kubernetes/autoscaler/tree/master/cluster-autoscaler). It can be used to scale either pods or nodes in a cluster and automatically increases the size of an auto-scaling group.
Go to AWS console and navigate to EC2 Dashboard - Auto Scaling Groups.

Copy the auto-scaling group name and replace ```` with it.
With ``--nodes=2:8``, it will auto-scale with minimum 2 nodes and maximum 8 nodes.
cluster_autoscaler.yaml
```
apiVersion: v1
kind: ServiceAccount
metadata:
labels:
k8s-addon: cluster-autoscaler.addons.k8s.io
k8s-app: cluster-autoscaler
name: cluster-autoscaler
namespace: kube-system
---
apiVersion: rbac.authorization.k8s.io/v1beta1
kind: ClusterRole
metadata:
name: cluster-autoscaler
labels:
k8s-addon: cluster-autoscaler.addons.k8s.io
k8s-app: cluster-autoscaler
rules:
- apiGroups: [""]
resources: ["events","endpoints"]
verbs: ["create", "patch"]
- apiGroups: [""]
resources: ["pods/eviction"]
verbs: ["create"]
- apiGroups: [""]
resources: ["pods/status"]
verbs: ["update"]
- apiGroups: [""]
resources: ["endpoints"]
resourceNames: ["cluster-autoscaler"]
verbs: ["get","update"]
- apiGroups: [""]
resources: ["nodes"]
verbs: ["watch","list","get","update"]
- apiGroups: [""]
resources: ["pods","services","replicationcontrollers","persistentvolumeclaims","persistentvolumes"]
verbs: ["watch","list","get"]
- apiGroups: ["extensions"]
resources: ["replicasets","daemonsets"]
verbs: ["watch","list","get"]
- apiGroups: ["policy"]
resources: ["poddisruptionbudgets"]
verbs: ["watch","list"]
- apiGroups: ["apps"]
resources: ["statefulsets"]
verbs: ["watch","list","get"]
- apiGroups: ["storage.k8s.io"]
resources: ["storageclasses"]
verbs: ["watch","list","get"]
---
apiVersion: rbac.authorization.k8s.io/v1beta1
kind: Role
metadata:
name: cluster-autoscaler
namespace: kube-system
labels:
k8s-addon: cluster-autoscaler.addons.k8s.io
k8s-app: cluster-autoscaler
rules:
- apiGroups: [""]
resources: ["configmaps"]
verbs: ["create"]
- apiGroups: [""]
resources: ["configmaps"]
resourceNames: ["cluster-autoscaler-status"]
verbs: ["delete","get","update"]
---
apiVersion: rbac.authorization.k8s.io/v1beta1
kind: ClusterRoleBinding
metadata:
name: cluster-autoscaler
labels:
k8s-addon: cluster-autoscaler.addons.k8s.io
k8s-app: cluster-autoscaler
roleRef:
apiGroup: rbac.authorization.k8s.io
kind: ClusterRole
name: cluster-autoscaler
subjects:
- kind: ServiceAccount
name: cluster-autoscaler
namespace: kube-system
---
apiVersion: rbac.authorization.k8s.io/v1beta1
kind: RoleBinding
metadata:
name: cluster-autoscaler
namespace: kube-system
labels:
k8s-addon: cluster-autoscaler.addons.k8s.io
k8s-app: cluster-autoscaler
roleRef:
apiGroup: rbac.authorization.k8s.io
kind: Role
name: cluster-autoscaler
subjects:
- kind: ServiceAccount
name: cluster-autoscaler
namespace: kube-system
---
apiVersion: extensions/v1beta1
kind: Deployment
metadata:
name: cluster-autoscaler
namespace: kube-system
labels:
app: cluster-autoscaler
spec:
replicas: 1
selector:
matchLabels:
app: cluster-autoscaler
template:
metadata:
labels:
app: cluster-autoscaler
spec:
serviceAccountName: cluster-autoscaler
containers:
- image: k8s.gcr.io/cluster-autoscaler:v1.2.2
name: cluster-autoscaler
resources:
limits:
cpu: 100m
memory: 300Mi
requests:
cpu: 100m
memory: 300Mi
command:
- ./cluster-autoscaler
- --v=4
- --stderrthreshold=info
- --cloud-provider=aws
- --skip-nodes-with-local-storage=false
- --nodes=2:8:
env:
- name: AWS_REGION
value: us-east-1
volumeMounts:
- name: ssl-certs
mountPath: /etc/ssl/certs/ca-certificates.crt
readOnly: true
imagePullPolicy: "Always"
volumes:
- name: ssl-certs
hostPath:
path: "/etc/ssl/certs/ca-bundle.crt"
```
Then we need to apply below inline IAM policy to worker nodes to allow them to manipulate auto-scaling
```json
{
"Version": "2012-10-17",
"Statement": [
{
"Effect": "Allow",
"Action": [
"autoscaling:DescribeAutoScalingGroups",
"autoscaling:DescribeAutoScalingInstances",
"autoscaling:DescribeTags",
"autoscaling:SetDesiredCapacity",
"autoscaling:TerminateInstanceInAutoScalingGroup"
],
"Resource": "*"
}
]
}
```
Go back to AWS Console - IAM and search the worker node group role created by eksctl

Click Add inline poilcy
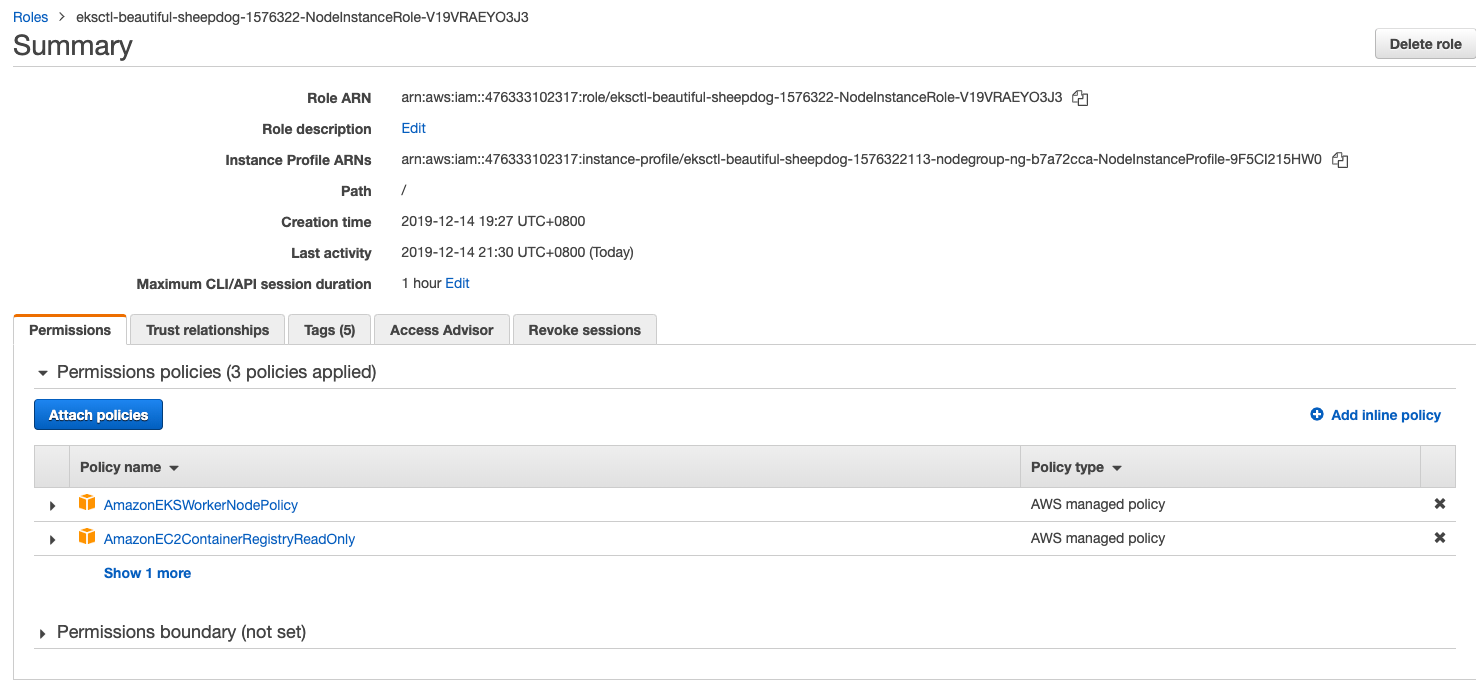
Click JSON tab and paste the above policy
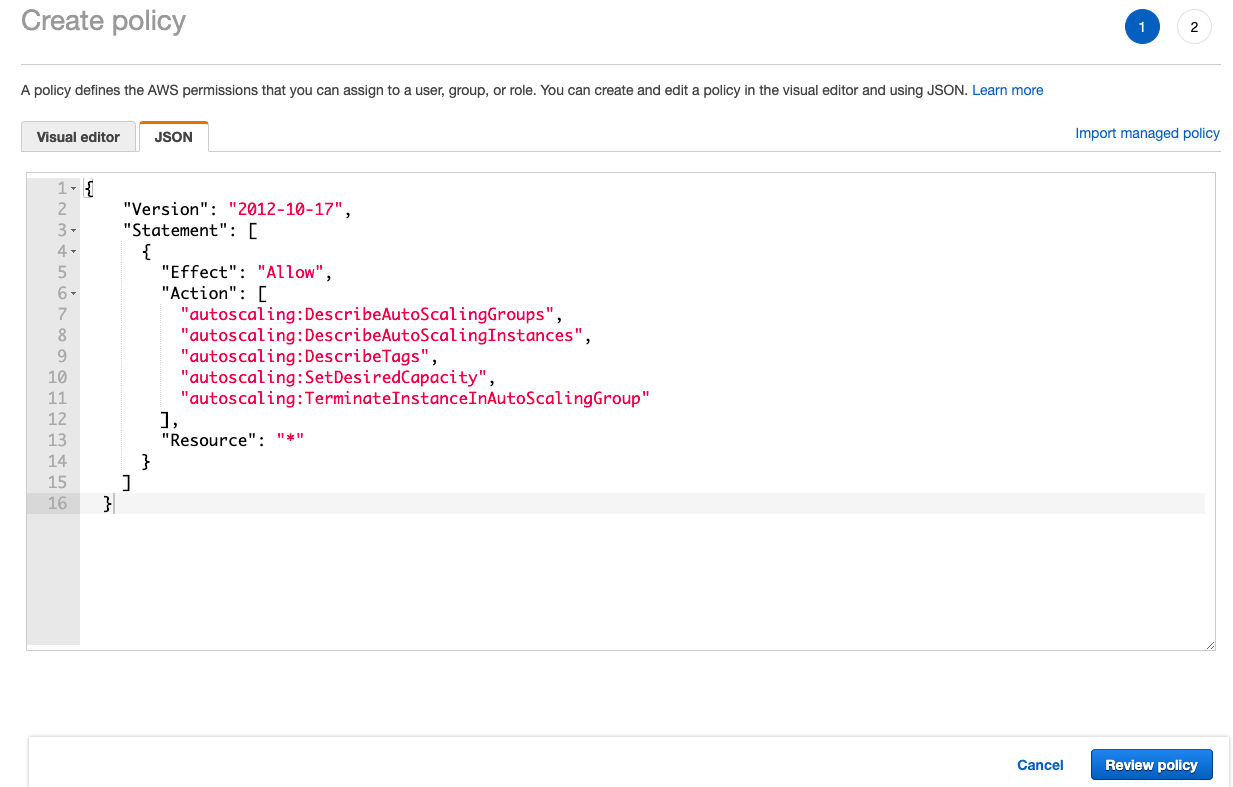
Name the policy and click Create policy
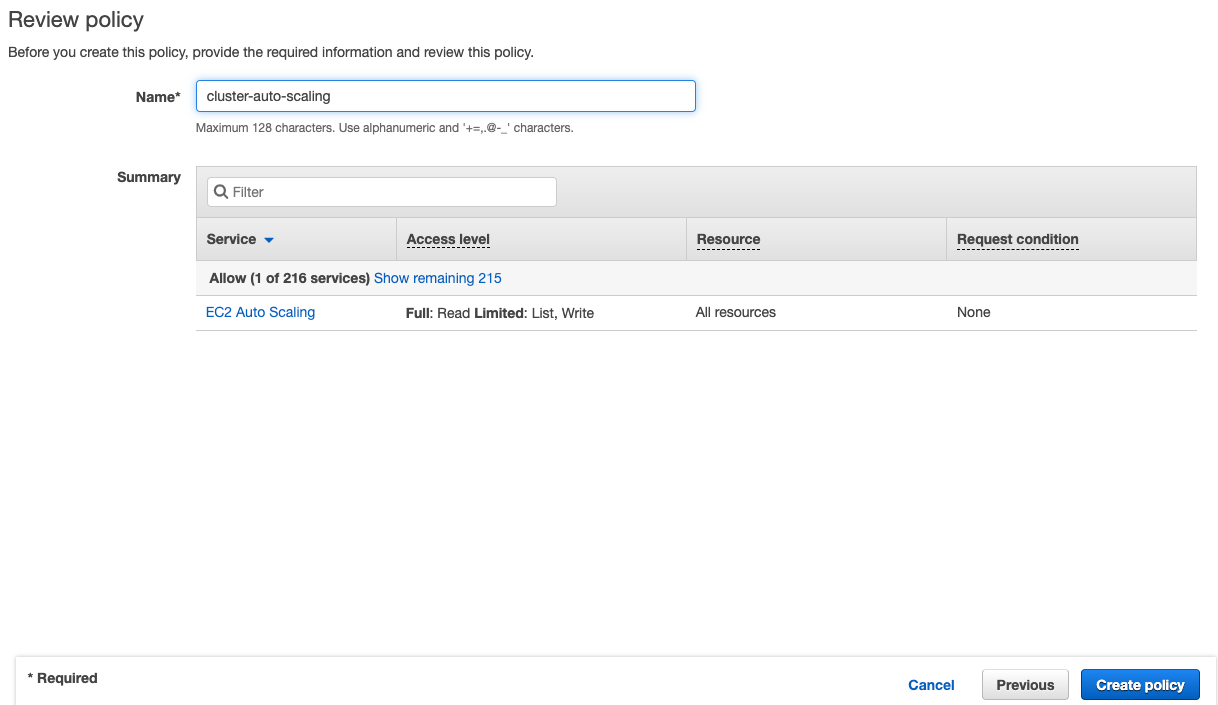
Run ``kubectl apply`` to deploy the autoscaler
```
kubectl apply -f cluster_autoscaler.yaml
```
You should see the following
```
serviceaccount/cluster-autoscaler created
clusterrole.rbac.authorization.k8s.io/cluster-autoscaler created
role.rbac.authorization.k8s.io/cluster-autoscaler created
clusterrolebinding.rbac.authorization.k8s.io/cluster-autoscaler created
rolebinding.rbac.authorization.k8s.io/cluster-autoscaler created
deployment.extensions/cluster-autoscaler created
```
Then let's deploy an Nginx sample application
```
apiVersion: extensions/v1beta1
kind: Deployment
metadata:
name: nginx-scaleout
spec:
replicas: 1
template:
metadata:
labels:
service: nginx
app: nginx
spec:
containers:
- image: nginx
name: nginx-scaleout
resources:
limits:
cpu: 500m
memory: 512Mi
requests:
cpu: 500m
memory: 512Mi
```
```
kubectl apply -f nginx.yaml
```
Check the deployment
```
kubectl get deployment/nginx-scaleout
```
```
NAME READY UP-TO-DATE AVAILABLE AGE
nginx-scaleout 1/1 1 1 14s
```
Let's scale the deployment with 10 replicas
```
kubectl scale --replicas=10 deployment/nginx-scaleout
```
```
deployment.extensions/nginx-scaleout scaled
```
You can run the following to see how it goes
```
kubectl logs -f deployment/cluster-autoscaler -n kube-system
```
Let's run it again
```
kubectl get deployment/nginx-scaleout
```
You can see 10 replicas have been scaled out
```
NAME READY UP-TO-DATE AVAILABLE AGE
nginx-scaleout 10/10 10 10 5m
```
Go to AWS Console - EC2 Dashboard. You should see there are 2 more instances spinning up.
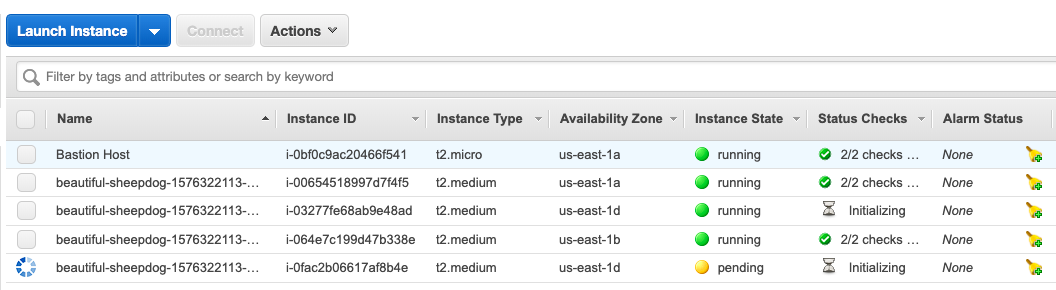
After a few minutes, try to see the nodes
```
kubectl get nodes
```
You'll get two more nodes joining to the cluster.
```
NAME STATUS ROLES AGE VERSION
ip-192-168-28-185.ec2.internal Ready 174m v1.14.7-eks-1861c5
ip-192-168-33-53.ec2.internal Ready 174m v1.14.7-eks-1861c5
ip-192-168-64-112.ec2.internal Ready 87s v1.14.7-eks-1861c5
ip-192-168-90-156.ec2.internal Ready 2m5s v1.14.7-eks-1861c5
```
To delete the deployments, run the following commands
```
kubectl delete -f cluster_autoscaler.yaml
kubectl delete -f nginx.yaml
```
Sunday, 29 December 2019
Building a K8s Cluster with Kubeadm
We build a K8s cluster for managing containers and use Kubeadm to simplify the proess of setting up a simple cluster.
# Install Docker on all three nodes
Add the Docker GPG Key:
```
curl -fsSL https://download.docker.com/linux/ubuntu/gpg | sudo apt-key add -
```
Add the Docker Repository
```
sudo add-apt-repository \
"deb [arch=amd64] https://download.docker.com/linux/ubuntu \
$(lsb_release -cs) \
stable"
```
Update packages:
```
sudo apt-get update
```
Install Docker:
```
sudo apt-get install -y docker-ce=18.06.1~ce~3-0~ubuntu
```
Hold Docker at this specific version:
```
sudo apt-mark hold docker-ce
```
Verify that Docker is up and running with:
```
sudo systemctl status docker
```
After running above commands, the Docker service status should be active (running).
```
● docker.service - Docker Application Container Engine
Loaded: loaded (/lib/systemd/system/docker.service; enabled; vendor preset: enabled)
Active: active (running) since Sun 2019-10-20 11:15:32 UTC; 19s ago
Docs: https://docs.docker.com
Main PID: 9869 (dockerd)
Tasks: 21
CGroup: /system.slice/docker.service
├─9869 /usr/bin/dockerd -H fd://
└─9894 docker-containerd --config /var/run/docker/containerd/containerd.toml
```
# Install Kubeadm, Kubelet, and Kubectl
Install the K8s components by running the following commands on all three nodes.
Add the K8s GPG Key
```
curl -s https://packages.cloud.google.com/apt/doc/apt-key.gpg | sudo apt-key add -
```
Add the K8s repo
```
cat << EOF | sudo tee /etc/apt/sources.list.d/kubernetes.list
deb https://apt.kubernetes.io/ kubernetes-xenial main
EOF
```
Update packages
```
sudo apt-get update
```
Install ``kubelet``, ``kubeadm`` and ``kubectl``
```
sudo apt-get install -y kubelet=1.12.7-00 kubeadm=1.12.7-00 kubectl=1.12.7-00
```
Hold the Kubernetes components at this specific version
```
sudo apt-mark hold kubelet kubeadm kubectl
```
# Bootstrap the cluster on the Kube master node
Initialize kubeadm on the master node
```
sudo kubeadm init --pod-network-cidr=10.244.0.0/16
```
After a few minutes, you should see a ``kubeadm join`` command that will be used later
```
kubeadm join 10.0.1.101:6443 --token ioxxtp.zugcxykam7jhmlqe --discovery-token-ca-cert-hash sha256:1feab8ca98d50689b5a524c1271b43a7c712d66dab0d6ab7b68c9fd472921731
```
Set up the local kubeconfig
```
mkdir -p $HOME/.kube
sudo cp -i /etc/kubernetes/admin.conf $HOME/.kube/config
sudo chown $(id -u):$(id -g) $HOME/.kube/config
```
Verify if Kube master node is up and running
```
kubectl version
```
You should see ``Client Version`` and ``Server Version`` as below
```
Client Version: version.Info{Major:"1", Minor:"12", GitVersion:"v1.12.7", GitCommit:"6f482974b76db3f1e0f5d24605a9d1d38fad9a2b", GitTreeState:"clean", BuildDate:"2019-03-25T02:52:13Z", GoVersion:"go1.10.8", Compiler:"gc", Platform:"linux/amd64"}
Server Version: version.Info{Major:"1", Minor:"12", GitVersion:"v1.12.10", GitCommit:"e3c134023df5dea457638b614ee17ef234dc34a6", GitTreeState:"clean", BuildDate:"2019-07-08T03:40:54Z", GoVersion:"go1.10.8", Compiler:"gc", Platform:"linux/amd64"}
```
## Join the two Kube worker nodes to the cluster
Once the Kube master node is ready, then we need to join those two Kube worker nodes to the cluster.
Copy the ``kubeadm join`` command that was printed by ``kubeadm init`` command in the previous step. Make sure you run it with ``sudo``
```
sudo kubeadm join 10.0.1.101:6443 --token ioxxtp.zugcxykam7jhmlqe --discovery-token-ca-cert-hash sha256:1feab8ca98d50689b5a524c1271b43a7c712d66dab0d6ab7b68c9fd472921731
```
Go back to the Kube master node, check if the nodes are joined the cluster successfully or not
```
kubectl get nodes
```
Verify the result. Three of nodes are expected to be here but in the ``NotReady`` state.
```
NAME STATUS ROLES AGE VERSION
ip-10-0-1-101 NotReady master 30s v1.12.2
ip-10-0-1-102 NotReady 8s v1.12.2
ip-10-0-1-103 NotReady 5s v1.12.2
```
# Setu up cluster networking
To get them ready, we need to use flannel because K8s does not provide any defalt network implementation. Flannel is a very simple overlay network that satisfies the Kubernetes requirements. Many people have reported success with Flannel and Kubernetes.
Turn on iptables bridge calls on all three nodes
```
echo "net.bridge.bridge-nf-call-iptables=1" | sudo tee -a /etc/sysctl.conf
sudo sysctl -p
```
Apply flannel on Kube master node
```
kubectl apply -f https://raw.githubusercontent.com/coreos/flannel/bc79dd1505b0c8681ece4de4c0d86c5cd2643275/Documentation/kube-flannel.yml
```
Once flannel is installed. Verifiy the node status.
```
kubectl get nodes
```
After a short time, all three nodes should be in the ``Ready`` state.
```
NAME STATUS ROLES AGE VERSION
ip-10-0-1-101 Ready master 85s v1.12.2
ip-10-0-1-102 Ready 63s v1.12.2
ip-10-0-1-103 Ready 60s v1.12.2
```
Subscribe to:
Posts (Atom)