Sunday, 29 March 2020
Building Serverless CRUD services in Go with OpenFaaS, Arkade, MongoDB and k3d
After the publishing the series - [Building Serverless CRUD services in Go with DynamoDB](https://dev.to/wingkwong/building-serverless-crud-services-in-go-with-dynamodb-part-1-2kec), I've been exploring different ways to build serverless CRUD services. I spent a day trying out Openfaas, MongoDB, Arkade and k3d and I think it is a good idea to write a post and share some mistakes that I've had.
# Prerequisites
You need to install Docker on your machine and you need to register for a Docker Hub account as your Docker images will be stored there.
# Install Docker
Check out [Docker Official Installation Page](https://docs.docker.com/install/)
# Register Docker Hub account
Register via [https://hub.docker.com/](https://hub.docker.com/)
# Install k3d
``k3d`` is a little helper to run k3s in docker, where ``k3s`` is the lightweight Kubernetes distribution by Rancher. It actually removes millions of lines of code from k8s. If you just need a learning playground, k3s is definitely your choice.
Check out [k3d Github Page](https://github.com/rancher/k3d#get) to see the installation guide.
> When creating a cluster, ``k3d`` utilises ``kubectl`` and ``kubectl`` is not part of ``k3d``. If you don't have ``kubectl``, please install and set up [here](https://kubernetes.io/docs/tasks/tools/install-kubectl/).
Once you've installed ``k3d`` and ``kubectl``, run
```bash
k3d create
```
It creates a new single-node cluster which is a docker container.
```
INFO[0000] Created cluster network with ID d198f2b6085ea710ab9b8cd7fa711e69acfe1f3750a2faa5efec06255723e130
INFO[0000] Created docker volume k3d-k3s-default-images
INFO[0000] Creating cluster [k3s-default]
INFO[0000] Creating server using docker.io/rancher/k3s:v1.0.1...
INFO[0000] Pulling image docker.io/rancher/k3s:v1.0.1...
INFO[0029] SUCCESS: created cluster [k3s-default]
INFO[0029] You can now use the cluster with:
```
We need to make ``kubectl`` to use the kubeconfig for that cluster
```bash
export KUBECONFIG="$(k3d get-kubeconfig --name='k3s-default')"
```
Let's take a look at the cluster info
```bash
kubectl cluster-info
```
You should see
```bash
Kubernetes master is running at https://localhost:6443
CoreDNS is running at https://localhost:6443/api/v1/namespaces/kube-system/services/kube-dns:dns/proxy
Metrics-server is running at https://localhost:6443/api/v1/namespaces/kube-system/services/https:metrics-server:/proxy
```
By running the following command,
```bash
kubectl get node
```
You should see there is a node provisioned by ``k3d``.
```bash
NAME STATUS ROLES AGE VERSION
k3d-k3s-default-server Ready master 8m42s v1.16.3-k3s.2
```
# Install arkade
Moving on to [arkade](https://github.com/alexellis/arkade), it provides a simple Golang CLI with strongly-typed flags to install charts and apps to your cluster in one command. Originally, the codebase is derived from [k3sup](https://github.com/alexellis/k3sup) which I've contributed last month.
Let's install the latest version of arkade
```bash
curl -sLS https://dl.get-arkade.dev | sudo sh
```
You should see
```
Downloading package https://github.com/alexellis/arkade/releases/download/0.2.1/arkade-darwin as /tmp/arkade-darwin
Download complete.
Running with sufficient permissions to attempt to move arkade to /usr/local/bin
New version of arkade installed to /usr/local/bin
Creating alias 'ark' for 'arkade'.
_ _
__ _ _ __| | ____ _ __| | ___
/ _` | '__| |/ / _` |/ _` |/ _ \
| (_| | | | < (_| | (_| | __/
\__,_|_| |_|\_\__,_|\__,_|\___|
Get Kubernetes apps the easy way
Version: 0.2.1
Git Commit: 29ff156bbeee7f5ce935eeca37d98f319ef4e684
```
# Install MongoDB
MongoDB is a cross-platform document-oriented database program which is classified as a NoSQL database program, and it uses JSON-like documents with schema.
We can use arkade to install mongodb to our cluster
```bash
arkade install mongodb
```
You can run ``arkade info mongodb`` to get more info about the connection.
Once you've installed MongoDB, it can be accessed via port 27017 on the following DNS name from within your cluster:
```bash
mongodb.default.svc.cluster.local
```
First, let's get the MongoDB root password
```bash
export MONGODB_ROOT_PASSWORD=$(kubectl get secret --namespace default mongodb -o jsonpath="{.data.mongodb-root-password}" | base64 --decode)
```
Connect to your database run the following command:
```bash
kubectl run --namespace default mongodb-client --rm --tty -i --restart='Never' --image docker.io/bitnami/mongodb:4.2.4-debian-10-r0 --command -- mongo admin --host mongodb --authenticationDatabase admin -u root -p $MONGODB_ROOT_PASSWORD
```
Execute the following commands if you need to connect to your database from outside the cluster
```bash
kubectl port-forward --namespace default svc/mongodb 27017:27017 &
mongo --host 127.0.0.1 --authenticationDatabase admin -p $MONGODB_ROOT_PASSWORD
```
By default, the selected db is ``admin``. Let's create a new one.
```
use k3d-mongodb-crud
```
You should see
```
switched to db k3d-mongodb-crud
```
Then, create a collection called ``foo``.
```
db.createCollection("foo")
```
Since you've logged in as a root account and this account has nothing to do with this database. Hence, you need to create a new user with read and write permission. Without this step, you will encounter authentication error later on.
Replace ```` before executing the below command. To keep it simple for this demonstration, I used the same password as MongoDB root password, i.e. ``$MONGODB_ROOT_PASSWORD``.
```
db.createUser({ user:"admin", pwd: "", roles: [{role: "readWrite", db: "k3d-mongodb-crud"}] })
```
Verify it
```
> db.getUsers()
[
{
"_id" : "k3d-mongodb-crud.admin",
"userId" : UUID("72671c44-7306-4abb-bf57-efa87286a0f0"),
"user" : "admin",
"db" : "k3d-mongodb-crud",
"roles" : [
{
"role" : "readWrite",
"db" : "k3d-mongodb-crud"
}
],
"mechanisms" : [
"SCRAM-SHA-1",
"SCRAM-SHA-256"
]
}
]
```
# Install OpenFaaS
[OpenFaaS](https://github.com/openfaas/faas) allows us to deploy event-driven functions and micro-services to Kubernetes easily.
Install the latest faas-cli
```bash
curl -SLsf https://cli.openfaas.com | sudo sh
```
Forward the gateway to your machine
```bash
kubectl rollout status -n openfaas deploy/gateway
kubectl port-forward -n openfaas svc/gateway 8080:8080 &
```
# Setup our project
OpenFaaS provides a curated list of functions for your kickstart.
```bash
faas-cli template store list | grep go
```
```bash
go openfaas Classic Golang template
golang-http openfaas-incubator Golang HTTP template
golang-middleware openfaas-incubator Golang Middleware template
```
Let's pick ``golang-middleware``
```bash
faas-cli template store pull golang-middleware
```
```
Fetch templates from repository: https://github.com/openfaas-incubator/golang-http-template at master
2020/03/28 14:55:08 Attempting to expand templates from https://github.com/openfaas-incubator/golang-http-template
2020/03/28 14:55:11 Fetched 4 template(s) : [golang-http golang-http-armhf golang-middleware golang-middleware-armhf] from https://github.com/openfaas-incubator/golang-http-template
```
The project will be built into a Docker image and push to Docker Hub.
> Replace ``wingkwong`` with your Docker Hub username
```bash
faas-cli new --lang golang-middleware k3d-mongodb-crud --prefix=wingkwong
```
```
Folder: k3d-mongodb-crud created.
___ _____ ____
/ _ \ _ __ ___ _ __ | ___|_ _ __ _/ ___|
| | | | '_ \ / _ \ '_ \| |_ / _` |/ _` \___ \
| |_| | |_) | __/ | | | _| (_| | (_| |___) |
\___/| .__/ \___|_| |_|_| \__,_|\__,_|____/
|_|
Function created in folder: k3d-mongodb-crud
Stack file written: k3d-mongodb-crud.yml
```
Let's take a look at the project structure. All files are generated by ``faas-cli``.
```
├── k3d-mongodb-crud
│ └── handler.go
├── k3d-mongodb-crud.yml
└── template
├── golang-http
│ ├── Dockerfile
│ ├── function
│ │ └── handler.go
│ ├── go.mod
│ ├── go.sum
│ ├── main.go
│ ├── template.yml
│ └── vendor
│ ├── github.com
│ └── modules.txt
├── golang-http-armhf
│ ├── Dockerfile
│ ├── function
│ │ ├── Gopkg.toml
│ │ └── handler.go
│ ├── go.mod
│ ├── go.sum
│ ├── main.go
│ ├── template.yml
│ └── vendor
│ ├── github.com
│ └── modules.txt
├── golang-middleware
│ ├── Dockerfile
│ ├── function
│ │ └── handler.go
│ ├── go.mod
│ ├── main.go
│ └── template.yml
└── golang-middleware-armhf
├── Dockerfile
├── function
│ └── handler.go
├── go.mod
├── main.go
└── template.yml
```
Here's ``k3d-mongodb-crud.yml``, which is our configuration file for the deployment.
```
version: 1.0
provider:
name: openfaas
gateway: http://127.0.0.1:8080
functions:
k3d-mongodb-crud:
lang: golang-middleware
handler: ./k3d-mongodb-crud
image: wingkwong/k3d-mongodb-crud:latest
```
Let's build and deploy the project to the cluster
```bash
faas-cli up -f k3d-mongodb-crud.yml
```
Oops..it failed to deploy due to unauthorised access
```
Deploying: k3d-mongodb-crud.
WARNING! Communication is not secure, please consider using HTTPS. Letsencrypt.org offers free SSL/TLS certificates.
Handling connection for 8080
unauthorized access, run "faas-cli login" to setup authentication for this server
Function 'k3d-mongodb-crud' failed to deploy with status code: 401
```
Let's get the password from Secret
```bash
PASSWORD=$(kubectl get secret -n openfaas basic-auth -o jsonpath="{.data.basic-auth-password}" | base64 --decode; echo)
```
Log into the gateway by running
```bash
echo -n $PASSWORD | faas-cli login --username admin --password-stdin
```
Okay..another error is occurred
```bash
Calling the OpenFaaS server to validate the credentials...
Cannot connect to OpenFaaS on URL: http://127.0.0.1. Get https://127.0.0.1:443/system/functions: x509: cannot validate certificate for 127.0.0.1 because it doesn't contain any IP SANs
```
This is because the name localhost maps to an IPv6 alias meaning that the CLI may hang on certain Linux distributions. As suggested by Openfaas, you may have following solutions:
```
1. Use the -g or --gateway argument with 127.0.0.1:8080 or similar
2. Set the OPENFAAS_URL environmental variable to 127.0.0.1:8080 or similar
3. Edit the /etc/hosts file on your machine and remove the IPv6 alias for localhost (this forces the use of IPv4)
```
Let's take the second solution and retry it
```bash
export OPENFAAS_URL="127.0.0.1:8080"
PASSWORD=$(kubectl get secret -n openfaas basic-auth -o jsonpath="{.data.basic-auth-password}" | base64 --decode; echo)
echo -n $PASSWORD | faas-cli login --username admin --password-stdin
```
```
Calling the OpenFaaS server to validate the credentials...
Handling connection for 8080
WARNING! Communication is not secure, please consider using HTTPS. Letsencrypt.org offers free SSL/TLS certificates.
credentials saved for admin http://127.0.0.1:8080
```
It looks good now. Let's deploy again.
```bash
faas-cli up -f k3d-mongodb-crud.yml
```
Deploy successfully!
```bash
Deployed. 202 Accepted.
URL: http://127.0.0.1:8080/function/k3d-mongodb-crud
```
Go to ``http://127.0.0.1:8080/ui/``. You should see the function on the portal.
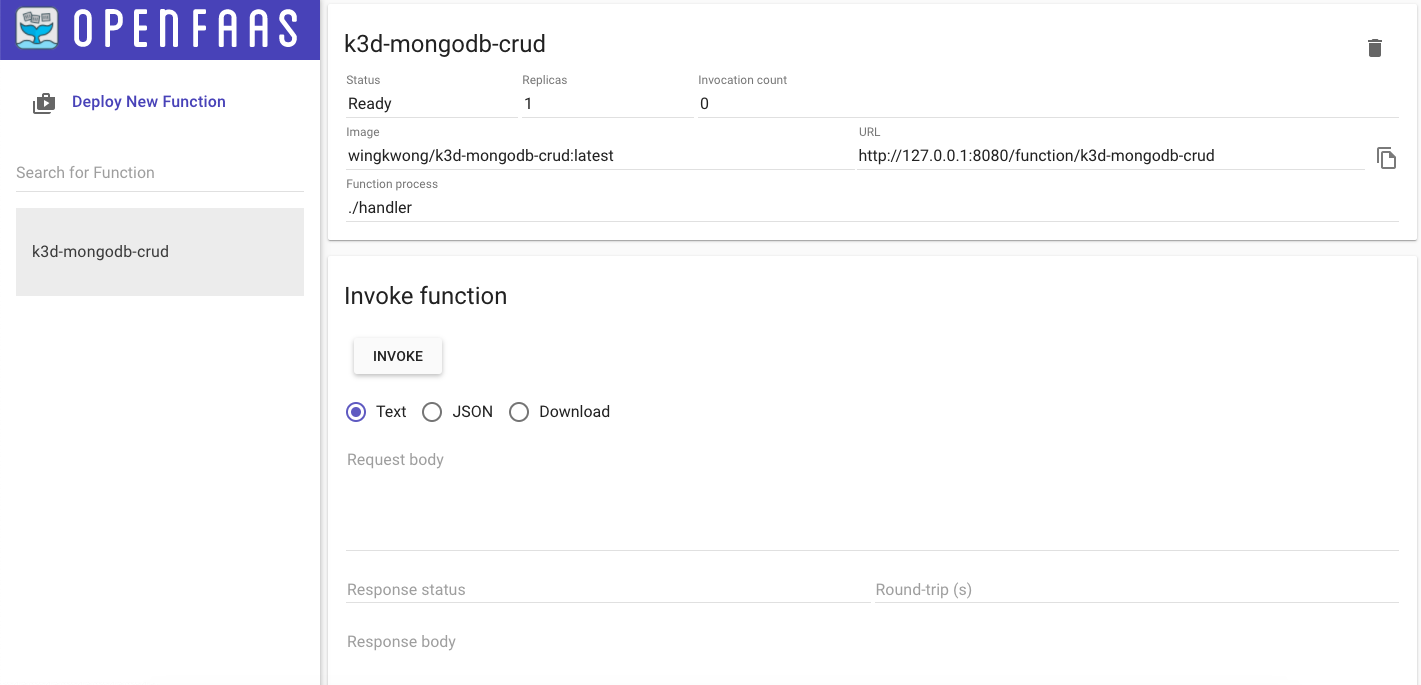
Finally we've all the setup. Let's move on to the coding part.
# Start Coding
Go to ``k3d-mongodb-crud.yml``, add ``environment`` and ``secrets`` under your function.
```
version: 1.0
provider:
name: openfaas
gateway: http://127.0.0.1:8080
functions:
k3d-mongodb-crud:
lang: golang-middleware
handler: ./k3d-mongodb-crud
image: wingkwong/k3d-mongodb-crud:latest
environment:
mongo_host: mongodb.default.svc.cluster.local:27017
mongo_database: k3d-mongodb-crud
mongo_collection: foo
write_debug: true
combine_output: false
secrets:
- mongo-db-username
- mongo-db-password
```
Back to the terminal, create two secrets by running
```bash
faas-cli secret create mongo-db-username --from-literal admin
faas-cli secret create mongo-db-password --from-literal $MONGODB_ROOT_PASSWORD
```
You should see
```bash
Creating secret: mongo-db-username
Creating secret: mongo-db-password
```
Back to ``k3d-mongodb-crud/handler.go``, import the libraries that we will use in this project
```
import (
"encoding/json"
"fmt"
"net/http"
"os"
"time"
"github.com/openfaas/openfaas-cloud/sdk"
"gopkg.in/mgo.v2"
"gopkg.in/mgo.v2/bson"
)
```
Declare some variables
```
var (
sess *mgo.Session
mongoDatabase = os.Getenv("mongo_database")
mongoCollection = os.Getenv("mongo_collection")
)
```
Add a new function called ``init`` where we establish a persistent connection to MongoDB.
As we've created our ``mongo-db-username`` and ``mongo-db-password`` in previous steps, we use ``sdk.ReadSecret`` to retrieve the value from the secret file.
Then we need to use DialWithInfo to establishe a new session to the cluster identified by info. Before that, we need ``DialInfo`` to hold our options.
```
func init() {
var err error
mongoHost := os.Getenv("mongo_host")
mongoUsername, _ := sdk.ReadSecret("mongo-db-username")
mongoPassword, _ := sdk.ReadSecret("mongo-db-password")
if _, err := os.Open("/var/openfaas/secrets/mongo-db-password"); err != nil {
panic(err.Error())
}
info := &mgo.DialInfo{
Addrs: []string{mongoHost},
Timeout: 60 * time.Second,
Database: mongoDatabase,
Username: mongoUsername,
Password: mongoPassword,
}
if sess, err = mgo.DialWithInfo(info); err != nil {
panic(err.Error())
}
}
```
Let's create a Foo struct with two fields ``Bar`` and ``Baz``
```
type Foo struct {
Bar string
Baz string
}
```
Delete anything inside Handle function and add the below structure
```
func Handle(w http.ResponseWriter, r *http.Request) {
if r.Method == http.MethodPost {
} else if r.Method == http.MethodGet {
} else if r.Method == http.MethodPut {
} else if r.Method == http.MethodDelete {
}
}
```
For ``CREATE``, as we've established ``sess`` in ``init()`` function. We can just use it to run ``Insert``. The below code snippet will insert 4 records to Collection ``foo`` in Database ``k3d-mongodb-crud``. If it goes wrong, it will throw an internal server error. IF not, it will return the defined json output.
```
if r.Method == http.MethodPost {
fmt.Println("4 records will be inserted")
if err := sess.DB(mongoDatabase).C(mongoCollection).Insert(
&Foo{Bar: "bar", Baz: "baz"},
&Foo{Bar: "bar1", Baz: "baz1"},
&Foo{Bar: "bar2", Baz: "baz2"},
&Foo{Bar: "bar3", Baz: "baz3"},
); err != nil {
http.Error(w, fmt.Sprintf("Failed to insert: %s", err.Error()), http.StatusInternalServerError)
return
}
w.Header().Set("Content-Type", "application/json")
w.Write([]byte(`{"success":true, "message": "4 records have been inserted"}`))
}
```
For ``GET``, similar to ``CREATE``, use ``sess.DB(mongoDatabase).C(mongoCollection)`` to call ``Find``. In this example, we do not input any filter so we just need to put ``bson.M{}``. All records will be retrieved and stored in foo. This time we do not output our json output but the actual result.
Remember if you find all records, make sure foo is an array or you will get ``MongoDB Error: result argument must be a slice address ``.
```
else if r.Method == http.MethodGet {
fmt.Println("All records will be listed")
var foo []Foo
err := sess.DB(mongoDatabase).C(mongoCollection).Find(bson.M{}).All(&foo)
if err != nil {
http.Error(w, fmt.Sprintf("Failed to read: %s", err.Error()), http.StatusInternalServerError)
return
}
out, err := json.Marshal(foo)
if err != nil {
http.Error(w, fmt.Sprintf("Failed to marshal: %s", err.Error()), http.StatusInternalServerError)
return
}
w.Header().Set("Content-Type", "application/json")
w.Write(out)
}
```
For ``UPDATE``, it is getting simple. Call ``Update`` with the the one
```
else if r.Method == http.MethodPut {
fmt.Println("bar1 will be updated to bar1-updated")
if err := sess.DB(mongoDatabase).C(mongoCollection).Update(bson.M{"bar": "bar1"}, bson.M{"$set": bson.M{"bar": "bar1-updated"}}); err != nil {
http.Error(w, fmt.Sprintf("Failed to update: %s", err.Error()), http.StatusInternalServerError)
return
}
w.Header().Set("Content-Type", "application/json")
w.Write([]byte(`{"success":true, "message": "bar1 has been updated to bar1-updated"}`))
}
```
Let's build and deploy
```bash
faas-cli up -f k3d-mongodb-crud.yml
```
Oops
```
Step 10/29 : RUN cat function/GO_REPLACE.txt >> ./go.mod || exit 0
---> Running in 2103ee3002c2
cat: can't open 'function/GO_REPLACE.txt': No such file or directory
```
This comes from ``k3d-mongodb-crud/build/k3d-mongodb-crud/Dockerfile``
```dockerfile
# Add user overrides to the root go.mod, which is the only place "replace" can be used
RUN cat function/GO_REPLACE.txt >> ./go.mod || exit 0
```
```
cd k3d-mongodb-crud/
export GO111MODULE=on
go mod init
go get
go mod tidy
cat go.mod > GO_REPLACE.txt
```
GO_REPLACE.txt should look like
```
module github.com/go-serverless/k3d-mongodb-crud/k3d-mongodb-crud
go 1.14
require (
github.com/alexellis/hmac v0.0.0-20180624211220-5c52ab81c0de // indirect
github.com/niemeyer/pretty v0.0.0-20200227124842-a10e7caefd8e // indirect
github.com/openfaas/faas-provider v0.15.0 // indirect
github.com/openfaas/openfaas-cloud v0.0.0-20200319114858-76ce15eb291a
gopkg.in/check.v1 v1.0.0-20200227125254-8fa46927fb4f // indirect
gopkg.in/mgo.v2 v2.0.0-20190816093944-a6b53ec6cb22
gopkg.in/yaml.v2 v2.2.8 // indirect
)
```
Let's build and deploy again
```bash
faas-cli up -f k3d-mongodb-crud.yml
```
# Testing
Currently I don't see OpenFaaS UI Portal allow us to select the HTTP request method.
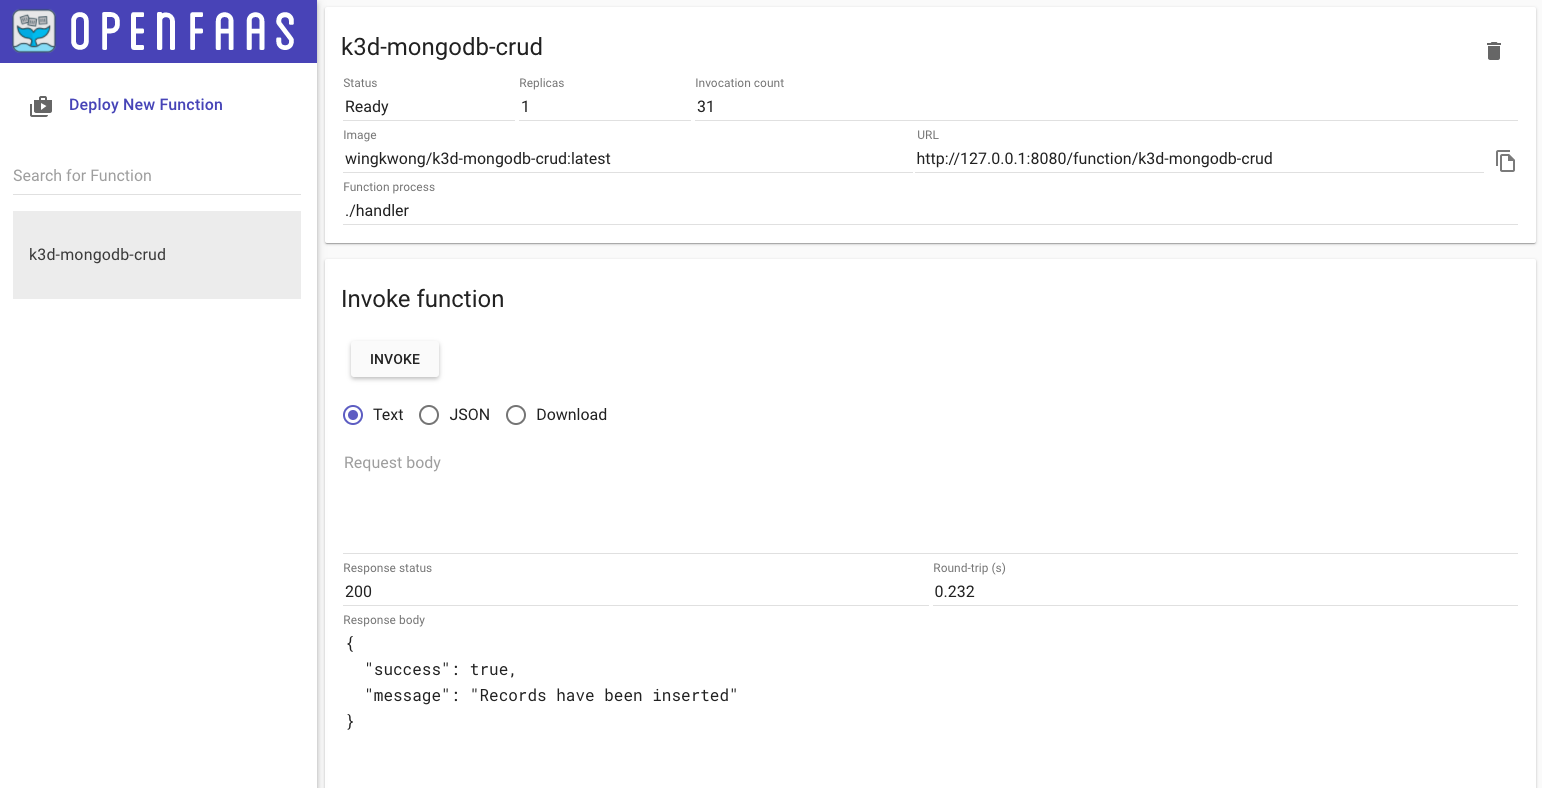
Hence, once your endpoints are ready, use curl to test instead
### Create
```
curl http://127.0.0.1:8080/function/k3d-mongodb-crud --request POST
{"success":true, "message": "4 records have been inserted"}
```
Go to MongoDB, check the collection
```
> db.foo.find()
{ "_id" : ObjectId("5e8014f10c4812773ee77f16"), "bar" : "bar", "baz" : "baz" }
{ "_id" : ObjectId("5e8014f10c4812773ee77f17"), "bar" : "bar1", "baz" : "baz1" }
{ "_id" : ObjectId("5e8014f10c4812773ee77f18"), "bar" : "bar2", "baz" : "baz2" }
{ "_id" : ObjectId("5e8014f10c4812773ee77f19"), "bar" : "bar3", "baz" : "baz3" }
```
### Read
```
curl http://127.0.0.1:8080/function/k3d-mongodb-crud --request GET
[{"Bar":"bar","Baz":"baz"},{"Bar":"bar1","Baz":"baz1"},{"Bar":"bar2","Baz":"baz2"},{"Bar":"bar3","Baz":"baz3"}]
```
### Update
```
curl http://127.0.0.1:8080/function/k3d-mongodb-crud --request PUT
{"success":true, "message": "bar1 has been updated to bar1-updated"}
```
Go to MongoDB, check the collection
```
> db.foo.find()
{ "_id" : ObjectId("5e8014f10c4812773ee77f16"), "bar" : "bar", "baz" : "baz" }
{ "_id" : ObjectId("5e8014f10c4812773ee77f17"), "bar" : "bar1-updated", "baz" : "baz1" }
{ "_id" : ObjectId("5e8014f10c4812773ee77f18"), "bar" : "bar2", "baz" : "baz2" }
{ "_id" : ObjectId("5e8014f10c4812773ee77f19"), "bar" : "bar3", "baz" : "baz3" }
```
### Delete
```
curl http://127.0.0.1:8080/function/k3d-mongodb-crud --request DELETE
{"success":true, "message": "bar1 has been deleted"}
```
```
> db.foo.find()
{ "_id" : ObjectId("5e8014f10c4812773ee77f17"), "bar" : "bar1-updated", "baz" : "baz1" }
{ "_id" : ObjectId("5e8014f10c4812773ee77f18"), "bar" : "bar2", "baz" : "baz2" }
{ "_id" : ObjectId("5e8014f10c4812773ee77f19"), "bar" : "bar3", "baz" : "baz3" }
```
It looks good. If you've encountered some errors, you can check the log to have more insights by running
```
faas-cli logs k3d-mongodb-crud
```
# Clean up
To clean up, simply just run
```
k3d delete
```
# Wrap up
Of course this is just a learning playground. In the real life scenarios, we take user input from the Request body and we may filter the requests by ``r.URL.Path``. Besides, the functions should be separated for better readability.
The full source code for this post is available
{% github go-serverless/k3d-mongodb-crud %}
If you are looking for Python version, please check out [Get storage for your functions with Python and MongoDB](https://www.openfaas.com/blog/get-started-with-python-mongo/).
I've also referenced a blog post [Building a TODO API in Golang with Kubernetes](https://medium.com/@alexellisuk/building-a-todo-api-in-golang-with-kubernetes-1ec593f85029) written by Alex Ellis (The founder of OpenFaaS).
Here's some useful links
[Template Store - OpenFaaS](https://www.openfaas.com/blog/template-store/)
[Troubleshooting Guide - OpenFaaS](https://docs.openfaas.com/deployment/troubleshooting/)
[mgo.v2 API Documentation](https://godoc.org/gopkg.in/mgo.v2)
[OpenFaaS workshop](https://github.com/openfaas/workshop/)

Thursday, 26 March 2020
Building Serverless CRUD services in Go with DynamoDB - Part 6 (Bonus)
Welcome to the part 6. This is the last part of this series. In this post, we will create ``loginHandler.go``.
# Getting started
First, let's add the config under functions in serverless.yml
```
login:
handler: bin/handlers/loginHandler
package:
include:
- ./bin/handlers/loginHandler
events:
- http:
path: iam/login
method: post
cors: true
```
Create a file ``loginHandler.go`` under src/handlers
Similarly, we have the below structure.
```
package main
import (
"context"
"encoding/json"
"fmt"
"os"
"github.com/aws/aws-lambda-go/events"
"github.com/aws/aws-lambda-go/lambda"
"github.com/aws/aws-sdk-go/aws"
"github.com/aws/aws-sdk-go/aws/session"
"github.com/aws/aws-sdk-go/service/dynamodb"
"github.com/aws/aws-sdk-go/service/dynamodb/dynamodbattribute"
utils "../utils"
)
type Credentials struct {
// TODO1
}
type User struct {
ID string `json:"id,omitempty"`
UserName string `json:"user_name,omitempty"`
FirstName string `json:"first_name,omitempty"`
LastName string `json:"last_name,omitempty"`
Age int `json:"age,omitempty"`
Phone string `json:"phone,omitempty"`
Password string `json:"password,omitempty"`
Email string `json:"email,omitempty"`
Role string `json:"role,omitempty"`
IsActive bool `json:"is_active,omitempty"`
CreatedAt string `json:"created_at,omitempty"`
ModifiedAt string `json:"modified_at,omitempty"`
DeactivatedAt string `json:"deactivated_at,omitempty"`
}
type Response struct {
Response User `json:"response"`
}
var svc *dynamodb.DynamoDB
func init() {
region := os.Getenv("AWS_REGION")
// Initialize a session
if session, err := session.NewSession(&aws.Config{
Region: ®ion,
}); err != nil {
fmt.Println(fmt.Sprintf("Failed to initialize a session to AWS: %s", err.Error()))
} else {
// Create DynamoDB client
svc = dynamodb.New(session)
}
}
func Login(ctx context.Context, request events.APIGatewayProxyRequest) (events.APIGatewayProxyResponse, error) {
var (
tableName = aws.String(os.Getenv("IAM_TABLE_NAME"))
)
//TODO2
}
func main() {
lambda.Start(Login)
}
```
Basically we are going to make an API with POST method. Users are expected to pass their credentials to ``iam/login`` to authorise their identities.
In this tutorials, we only send username and password. You may change username to email if you want. Let's update the below code and remove the comment ``// TODO1``.
```
type Credentials struct {
UserName string `json:"user_name"`
Password string `json:"password"`
}
```
As we only need to return a single object, we can use same response struct used in ``getHandler.go``
```
type Response struct {
Response User `json:"response"`
}
```
The next step is to write our logic under ``//TODO2``. The general idea is that users send their credentials which are further used to check the data in Amazon DynamoDB. It then returns the user object if it matches.
First, we need to initialise ``Credentials`` to hold our users input.
```
creds := &Credentials{}
```
Like what we did previously, parse the request body to creds
```
json.Unmarshal([]byte(request.Body), creds)
```
The next step is to utilise Query API operation for Amazon DynamoDB. In this tutorial, it finds items based on primary key values. You can also query any table or secondary index which has a composite primary key.
Query takes QueryInput. It should includes ``TableName``, ``IndexName``, ``KeyConditions``.
``TableName`` is a required field which tells the client service which table you want to perform Query.
``IndexName`` is the name of an index to query. It can be local secondary index or global secondary index on the table.
``KeyConditions`` includes ``Condition`` which is used when querying a table or an index with comparison operators such as EQ | LE | LT | GE | GT | BEGINS_WITH | BETWEEN. It can also apply ``QueryFilter``.
```
result, err := svc.Query(&dynamodb.QueryInput{
TableName: tableName,
IndexName: aws.String("IAM_GSI"),
KeyConditions: map[string]*dynamodb.Condition{
"user_name": {
ComparisonOperator: aws.String("EQ"),
AttributeValueList: []*dynamodb.AttributeValue{
{
S: aws.String(creds.UserName),
},
},
},
},
})
```
Like other handler, we retrieve the value of IAM_TABLE_NAME in our configuration file and set it to tableName.
```
tableName = aws.String(os.Getenv("IAM_TABLE_NAME"))
```
We select ``IAM_GSI`` to query, which is also defined in serverless.yml in part 1.
```
GlobalSecondaryIndexes:
- IndexName: IAM_GSI
KeySchema:
- AttributeName: user_name
KeyType: HASH
Projection:
ProjectionType: ALL
ProvisionedThroughput:
ReadCapacityUnits: 5
WriteCapacityUnits: 5
```
We then define a ``dynamodb.Condition`` struct holding our condition. As you can see, we only have one condition which is to check if ``user_name`` and ``creds.UserName`` are equal (EQ).
Check if there is an error
```
if err != nil {
fmt.Println("Got error calling Query:")
fmt.Println(err.Error())
// Status Internal Server Error
return events.APIGatewayProxyResponse{
Body: err.Error(),
StatusCode: 500,
}, nil
}
```
If there is no error, we can see a User object in ``result.Items``. However, if there is no item returned from Amazon DynamoDB, we can return an empty object in response.
```
user := User{}
if len(result.Items) == 0 {
body, _ := json.Marshal(&Response{
Response: user,
})
// Status OK
return events.APIGatewayProxyResponse{
Body: string(body),
StatusCode: 200,
}, nil
}
```
The response should look like this
```json
{
"response": {}
}
```
If there is a record found, we can pass it to user.
```
if err := dynamodbattribute.UnmarshalMap(result.Items[0], &user); err != nil {
fmt.Println("Got error unmarshalling:")
fmt.Println(err.Error())
return events.APIGatewayProxyResponse{
Body: err.Error(),
StatusCode: 500,
}, nil
}
```
Now we only check if the password in user input matches with the one in the record.
Remember we've created ``utils/password.go`` in Part 1? We've only created ``HashPassword``. We use this function to hash the password. In order to compare a bcrypt hashed password with its possible plaintext equivalent, we need another function here.
```
func CheckPasswordHash(password, hash string) bool {
err := bcrypt.CompareHashAndPassword([]byte(hash), []byte(password))
return err == nil
}
```
It's simple. We also use bcrypt to perform checking by using ``CompareHashAndPassword``.
Back to ``loginHandler.go``
```
match := utils.CheckPasswordHash(creds.Password, user.Password)
```
If it matches, then we can return user to Response.
```
if match {
body, _ := json.Marshal(&Response{
Response: user,
})
// Status OK
return events.APIGatewayProxyResponse{
Body: string(body),
StatusCode: 200,
}, nil
}
```
If not, we just return an empty user
```
body, _ := json.Marshal(&Response{
Response: User{},
})
// Status Unauthorized
return events.APIGatewayProxyResponse{
Body: string(body),
StatusCode: 401,
}, nil
```
Run the below command to deploy our code
```
./scripts/deploy.sh
```
# Testing
If you go to AWS Lambda Console, you will see there is a function called ``serverless-iam-dynamodb-dev-login``
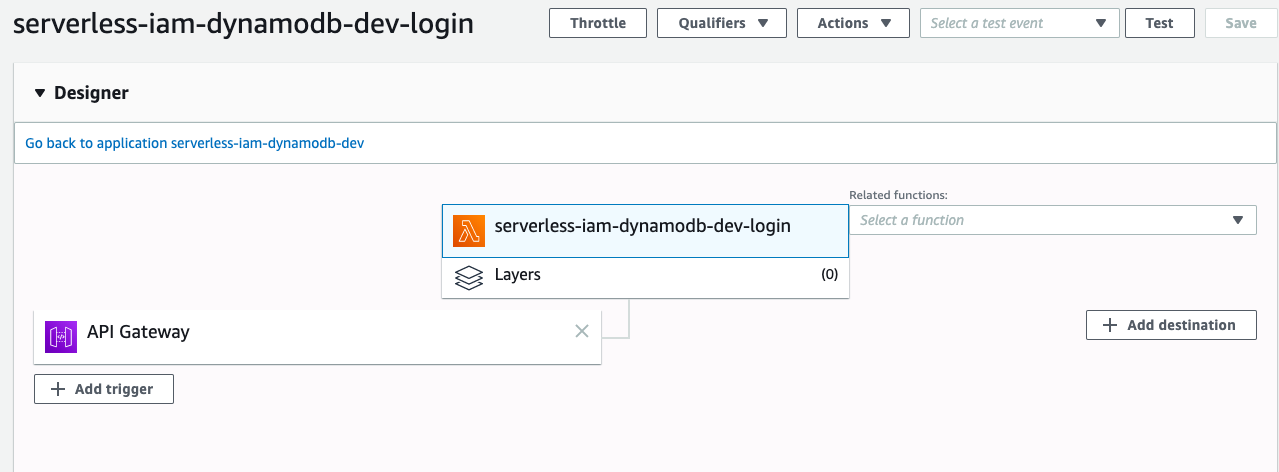
Go to API Gateway Console to test it,
```json
{
"user_name": "wingkwong",
"password": "password"
}
```
You should see the corresponding data.
```json
{
"response": {
"id": "6405bc74-a706-4987-86a9-82cf69d386c2",
"user_name": "wingkwong",
"password": "$2a$15$abtf69CeWZwGPJxIS/D/teXV26kBfY3SmHFNSNTbhP8gNa1OUeoiy",
"email": "wingkwong.me@gmail.com",
"role": "user",
"is_active": true,
"created_at": "2020-03-07 07:29:23.336349405 +0000 UTC m=+0.087254950",
"modified_at": "2020-03-07 07:30:47.531266176 +0000 UTC m=+0.088812866"
}
}
```
Let's try a wrong password
```json
{
"user_name": "wingkwong",
"password": "password2"
}
```
You should see an empty object
```json
{
"response": {}
}
```
# Cleanup
As mentioned in Part 1, serverless provisions / updates a single CloudFormation stack every time we deploy. To cleanup, we just need to delete the stack.
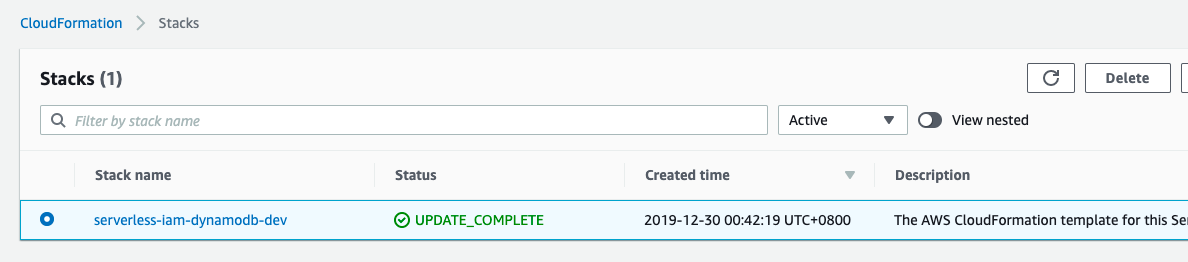
Click Delete stack
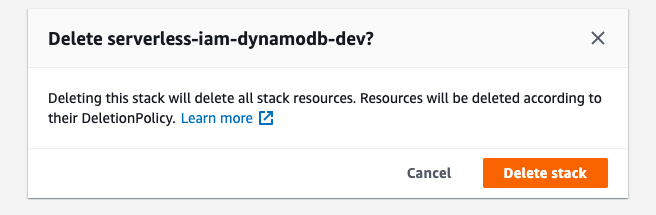
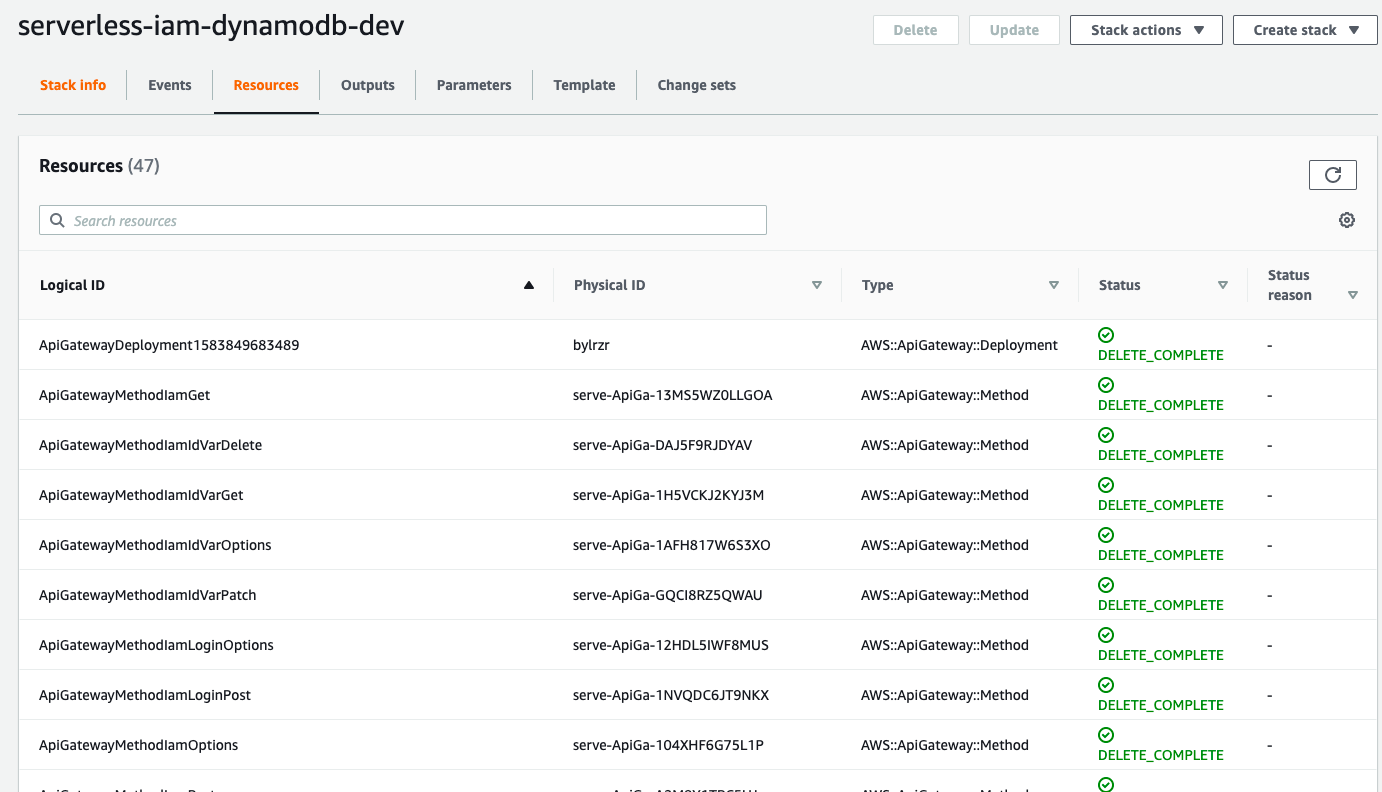
You should see the status is now DELETE_IN_PROGRESS.
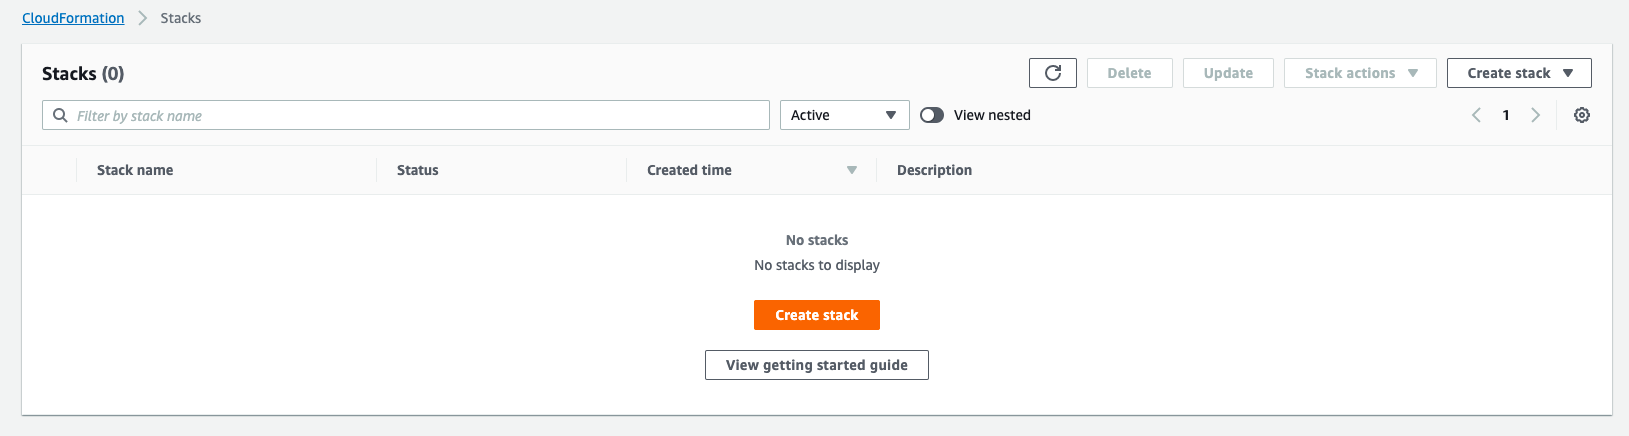
Once it's done, you should see the stack has been deleted.
# Source Code
{% github go-serverless/serverless-iam-dynamodb %}
Tuesday, 24 March 2020
Deploying Your Application to Amazon EKS with GitHub Actions and Weave Flux
Last month I've published a tutorial to show you how to build and push a docker image to Amazon ECR with GitHub Actions.
However, if you are using Amazon EKS, you may need to manually update the image URI every time you have a new release. is there a way to automate the whole process that the image URI can be updated automatically? Yes. Here's the solution for you.
Flux is the operator that makes GitOps happen in your cluster. It ensures that the cluster config matches the one in git and automates your deployments.
Suppose you've already provisioned your Amazon EKS cluster. If not, please check out my previous post.
Configure your kubectl so that you can connect to an Amazon EKS cluster by running
```bash
export AWS_REGION="ap-southeast-1"
export CLUSTER_NAME="your-cluster-name"
aws eks --region ${AWS_REGION} update-kubeconfig --name ${CLUSTER_NAME}
```
If you enable load balancer ingress access, make sure that you have the corresponding IAM role.
```bash
aws iam get-role --role-name "AWSServiceRoleForElasticLoadBalancing" || aws iam create-service-linked-role --aws-service-name "elasticloadbalancing.amazonaws.com"
```
Run your manifest files
```bash
kubectl apply -f manifests/deployment.yaml
kubectl apply -f manifests/service.yaml
kubectl apply -f manifests/ingress.yaml
```
A sample deployment can be found [here](https://github.com/github-developer/example-actions-flux-eks/blob/master/manifests/deployment.yml). Make sure you have ``fluxcd.io/automated: "true"`` under ``annotations``.
The next step is to run Flux on our EKS cluster. Let's create a new namespace ``flux`` in where flux objects will be installed.
```bash
kubectl create ns flux
```
Install flux objects under ``flux`` namespace. By doing so, flux is monitoring the manifests folder for the changes.
```bash
export GHUSER=your-github-user
export GHREPO=your-github-repo
fluxctl install \
--git-user=${GHUSER} \
--git-email=${GHUSER}@users.noreply.github.com \
--git-url=git@github.com:${GHUSER}/${GHREPO} \
--git-path=manifests \
--namespace=flux | kubectl apply -f -
```
You should see the following
```bash
serviceaccount/flux created
clusterrole.rbac.authorization.k8s.io/flux unchanged
clusterrolebinding.rbac.authorization.k8s.io/flux configured
deployment.apps/flux created
secret/flux-git-deploy created
deployment.apps/memcached created
service/memcached created
```
Let's verify if they are running or not
```bash
kubectl get all -n flux
```
```bash
NAME READY STATUS RESTARTS AGE
pod/flux-6449c6bd94-7gz88 1/1 Running 0 5m
pod/memcached-86869f57fd-52cwn 1/1 Running 0 5m
NAME TYPE CLUSTER-IP EXTERNAL-IP PORT(S) AGE
service/memcached ClusterIP 10.100.152.74 11211/TCP 5m
NAME READY UP-TO-DATE AVAILABLE AGE
deployment.apps/flux 1/1 1 1 5m
deployment.apps/memcached 1/1 1 1 5m
NAME DESIRED CURRENT READY AGE
replicaset.apps/flux-6449c6bd94 1 1 0 5m
replicaset.apps/memcached-86869f57fd 1 1 1 5m
```
Upon the completion of deployment, the docker image URI in deployment.yaml should be updated. To do so, we need to grand read/write access to the repository with a deploy key so that Flux can be able to write it back every time it deploys.
By running
```bash
fluxctl identity --k8s-fwd-ns flux
```
You should get a deploy key.
```bash
ssh-rsa
AAAAB3NzaC1yc2EAAAADAQABAAABAQC64WoWesnPneyDqq8ddTAAOKSaLHcu+0ALL8xxtGdnbK2WG99OZ7A9cq24Y9TmSL4gIuXb0HDvwhHsnbkTNsFmVWpO9xS/T3bqhLzhdQwLCGP21ckhRVF7RBv+pK6PnenY4ZjTRkW5h7SxYnunEarj/9E9NlL/JP8tDnb53liDXF4AB1y3Xi/nKwjlgwkGGrSBXGSRij7a6uq2iMlGF/H9MmHn8ct7w/dd/RF6VN4phbNpsVfnBVu1yDgRJTNKznXDOCEEAfflxAFrDWjbAsXwCxvWLNsbP5HtMTf5Ep/Eba7ZAjZ7XnWYLgoXRZHOf+0WYqn1EfsSot5pb01TFeYr
```
Go to Settings > Deploy keys and click 'Add deploy key'
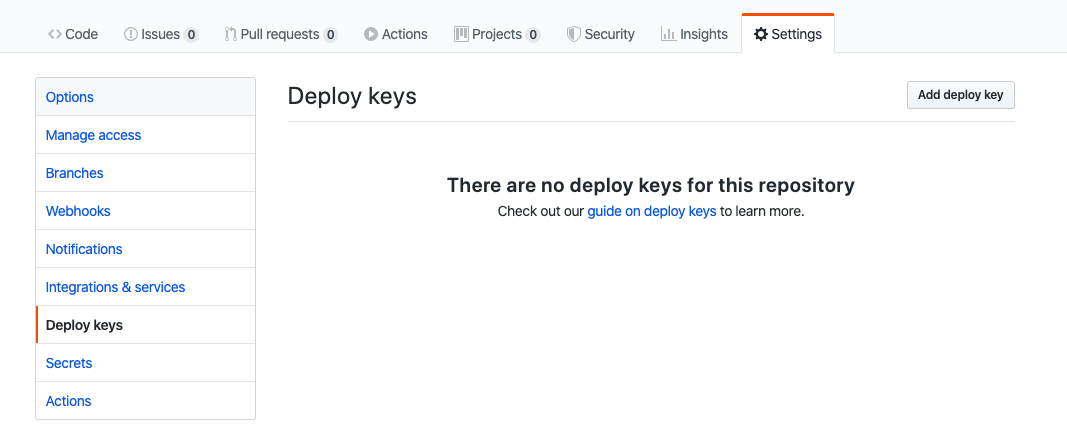
Enter the title and the key you just generated. Make sure you tick 'Allow write access'
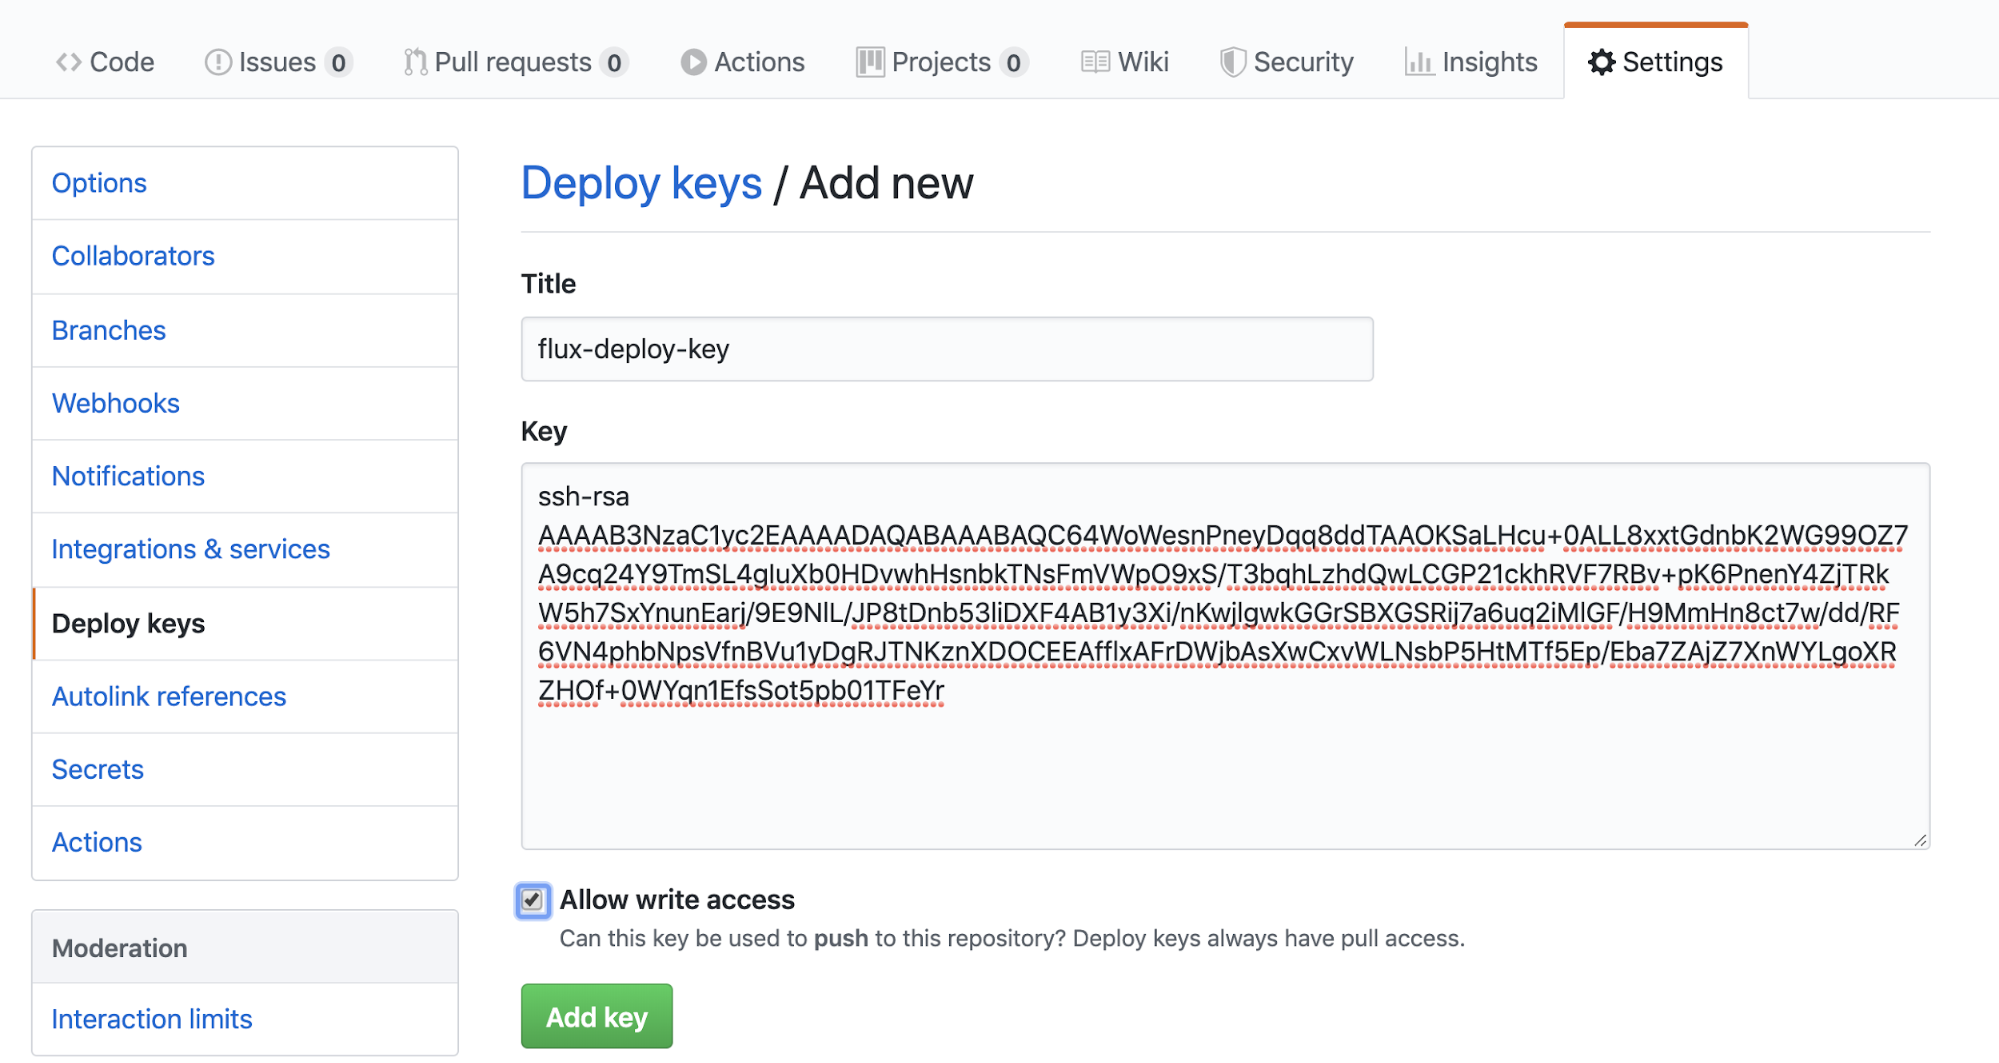
Then we can go back to the console and run the following command to sync Flux and Github.
```bash
fluxctl sync --k8s-fwd-ns flux
```
For the first time, you should see
```bash
Synchronizing with git@github.com:wingkwong/eks-flux-playground
Revision of master to apply is a8e3b45
Waiting for a8e3b45 to be applied ...
Done.
```
If you make a change and push to master, Github Actions helps to build and push the docker image to Amazon ECR, and Flux helps to deploy the latest image to Amazon EKS.
Go back to the repository, you should see there is a new commit on your deployment.yaml while the change is only updating the image URI.
```bash
Auto-release xxxxxxxxxxxx.dkr.ecr.ap-southeast-1.amazonaws.com/eks-flux…
Monday, 23 March 2020
Building Serverless CRUD services in Go with DynamoDB - Part 5
Welcome to Part 5. Last time we've learnt how to delete a single item in a table by primary key. In this post, we'll learn how to secure our APIs.
# Getting started
First, let's add the config under functions in serverless.yml
```
auth:
package:
include:
- ./bin/handlers/authHandler
handler: bin/handlers/authHandler
```
Previously, we've already created ``list``, ``create``, ``update`` and ``delete``. We would like to secure these APIs. To do so, we just need to simply to just add ``authorizer: auth`` to allow us to run an AWS Lambda Function before your targeted AWS Lambda Function.
Take ``list`` as an example:
```
list:
handler: bin/handlers/listHandler
package:
include:
- ./bin/handlers/listHandler
events:
- http:
path: iam
method: get
cors: true
authorizer: auth
```
Then also add it to ``create``, ``update`` and ``delete``.
Before running our business logic, we can perform some Authorisation. It's also useful for micro-service Architectures.
The next step is to create ``authHandler.go`` under ``src/handlers/``. We need a custom authoriser calling an AWS Lambda Function.
About few months ago, I wrote a tutorial to teach how to build a simple authoriser. If you miss it, please check it out via below link and come back later. We'll use the exact code for this tutorial.
{% link https://dev.to/wingkwong/a-simple-amazon-api-gateway-lambda-authoriser-in-go-4cgd %}
In this example, our authentication strategy is to use bearer token like JWT to authorise our requests before reaching to our endpoints.
Under your environment in serverless.yml, you should add your JWT_SECRET_KEY.
```
environment:
IAM_TABLE_NAME: ${self:custom.iamTableName}
JWT_SECRET_KEY:
```
Run the below command to deploy our code
```
./scripts/deploy.sh
```
# Testing
Go to Amazon API Gateway Console, Select your API and Click Authorizers.
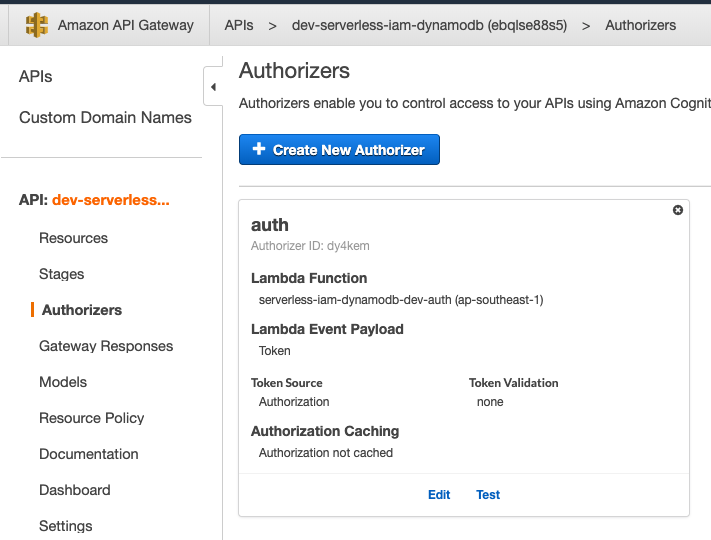
If you test it without the token, you are expected to see the below messages.
```
Response
Response Code: 401
Latency 344
Execution log for request [HIDDEN]
Mon Dec 30 08:56:58 UTC 2019 : Starting authorizer: [HIDDEN]
Mon Dec 30 08:56:58 UTC 2019 : Incoming identity: [HIDDEN]
Mon Dec 30 08:56:58 UTC 2019 : Endpoint request URI: [HIDDEN]
Mon Dec 30 08:56:58 UTC 2019 : Endpoint request headers: [HIDDEN]
Mon Dec 30 08:56:58 UTC 2019 : Endpoint request body after transformations: [HIDDEN]
Mon Dec 30 08:56:58 UTC 2019 : Sending request to [HIDDEN]
Mon Dec 30 08:56:58 UTC 2019 : Unauthorized request: [HIDDEN]
Mon Dec 30 08:56:58 UTC 2019 : Unauthorized
```
With the token, you should see the policy statement authorise our requests.
```json
{
"Version": "2012-10-17",
"Statement": [
{
"Action": [
"execute-api:Invoke"
],
"Effect": "Allow",
"Resource": [
"arn:aws:execute-api:ap-southeast-1:*:a123456789/ESTestInvoke-stage/GET/"
]
}
]
}
```
That's it for part 5. In the next part, we'll create ``loginHandler.go``.
Friday, 20 March 2020
Building Serverless CRUD services in Go with DynamoDB - Part 4
Welcome back! It's been a while. Here's the part 4. In this post, we will create ``deleteHandler.go``.
# Getting started
First, let's add the config under functions in serverless.yml
```
delete:
handler: bin/handlers/deleteHandler
package:
include:
- ./bin/handlers/deleteHandler
events:
- http:
path: iam/{id}
method: delete
cors: true
```
Create a file deleteHandler.go under src/handlers
Similarly, we have the below structure.
```
package main
import (
"context"
"fmt"
"github.com/aws/aws-lambda-go/events"
"github.com/aws/aws-lambda-go/lambda"
"github.com/aws/aws-sdk-go/aws"
"github.com/aws/aws-sdk-go/aws/session"
"github.com/aws/aws-sdk-go/service/dynamodb"
"os"
)
var svc *dynamodb.DynamoDB
func init() {
region := os.Getenv("AWS_REGION")
// Initialize a session
if session, err := session.NewSession(&aws.Config{
Region: ®ion,
}); err != nil {
fmt.Println(fmt.Sprintf("Failed to initialize a session to AWS: %s", err.Error()))
} else {
// Create DynamoDB client
svc = dynamodb.New(session)
}
}
func Delete(ctx context.Context, request events.APIGatewayProxyRequest) (events.APIGatewayProxyResponse, error) {
var (
tableName = aws.String(os.Getenv("IAM_TABLE_NAME"))
id = aws.String(request.PathParameters["id"])
)
// TODO: Add delete logic
}
func main() {
lambda.Start(Delete)
}
```
Deleting a record is pretty simple, we just need the record id (primary key) which can be retrieved from the request path parameters ``id``.
```
func (c *DynamoDB) DeleteItem(input *DeleteItemInput) (*DeleteItemOutput, error)
```
In order to call DeleteItem API operation for Amazon DynamoDB, we need to build ``DeleteItemInput`` first.
```
input := &dynamodb.DeleteItemInput{
Key: map[string]*dynamodb.AttributeValue{
"id": {
S: id,
},
},
TableName: tableName,
}
```
If you define a composite primary key, you must provide values for both the partition key and the sort key. In this case, we just need to provide the first one. We also need to tell which table your records are located in.
call ``DeleteItem`` to delete a single item in a table by primary key
```
_, err := svc.DeleteItem(input)
if err != nil {
fmt.Println("Got error calling DeleteItem:")
fmt.Println(err.Error())
// Status Internal Server Error
return events.APIGatewayProxyResponse{
Body: err.Error(),
StatusCode: 500,
}, nil
}
// Status No Content
return events.APIGatewayProxyResponse{
StatusCode: 204,
}, nil
```
Run the below command to deploy our code
```
./scripts/deploy.sh
```
# Testing
If you go to AWS Lambda Console, you will see there is a function called ``serverless-iam-dynamodb-dev-delete``
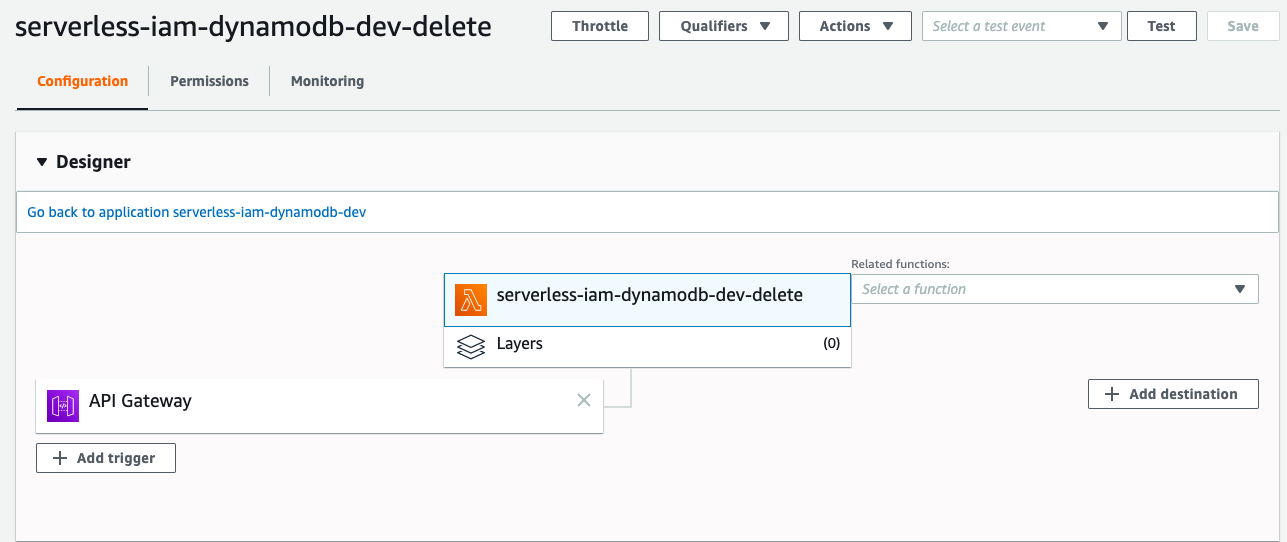
You can test your code either in Lambda or API Gateway.
Upon the success deletion, you should see that the status code returns 204.
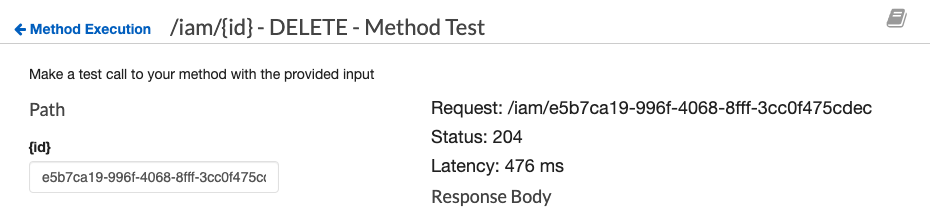
That's it for part 4. In the next post, we'll create ``authHandler.go`` to secure our APIs.
Subscribe to:
Posts (Atom)