Tuesday, 31 December 2019
Deploying an Application with AWS OpsWorks
AWS OpsWorks is a configuration management service providing managed instances of Chef and Puppet which allow you to use code to automate the configurations of your servers. It can be seen as a Platform as a Service (PaaS). However, the difference is that you can have full control over the OS, instance count and make changes directly to the deployment mechanisms.
Before getting started, here are some OpsWorks anatomy.
**Stacks** — A top level AWS Stacks entity. It represents a set of instances that you want to manage collectively, typically because they have a common purpose such as serving PHP applications. In addition to serving as a container, a stack handles tasks that apply to the group of instances as a whole, such as managing applications and cookbooks.
**Layers** — Every stack contains one or more layers, each of which represents a stack component, such as a load balancer or a set of application servers.
**Instances** —An instance represents a computing resource, such as an Amazon EC2 instance, which handles the work of serving applications, balancing traffic, and so on.
**Apps** — It represents code that you want to run on an application server. The code itself resides in a repository such as an Amazon S3 archive; the app contains the information required to deploy the code to the appropriate application server instances.
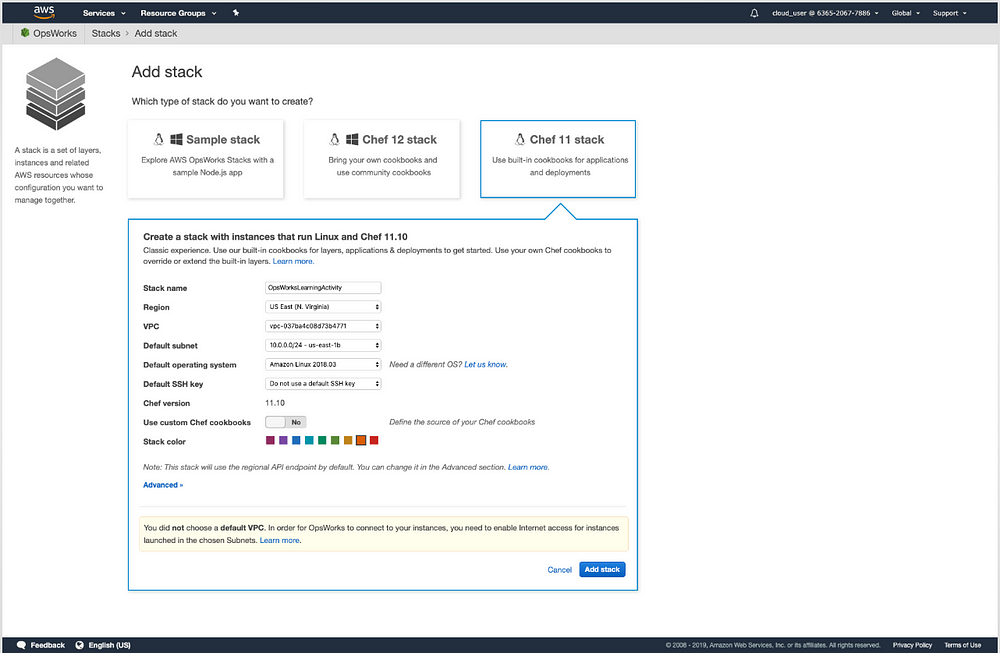
Now we are going to deploy a PHP application using AWS OpsWorks step by step. First of all, go to your AWS OpsWorks console at https://console.aws.amazon.com/opsworks to choose a chef stack and fill in some basic info.
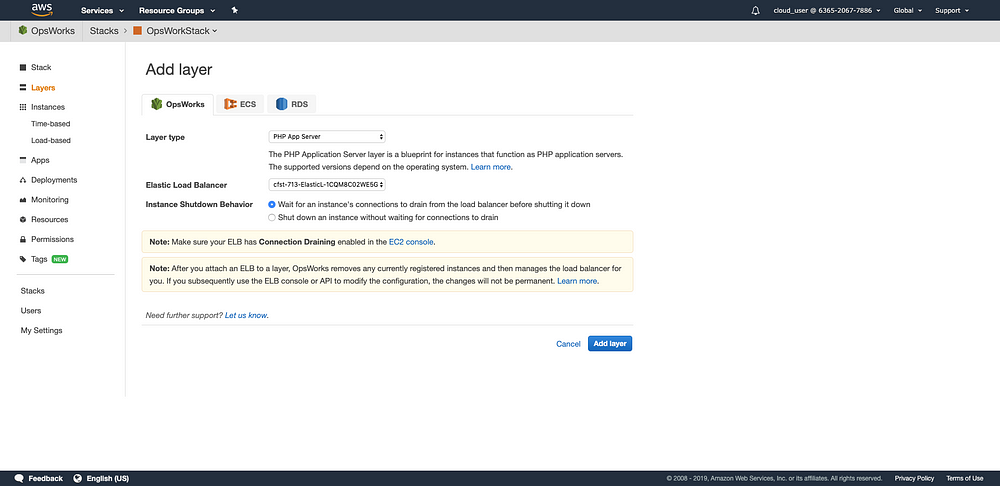
Then, on the left navigation bar, click ‘Layers’. We are going to add a PHP App Server and choose an Elastic Load Balancer (ELB). We also need to wait for an instance’s connections to drain from the load balancer before shutting down.
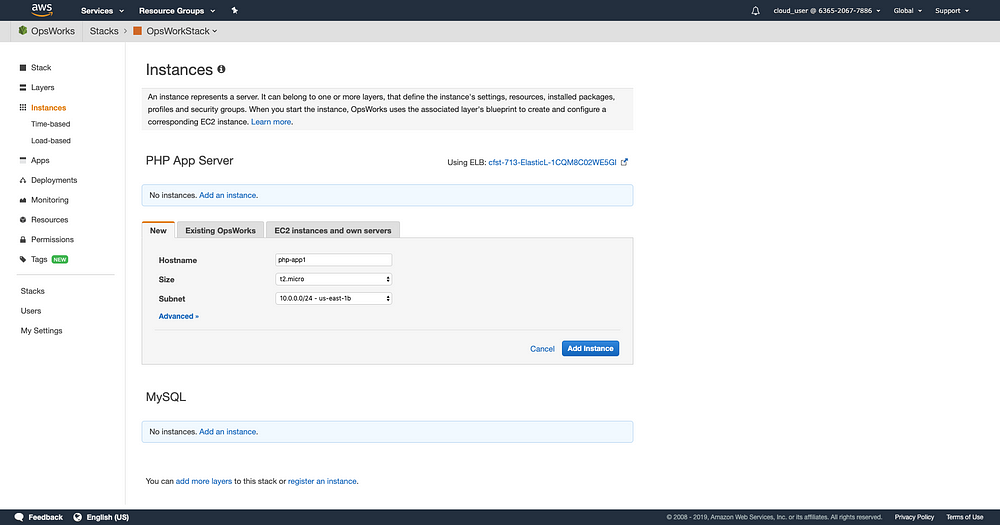
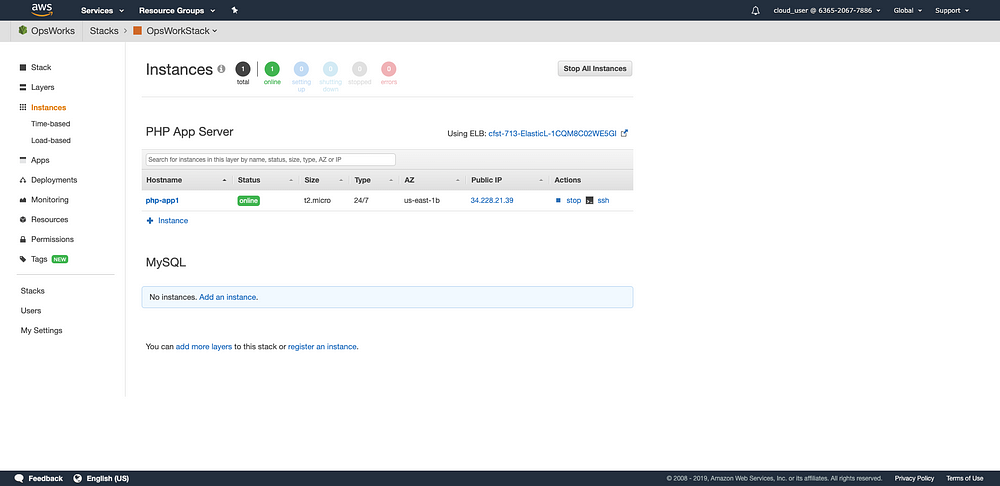
Once we have a layer, the next step is to create an instance. Let’s click ‘Instances’ and add an instance.
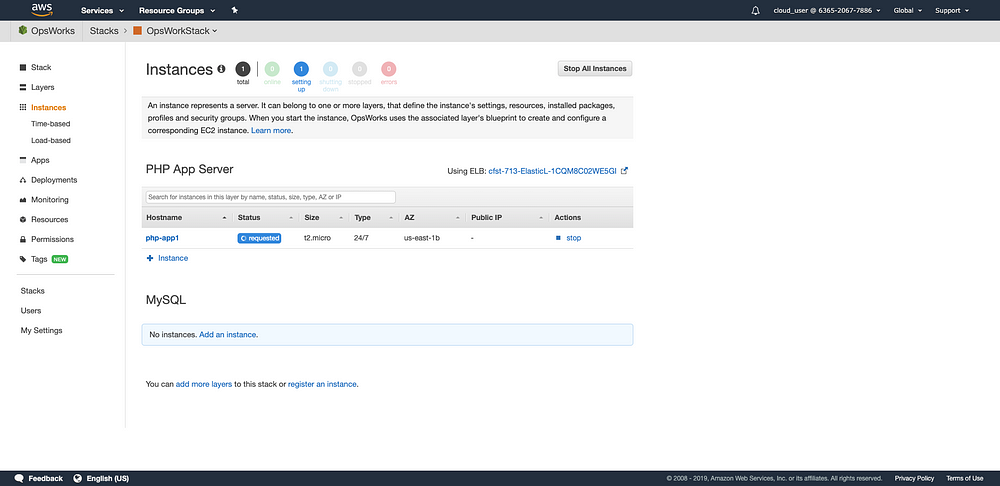
Click ‘start’ and the server is being requested.
The server is now online.
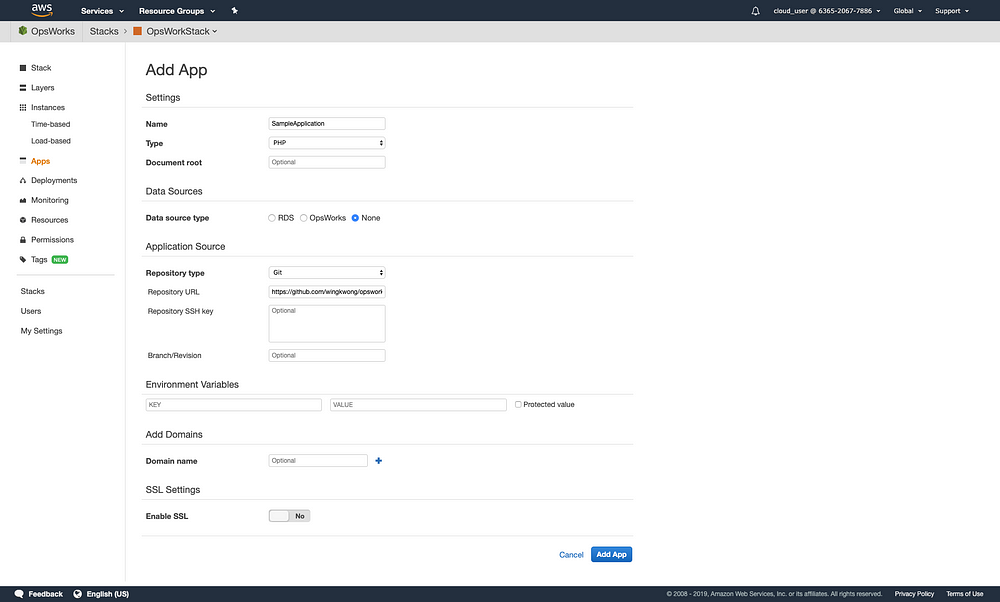
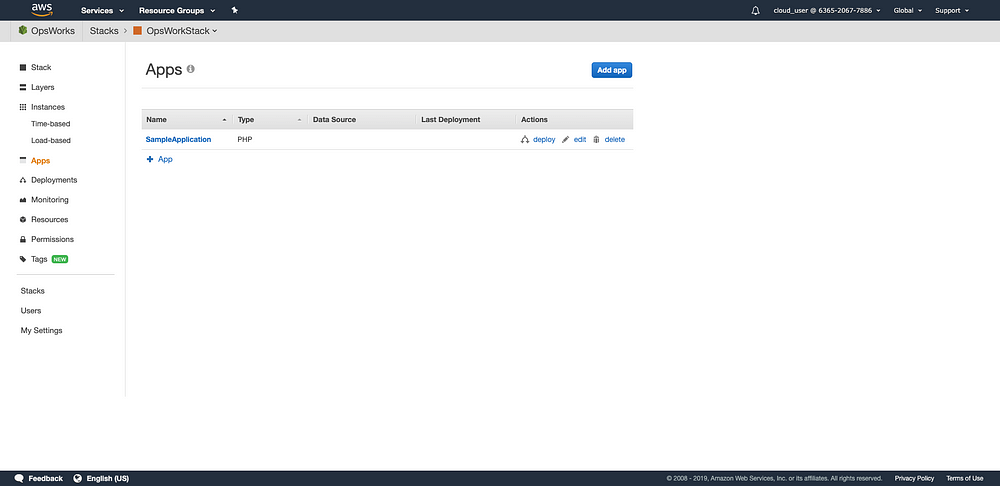
Then, we need to add an App. Click ‘Apps’ and click ‘Add an app’

Let’s fill in the name and choose PHP type. Since this demonstration does not include data source so ‘None’ is selected. Then, you have to specify the source. Click ‘Add App’ after defining the repository URL.
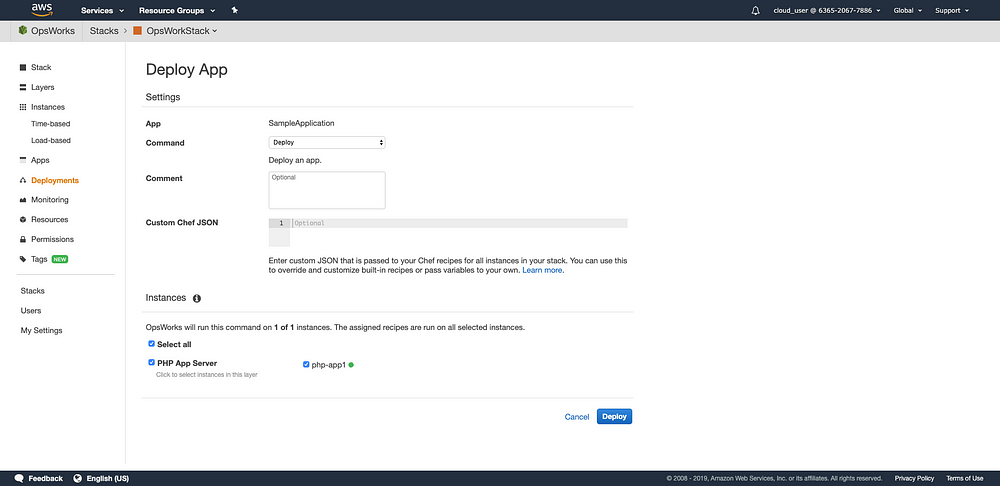
Under ‘Actions’ tab, click ‘deploy’
Under Instances, choose the instance you just created.
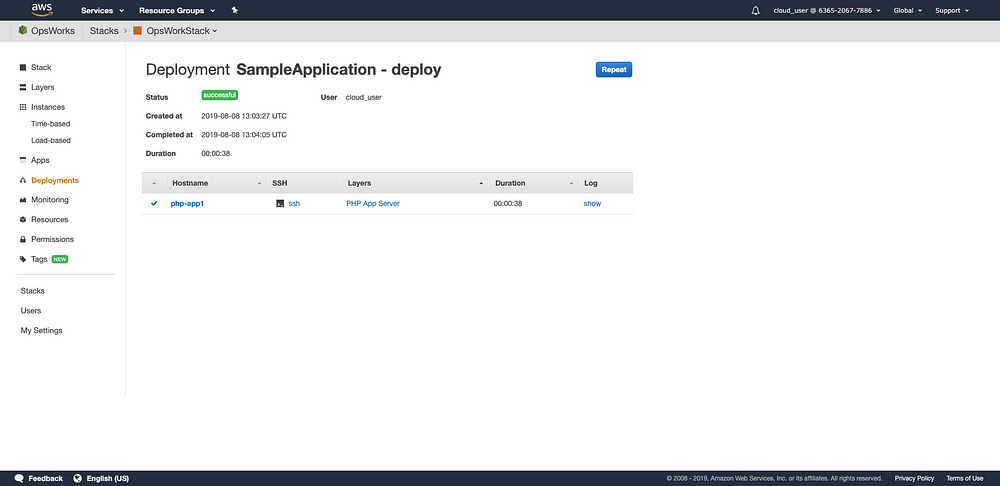
The application is now up and running.
Go to EC2, you will see a new instance. Copy the public IP address and browser it to verify.

Now that you have completed this walkthrough. This article only gives you some basic ideas and steps on deploying an application using AWS OpsWorks. For details, please go to [AWS Documentation](https://docs.aws.amazon.com/opsworks/latest/userguide/welcome.html).
Subscribe to:
Post Comments (Atom)
No comments:
Post a Comment