Sunday, 5 January 2020
Docker Commands Cheat Sheet
docker build with a tag
```
docker build -t wingkwong/example:latest .
```
Run a simple container using the hello-world image:
```
docker run hello-world
```
Run a container using a specific image tag:
```
docker run nginx:1.15.11
```
Run a container with a command and arguments:
```
docker run busybox echo hello world!
```
Run an Nginx container customized with a variety of flags:
- -d: Run container in detached mode. The **docker run** command will exit immediately and the container will run in the background
- --name: A container is assigned a random name by default, but you can give it a more descriptive name with this flag
- --restart: specify when the container should be automatically restarted
- no(default): never restart the container
- on-failure: only if the container fails (exits with a non-zero exit code)
- always: always restart the container whether it succeeds or fails. Also starts the container automatically on daemon startup
- unless-stopped: always restart the container whether it succeeds or fails, and on daemon startup, unless the container was manually stopped
```
docker run -d --name nginx --restart unless-stopped -p 8080:80 --memory 500M --memory-reservation 256M nginx
```
List any currently running containers:
```
docker ps
```
List all containers, both running and stopped:
```
docker ps -a
```
Stop the Nginx container:
```
docker container stop nginx
```
Start a stopped container:
```
docker container start nginx
```
Delete a container (but it must be stopped first):
```
docker container rm nginx
```
Downgrade to a previous version:
```
sudo systemctl stop docker
sudo apt-get remove -y docker-ce docker-ce-cli
sudo apt-get update
sudo apt-get install -y docker-ce=5:18.09.4~3-0~ubuntu-bionic docker-ce-cli=5:18.09.4~3-0~ubuntu-bionic
docker version
```
Upgrade to a new version:
```
sudo apt-get install -y docker-ce=5:18.09.5~3-0~ubuntu-bionic docker-ce-cli=5:18.09.5~3-0~ubuntu-bionic
docker version
```
Check the current default logging driver:
```
docker info | grep Logging
```
Edit daemon.json to set a new default logging driver configuration:
```
sudo vi /etc/docker/daemon.json
{
"log-driver": "json-file",
"log-opts": {
"max-size": "15m"
}
}
```
Restart docker
```
sudo systemctl restart docker
```
Run a docker container, overriding the system default logging driver settings:
```
docker run --log-driver json-file --log-opt max-size=50m nginx
```
Install Docker Engine:
```
sudo apt-get update
sudo apt-get -y install \
apt-transport-https \
ca-certificates \
curl \
gnupg-agent \
software-properties-common
curl -fsSL https://download.docker.com/linux/ubuntu/gpg | sudo apt-key add -
sudo apt-key fingerprint 0EBFCD88
sudo add-apt-repository \
"deb [arch=amd64] https://download.docker.com/linux/ubuntu \
$(lsb_release -cs) \
stable"
sudo apt-get update
sudo apt-get install -y docker-ce=5:18.09.5~3-0~ubuntu-bionic docker-ce-cli=5:18.09.5~3-0~ubuntu-bionic containerd.io
sudo usermod -a -G docker cloud_user
```
Initialize Docker Swarm
```
docker swarm init --advertise-addr
```
View the current state of the swarm:
```
docker info
```
List the current nodes in the swarm and their status:
```
docker node ls
```
Get a join token from the manager. Run this command on the swarm manager:
```
docker swarm join-token worker
```
Copy the docker swarm join command provided in the output and run it on both workers:
```
docker swarm join --token :2377
```
Docker Swarm Backup (on manager)
```
sudo systemctl stop docker
sudo tar -zvcf backup.tar.gz -C /var/lib/docker/swarm
sudo systemctl start docker
```
Docker Swarm Restore (on manager)
```
sudo systemctl stop docker
sudo rm -rf /var/lib/docker/swarm/*
sudo tar -zxvf backup.tar.gz -C /var/lib/docker/swarm/
sudo systemctl start docker
docker node ls
```
View file system layes in an image. Nginx as an example
```
docker image history nginx
```
Delete an iamge. Nginx as an example
```
docker image rm nginx:1.14.0
```
Download an image
```
docker image pull nginx:1.14.0
```
List images on the system:
```
docker image ls
docker image ls -a
```
Force Deleteion of an image used by a container
```
docker run -d --name nginx nginx:1.14.0
docker image rm -f nginx:1.14.0
```
Delete an iamge. Nginx as an example
```
docker image rm nginx:1.14.0
```
Locate a dangling image and clean it up. Nginx as an example
```
docker image ls -a
docker container ls
docker container rm -f nginx
docker image ls -a
docker image prune
```
Inspect image metadata. Nginx as an example
```
docker image inspect nginx:1.14.0
docker image inspect nginx:1.14.0 --format "{{.Architecture}}"
docker image inspect nginx:1.14.0 --format "{{.Architecture}} {{.Os}}"
```
Enable Docker Swarm autolock
```
docker swarm update --autolock=true
```
Unlock the swarm using the unlock key
```
docker swarm unlock
```
Get the current unlock key
```
docker swarm unlock-key
```
Rotate the unlock key
```
docker swarm unlock-key -rotate
```
Disable autolock
```
docker swarm update --autolock=false
```
Start Compose application with detached mode:
```
docker-compose up -d
```
Stop Compose application
```
docker-compose down
```
List the Docker Compose container
```
docker-compose ps
```
Deploy a new Stack to the cluster using a compose file
```
docker stack deploy -c
```
List current stacks
```
docker stack ls
```
List the tasks associated with a stack
```
docker stack ps
```
List the services associated with a stack
```
docker stack services
```
Delete a stack
```
docker stack rm
```

Thursday, 2 January 2020
Generating an S3 Presigned URL in Go
When you create an object in s3, by default it is private. If you access an object url, you should see
```
Access Denied
0E7531544D92C793
wCC8lVp1Yqnjl2ItHuFxhAKCr2IWLziOavoWyif/Spn1WVsHUyTHEK3vckTK49Kmy/M/YIHQvQ4=
```
If you need to share the object to other people without making it public, you can control the access using a fine-grained IAM policy or use presigned url to grant your users temporary access to a specific object.
In this post, you will learn how to generate a s3 presigned url in Go.
First, let's import some packages that will be used
```
import (
"fmt"
"github.com/aws/aws-sdk-go/aws"
"github.com/aws/aws-sdk-go/aws/session"
"github.com/aws/aws-sdk-go/service/s3"
"time"
)
```
Create a function which takes three parameters - bucket, key and region. It returns the presigned url at the end.
```
func GetS3PresignedUrl(bucket string, key string, region string, expiration time.Duration) string{
// TODO
}
```
Initialize a session in the target region that the SDK will use to load credentials from the shared credentials file ``~/.aws/credentials``.
```
sess, err := session.NewSession(&aws.Config{
Region: aws.String(region)},
)
```
Create S3 service client
```
svc := s3.New(sess)
```
Construct a new GetObjectRequest
```
req, _ := svc.GetObjectRequest(&s3.GetObjectInput{
Bucket: aws.String(bucket),
Key: aws.String(key),
})
```
Create a presigned url with expiration time
```
presignedUrl, err := req.Presign(expiration * time.Minute)
```
Check if it can be presigned or not
```
if err != nil {
fmt.Println("Failed to sign request", err)
}
```
Return the presigned URL
```go
return presignedUrl
```
You can find the complete code [here](https://gist.github.com/wingkwong/a7a33fee0b640997991753d9f06ff120)
Let's have a quick test
```
S3PresignedUrl.GetS3PresignedUrl("test-s3-presigned-url-s2kvn2bs", "d4fb43054862c768921504199c78958b.jpg", "ap-southeast-1", 15)
```
The ``presignedUrl`` is
```
https://test-s3-presigned-url-s2kvn2bs.s3.ap-southeast-1.amazonaws.com/d4fb43054862c768921504199c78958b.jpg?X-Amz-Algorithm=AWS4-HMAC-SHA256&X-Amz-Credential=AKIAW4RRUVRQTI2J564J%2F20191227%2Fap-southeast-1%2Fs3%2Faws4_request&X-Amz-Date=20191227T055220Z&X-Amz-Expires=900&X-Amz-SignedHeaders=host&X-Amz-Signature=ed1d94edd580976f0175eca1c4c1944a9f215fd572540e3e3c7ed1c317656358
```
If we break it down, the presigned url contains ``X-Amz-Algorithm``, ``X-Amz-Credential``, ``X-Amz-Date``, ``X-Amz-Expires`` and ``X-Amz-Signature``. These are AWS Signature Version 4 query parameters.
```
https://test-s3-presigned-url-s2kvn2bs.s3.ap-southeast-1.amazonaws.com/d4fb43054862c768921504199c78958b.jpg
?X-Amz-Algorithm=AWS4-HMAC-SHA256
&X-Amz-Credential=AKIAW4RRUVRQTI2J564J%2F20191227%2Fap-southeast-1%2Fs3%2Faws4_request
&X-Amz-Date=20191227T055220Z
&X-Amz-Expires=900&X-Amz-SignedHeaders=host
&X-Amz-Signature=ed1d94edd580976f0175eca1c4c1944a9f215fd572540e3e3c7ed1c317656358
```
Browse the presigned url

After the expiration time, you will see the below message
```
Request has expired
900
2019-12-27T06:07:20Z
2019-12-27T07:13:10Z
805E5BD14FFAEA84
My9ZyJNtcixWAu91g79KVomutCU2AE4cj8G2eQo4KERAm/AoRxzppIZfXs5Cw+cuhuyo8eFgtvY=
```
Complete Code: [https://gist.github.com/wingkwong/a7a33fee0b640997991753d9f06ff120](https://gist.github.com/wingkwong/a7a33fee0b640997991753d9f06ff120)
AccessDenied
AccessDenied
Make Good
You can practice the problem [here](https://codeforces.com/contest/1270/problem/C).
## Problem
An array a[0], a[1], ... , a[n - 1] of nonnegative integer numbers is said to be good if
```
a[0] + a[1] + ... + a[n - 1] = 2 * (a[0] ^ a[1] ^ ... ^ a[n - 1])
```
Given that an array of length n, append at most 3 elements to it to make it good.
## Solution
Let S be the sum of the array, which is a[0] + a[1] + ... + a[n - 1] and X be their XOR value. Then we'll have
```
S = 2 * X
```
A simple solution here is to add X and X + S to the array.
```
S = 2 * X
S + X + (X + S) = 2 * (X ^ X ^ (X + S)) // X ^ X = 0
2 * (X + S) = 2 * (X + S)
```
C++ Implementation
```
ll S = 0, X = 0;
REP(i, n) {
ll a; cin >> a;
S += a;
X ^= b;
}
cout << 2 << "\n";
cout << X << " " << X + S << "\n";
```
Wednesday, 1 January 2020
Copying Files from On-Premises to Azure Storage Accounts using AzCopy
In this tutorial, you will learn how to copy data using AzCopy
- From an on-premise to the Azure Storage Account
- From Azure Storage Account to another Azure Storage Account
- From the Azure Storage Account to an on-premise
# What is AzCopy
AzCopy is a command-line utility that you can use to copy blobs or files to or from a storage account.
# Disable Security Configuration
If you are using Virtual Machine, you need to change the security configuration in order to download AzCopy.
Login to your Virtual Machine and Open Server Manager
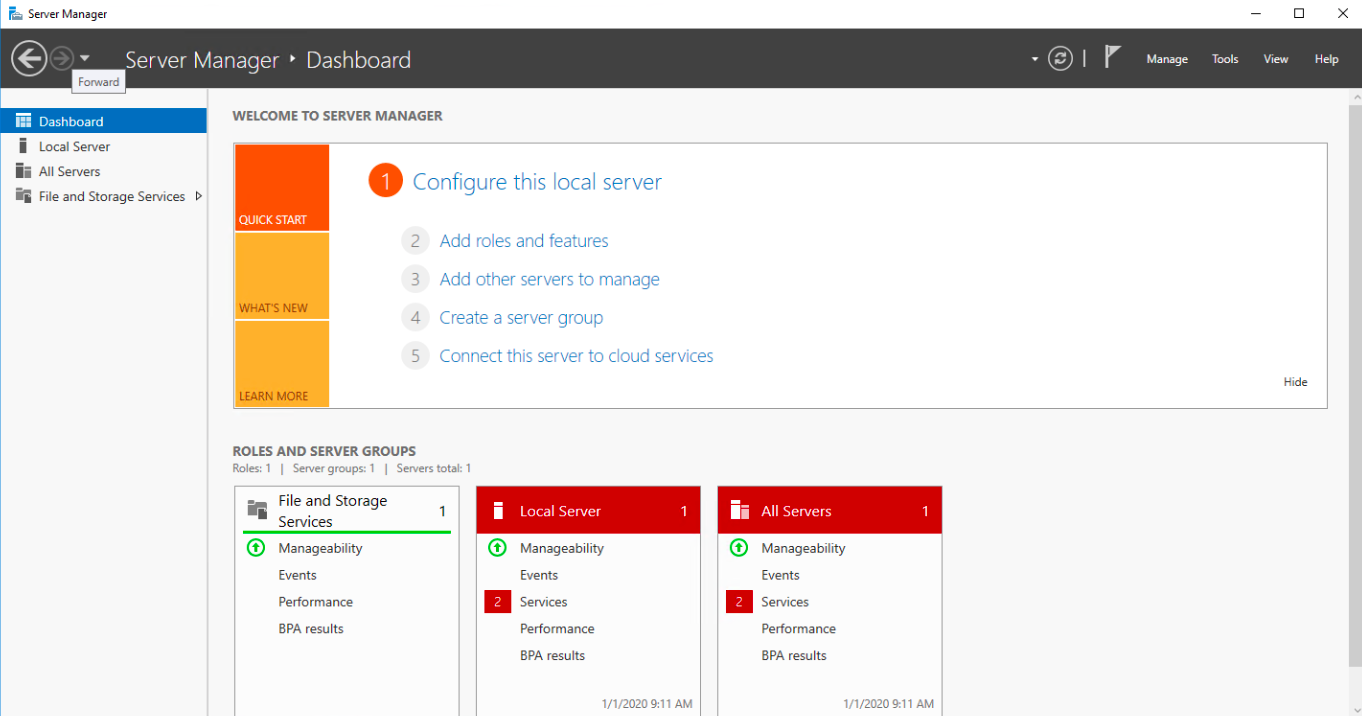
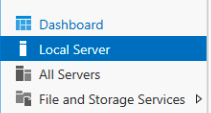
On the left navigation, click Local Server
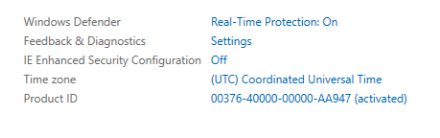
Click On next to IE Enhanced Security Configuration.
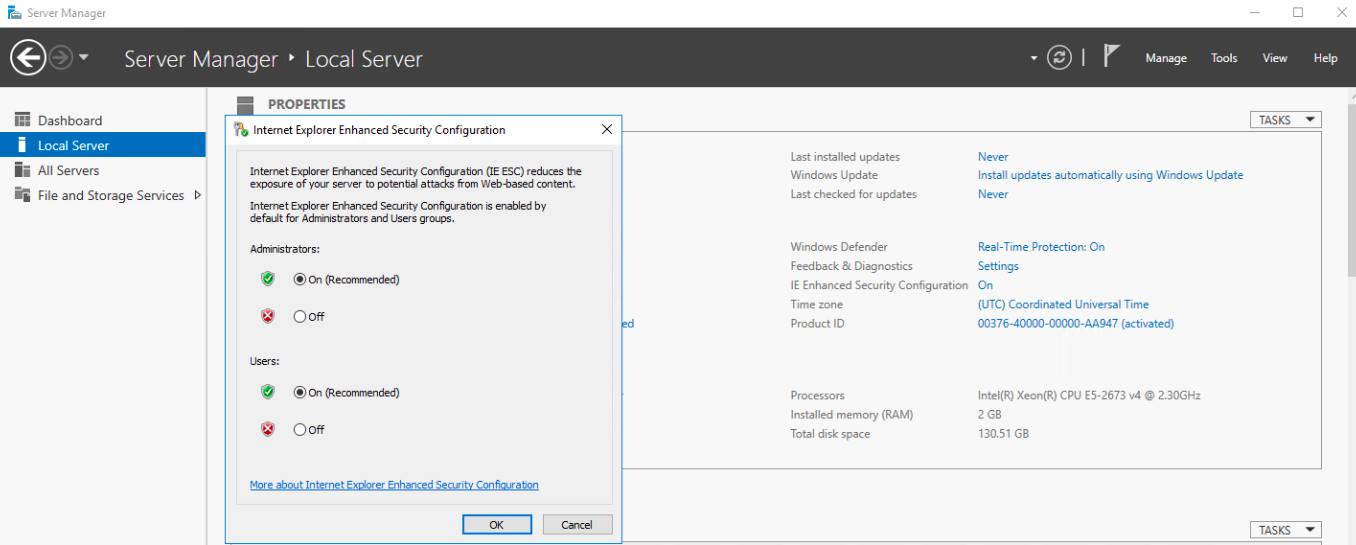
For Administrators, select Off and click OK.
# Download AzCopy
Now we can download AzCopy.
Open the browser and browse https://aka.ms/downloadazcopy
Click Run

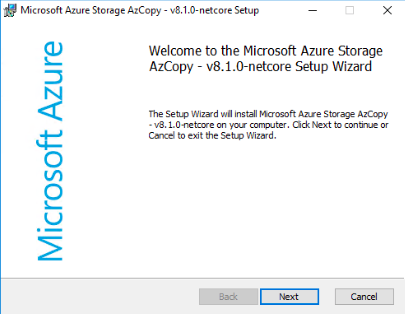
Click Next
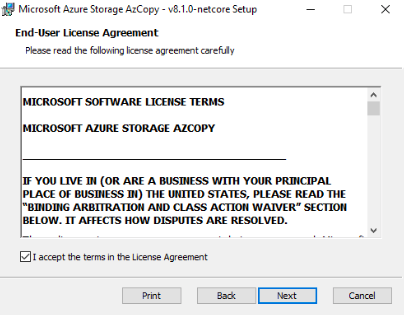
Tick I accept the terms in the License Agreement and click Next
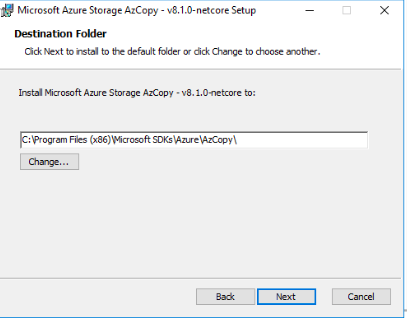
Select a destination folder and click Next
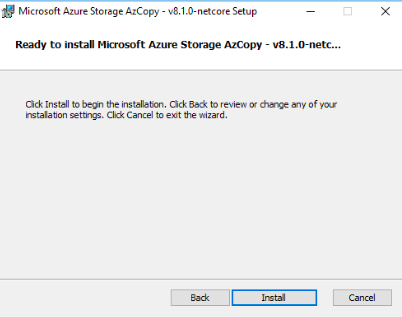
Click Install
# Create Storage Account
> A storage account provides a unique namespace in Azure for your data. Every object that you store in Azure Storage has an address that includes your unique account name. The combination of the account name and the Azure Storage blob endpoint forms the base address for the objects in your storage account.
Go to Azure Portal and select Storage Accounts
Click Add
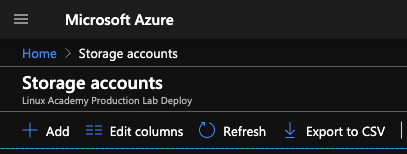
Select a Resource group if it is not populated. Enter the storage account name you want to use and leave other options as default. Click Review and Create.
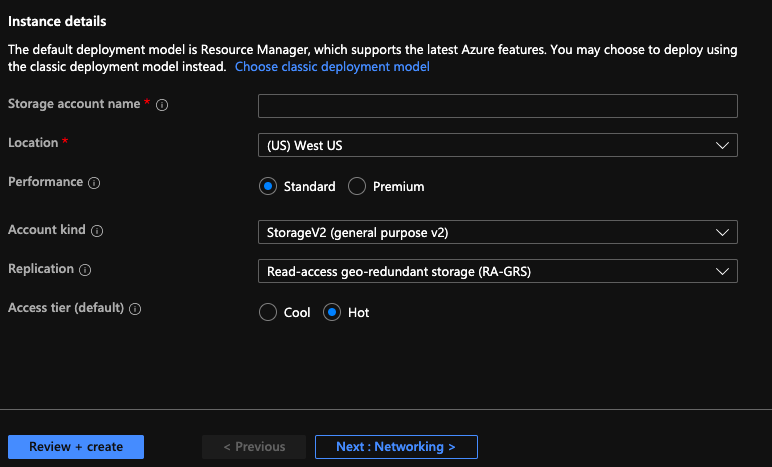
Click Create

Wait for the deployment. It may takes around 30 seconds or longer.
Once it's complete, click Go to Resource
# Create Blob Service Container
We will use Azure Blob storage for storing our data for this demonstration.
> Azure Blob storage is Microsoft's object storage solution for the cloud. Blob storage is optimised for storing massive amounts of unstructured data. Unstructured data is data that doesn't adhere to a particular data model or definition, such as text or binary data.
Under Blob service, click Containers.
> A container organises a set of blobs, similar to a directory in a file system. A storage account can include an unlimited number of containers, and a container can store an unlimited number of blobs.
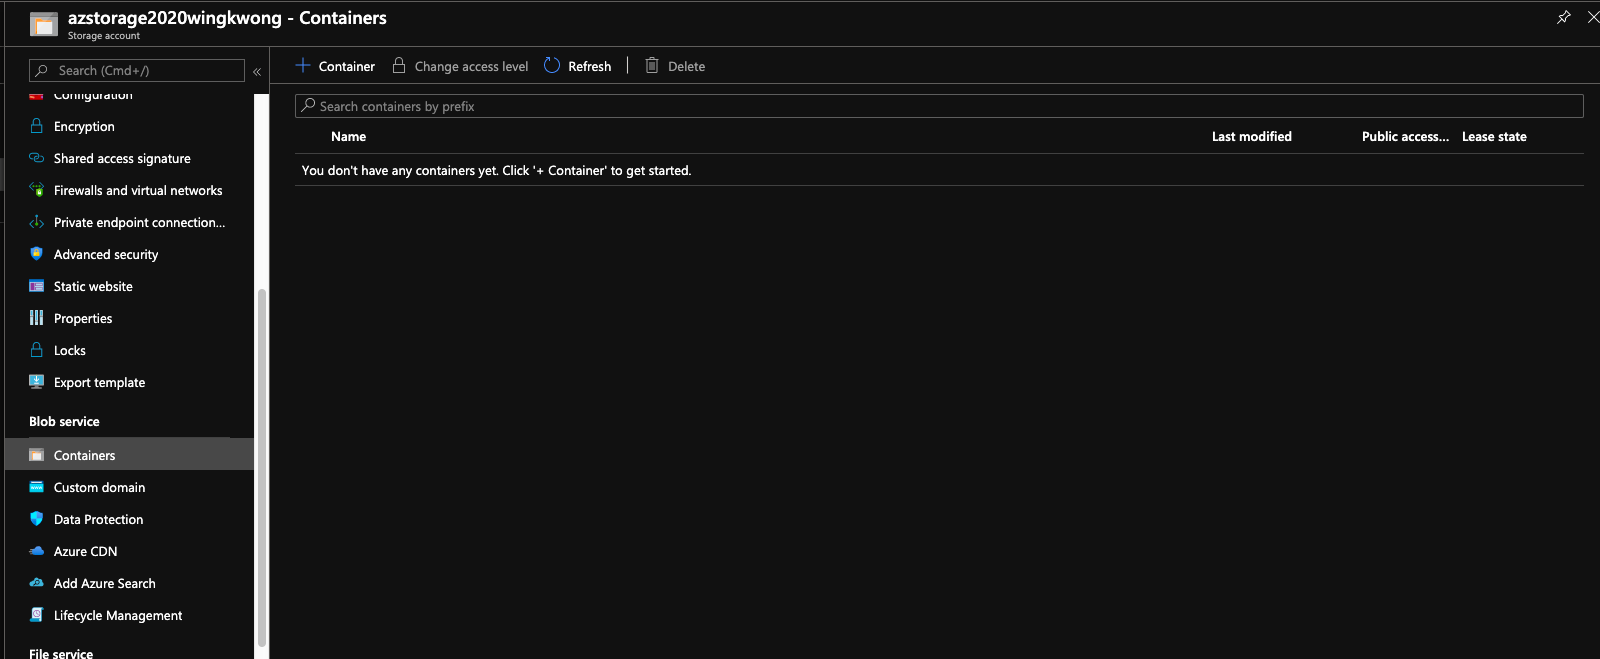
Create a new Container. Enter the name and click ok
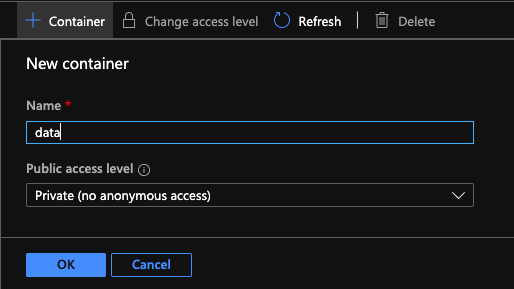
Now let's do the above steps again to create our second Storage Account.

Now we got two Storage Accounts.
# Copy data from an on-premise to Storage Account 1
Go to Storage Account 1, Navigate back to Blob service - Containers. Click the three dot button and click Container properties
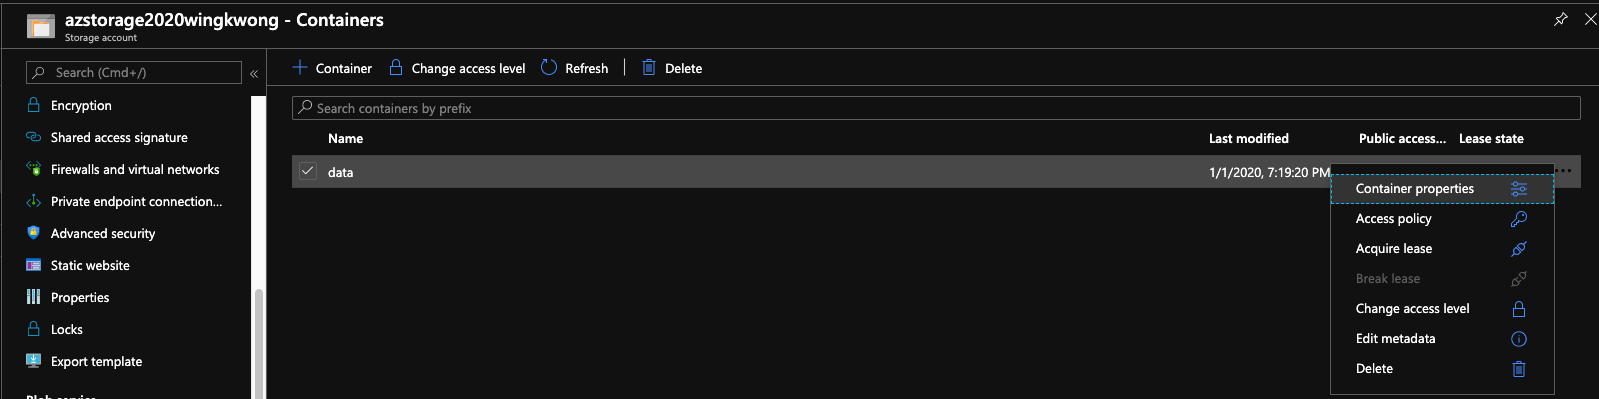
Copy the URL and paste it to a text editor first. We'll use it later.
Since the container is private, we need to access it with the container access key.
Under Settings, you can see ``Access keys``. Copy ``Key`` from key1.
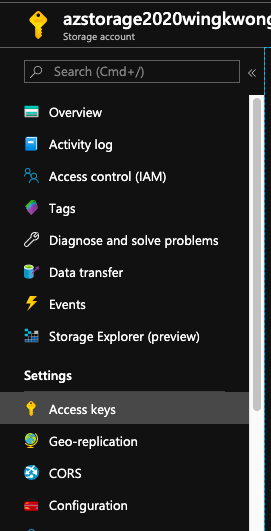
You may wonder why there are two access keys. It is designed for avoiding downtime and for temporary sharing of access keys. For more, please check out [Why does an Azure storage account have two access keys?](https://blogs.msdn.microsoft.com/mast/2013/11/06/why-does-an-azure-storage-account-have-two-access-keys/)
Go back to Virtual Machine, launch Command Prompt and type the below command and click Enter. Remember to replace and with the values you just copied.
For this demonstration, we're going to upload files under ``C:\Windows\System32\drivers``
```
azcopy
/Source:C:\Windows\System32\drivers
/Dest:
/DestKey:
```
You should see similar output
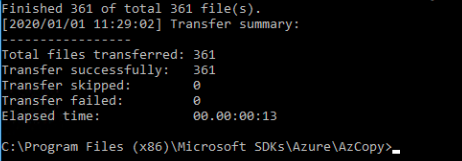
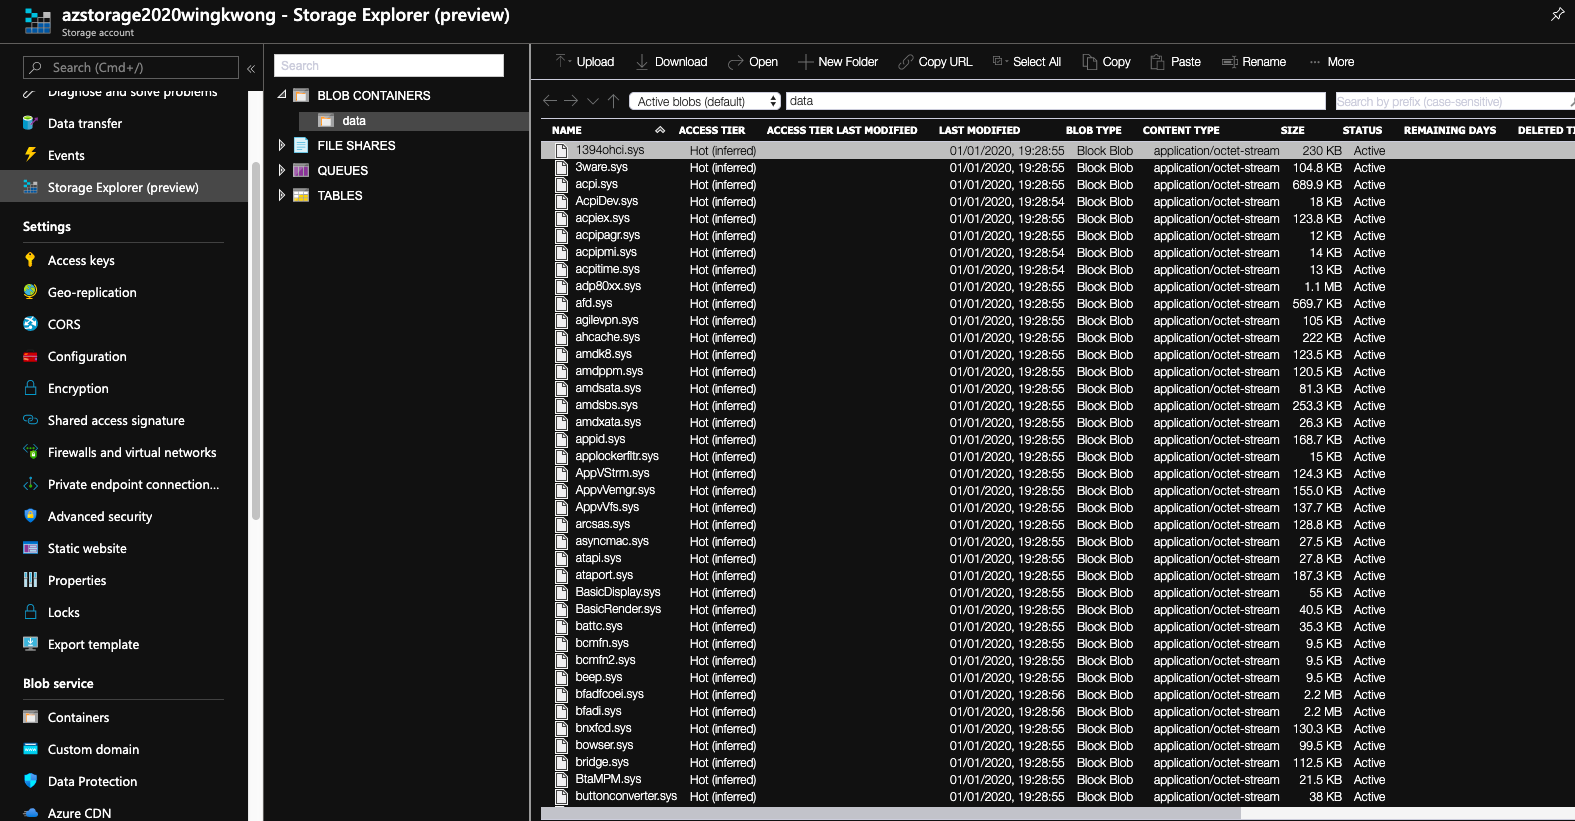
Back to the console, click Storage Explorer(preview). Under BLOB CONTAINERS, click ``data``. You should see the files that you just uploaded using AzCopy.
# Copy data from Storage Account 1 to Storage Account 2
What if you want to copy files from one blob container in a Storage Account to that in another Storage Account?
Similarly, copy the source URL in the second Storage Account.
Go back to Command Prompt,
```
azcopy
/source:
/Dest:
/sourcekey:
/DestKey
/s
```
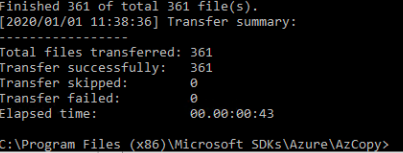
Go back to the console, check Storage Explorer in Storage Account 2.
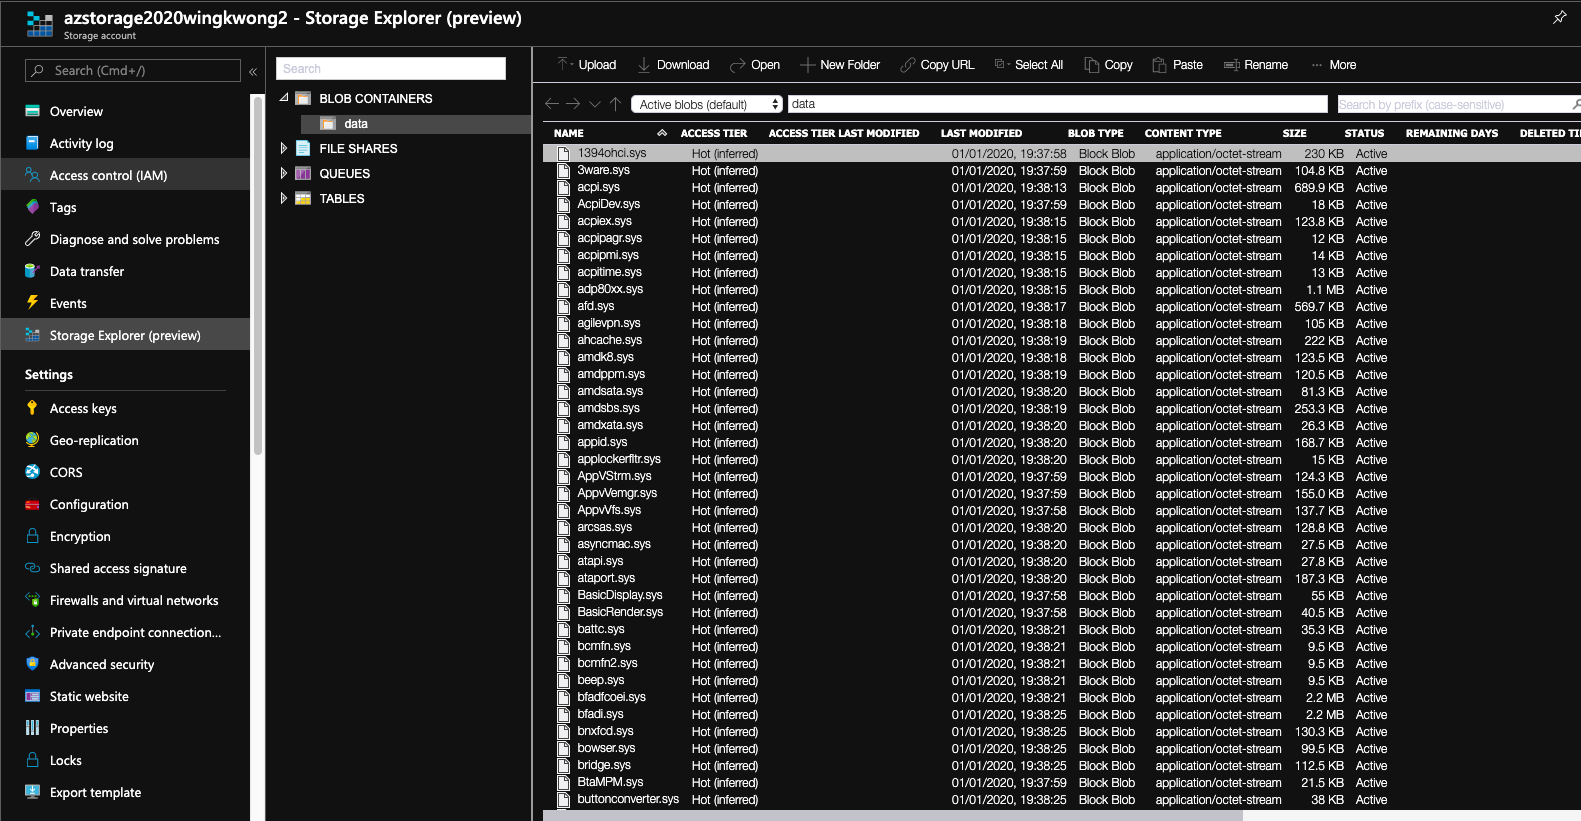
We've successfully copied the files from Storage Account 1 to Storage Account 2.
# Copy data from Storage Account to an on-premise
What if we want to copy the files from Storage Account to our local system? You may already know the answer.
```
azcopy
/source:
/Dest
/SourceKey:
/s
```
That's it.
Creating an ALB from the AWS CLI
In this article, we will create an application load balancer from the command line interface.
**Scenario:**
We would have an ALB serving a single point of contact for clients with two listeners forwarding traffic to target groups with health check.
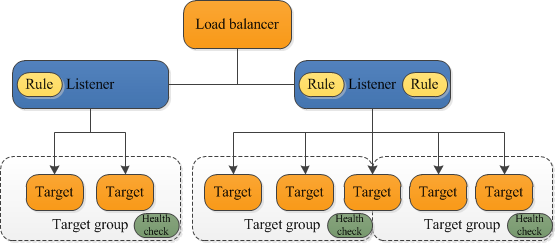
**Prerequisites:**
- awscli has been installed
- two EC2 instances are configured
- instance 1:
- default VPC
- subnet: us-east-1a
- auto-assign public IP: enable
- instance 2:
- default VPC
- subnet: us-east-1b
- auto-assign public IP: enable
First, login in to the admin instance using ssh
```bash
ssh @
```
Once you are in, configure your aws settings.
```bash
aws configure
```
Fill in the following values:
```
AWS Access Key ID [None]:
AWS Secret Access Key [None]:
Default region name [None]: us-east-1
Default output format [None]:
```
Supposing your instances are in default VPC
```bash
aws ec2 describe-vpcs --filters "Name=isDefault, Values=true"
```
Once you get the ID of VPC, use the follwoing command to get subnet IDs:
```bash
aws ec2 describe-subnets --filters "Name=vpc-id,Values=" --query 'Subnets[*].{ID:SubnetId}'
```
To get security group ID:
aws ec2 describe-security-groups --filter Name=vpc-id,Values= Name=group-name,Values=
Then enter the following command and replace and
```bash
aws elbv2 create-load-balancer --name alblab-load-balancer --subnets --security-groups
```
An ALB is created. The next step is to create a target group.
```bash
aws elbv2 create-target-group --name demo-targets --protocol HTTP --port 80 --vpc-id
```
Copy ``TargetGroupArn`` which will be used later
Then, register the targets
```bash
aws elbv2 register-targets --target-group-arn --targets Id= Id=
```
For the instance IDs, you can use ``aws ec2 describe-instances`` to get them.
Then, enter the following command to create a listener:
```bash
aws elbv2 create-listener --load-balancer-arn --protocol HTTP --port 80 --default-actions Type=forward TargetGroupArn=
```
Perform a health check with the following command:
```bash
aws elbv2 describe-target-health --target-group-arn
```
At this moment, the status of the instances is unhealthy. It is because we still need to configure out instances as web servers.
Log in to instance 1 using ssh and run the following commands:
```bash
sudo yum update -y
sudo yum install -y httpd
sudo service httpd start
sudo chkconfig httpd on
```
If you copy the public IP address and paste it into a browser. You should see the Apache test page. If not, that means your ingress on the instance's security group is incorrect. It should allow HTTP on port 80.
If you copy the DNS name and paste it into a browser, you should see the Apache test page.
However, if we take a look at the target groups. We will see the instanecs are unhealthy. The health check for the ALB is checking the return code of 200, but currently there is no ``index.html`` page for the instances to return the 200 code to the ALB.
Let's create one.
```bash
cd /var/www/html
sudo touch index.html
sudo chmod 777 index.html
vi index.html
```
Add something to index.html
Save and exit by pressing Esc and typing
```bash
:wq
```
Then we do the same thing for instance 2.
Once you have done, go back to admin instance.
Verify the target health check
```bash
aws elbv2 describe-target-health --target-group-arn
```
You should be see "OK" message.
Subscribe to:
Posts (Atom)